
Turn heads with a stunning crochet shawl that brings cozy vibes and effortless charm to your wardrobe, making every outfit feel uniquely special.
From Classic to Bold Crochet Shawl Patttern for Every Mood
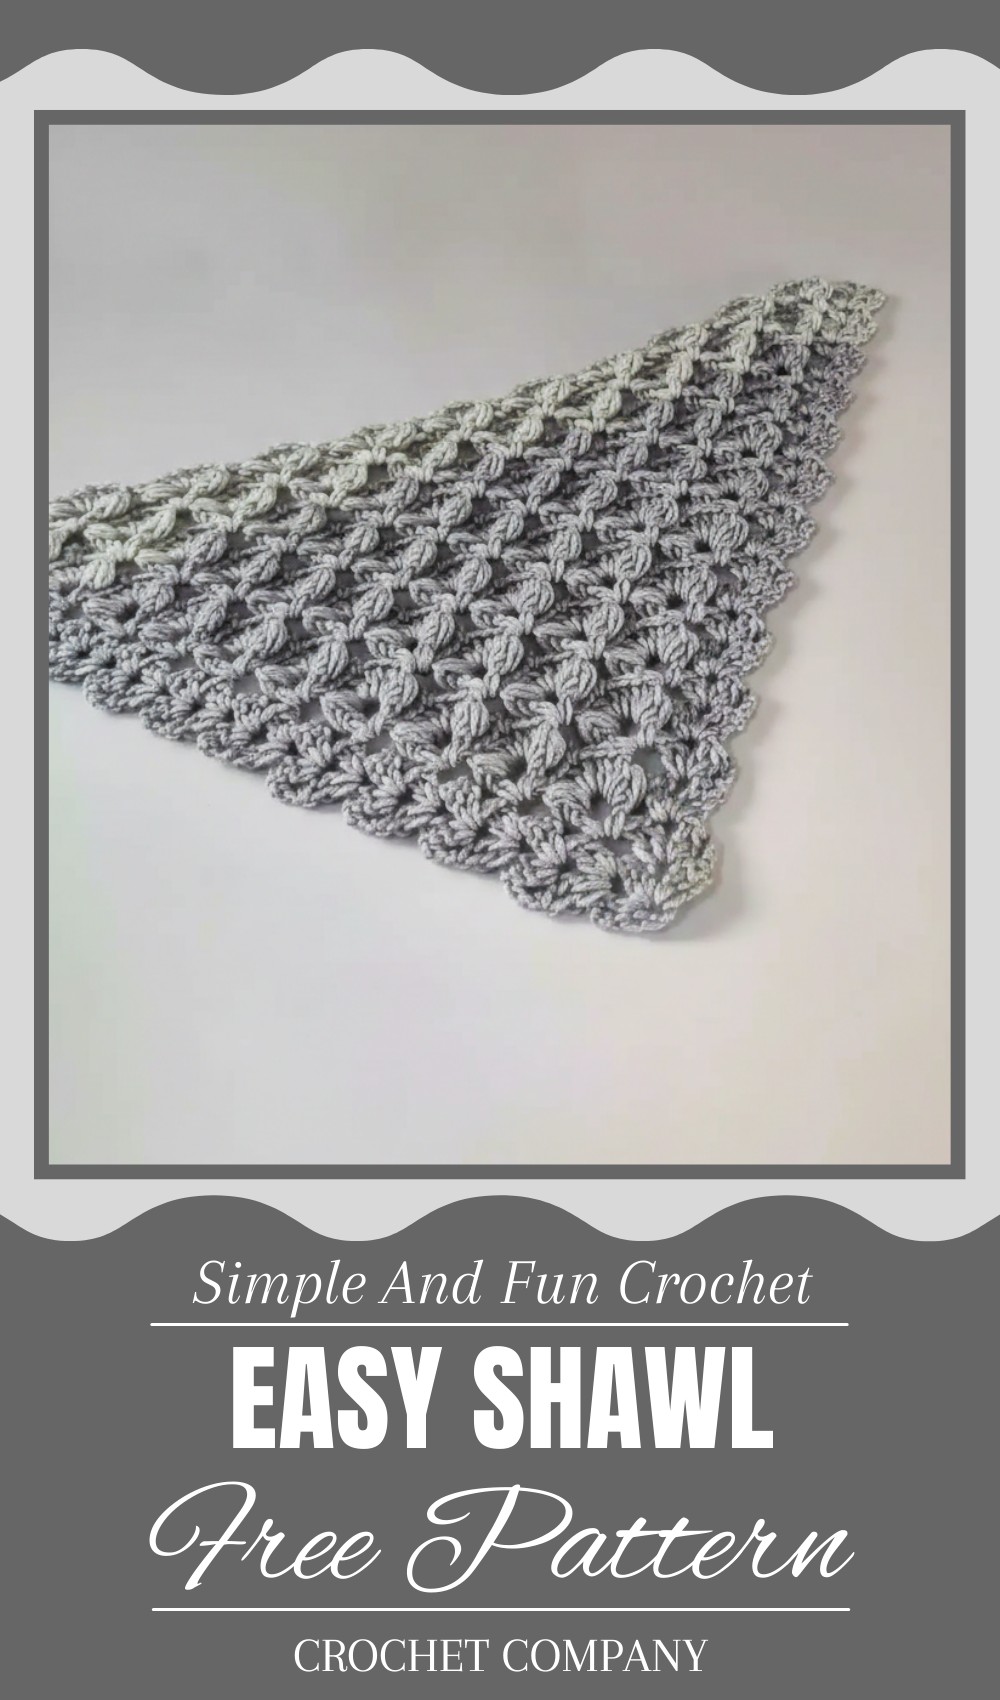
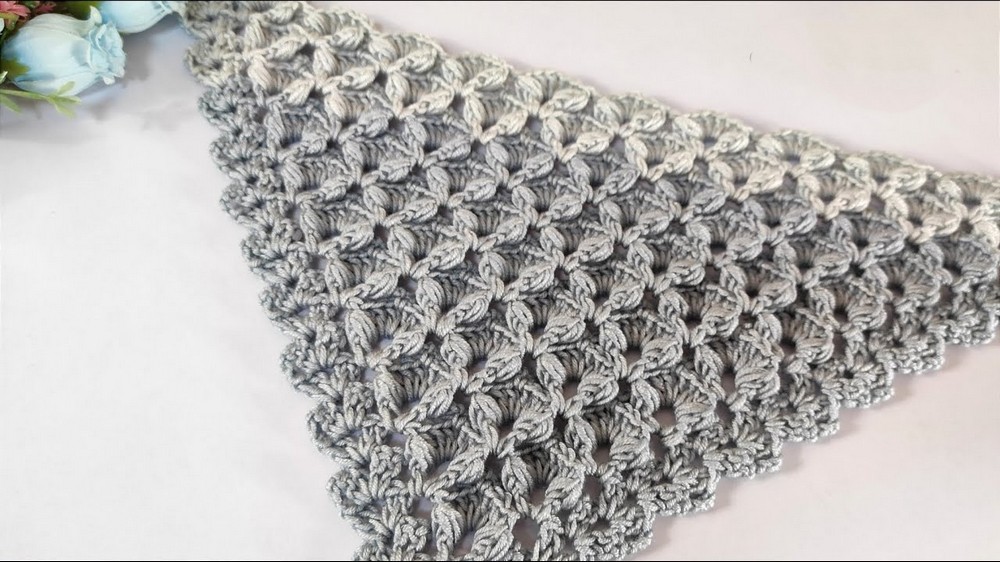
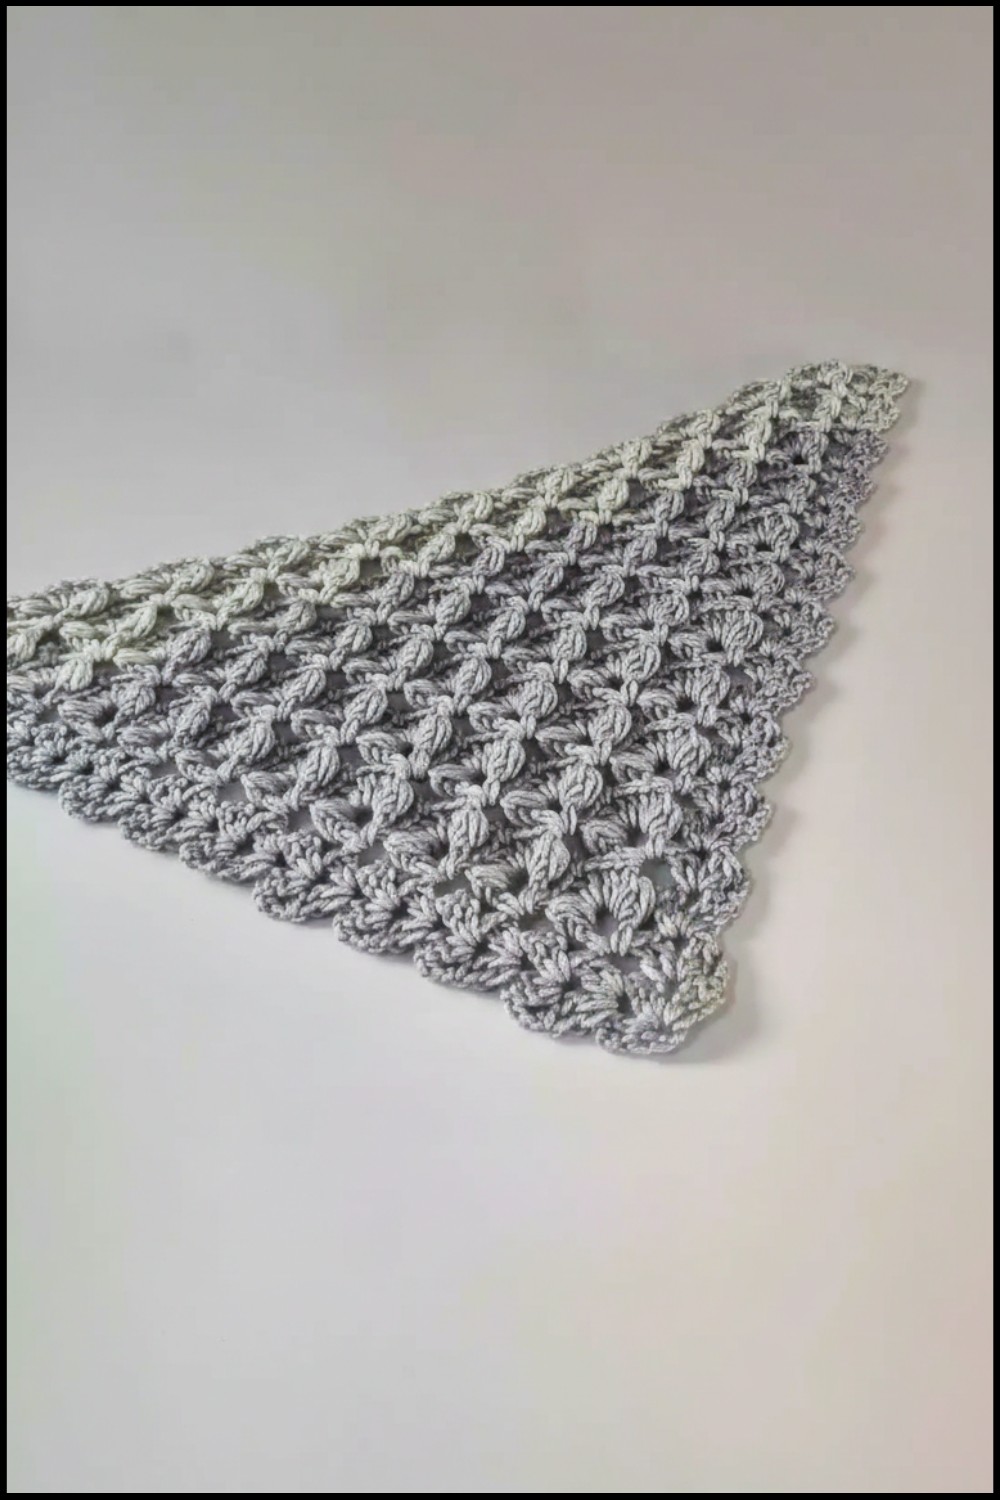
There’s something timeless and elegant about a crochet shawl. With its soft texture and intricate patterns, it looks like a masterpiece woven with care and creativity. A shawl is more than just an accessory, it protects you from the chill, adds charm to your outfit, and leaves a lasting impression with its beauty. Whether worn over a dress for a formal gathering or draped casually over your shoulders, it highlights your sense of style effortlessly.
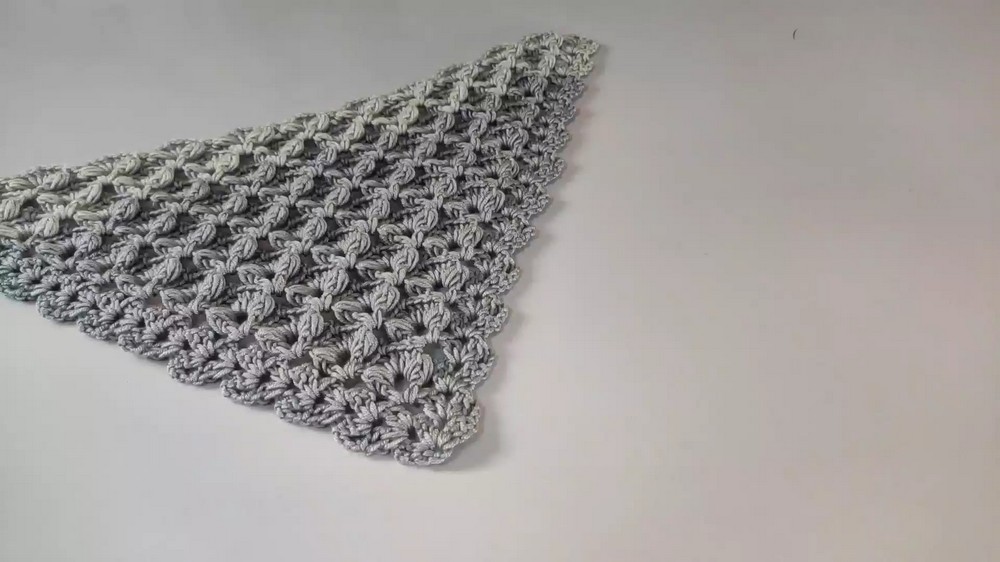
The delicate stitches can resemble floral blooms, lacy waves, or bold geometric designs, making each shawl unique and attractive. Perfect for all ages, it’s lightweight, versatile, and can turn any outfit into something special. Creating one is like crafting magic; you take simple yarn, work it with love, and end up with a stunning piece of clothing that’s both functional and beautiful. A crochet shawl is truly a blend of comfort, beauty, and art.
Crochet Pattern: Simple and Easy Shawl
Pattern Level: Beginner-Friendly
(Minimal skills required. Stitch repeats and simple techniques.)
Materials Needed
- Yarn: Himalaya thread (or any yarn of your choice)
- Crochet hook: 4mm (or appropriate size for your yarn)
- Scissors
- Tapestry needle (for weaving in ends)
Stitches Used
- Chain (ch)
- Slip stitch (sl st)
- Double crochet (dc)
- Puff stitch (3 yo – yarn overs)
Step-by-Step Crochet Pattern
Step 1: Starting the Center Circle
- Begin with a slip knot.
- Chain 5, and join the first chain into a circle using a slip stitch. (This forms the starting point of the shawl.)
- Chain 3 (Counts as the first double crochet stitch).
Step 2: Row 1
- Inside the circle:
- Work 2 double crochets (dc).
- Chain 2, then repeat 2 dc.
- Chain 2, and finish with 2 dc.
- You should now have a pattern of:
- [2 dc, ch 2, 2 dc], repeated three times around the circle.
- This creates three sets of shells separated by chain spaces.
- Finish Row 1 by fastening off and turning your work.

Step 3: Row 2
- Chain 4 (counts as one double crochet and chain space).
- In the first chain-2 space from the previous row, work:
- Shell stitch: 2 dc, ch 2, 2 dc.
- Chain 2 and repeat the shell stitch in each chain-2 space along the row.
- At the end of the row, you should have a shell worked in each of the spaces.
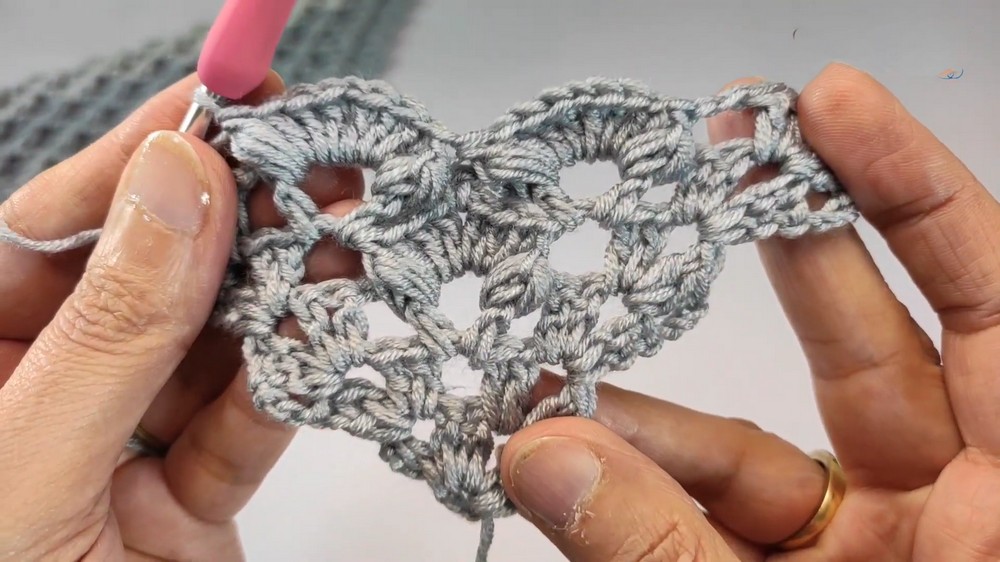
Step 4: Row 3 (Adding Letter ‘V’ Stitches)
- Chain 4 and turn the work.
- Create the first shell (always worked at the beginning row and at the end row):
- 2 dc, ch 2, 2 dc in the first chain space.
- Chain 2, and in the next chain-2 space, create a V-stitch:
- 1 dc, ch 3, 1 dc in the same space.
- Chain 2, then continue alternating shell stitches at the edges and V-stitches in the center.
- Finish with a shell stitch at the end.

Step 5: Row 4 (Adding Puff Stitch)
- Chain 4 to start.
- In the chain-2 space at the beginning, work a basic shell stitch (2 dc, ch 2, 2 dc).
- For each V-stitch in the previous row, follow this process:
- Around the first dc of the “V”, make a puff stitch (3 yarn overs, pull through loops).
- In the middle chain-3 space of the “V”, work:
- 3 double crochet (dc), ch 3, 3 dc (this enhances the V-shape).
- Around the last dc of the “V”, make another puff stitch.
- Continue alternating shells and puff stitch formations.
Step 6: Repeating Row 6 & 7 Until Desired Size
- Alternate Row 6 (Puff stitches and reinforced V’s) and Row 7 (adding more V’s) until the shawl reaches your desired length and width.
- Each new row will increase the number of “V” stitches, expanding the shawl beautifully on both sides.
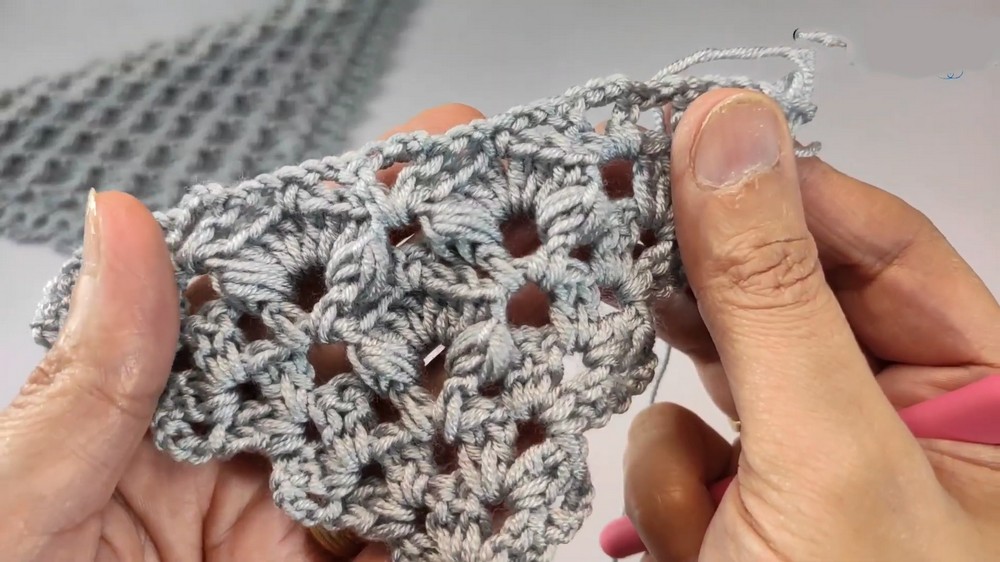
Special Features
- Customizable Size: Continue repeating rows until you achieve your preferred length.
- Light & Airy Texture: Perfect for layering or wearing during mild weather.
- Stylish Edges: The puff stitches and reinforced “V” detailing elevate the shawl’s appearance.
Tutor’s Suggestions
- Use lightweight yarn like acrylic blends for a spring-summer shawl, or switch to chunky yarn for a cozy winter wrap.
- Feel free to add fringes at the ends for a classic finish.
Uses
- Elegant wrap for cool days.
- A cozy addition to your outfit for formal evenings.
- Perfect as a customized gift for friends and family.
Tip for Success
While working with puff stitches, try to keep the thread tension even so that all puff stitches look uniform and neat. Take it slow to achieve a consistent, polished design.
Conclusion
Congratulations! You’ve completed this elegant, beginner-friendly shawl. Its versatile design makes it perfect for various occasions, and it’s fun to crochet. Continue practicing this stitch to enhance your skills further.
Leave a Reply