
Wrap yourself in cozy charm with this easy-to-follow crochet cardigan guide that brings warmth, style, and handmade delight to your wardrobe.
Perfect Crochet Cardigan Pattern for Cool Days
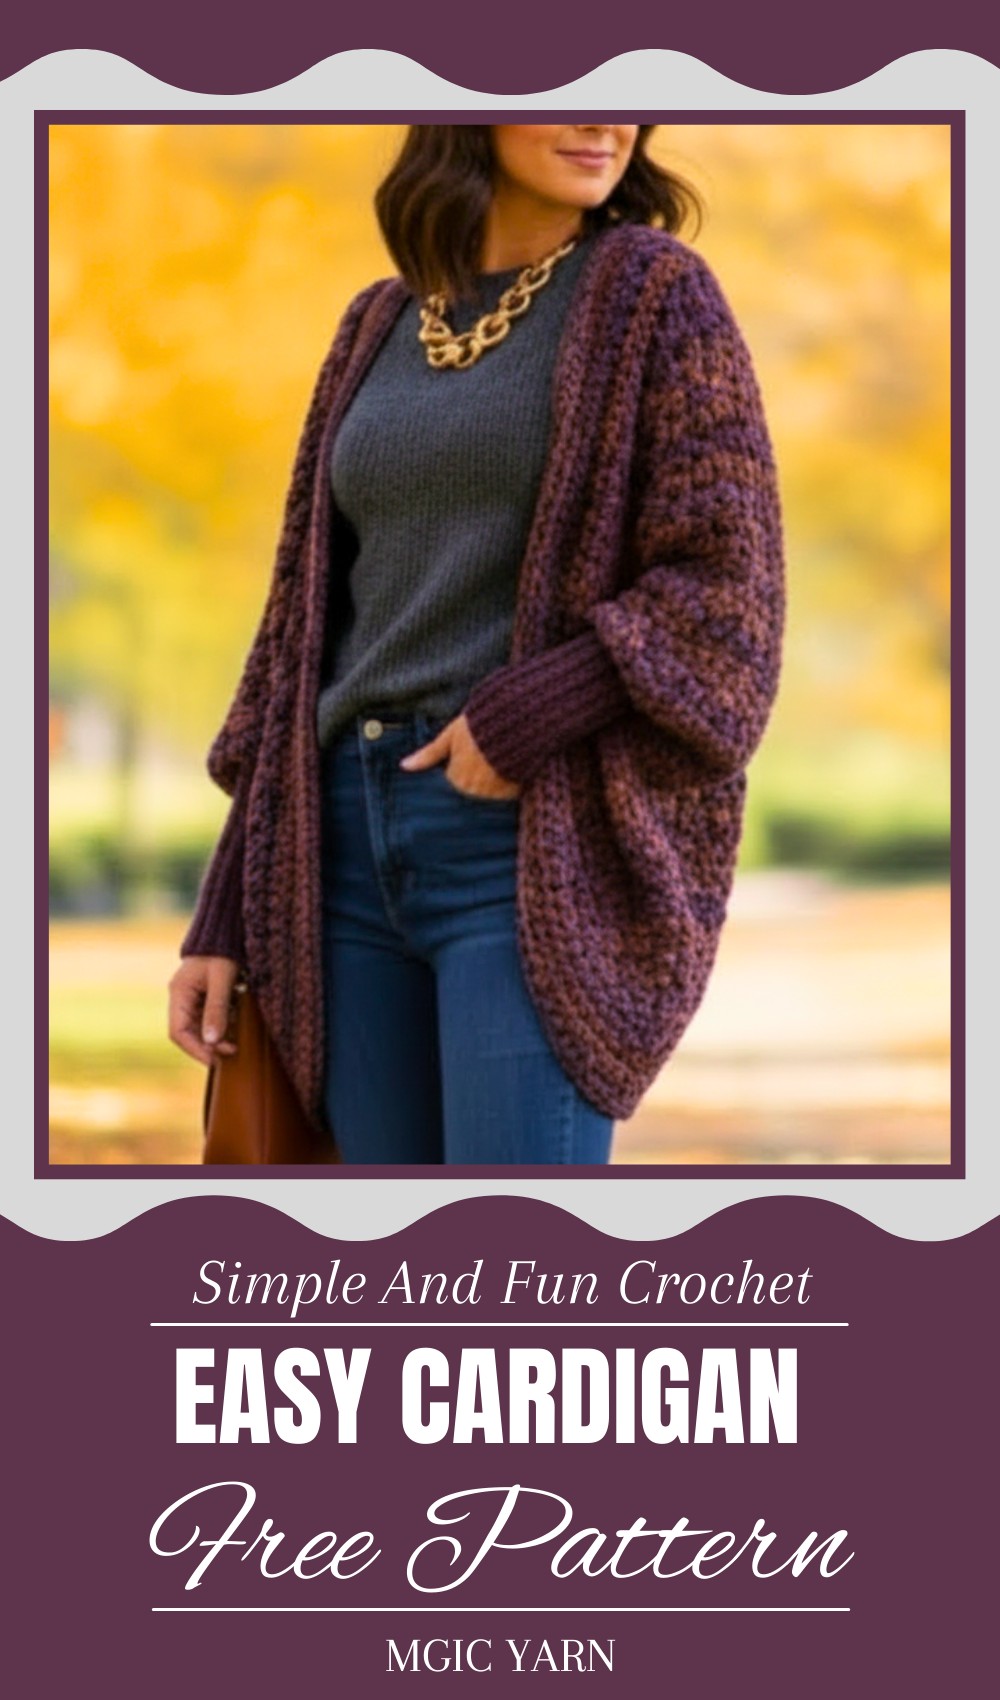
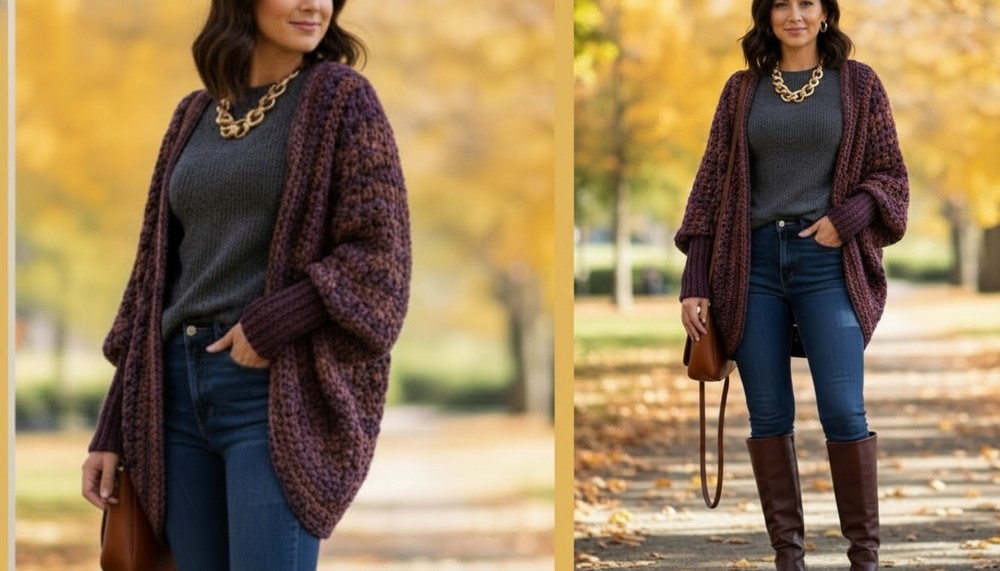
This cozy garment is perfect for keeping warm while looking stylish. Soft yarn hugs the body gently, making it comfortable to wear on cool mornings or chilly evenings. Cardigan open front allows easy wearing and breathability, giving a relaxed and inviting look. The long sleeves add extra warmth, while the simple yet elegant texture makes it suitable for many occasions, from casual walks to friendly gatherings.
Its lightweight feel means it won’t weigh you down but will still give just the right amount of comfort. You can pair it with different clothes to change your style, whether with dresses, pants, or skirts. Handmade or store-bought, this piece adds a touch of charm and softness to any outfit. Its pleasant colors and flowing shape make it both useful and beautiful, inviting you to wrap yourself in its cozy embrace whenever you need a little extra comfort and style.
Crochet Easy Poncho Pattern
Materials
- Yarn: Two strands worked together
- Ganga stock yarn
- Karma anti-pilling soft lux yarn (soft, smooth, no pilling)
- Crochet hook size 8 mm for main body (larger than usual for softness)
- Crochet hook size 5 mm for the wristbands
- Stitch markers
- Yarn needle for sewing
- Scissors
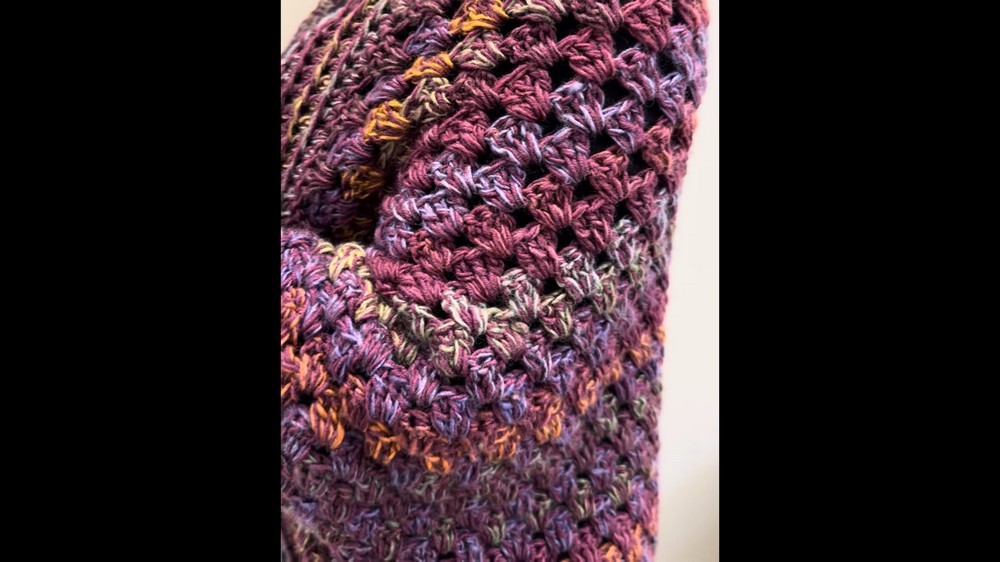
Special Features
- Soft and durable double yarn texture
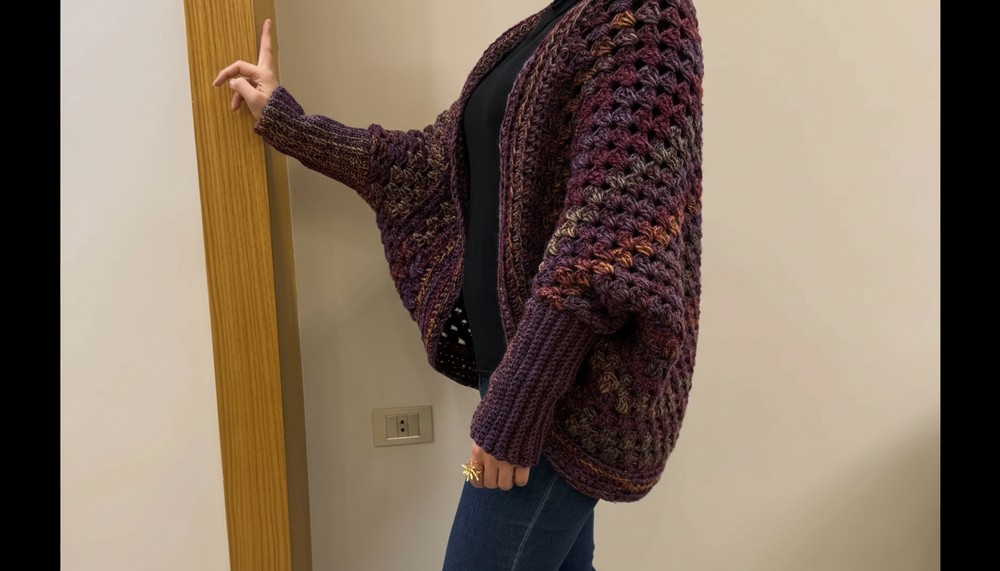
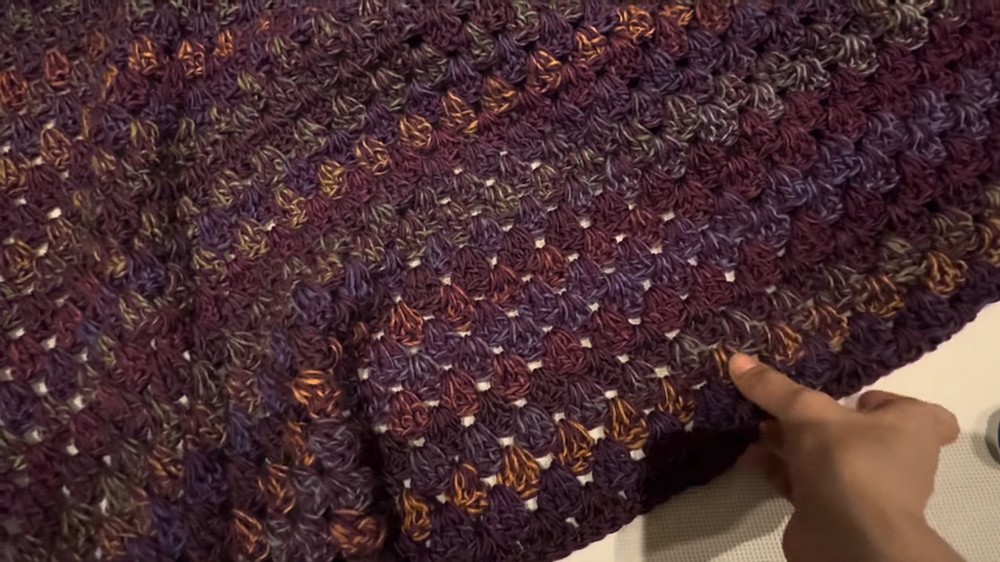
- Classic granny stitch pattern for easy, repetitive working
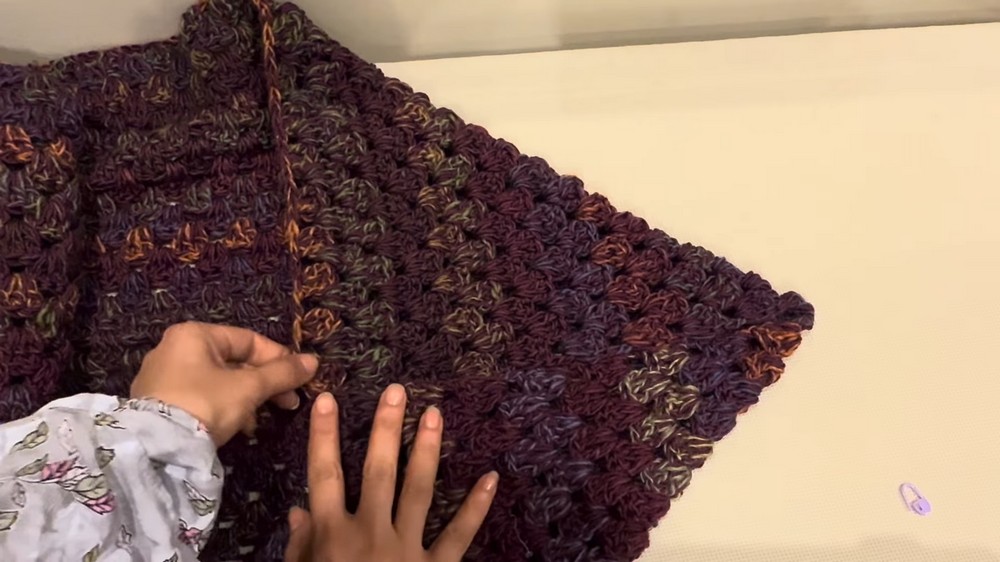
- Rectangular panel construction folded into poncho shape
- Wristbands provide snug, comfortable armholes
- Perfect for layering and cool weather wear
Difficulty Level
Beginner to Intermediate
Familiarity with basic stitches and reading stitch patterns needed. Sewing and finishing skills recommended for best results.
Step-By-Step Pattern Instructions
Step 1: Take Your Measurements and Plan the Rectangular Panel
- Measure arm length starting just below your elbow, across your back/shoulders to the other arm’s elbow.
- For a large size, approximately 117 cm length (measured in the video).
- This converts to roughly 105 chains + 2 chains (107 chains total) because granny stitch repeats come in multiples of 3 plus 2 chains.
Step 2: Foundation Chain
- Make a slip knot.
- Chain 107 (multiple of 3 plus 2) to match the desired length.
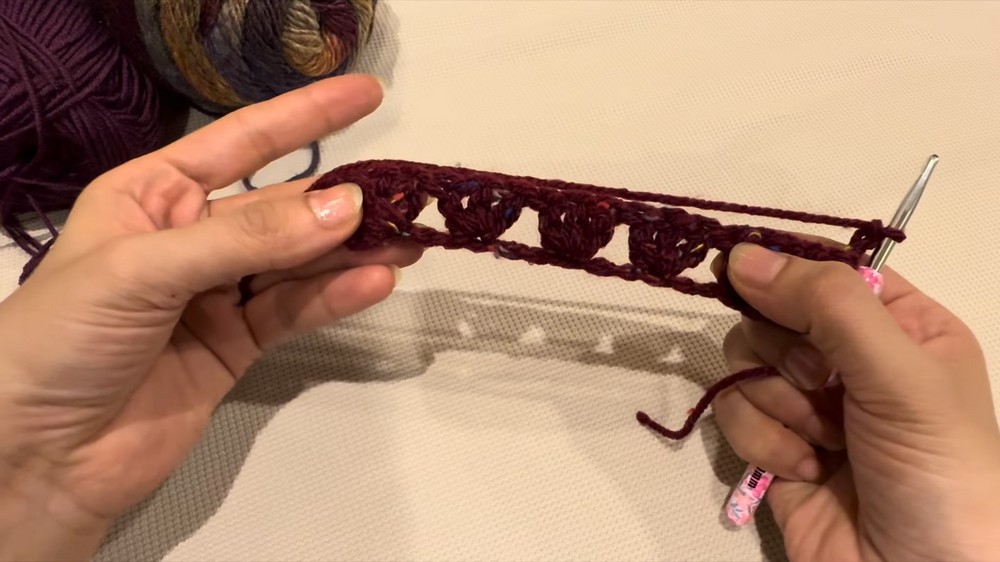
Step 3: First Row – Begin Granny Stitch
- Chain 2 (counts as first double crochet (dc)).
- In the 5th chain from the hook, work 3 double crochets (dc) in same stitch — this starts your first granny cluster.
- Skip 1 chain, then in the next stitch work 3 dc (granny cluster).
- Repeat (skip 1, 3 dc cluster) across the row until end.
Note: All 3 dc should be worked into the same stitch for clusters.
Step 4: Second and Subsequent Rows – Continue Granny Stitch Pattern
- Chain 3 and turn (counts as first dc).
- Work 3 dc clusters in each space between clusters from the previous row (the chain spaces), not on the clusters themselves.
- Continue across row, end with 3 dc cluster in last space.
- Chain 1 and turn.
- Keep repeating this pattern, growing the rectangle, until the desired poncho width is reached (about 66 cm according to the video).
Step 5: Finishing Rectangle
- After reaching desired width, fasten off by chaining 1 and cutting yarn.
- Weave in ends securely.
Step 6: Folding & Marking Armholes
- Fold the rectangle in half lengthwise to create a square shape.
- From each top corner, measure down 14 cm along the fold. Mark these points – they define where you’ll sew to create armholes.
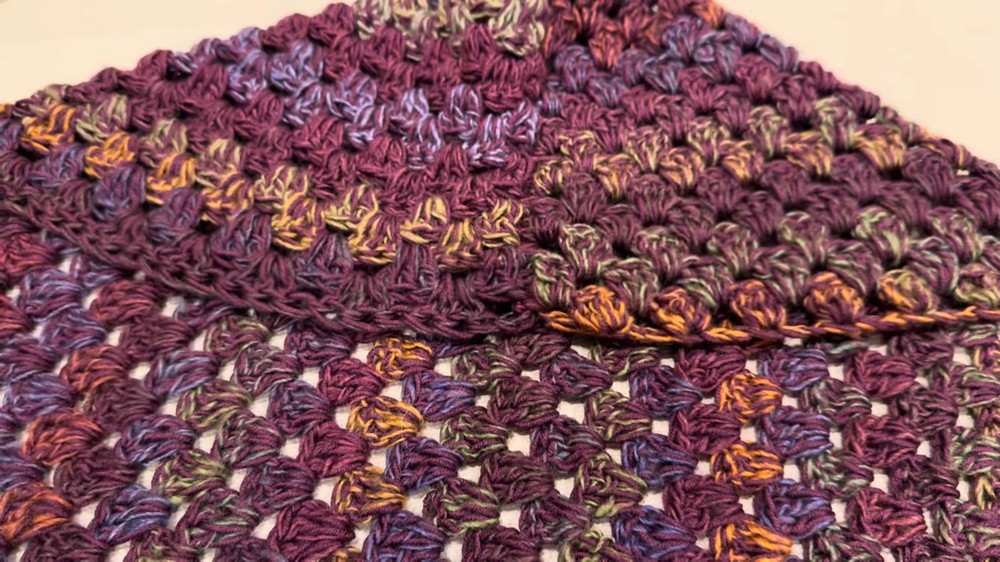
Step 7: Sew Poncho Body
- Sew along the side seams from the bottom edge up to each 14 cm marker, leaving armhole openings unsewn.
- Use slip stitches for sewing, gently tensioning so seams don’t become tight or stiff.
- Cut yarn and weave in ends after sewing.
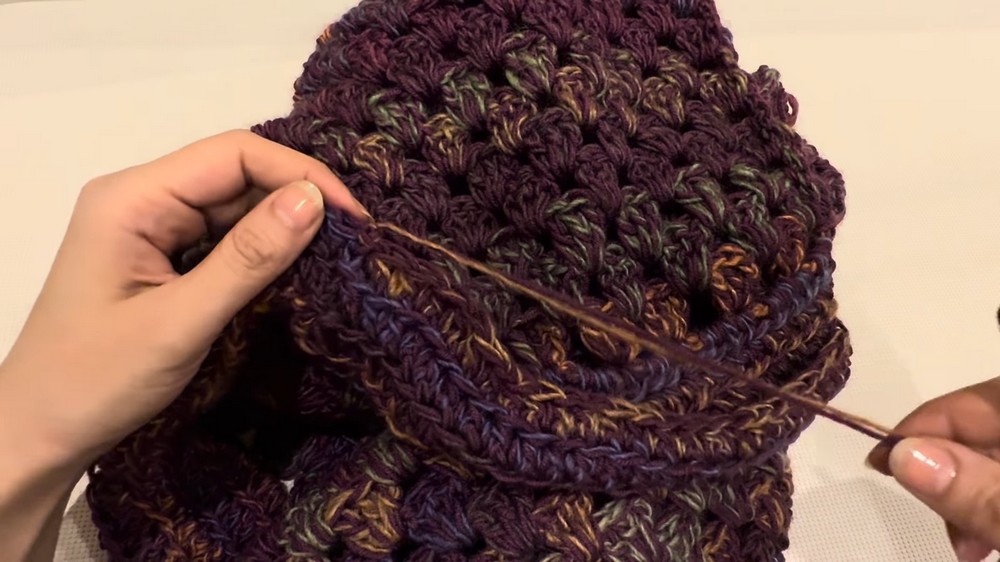
Step 8: Half Double Crochet Border Around Poncho Edge
- Attach yarn anywhere on the outer edge with a slip stitch.
- Chain 2 (counts as first half double crochet (hdc)).
- Work hdc stitches evenly all around edges and armholes.
- Join with slip stitch at beginning of round.
- Chain 2 and work five more rows of hdc in the back loops only around edges for a neat, stretchy border.
- Fasten off and weave ends.
Step 9: Wristbands (Sleeves)
- Switch to size 5 mm hook for wristbands (firmer fabric).
- Chain 30 stitches for length.
- Skip first chain and work sc in the back loop across for the first row.
- Chain 1 and turn; work sc in back loops only each row for 31 rows (or desired wristband length).
- Join wristband ends by sewing carefully matching stitches.
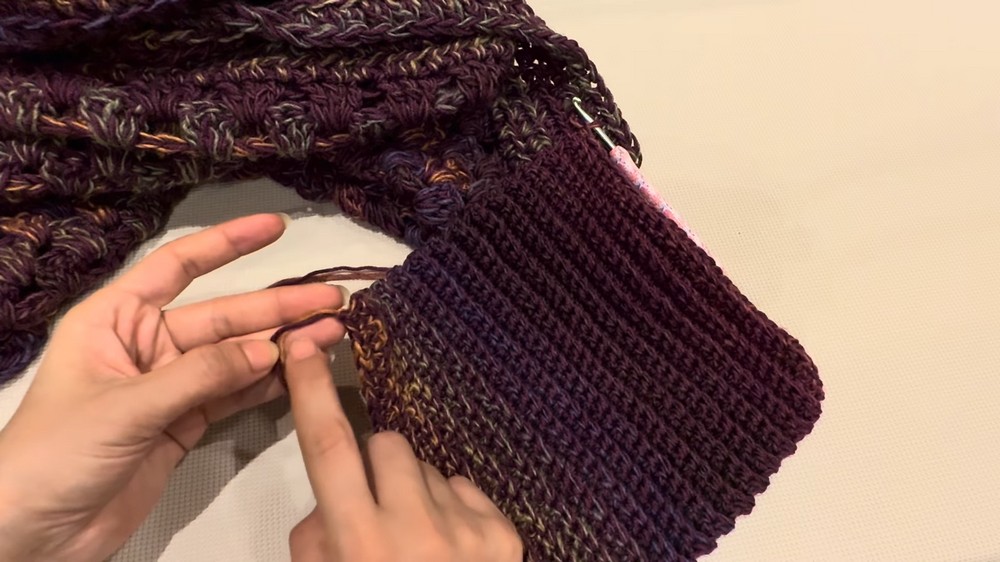
Step 10: Attach Wristbands to Poncho
- Turn poncho inside out.
- Align wristbands with armhole openings.
- Sew wristbands to armholes using a yarn needle and yarn; keep stitches neat and seams flat.
- Ensure a comfortable stretch without over-tightening.
Tutor’s Suggestions
- Using a bigger hook than normal makes clothing soft and less stiff — don’t use a hook that’s too small.
- When sewing seams, don’t pull yarn too tight to keep the garment flexible and wearable.
- Use stitch markers for armhole marking, which makes sewing easier.
- For beginners, take time with wristband sewing to ensure neat attachment.
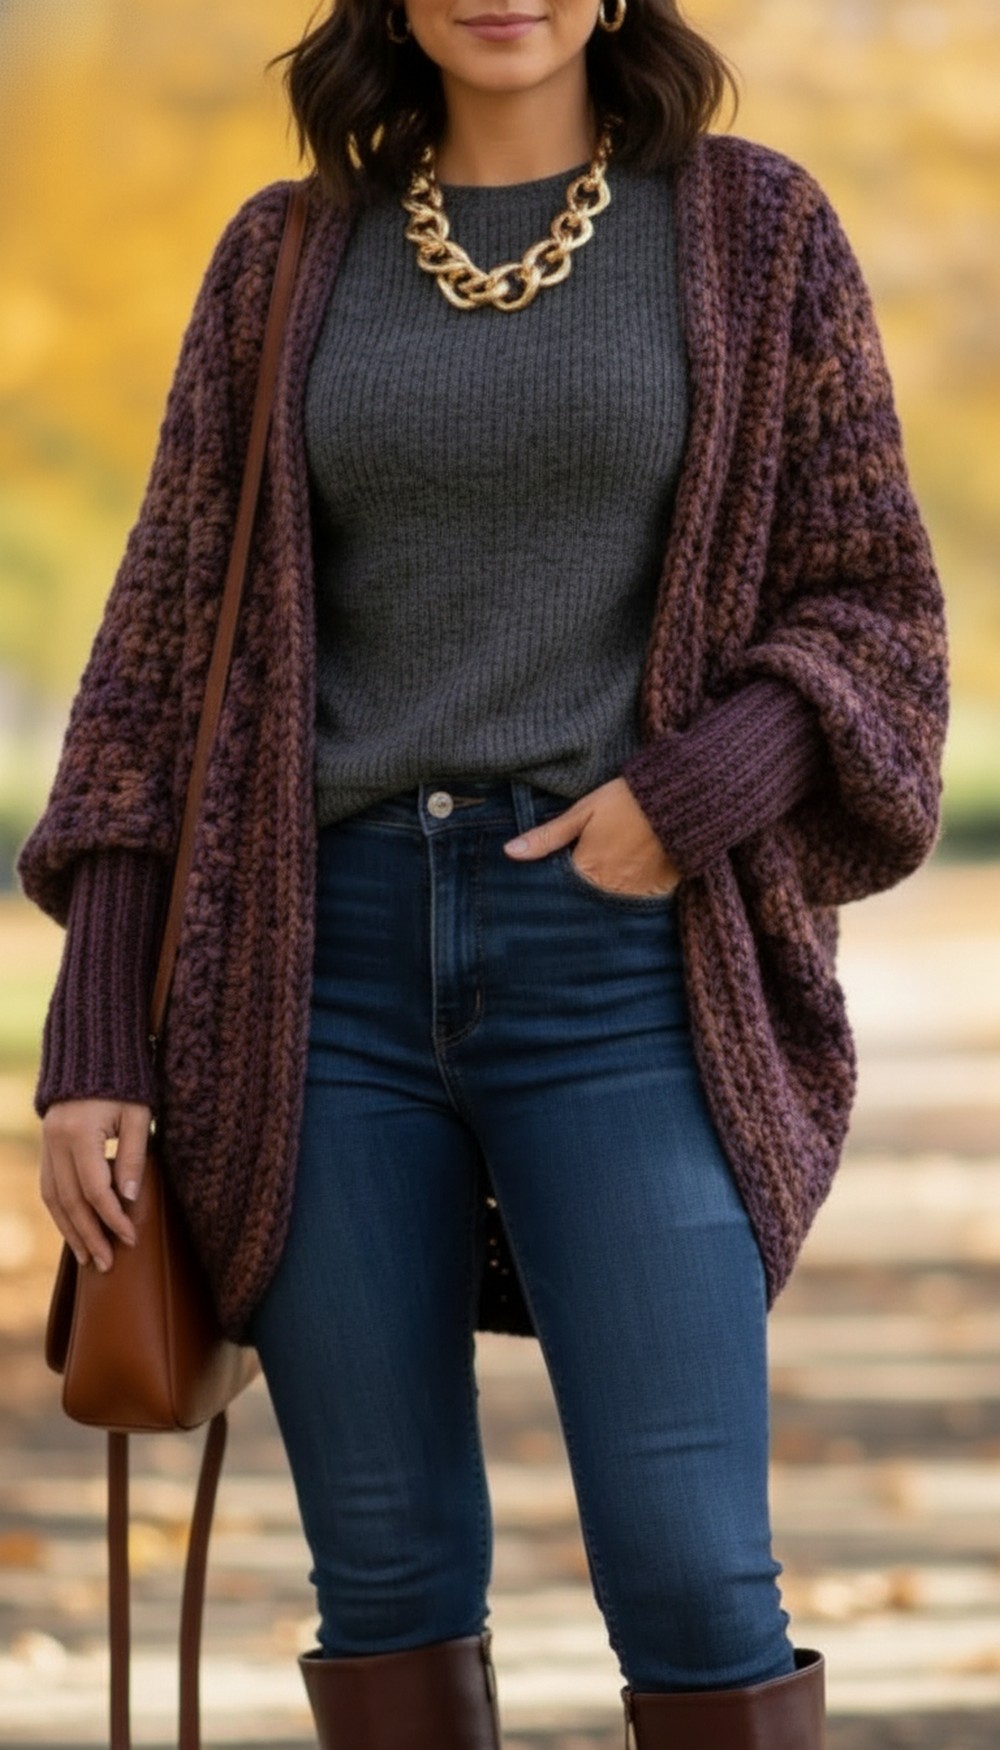
Uses
- Cozy poncho for cooler weather
- Stylish layering piece with breathable granny stitch texture
- Can be customized in size and yarn weight for different seasons
- Great handmade gift and wardrobe addition
Tip
If you want the poncho to drape even softer, consider blocking the rectangle before folding and sewing. Also, fabric lining is optional but helpful if you want extra warmth or structure.
Conclusion
You now have a simple but elegant poncho pattern that produces a beautifully soft, fitting garment. Enjoy creating this cozy piece that combines comfort, style, and ease.
Leave a Reply