
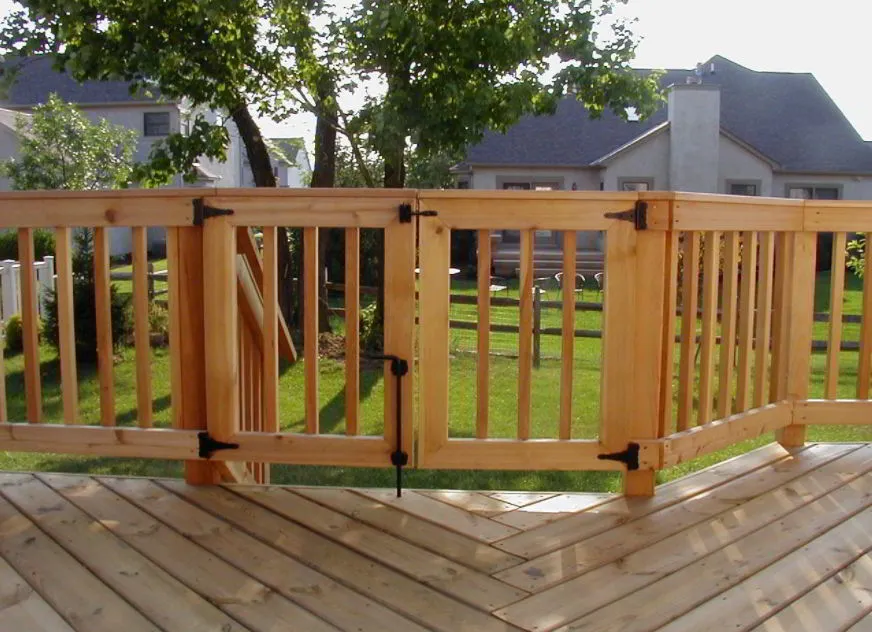
Making a wooden gate for your deck is a great way to keep your pets and little ones safe while they play outside. This guide shows you how to make a simple yet effective gate that looks good and doesn’t cost much, all in just a few hours. Whether it’s to prevent your dog from chasing squirrels or to make sure your kids don’t wander too far, this project is both affordable and satisfying, costing less than $30 to make. You’ll follow clear steps to measure, cut, and assemble your gate, ensuring it fits perfectly with your deck and swings smoothly.

DIY Wooden Outdoor Gate
Materials List:
- 2×4″ pressure-treated boards
- 2×2″ pressure-treated balusters
- Gate hinge and latch set
- 2″ deck screws
Tools Used:
- Miter saw
- Screwdriver
- Measuring tape
- Clamps
- Step-by-Step Guide

Measure & Precision Cutting:
Each wooden deck gate should be cut an inch narrower than the opening for ease of operation. Maintaining the accurate height will allow it to align gracefully with the existing railing. Optionally, mitering the corners adds a touch of craftsmanship. Keep paired boards clamped together during cutting for a consistent and square edge.
Assemble the Frame:
Using a reliable tool like the Kreg Jig, create pocket holes to unite the frame robustly at the corners. If a Kreg Jig isn’t within reach, use long screws through the board sides. The frame assembly is crucial, ensuring all corners square up for a neat appearance.

Attaching Balusters:
To keep the design seamless with your deck, space the 2×2 balusters evenly across the gate. A homemade spacer can help execute this with precision, achieving a gate that complements its surroundings and functions impeccably.
Secure with Gate Hardware:
A standard gate hardware kit will equip you with the necessary hinges and latch for mounting. For balanced operation, appropriate hinge placement is about a fifth of the gate length. Sometimes, improvisation is required, like adding wood blocks for hinge attachments when dealing with tricky corners.
Finishing Touches:
The final step involves staining or sealing the gate, but patience is key. Let the pressure-treated wood dry out to prevent treatment chemicals from affecting the finish. Once dried, stain to match your existing deck for an integrated aesthetic appeal.

Leave a Reply