
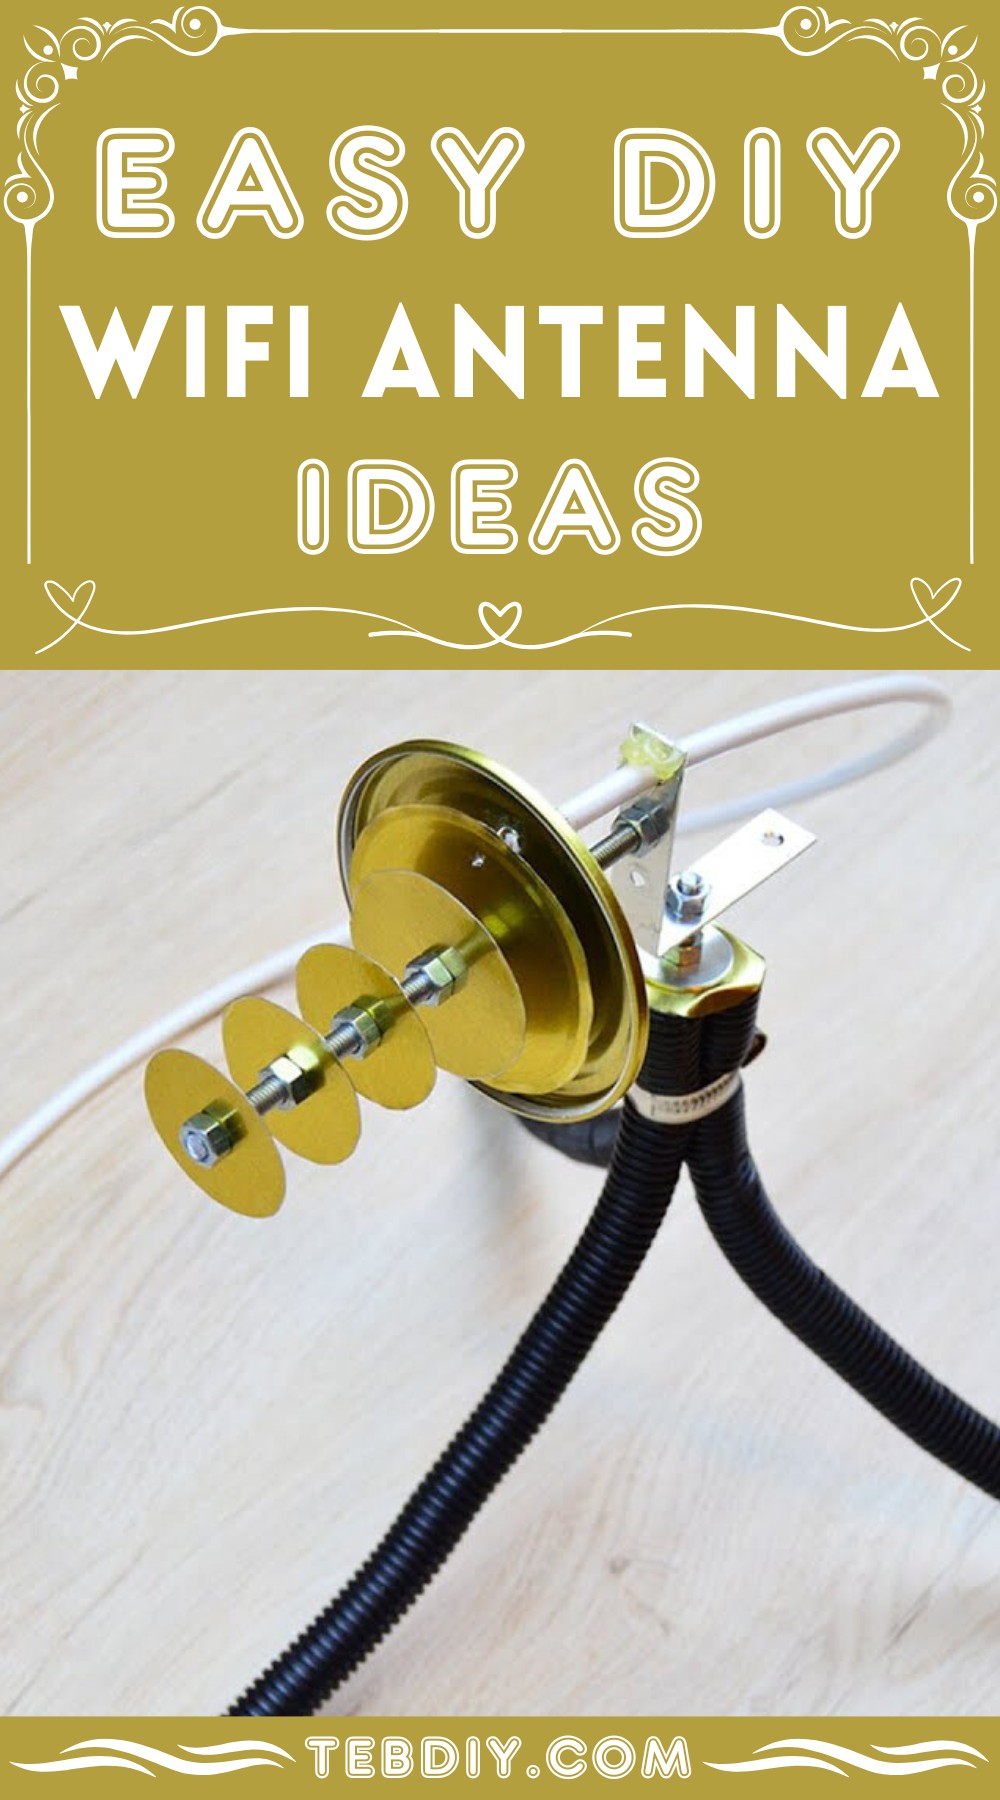
When it comes to WiFi connectivity, many of us encounter challenges that affect our everyday routines. Often, the WiFi signal may be weak in certain areas of our homes or workplaces. To address this issue, we introduce a DIY WiFi antenna that is relatively easy to construct and significantly enhances your WiFi signals. This DIY project not only offers tangible improvements in your internet connectivity but also lays the groundwork for understanding DIY electronics and opens the door to other creative endeavors.
Materials and Tools:
- Aluminum circular Lid
- Board Marker
- Long Screw
- Wifi Router Antenna
- Earthland Cable
- Bolts
- Measuring tape
- Soldering Iron
- Vernier Caliper
- Scissor
- Drill
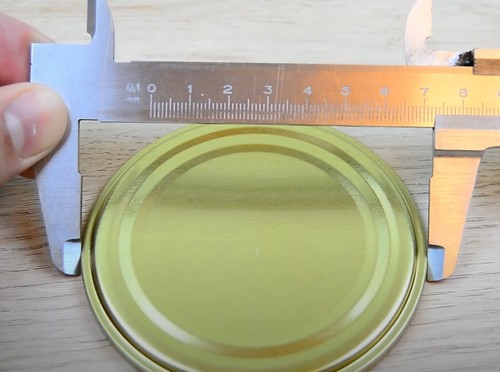
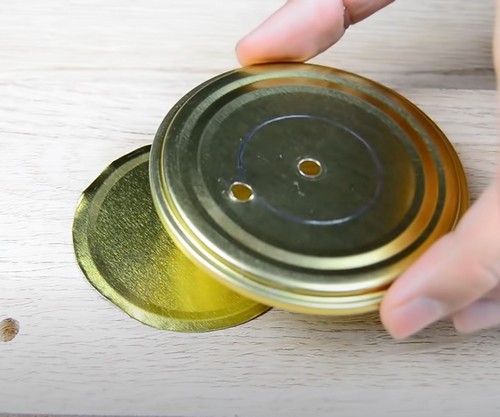
Getting the Jar Lid
First, obtain a jar lid with a diameter of at least 7.3 mm. This will serve as the main component for creating the circular sheets of your antenna.
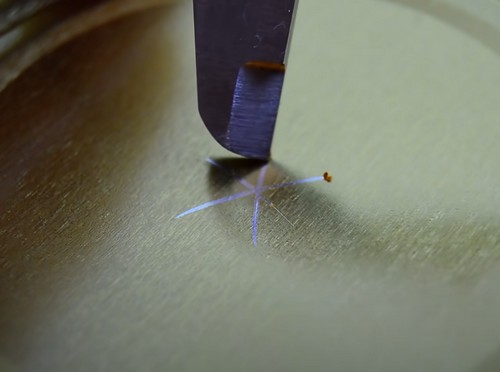
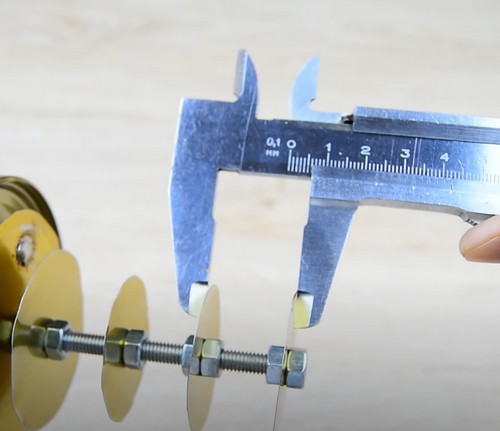
Making the Center Point with Vernier Caliper
Set the Vernier caliper to 2.8 mm, and then use it to make three equidistant marks along the outer circumference of the jar lid. By connecting these marks, you can find the center point of the circular sheet, a crucial step in building your antenna.
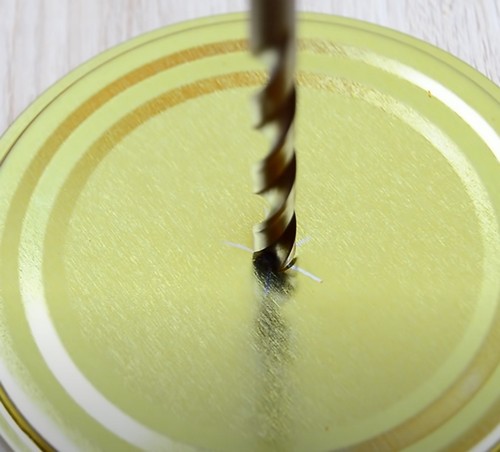
Making a Hole with a Drill
After marking the center point with a black marker, use a drill to make a hole precisely in the center of the jar lid. This hole will be used to assemble the antenna with screws later on.
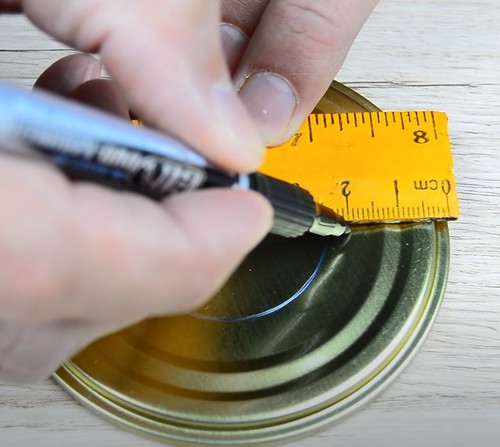
Marking the Circle with Vernier Caliper
Now, open the Vernier caliper to the desired circle size for your antenna. Place one jaw of the caliper in the middle hole and use the other jaw to draw a circle on the lid, creating an outline for cutting.

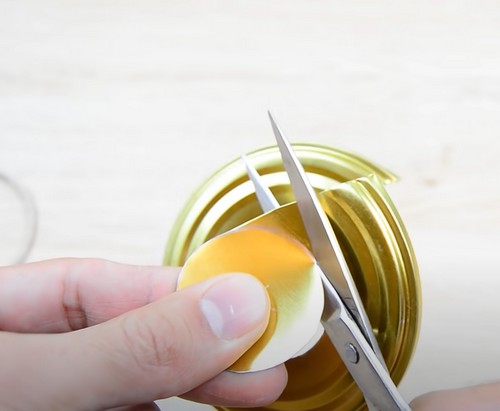
Cutting the Sphere from the Lid
Carefully use scissors to cut the circular sheet following the marked outline. This sheet will become a part of your antenna’s structure.
Caution: Be careful in this step, as the sharp edges of the circular sheet can get you injured.
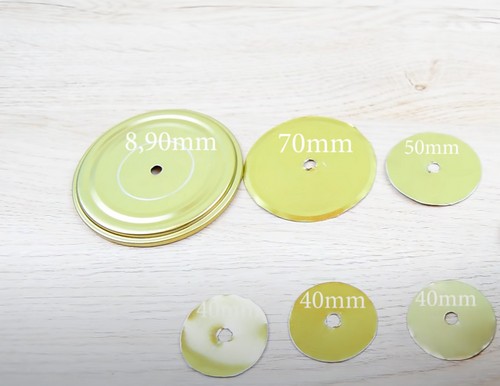
Cutting Many Spheres
Repeat the above process (steps 2-5) to create multiple circular sheets according to your desired dimensions. These sheets will be placed with precise spacing on the central screw during assembly.
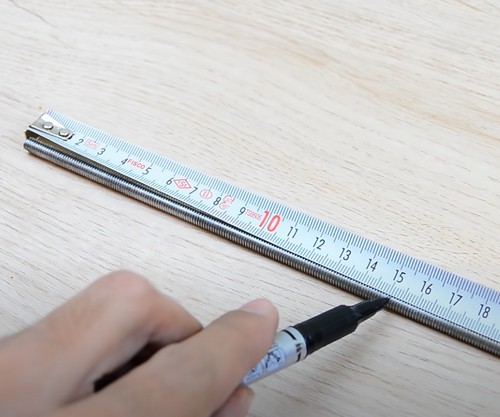
Marking the Screw to Cut
Take a long screw and use a measuring tape to mark the necessary length according to your antenna design. Use a grinder to cut the screw to the marked length.
Marking the First Hole
On the jar lid (the larger circular sheet), make a hole 0.5 mm above the previously marked circle.
Marking the Second Hole
- Place the jar lid on top of the 7mm circular sheet, aligning their edges.
- Using the hole from the jar lid as a reference, mark the same position on the 7mm circular sheet. You can do this by inserting a marker through the hole in the jar lid while it is positioned on the 7mm sheet.

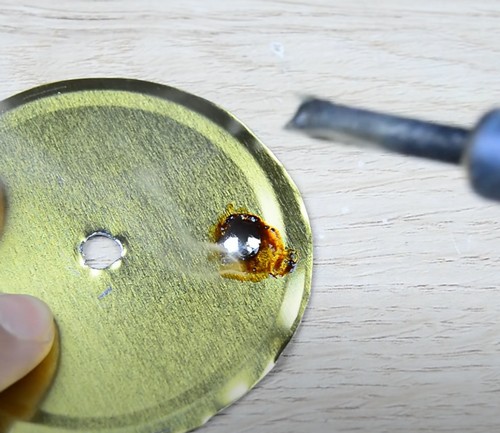
Soldering the 7mm Sheet’s Hole
- Create a small hole in the 7mm circular sheet at the marked location.
- Apply solder to the hole to reinforce it and ensure a strong connection during the antenna assembly.
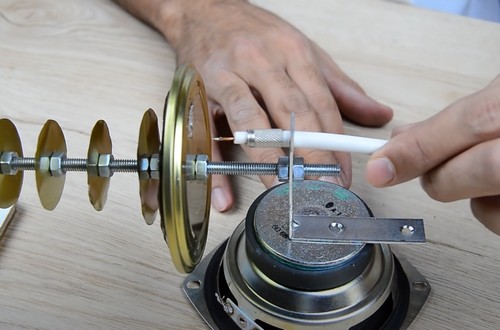
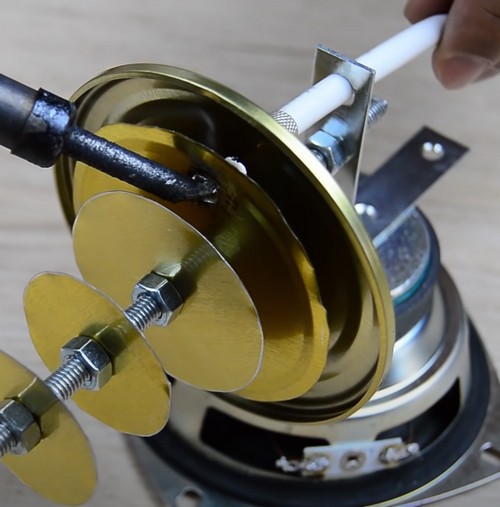
Assembling the Antenna with Screws
Place the circular sheets on the central screw, securing them with nuts on both sides of the sheets. This forms the main structure of your DIY WiFi antenna.
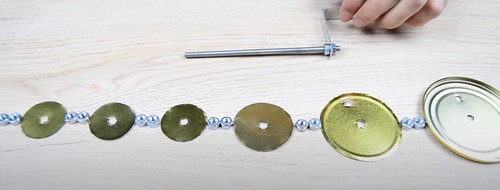
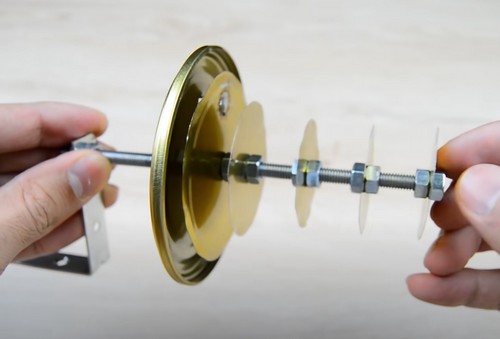
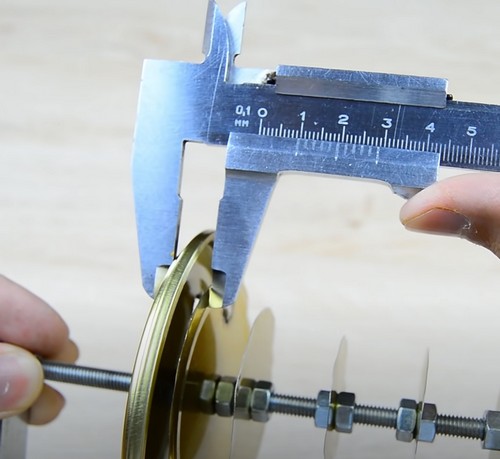
Adjusting Spacing Between Spheres
Make sure the spacing between the sheets is adjusted to your given dimensions, using a Vernier caliper to measure for accuracy. This optimizes your antenna’s performance for better WiFi signal reception.
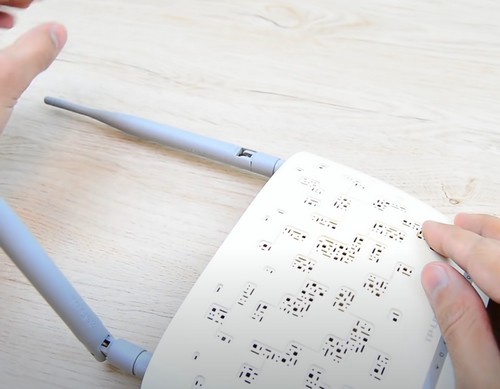
Removing Old Antenna
Carefully detach the antenna currently installed on your router, as you will replace it with your DIY antenna. During this process, be sure to preserve the holder of the antenna as you will be reusing this component to install your DIY antenna.
Disassembling the Old Antenna
With care, disassemble the old antenna and the holder, and the first part will be reused in the new DIY antenna. Be cautious not to damage the connecting wire during disassembly.
Attaching the Wire to the Connector
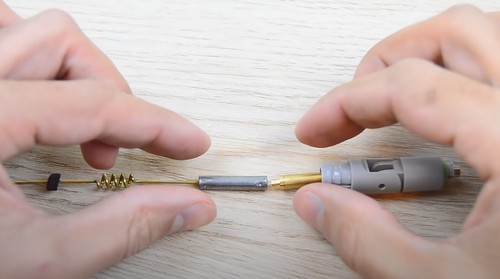
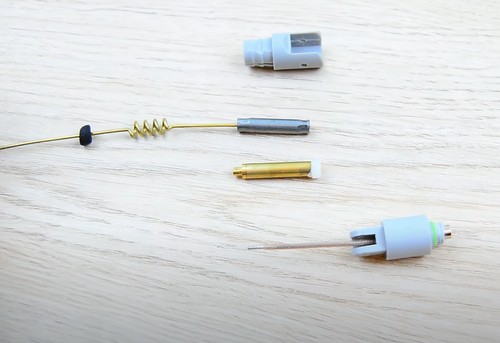
Take the earthland cable, peel back the insulation, and attach it to the connector. Then, solder the two wires of the connector and the earthland to establish a strong connection. Now you ned to attach this holder back to the wifi router.

Final Assembly and Connection:
Take the other end of the cable that is currently attached to the WiFi route. Pass the wire through the larger hole of the first circular plate and solder the copper wire to the small hole you soldered in step 8. You have now successfully created your DIY WiFi antenna.
Tip:
After installation, test the WiFi signal in different areas of your home or workplace to evaluate improvement. If signal strength or range isn’t improved, recheck all your steps for discrepancies.
Congratulations on successfully assembling your DIY WiFi antenna! Now is the time to appreciate and marvel at what you’ve created.
Leave a Reply