
Create charming and unique decorations using air dry clay and no bake polymer clay trinket dishes and plates for jewelry or a handmade touch.
Making small dishes and plates with air-dry or polymer clay is a fun and easy activity anyone can enjoy. These little bowls are perfect for holding rings, keys, coins, or other tiny items, and you don’t need expensive tools or an oven to make them. All you need is some clay, a few basic supplies, and a bit of time to shape and paint them however you like.
Creative Ways to Use Polymer Clay Trinket Dishes & Plates
The process is simple. Start by molding the clay into shapes, classic round bowls, leaf designs, or even fun patterns and smooth the edges for a neat finish. Once you’re happy with the shape, leave the air-dry clay out to harden naturally. When it’s dry, you can paint them with your favorite colors, add patterns, or decorate in small details to make them unique. With so many possibilities, it’s a great way to let your creativity show.

These handmade dishes don’t just look good, they also make lovely gifts. Whether you’re giving one to a friend or keeping them as a treat for yourself, they’re both practical and thoughtful. Place them on your desk to hold paperclips, on your nightstand for jewelry, or near the door for keys. No matter how they’re used, they’ll be a charming addition to any space.
What’s great about this activity is how simple it is, yet the results feel special and personal. Light, durable, and easy to make, these trinket dishes are a perfect way to spend an afternoon. Try using different colors, shapes, or patterns to make each one unique. Once you start, it’s hard to stop—you might even surprise yourself with how professional they turn out. Why not try it out today?
Instructions For Making Polymer Clay Trinket Dishes & Plates
Materials Needed
- Polymer clay (or resin-based clay like Mouldit clay as mentioned in the transcription)
- Hardener (if using resin-based clay)
- Talcum powder or wall putty powder (to prevent sticking)
- Basic tools:
- Rolling pin
- Knife or clay cutting tool
- Household items that can double as sculpting tools (e.g., toothpicks, spoons, chopsticks, etc.)
- Acrylic paints (minimum of 4 basic colors: yellow, white, green, blue; more as needed)
- Glue (for attaching dried clay pieces)
- Sandpaper (fine-grit for smoothing edges and surfaces)
- Paintbrushes (various sizes for detailed painting)
- Varnish (to seal and protect the finished piece)
Preparing for the Project
1. Choose the Type of Clay
- For Mouldit clay, be sure to have the resin and hardener ready.
- For polymer clay or homemade air-dry clay, ensure it is pliable and easy to work with.
2. Set Up Your Workspace
- Cover your work surface with parchment paper or another protective layer.
- Arrange all materials and tools within reach for easier workflow.
3. Mix the Clay
- If using resin-based clay, mix equal parts of resin and hardener thoroughly.
- Remember: resin clay hardens quickly, so work fast once mixed.
Start Making Here
1. Prepare the Clay
- Dust your workspace and hands with talcum powder or wall putty powder to prevent the clay from sticking.
- Roll the clay into a thin flat slab using a rolling pin or similar tool. The thickness can be around 0.25 inches, depending on your preference.
2. Shape the Base
- Use a knife or cookie cutters to cut the clay into desired shapes: circles, ovals, flowers, hearts, or leaves.
- For plates, keep the edges flat. For trinket dishes, gently curve the edges upward by placing the clay over a bowl or a mold.

3. Add Details
- Create lotus buds, leaves, or other embellishments from small clay pieces.
- If attaching details to the main piece while the clay is wet, press securely.
- If working with dry clay, use glue to attach embellishments around the edges or surface of the main piece.

4. Dry the Clay
- Allow the clay pieces to dry completely before sanding or painting. Drying time varies depending on the type of clay:
- Resin-based clay: Typically dries within a few hours.
- Air-dry clay: Could take up to 24 hours.
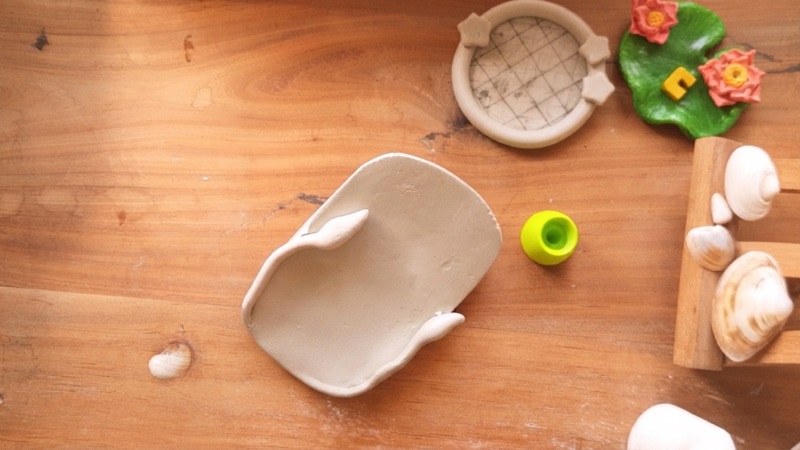
5. Sand the Pieces
- Once dry, use fine-grit sandpaper to smooth out rough edges and imperfections. This will ensure a polished look and a professional finish.
Painting and Decorating
6. Start Painting
- Choose your color palette (inspiration from Pinterest or your own creativity). Use acrylic paints for their vibrant finish and durability.
- Paint your trinket dish or plate layer by layer. Let each layer dry before adding the next.

7. Experiment with Colors
- If the initial paint job doesn’t meet your expectations, repaint. Try mixing colors or adding shading for depth.
- For intricate designs, such as flower-shaped brush holders or lotus details, use smaller brushes for precision.
Finishing
8. Varnishing
- Once the paint has dried completely, apply a thin, even layer of varnish to seal and protect the surface.
- Leave the varnish to dry thoroughly before handling the piece.
9. Final Touches
- Add stands or decorative elements underneath the dish or plate if desired. Use glue to fix these securely.
- Check for any areas needing touch-ups and address them carefully.
Features of the Final Product
- Customizable Designs:
- Transform your clay into a variety of aesthetic shapes, such as simple plates, flower-shaped holders, or lotus-themed designs.
- Durable Finish:
- Once dried and varnished, the trinket dishes are sturdy and resilient to wear.
- Decorative and Functional:
- Ideal for holding jewelry, small keepsakes, or art tools like paintbrushes, while also enhancing the aesthetic appeal of any space.
Tips for Better Results
- Work Quickly: Resin-based clay can dry out fast, so don’t let it sit for too long after mixing.
- Avoid Sticky Hands: Use sufficient talcum powder or wall putty powder to prevent the clay from sticking to your hands or tools.
- Use Molds: Molds simplify designs and create uniform shapes when making curved dishes.
- Plan Your Colors: Sketch or imagine your design beforehand to avoid repainting and unnecessary frustration.
- Take Breaks: If the process takes longer than expected (e.g., a week), work in small manageable steps.
Enjoy Your Finished Polymer Clay Trinket Dishes & Plates
You now have beautifully handcrafted pieces that can be used to add a unique touch to your home or gifted to loved ones. Whether they serve as décor or functional items, they’re sure to make a lasting impression.
Leave a Reply