
Grab this easy crochet square top with sleeves that offers comfort, style, and a fresh look perfect for every occasion and season.
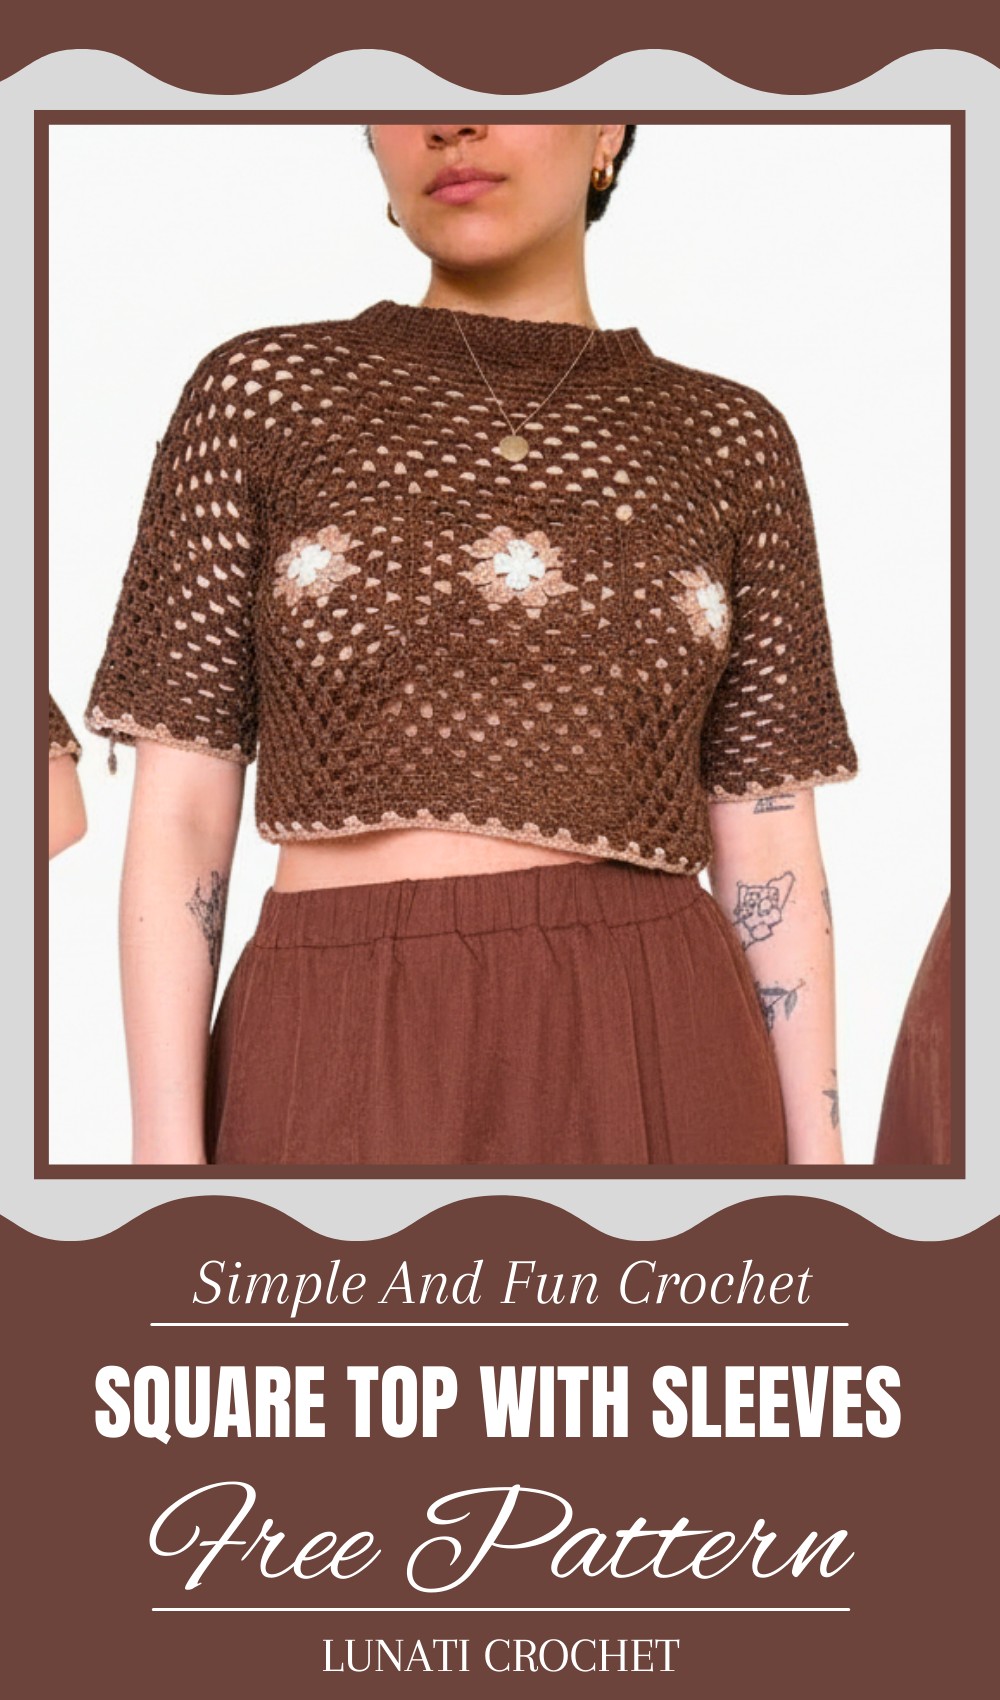
Crochet Square Top with Sleeves Perfect for Any Occasion
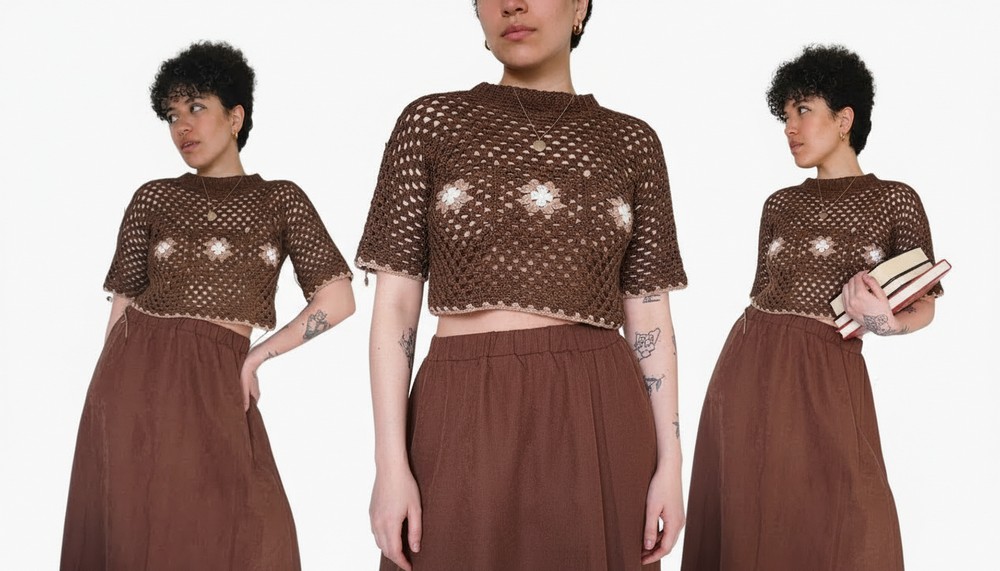
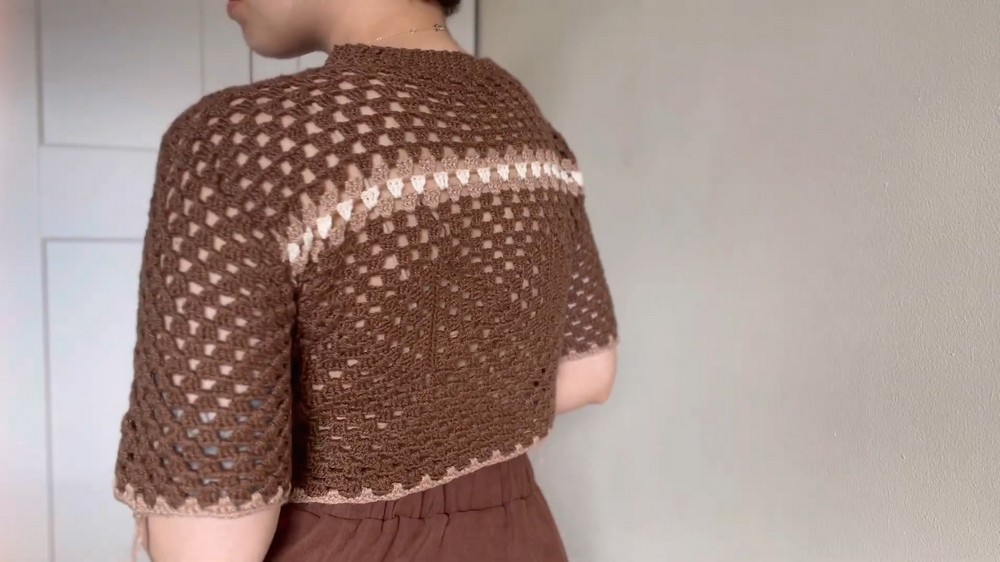
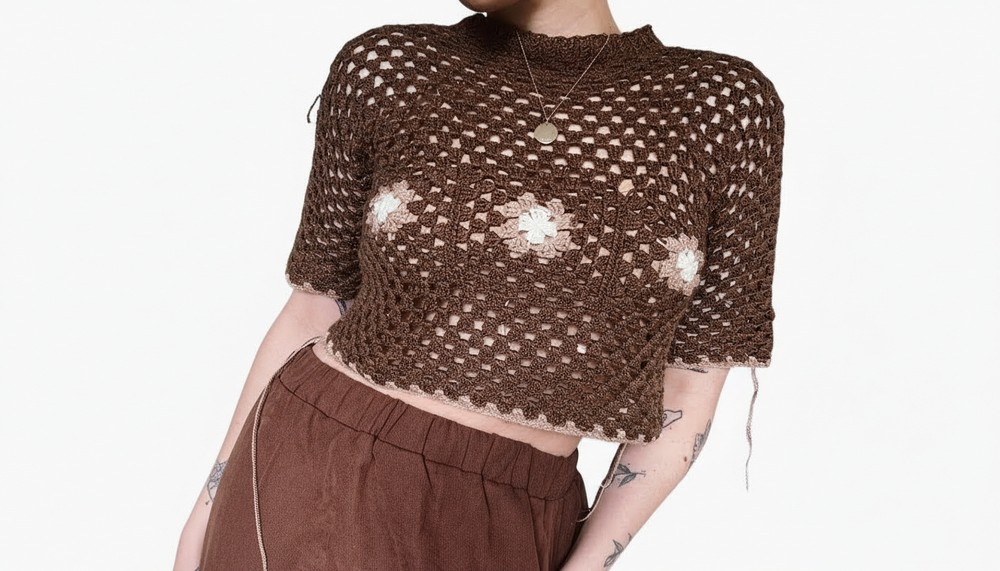
This stylish top offers a perfect blend of charm and comfort, making it an ideal choice for casual outings or cozy days at home. With its unique square shape and gentle sleeves, it provides a relaxed fit that flatters all body types. The simple stitch details create a textured look that adds personality without being too busy, making it easy to pair with jeans, shorts, or skirts.
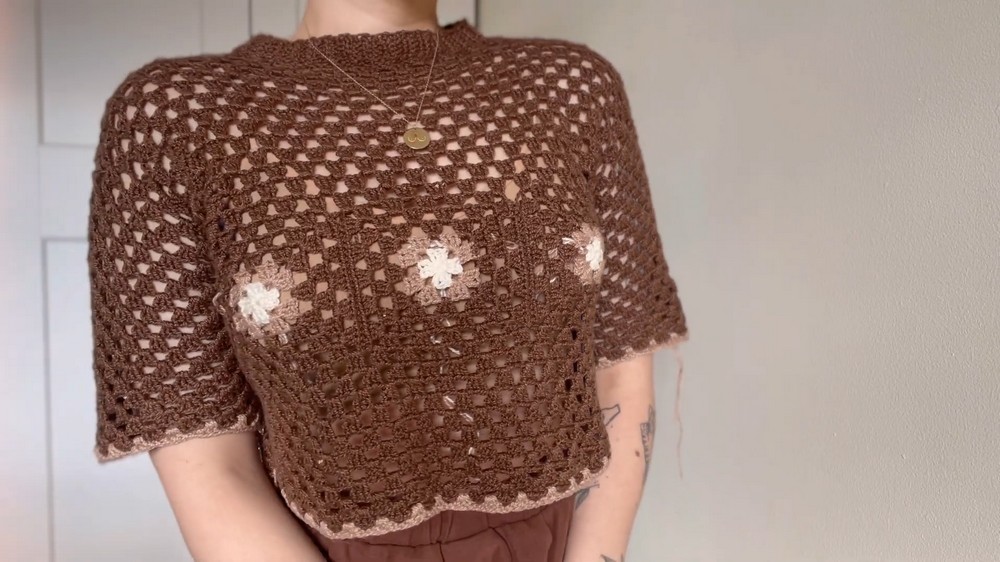
Its breathable fabric keeps you cool during warm weather, while the sleeves offer just enough coverage for a bit of extra warmth. Whether worn on a sunny day or layered over a tank top, this piece stands out with its handmade feel and timeless design. The softness and flexibility make it easy to move around in, perfect for everyday activities. Plus, the charming square design sets it apart from regular tops, giving you a fun and fresh look that’s both comfortable and attractive.
Crochet Colorblock Square Top Pattern
Materials Needed:
- Anne yarn from Círculo (500m per skein, tex 295) – main and secondary colors
- Crochet needle sizes: recommended 1.75 mm, larger needle for drape as preferred
- Scissors
- Yarn needle for sewing motifs and ends
- Stitch markers (optional)
Difficulty Level: Intermediate
This project involves working motifs from the magic ring, color changes, joining motifs together, shaping, and finishing. Some experience with crochet basics and color changes is helpful.
Step-by-Step Pattern
Step 1: Yarn Details & Preparation
- Use Anne yarn by Círculo, 100% cotton, 500m per skein.
- Recommended needle size is 1.75 mm, but you may choose a slightly larger needle for better drape.
- Secondary colors are used only in the front squares; the back is worked in a single main color.
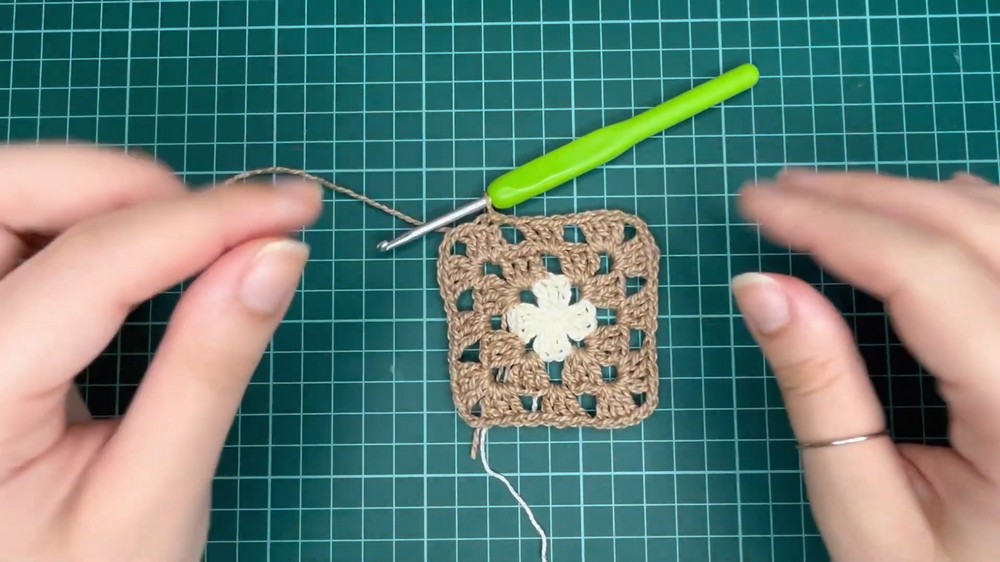
Step 2: Making the First Square (Magic Ring & Round 1)
- Create a Magic Ring:
- Wrap yarn into an X, loop needle through and pull up a loop to create the magic ring.
- Chain 1 to secure.
- Chain 3:
- Counts as first double crochet (dc).
- Crochet Clusters in Ring:
- Work 3 double crochet (dc) into the ring.
- Chain 2 to create a corner space.
- Repeat: 3 dc, chain 2, three times more to have four sets of 3 dc clusters separated by chain 2 spaces.
- Close the Round:
- Chain 2, slip stitch into the top of the initial 3 chain stitches.
- Pull the tail tightly to close the center gap of the magic ring.
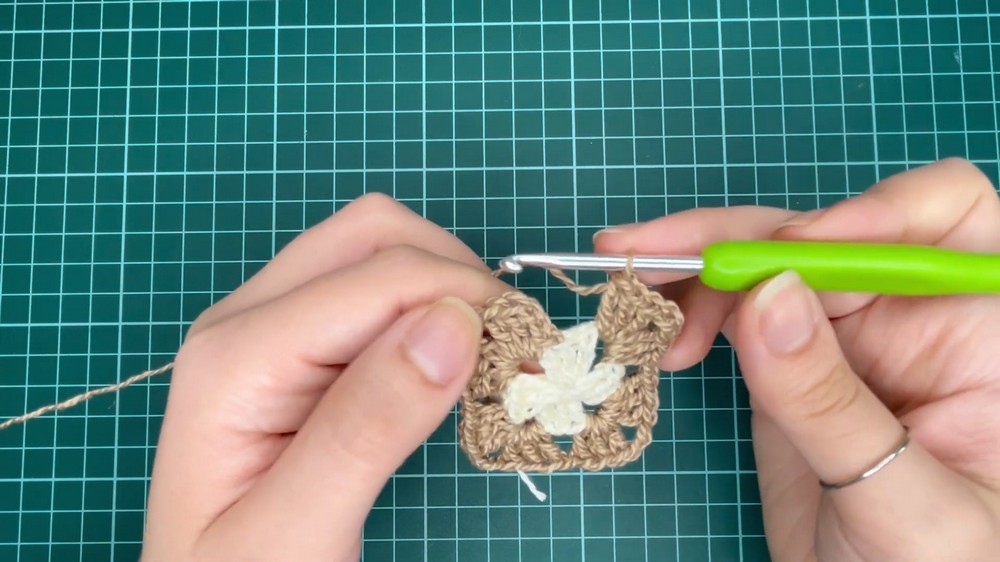
Step 3: Round 2 – Building Square Clusters
- Chain 3:
- Counts as the first double crochet (dc).
- In corner chain-2 spaces:
- Work 3 dc, chain 2, 3 dc to form corners.
- In side chain-1 spaces:
- Work 3 dc clusters separated by chain 1 spaces.
- Repeat around all four sides forming a larger square.
Step 4: Changing Colors within Squares
- Before finishing the last stitch of a round, stop before last yarn over.
- Pick up the new color yarn and complete the last yarn over with this color to seamlessly change colors.
- Crochet over loose strands of previous color to secure them inside stitches for a neat finish.
- Tie color changes securely with loose ends woven in.
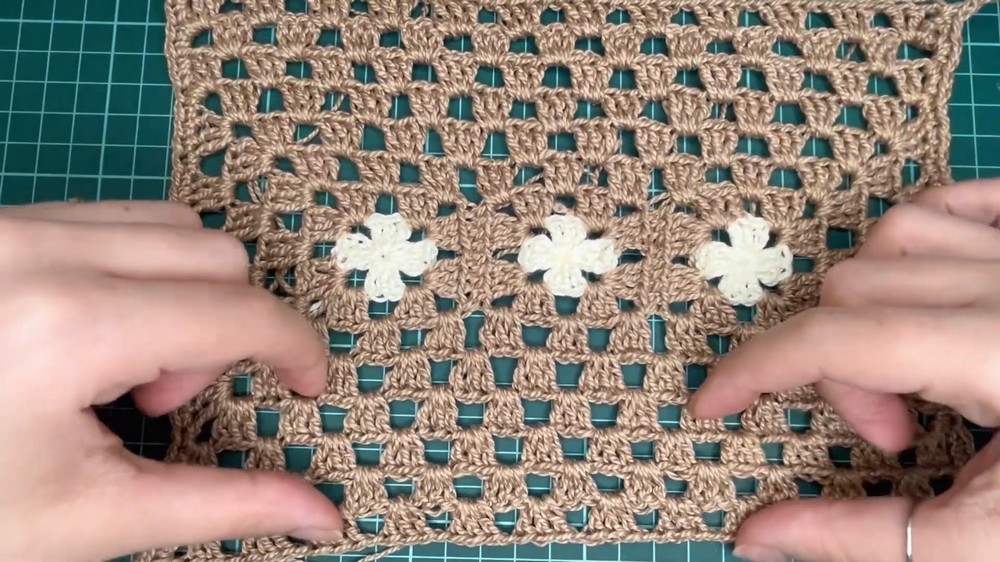
Step 5: Increasing the Size of Squares
- For bigger squares, add more rounds:
- Chain 3 to start each round.
- Create 3 dc clusters, chain 2 corners and chain 1 between clusters on sides.
- Skip 3 dc clusters, chain 1, then continue clusters and chains to add width/length.
- Add increases at corners only (3 dc, chain 2, 3 dc).
- Continue until the square is desired size for your garment.
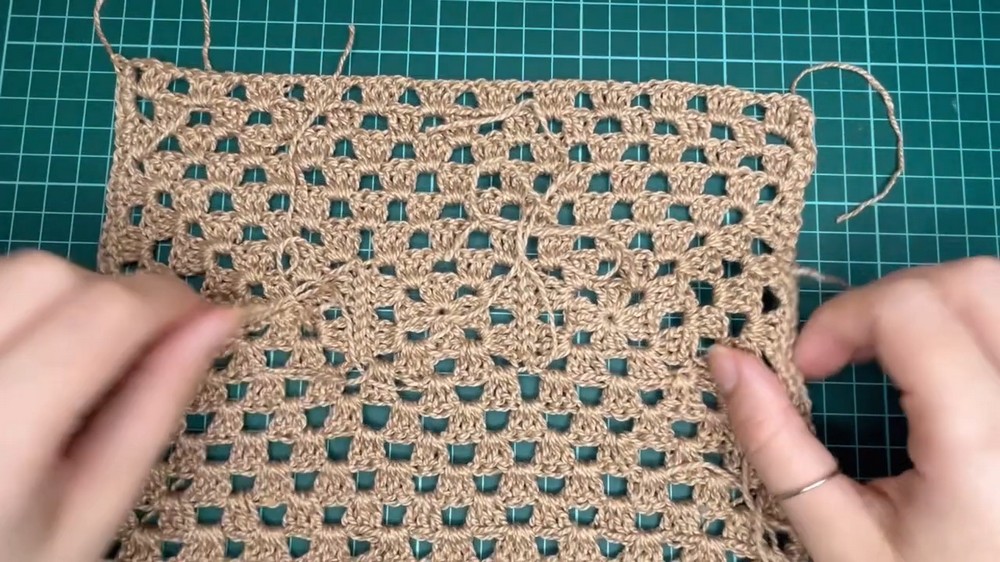
Step 6: Joining Squares
- Arrange the squares in the layout for your garment front and back.
- Turn squares inside out (wrong side out).
- Use single crochet (sc) or slip stitch to sew adjacent motifs together:
- Insert hook through loops of corresponding stitches in two adjacent squares.
- Slip stitch or single crochet to join evenly, maintaining garment shape.
- Leave some edges partially open for shaping (sleeves, neck).
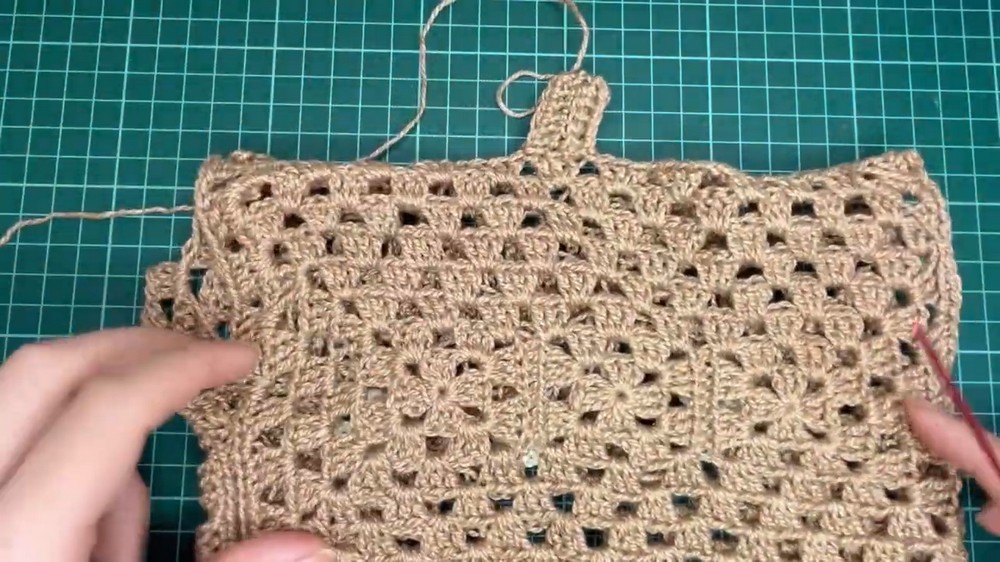
Step 7: Crochet Borders around Joined Squares
- Using main color yarn, crochet rounds around the entire joined squares piece.
- Work double crochet (dc) stitches into spaces, adding chains for shaping at corners.
- Continue until garment reaches desired dimensions, adjusting width and length as needed.
- For longer tops, add rows only on top and bottom edges.
Step 8: Crochet Sleeves
- Pick up stitches at armholes.
- Work in rounds or rows with pattern of 3 double crochets (dc), chain 1, creating lacy sleeve design.
- Add increases for sleeve shaping as needed.
- Stop when sleeves reach preferred length (e.g., elbow length).
Step 9: Crochet Neckline (Collar)
- Using a smaller needle (e.g., 2 mm), pick up stitches evenly around neckline.
- Work single crochet (sc) rows, picking up only back loop for decorative ribbed effect.
- Chain 1 at beginning of rows to build collar height without bulk.
- Finish collar by slip stitching or sewing for a neat edge.
Step 10: Finishing
- Weave in all loose ends securely using a yarn needle.
- Block the garment lightly for shape and evenness.
- Try on and adjust if needed by adding or subtracting rows.
Special Features
- Colorblock squares for a vibrant, modular look.
- Seamless color changes that maintain stitch consistency.
- Light, breathable texture suitable for warm weather.
- Custom sizing by adding/removing squares or rounds.
Tutor’s Suggestions
- Measure frequently to adjust square size and total number of squares for perfect fit.
- Use stitch markers to keep track of corners and joins.
- When changing colors, crochet over yarn ends for cleaner joins.
- Practice magic ring and cluster stitches before starting motifs.
Uses
- Stylish lightweight summer top or layering piece.
- Ideal for showcasing creativity with color and design.
- Suitable as a unique handmade gift or personal wardrobe staple.
Tip
To keep your squares perfectly shaped, always pull the magic ring tight and maintain consistent tension throughout rounds. This ensures neat blocks that join smoothly.
Conclusion
This crochet square top combines colorful motifs and classic stitches to create a unique, wearable piece perfect for warm weather. The step-by-step instructions enable you to customize size and colors easily while learning essential crochet techniques.
Leave a Reply