
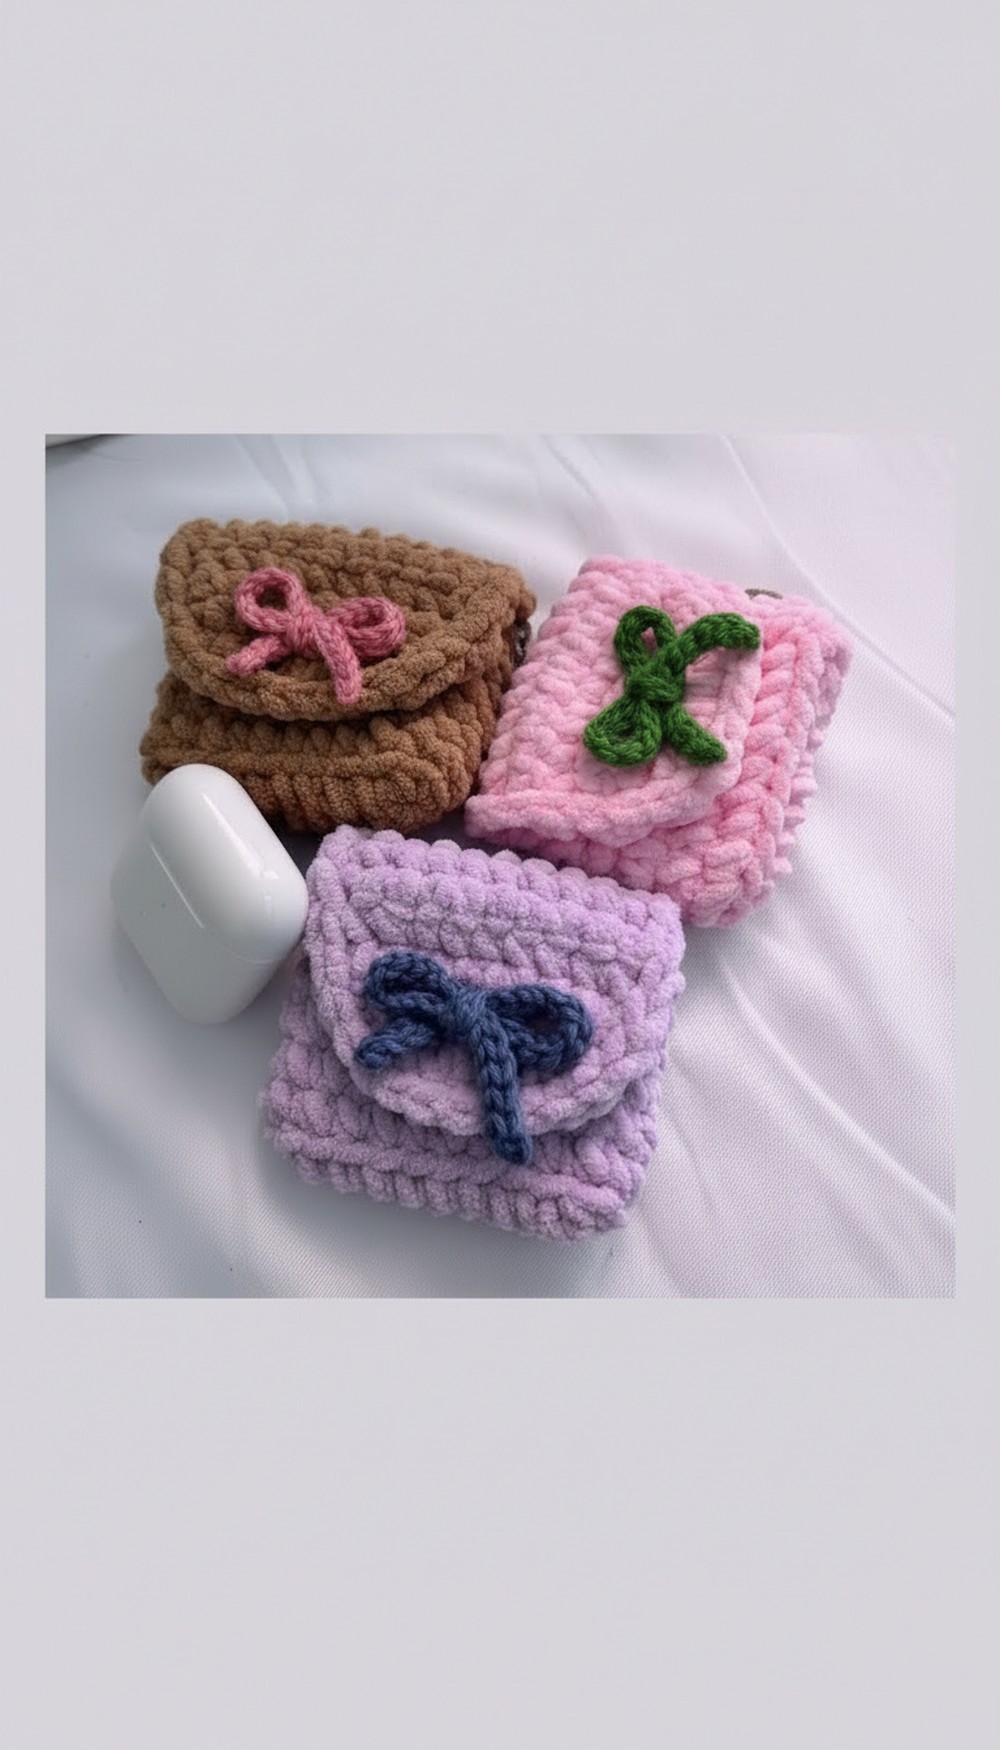
Shine with a charming crochet mini bag keychain that holds your tiny essentials while adding a burst of color and fun to your everyday items.
A mini bag keychain is a small, charming accessory that combines beauty and practicality in one tiny package. Its delicate crochet design showcases soft, colorful yarn crafted into a cozy pouch perfect for holding small items like coins, lip balm, or tiny gifts. This adorable bag can easily hang on your keys, backpack, or purse, helping you keep track of essentials while adding a playful touch to everyday belongings.
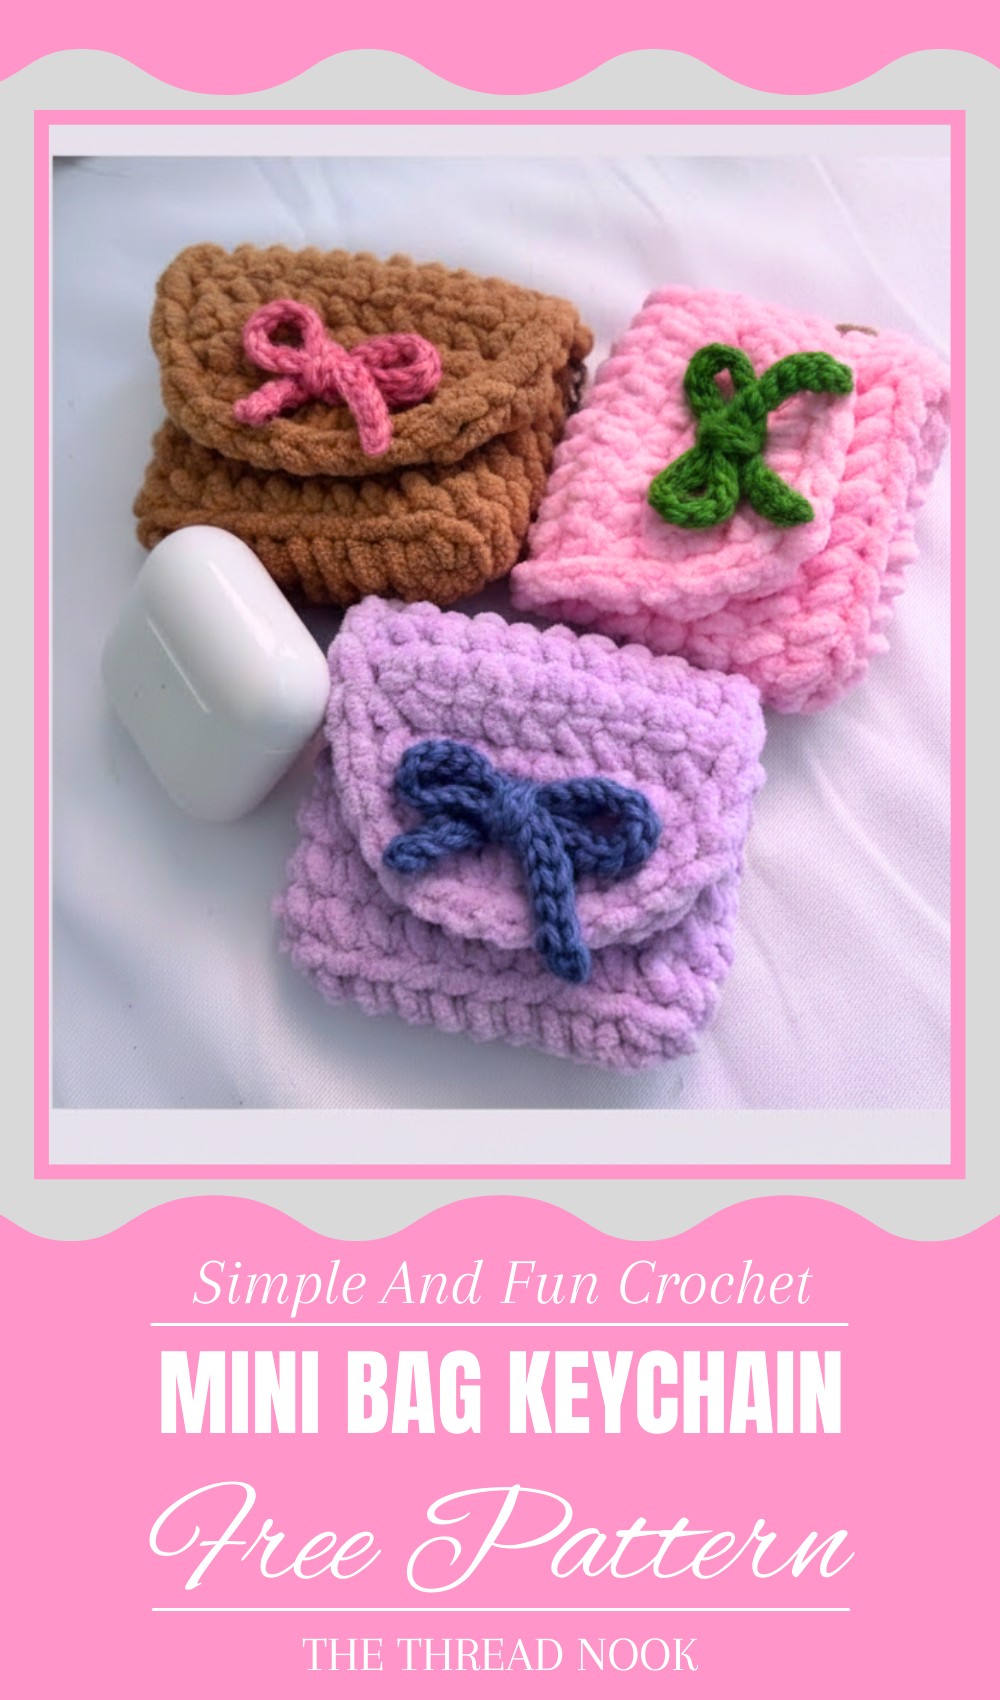
Adorable Crochet Mini Bag Keychain Pattern You’ll Love
The neat stitches and bright colors make it an eye-catching piece that brings a bit of handmade charm wherever you go. Lightweight and portable, it’s both functional and fashionable, making it a perfect accessory for anyone who loves unique, creative touches in their daily life. Whether as a gift or a personal treat, this mini bag keychain is a delightful way to carry small treasures with style and ease.

Crochet Mini Bag / AirPods Holder Pattern
Materials Needed:
- Mini chenille (or worsted weight) yarn
- Crochet hook size 3.5 mm (recommended 4-5 mm but 3.5 mm used for tightness)
- 2 Stitch markers
- Yarn needle
- Scissors
- Magnet lock for bag closure
- Optional: smaller yarn and hook for making a decorative bow
Pattern Steps:
1: Foundation Chain
- Make a slip knot.
- Chain 10 (an even number) + 1 turning chain (chain 11 total).
- Note: The turning chain does not count as a stitch.
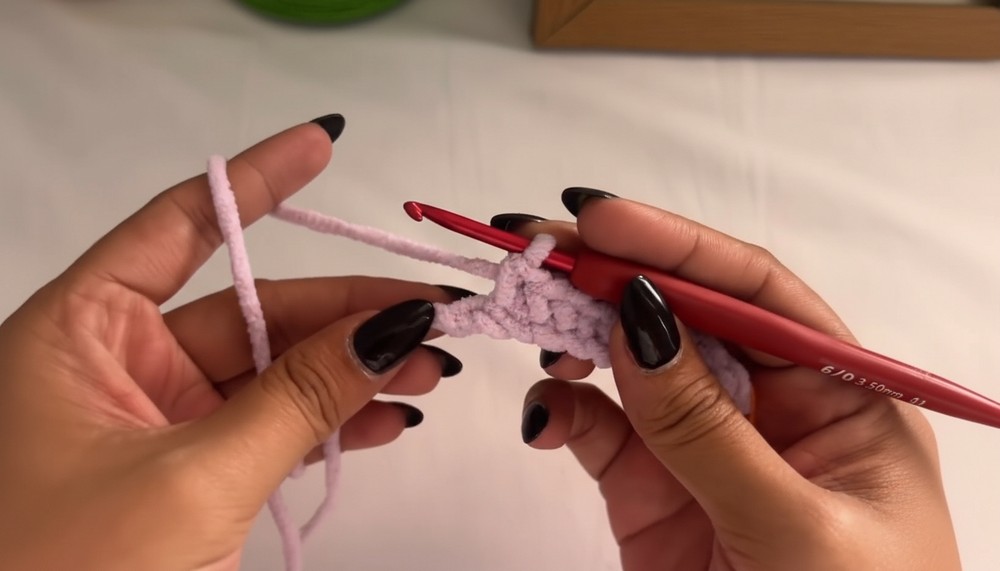
2: First Row – Single Crochet Base
- Single crochet (sc) in the 2nd chain from hook and in every chain across, except the last chain.
- In the last chain, make 3 single crochets in the same stitch to create a rounded corner.
- On the other side of the foundation chain, single crochet in each chain stitch.
- For the last stitch, make 2 single crochets in the same stitch to prepare for joining.
- Join with a slip stitch to the first sc.
- Place a stitch marker at the joining point to track your rounds.
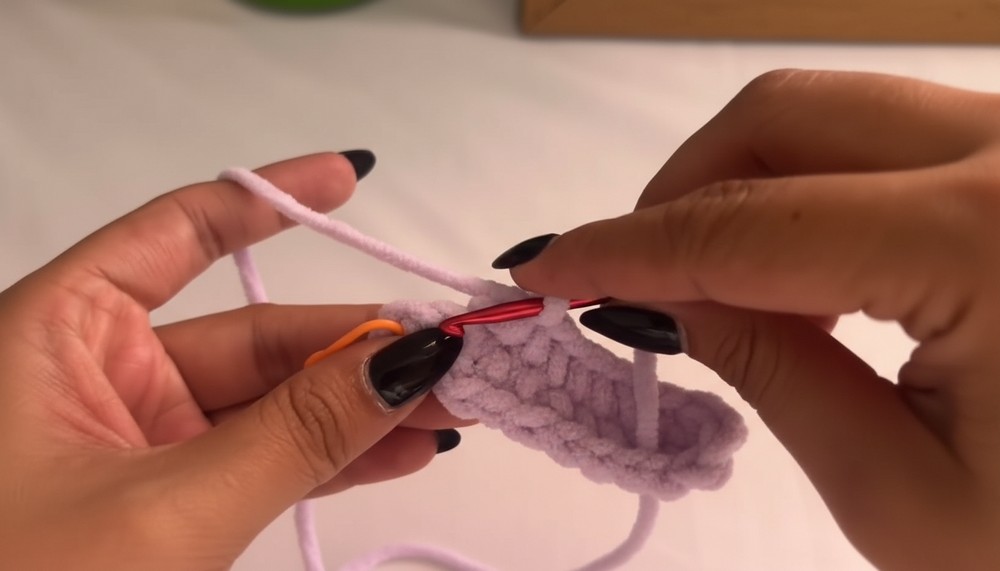
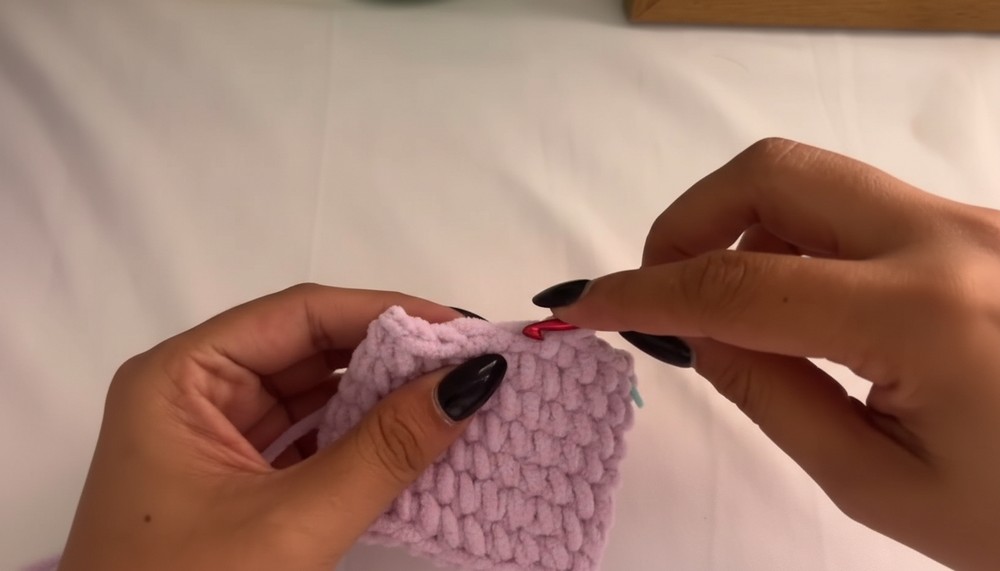
3: Second Row – Back Loop Single Crochet
- Chain 1 (does not count as a stitch).
- Single crochet in the back loop only (BLO) across the row.
- Add a stitch marker at the end to mark your rows.
- Join with slip stitch to the first stitch.
- This creates a textured ribbing effect.
4: Third Row Onwards – Single Crochet Both Loops
- Chain 1, turn.
- Single crochet in both loops across the row.
- Join with slip stitch.
- Repeat Row 3 until your piece reaches your desired height for the mini bag.
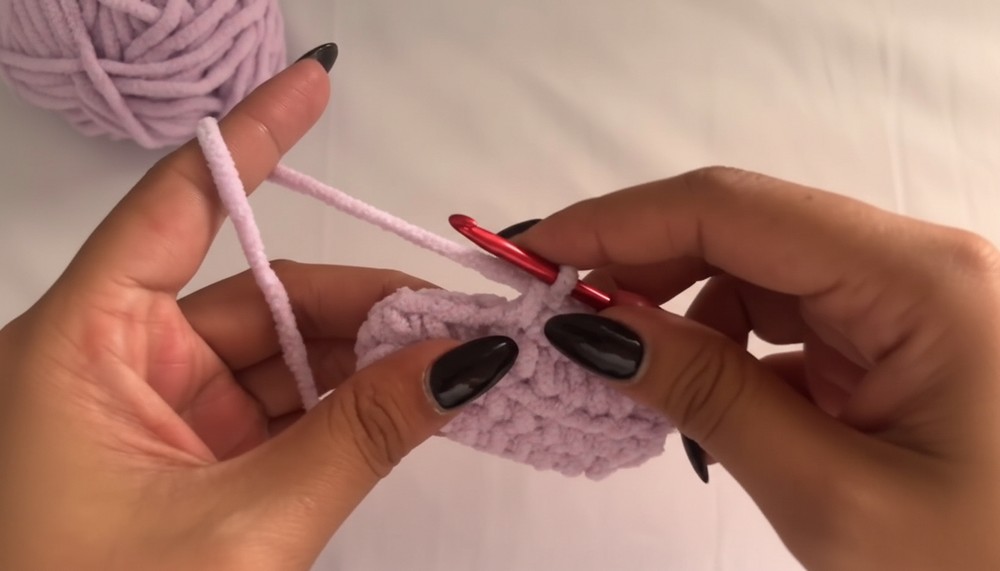
5: Measure Your Work
- The sample measures approx 3” width x 2” height after 6 rows (excluding foundation). Adjust rows for your desired size.

6: Cover / Flap Construction
- Chain 1, single crochet across only half the width of your base (do not crochet all the way around).
- Chain 1, turn, and single crochet across.
- Repeat this row until the piece covers the top height required for the flap.
- Keep 2 stitches at the edge for a neat decrease.
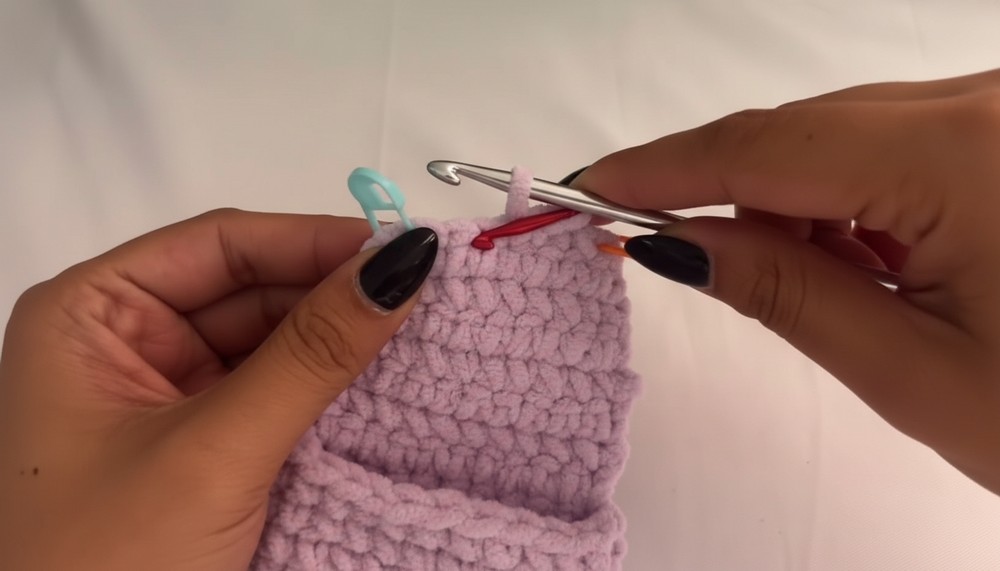
7: Decrease Rows
- Remove stitch markers.
- Make 2 single crochet decreases at each end to taper the edges for a neat finish.
- To decrease: Insert hook, yarn over and pull through without completing single crochet, insert hook into next stitch, yarn over and pull through, yarn over and pull through all loops on hook.
- Repeat decreases as desired for shaping.
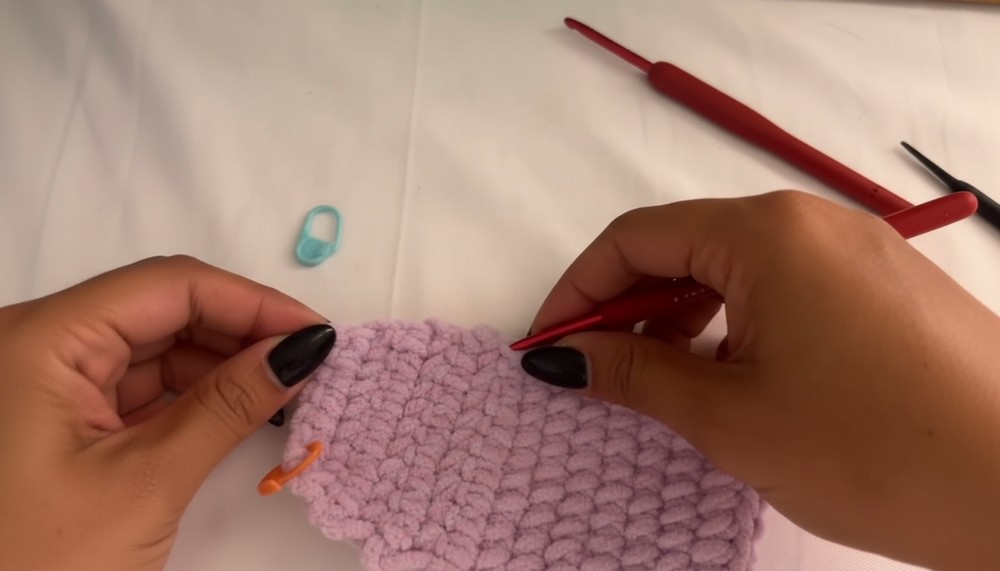
8: Finishing Off
- Cut yarn and pull through to secure.
- Weave in ends neatly with yarn needle.
9: Attaching the Cover
- Turn work right side out.
- Attach yarn at the start of the cover flap with slip stitches all around the edges for a nice border.
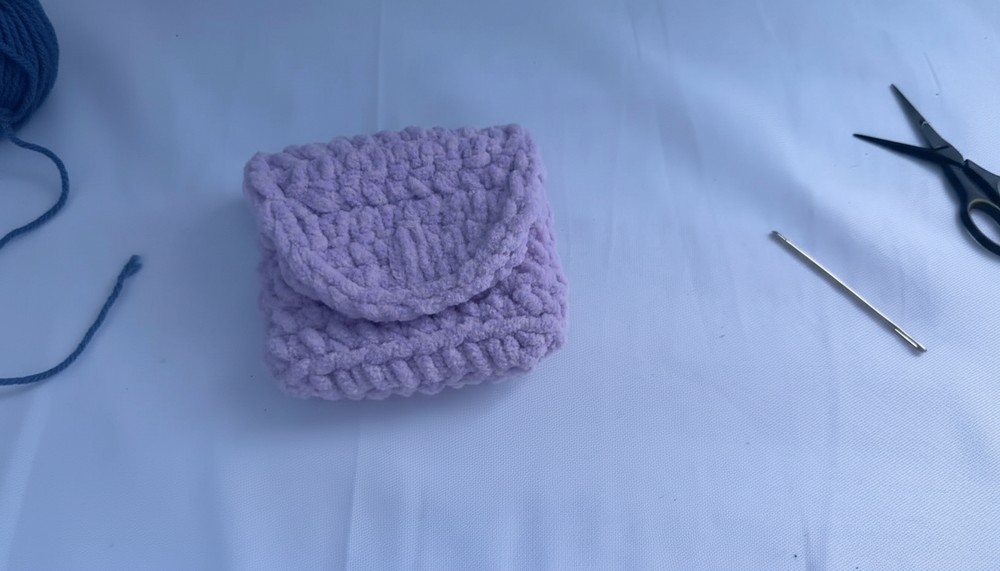
10: Adding Magnet Lock
- Place magnet lock on the flap and bag body.
- Use pliers to secure locking pins from the back.
- Cover back pins with yarn stitches so they don’t snag.
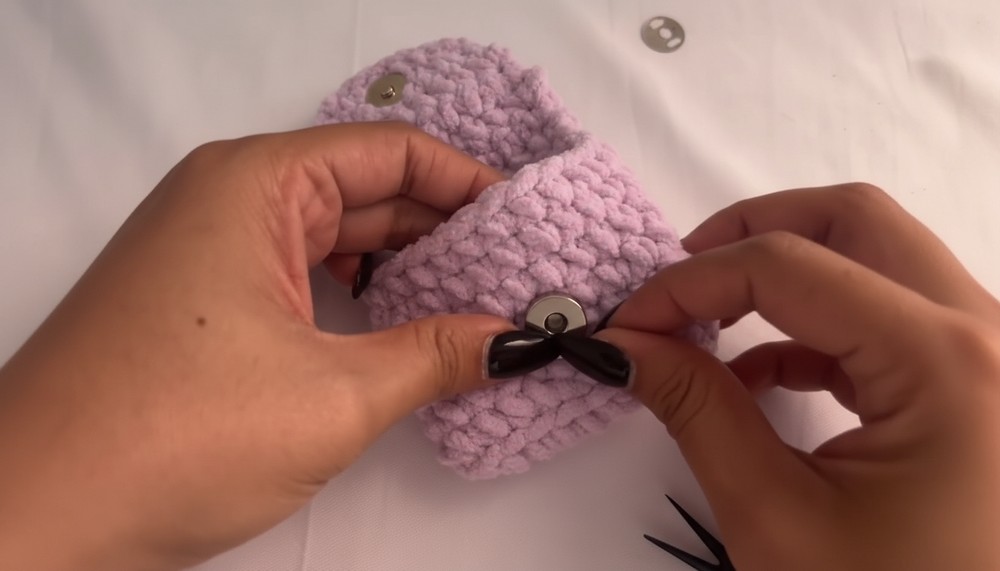
11: Optional Bow Decoration
- Using sport weight yarn and smaller hook, chain ~40.
- Make slip stitches across the chain to create a narrow strip.
- Tie into a bow and attach to your mini bag for decoration.

Tutor’s Suggestions:
- Use stitch markers generously—chenille yarn can be tricky to see stitches.
- Experiment with yarn weights and hook sizes to customize bag size and texture.
- The magnet lock keeps your mini bag secure and user-friendly.
- Add other charms or crocheted appliques to personalize.
Uses:
- AirPods or small earbud holder
- Keychain charm
- Mini purse for coins or lip balm
- Cute gift or craft fair item
Tip:
When working with chenille yarn, keep your tension loose enough to avoid splitting but tight enough to keep shape. Utilize stitch markers for accuracy in every round!
Conclusion:
This quick, fun crochet mini bag pattern is perfect for beginners or anyone wanting a stylish and functional accessory. With easy rounds and a simple magnet closure, you’ll love making and using this versatile piece!
Leave a Reply