
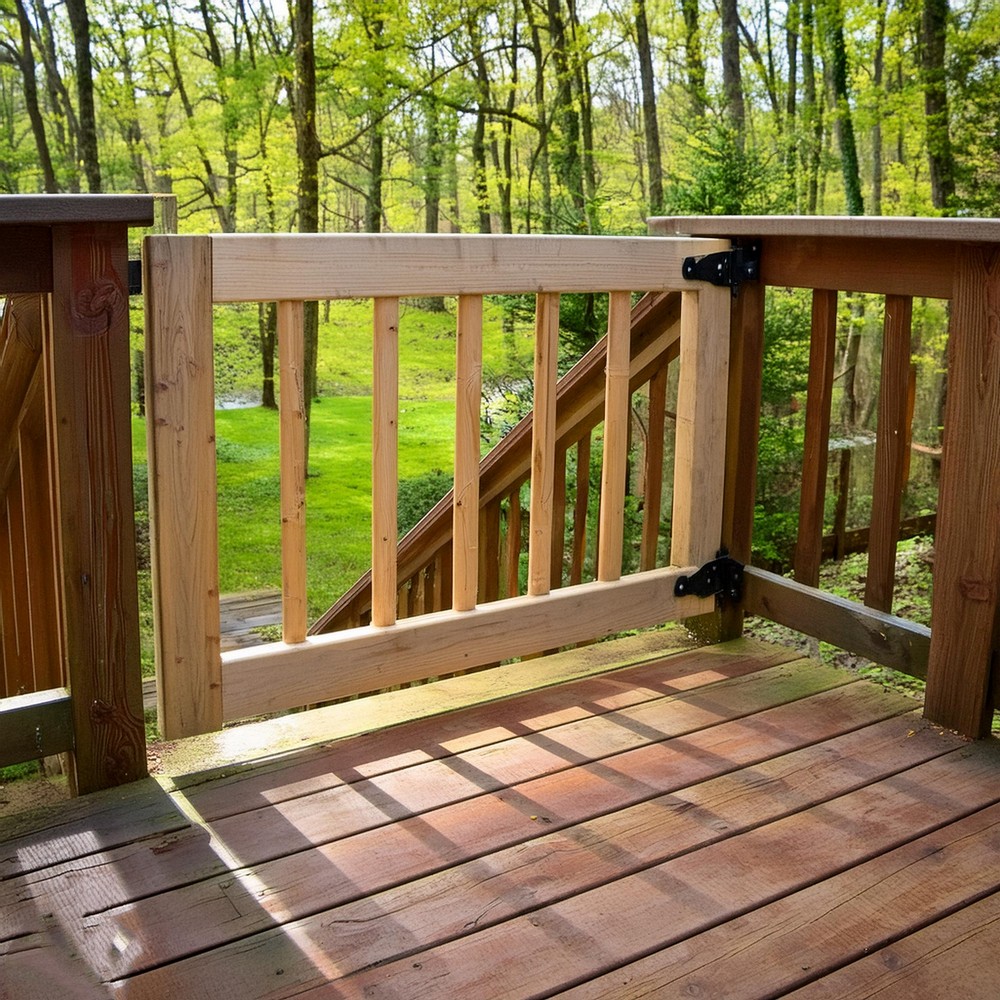
With this simple weekend project, you can create a safe and stylish addition to your deck. Our guide provides step-by-step instructions for building a durable, charming deck gate using basic materials and tools. This deck gate can be a savior for little ones who want to stay inside and not experience damage, like falling off the stairs or decor. It can also be a stylized addition to your simple deck.

How To Build A Deck Gate

Materials Needed
- 2×4 pressure-treated pine lumber
- 1-inch-thick wood decking
- 1½-inch square balusters
- 3-inch deck screws
- 5- or 6-inch deck screws
- 2½-inch deck screws
Tools Required
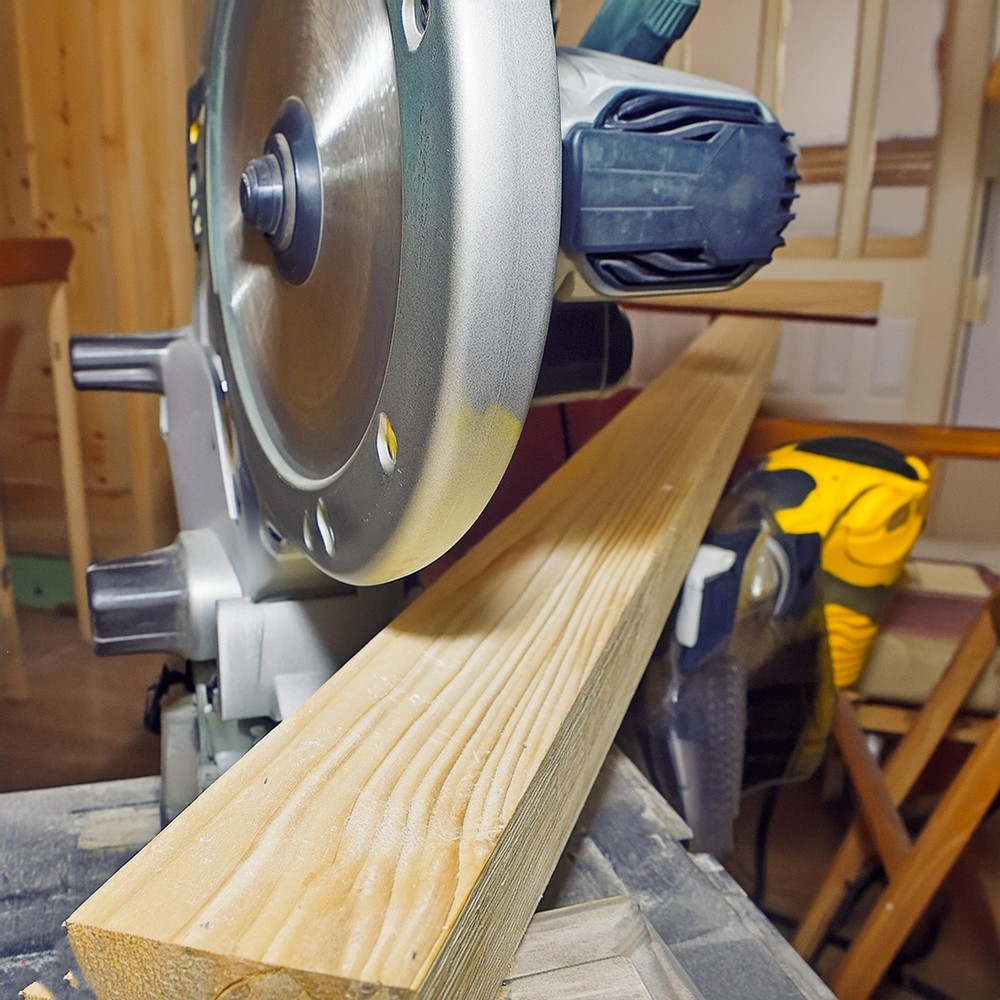
- Miter saw or circular saw
- Drill
- Framing square
- Tape measure
- Level
- Sandpaper or router with a ¼-inch round over bit
- Clamps
- Pencil
Step-by-Step Guide
Step 1: Initial Planning and Measurements: Start by ensuring compliance with local building codes, especially if the gate is near a pool. Consider integrating a childproof latch and closely spaced balusters for safety. Select a rot-resistant wood like pressure-treated pine, cedar, or redwood for longevity. Define the dimensions of your gate based on the width and height of the deck railing opening, making sure the gate won’t be too tight within the space.
Step 2: Drafting the Gate Design: With the gathered measurements, sketch out your gate, accommodating slight clearances on each side and the bottom for smooth operation throughout the changing seasons. This blueprint will be your roadmap throughout the construction process.
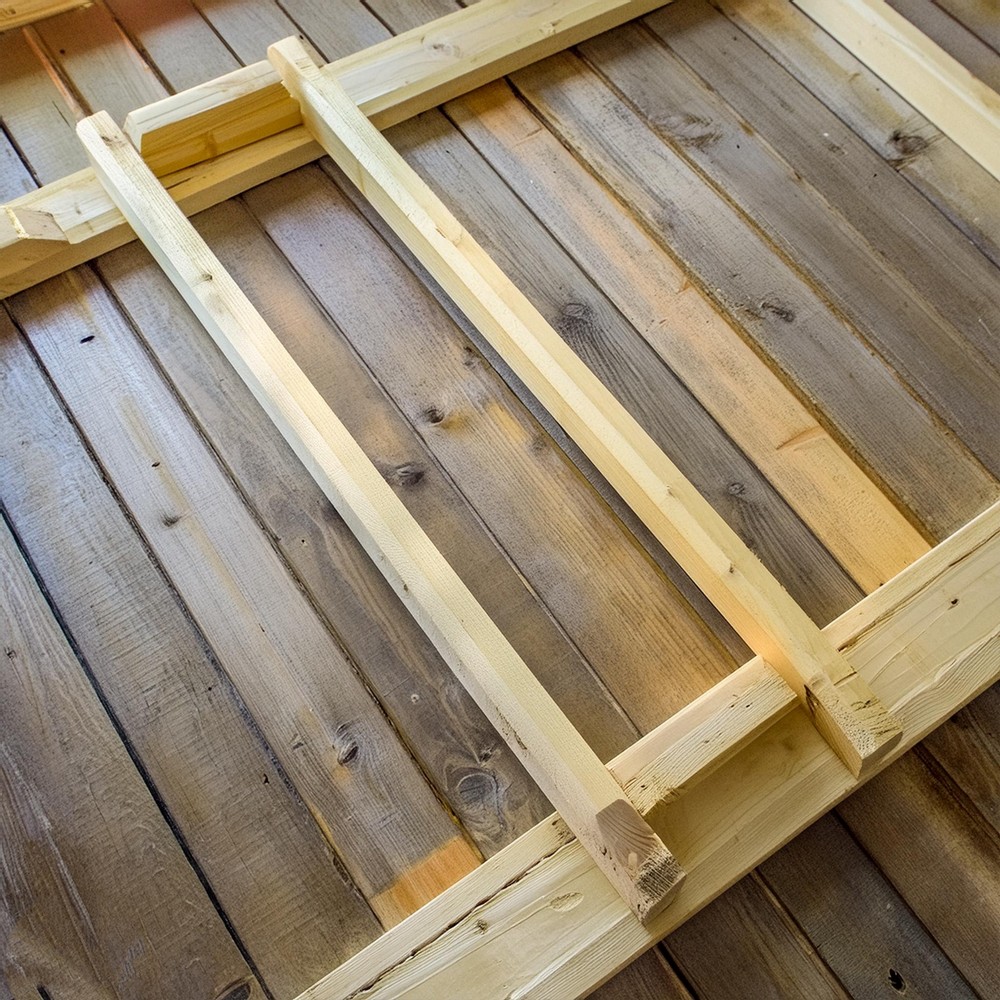
Building the Frame:
Cut your frame pieces, ensuring the horizontal components span the full gate width and the vertical ones fit within. Arrange the pieces on a flat surface, securing them with clamps, and then fasten them together with deck screws at each corner, driven across the grain for maximum hold. Pre-drilling holes is critical to prevent splitting.
Affixing the Cap Board: Choose a width for the cap board that overhangs the gate frame slightly, creating a cohesive look with your deck’s railing. After cutting the board, sand or root the edges for a smooth, finished look. Attach it to the frame using 2½-inch screws, maintaining even spacing.
Laying Out and Attaching the Balusters: Comply with safety standards by spacing balusters less than 4 inches apart. Mark their positions on the frame, pre-drill to prevent splitting, and secure them while ensuring they are plumb and evenly spaced.
Finishing Touches: If desired, apply an exterior-grade finish to the gate for added protection and aesthetic appeal. For the best results, follow the manufacturer’s recommendations.
Gate Installation: Use wooden spacers for precise alignment when installing the gate within the deck opening, taking into account the designated clearance. Once positioned, attach the gate to the deck using appropriate hardware, ensuring a swing with ease.
Leave a Reply