
Create adorable couple pigs with this beginner-friendly crochet pattern that’s fun, quick, and perfect for adding cute handmade charm to any space.

Lovely Crochet Couple Pigs Pattern with Easy Steps
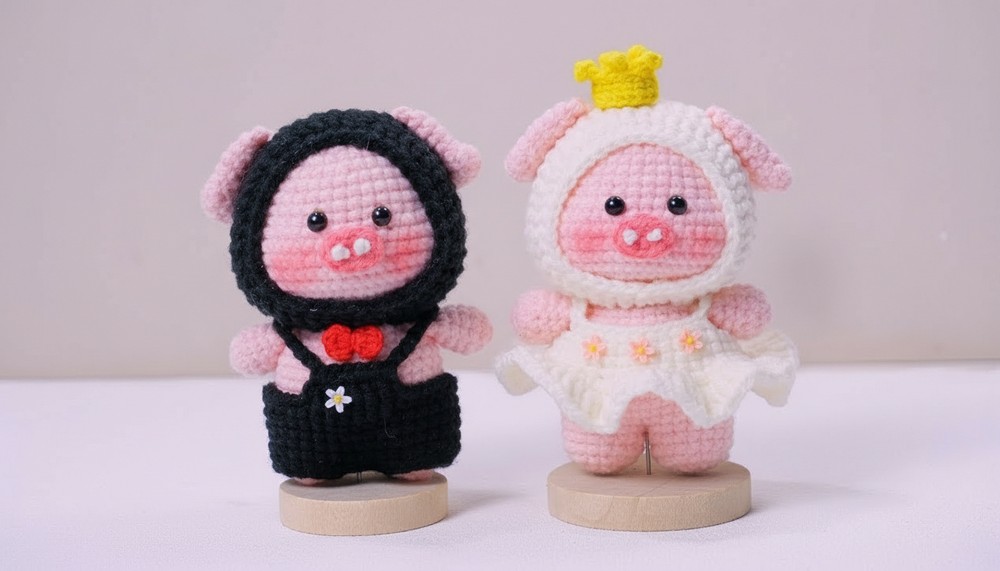
Bringing a pair of adorable pigs to life through crochet is a rewarding and fun project, especially for those new to the craft. These charming little pigs have sweet details like cute hats and tiny bow ties that add personality and make them perfect as gifts or decorations. Their soft, round shapes and gentle pastel colors give them a warm and inviting appearance that immediately draws smiles.

These couple pigs can brighten a nursery, add whimsy to a home shelf, or become a thoughtful, handmade present for loved ones. Their lovable look combined with easy-to-follow instructions invites even those just starting out to complete a delightful project and enjoy the satisfaction of making something truly special by hand.
Crochet Bride and Groom Piggy Banks Pattern
Special Features
- Uses two yarn thicknesses (2.5 mm and 1.5 mm gauges) for texture and detail.
- Magic ring starts for smooth, tight circles.
- Shaping via increases and decreases gives a rounded, soft shape.
- Includes color changes for hats and noses.
- Separate pieces (head, arms, ears, legs, pants, skirt, crown, bow tie) assembled for precise detail.
- Beginners-friendly with progressive difficulty and clear stitch counts.
- Embellishments like glued-on eyes and blush add finishing touches.
Skill Level
Beginner to Intermediate
Prerequisites:
- Magic ring
- Single crochet (sc) and double crochet (dc)
- Increase (inc) and decrease (dec) stitches
- Changing yarn colors
- Basic sewing and stuffing
- Simple embroidery
Materials
- Pink orchid, light pink, white, black, yellow, red yarn (various gauges)
- Crochet hooks: 2.0 mm and 2.5 mm
- Fiberfill stuffing
- Yarn needle and scissors
- Plastic safety eyes
- Glue for embroidery and accessories
Pattern Overview
Head
- Start with pink orchid yarn. MR, 6 sc in circle.
- Round 2: inc in each stitch → 12 sc.
- Round 3: (1 sc, inc) repeat → 18 sc.
- Round 4: (1 sc, 1 sc, inc) repeat → 24 sc.
- Round 5: Increase every few stitches → 30 sc.
- Round 6–7: Continue shaping head to 36 and 42 stitches respectively.
- Rounds 8–11: Maintain 42 sc per round.
- Rounds 12–17: Build up to 52 stitches per round; then start decreasing for shaping.
- Rounds 18–21: Gradually decrease to 24 stitches, stuff firmly before closing.


Hat
- Female pig uses white yarn; male pig uses black yarn.
- Crochet 7 rows following cluster and dc pattern with 42 stitches per row.
- Decrease slightly on row 14; finish and fit hat on head.


Arms (Make 4)
- Light pink yarn; crochet sleeves for 6 rows using single crochet.
- Fold sleeve and crochet across edges to puff, creating 10 stitches total.
- Stuff lightly.
Ears (Make 2)
- Use light pink yarn, starting with 6 stitches in a magic ring, increase to 16 stitches over 6 rounds.
- Shape and finish as ears.
Nose
- Crochet 4 chain stitches; single crochet along chain to form nose.
- Embroider nostrils with white yarn.
Legs and Body
- Black yarn for pants legs; join two legs by crocheting connecting stitches.
- Increase rounds to 38 stitches; continue with single crochet rounds.
- Stuff legs and torso as you work.

Skirt (For female pig)
- White yarn, chain 40 stitches and join in circle.
- Crochet single and double crochet stitches to create texture, finishing with lace-like pattern.
Crown
- Use yellow yarn with 2.0 mm hook.
- MR with 5 sc stitches, increase to 15 stitches.
- Crochet several rounds without increasing, followed by lace detail for crown points.
Bow Tie
- Red yarn, MR to start, crochet double crochet stitch clusters separated by chains.
- Finish with knot in middle.
Assembly
- Sew head to body carefully; insert safety eyes 3–4 cm apart.
- Attach arms to body, spacing evenly.
- Sew ears and nose securely to head.
- Fit hat on head and glue or stitch as needed.
- Attach bow tie to groom pig; decorate bride pig with crown and additional flowers.
- Add blush and final details to bring characters to life.


Tutor’s Suggestions
- Use stitch markers to keep track of rounds.
- Stuff parts moderately for shape and softness.
- Take time sewing parts firmly, especially for toys meant as keepsakes.
- Watch tutorials for tricky stitches like decreases and double crochet.
- Practice finishing techniques like embroidery and glue embellishments neatly.
Uses
- Unique handmade wedding gifts or keepsakes.
- Decorative items for nursery or home.
- Fun amigurumi collectibles or toys.
Tip
Always leave longer yarn tails when finishing parts for easier sewing and weaving in.
Conclusion
Creating these bride and groom piggy banks is a joyful project combining basic crochet skills with charming character design. Each carefully shaped piece and colorful detail builds into a lovely pair perfect for gifting or display. By following the steps thoroughly, beginners can confidently complete a memorable amigurumi set.
Leave a Reply