
Tie-dye shirts are like a burst of rainbow colours splashed across the fabric, making each one unique and fun to wear. They bring a cool, hippie vibe that’s been popular since the 1960s and never really went out of style. Here, we are presenting a super-simple way to give an old white shirt a fresh, colourful makeover. All you need are basic supplies and a bit of creativity. This straightforward approach not only breathes new life into your wardrobe without breaking the bank but also offers a fantastic way to express your individuality. Plus, it’s an eco-friendly DIY craft, giving your old clothes a second chance to shine.
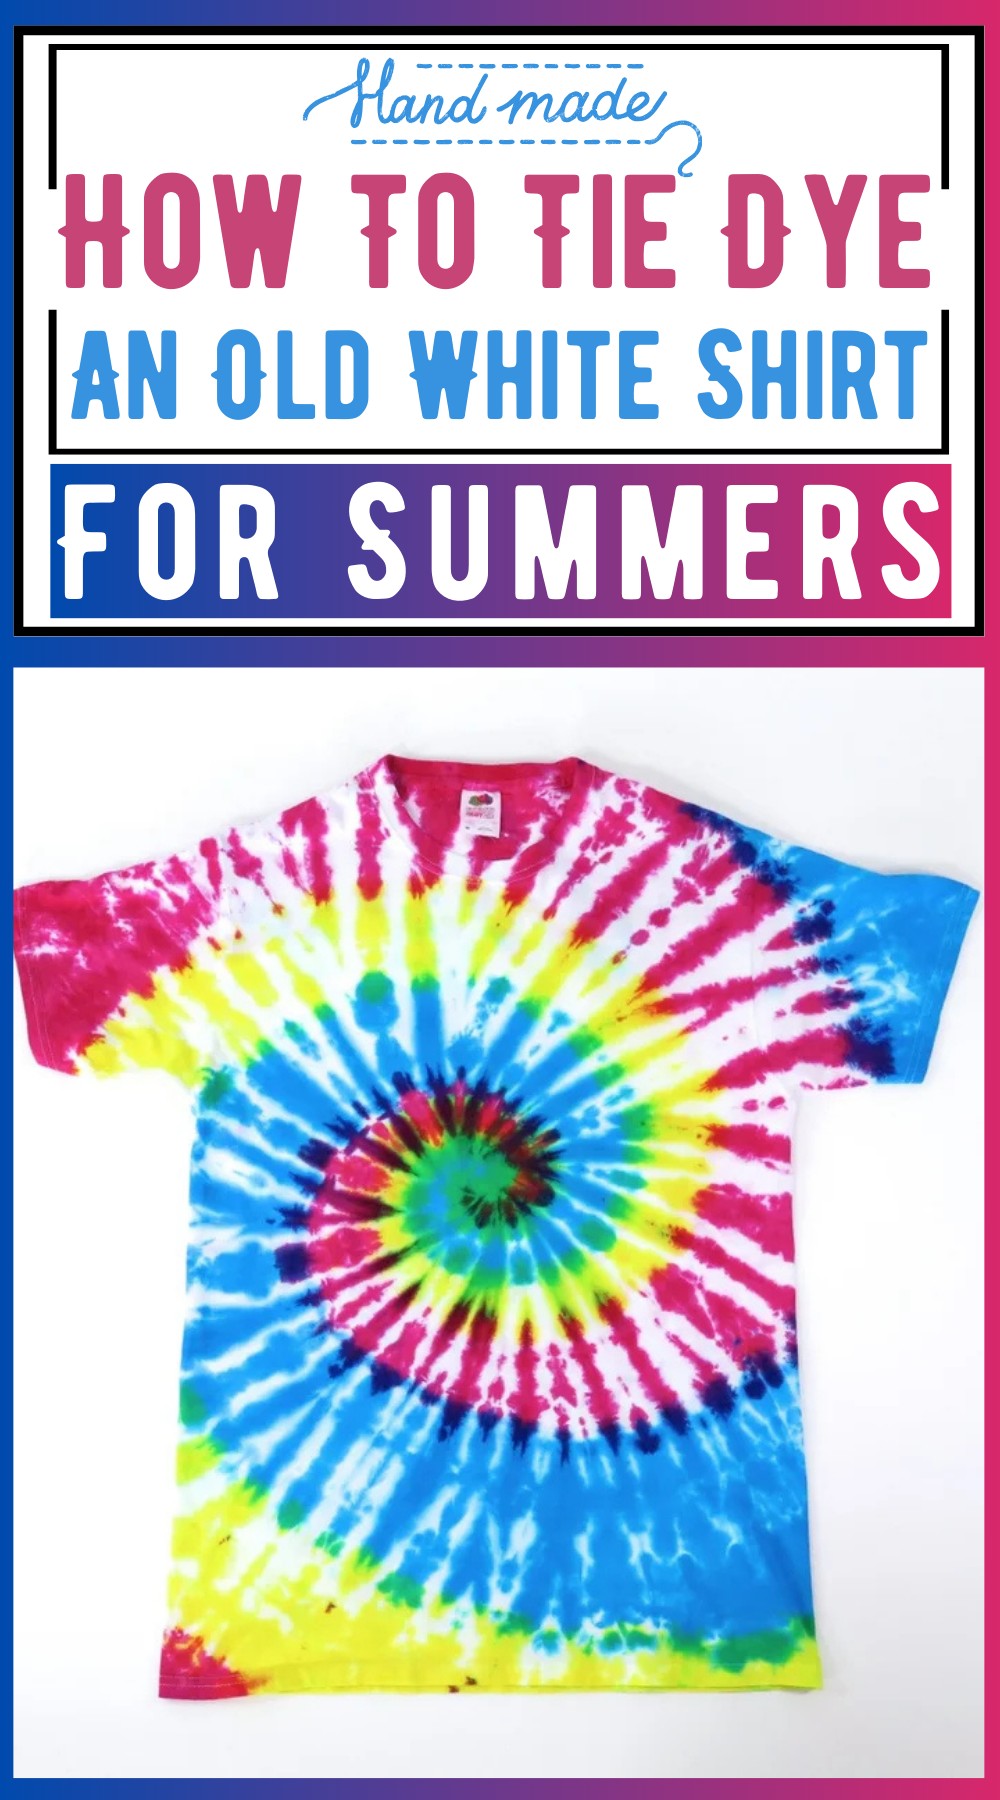
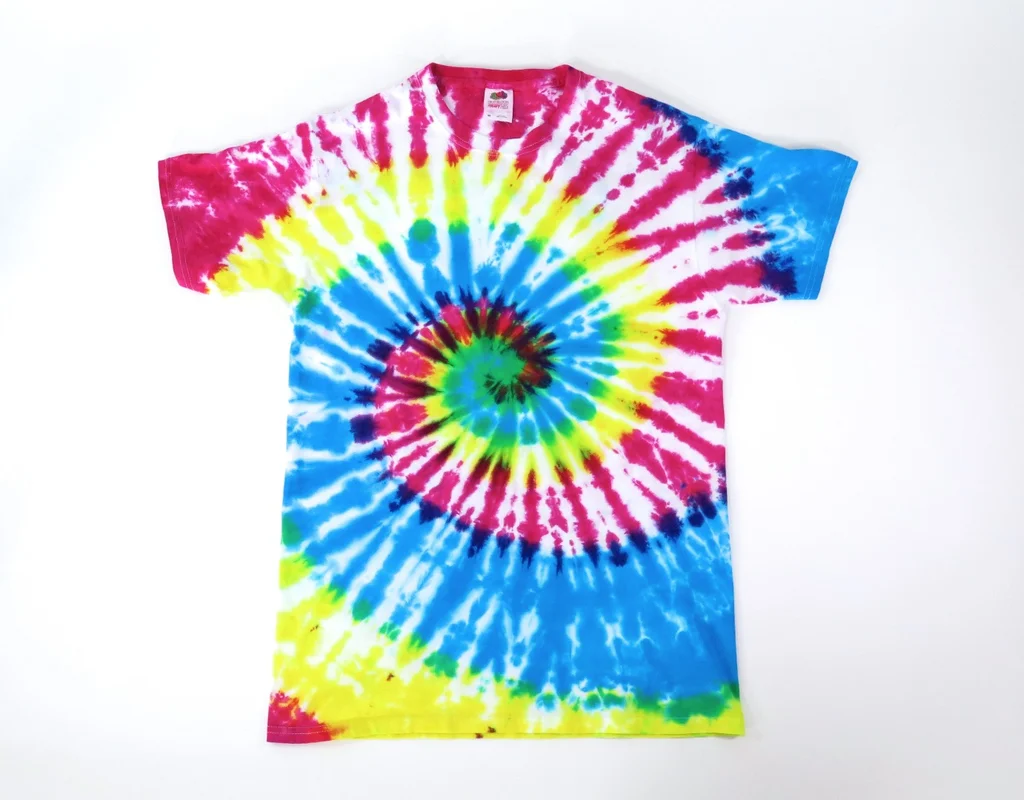
This simple DIY craft of transforming an old white shirt is not only easy but also opens up a world of possibilities for customization. You can create various patterns like spirals, circles, or even random splotches that express your unique style. These shirts are praised for their vibrant colours and the fun, laid-back vibe they bring. Wearing a tie-dye shirt is more than a fashion statement; it’s a celebration of creativity and individuality, capturing the free spirit in all of us.
Dying Your Old White Shirt (Simplest Method)
Materials Needed:
The Shirt:
- 100% cotton shirt (Note: 50% cotton/50% polyester can also be used, but the results will not be as vibrant. Polyester doesn’t dye well.)
- Rubber gloves
- Rubber bands
- Soda ash
- Urea
- Squeeze bottles for the dye
Other Tools:
-
- Large ziplock bags
- A tub for soaking the shirts
- A wooden dowel (or something similar for creating twists in the shirt)
- A funnel (useful for mixing the dye)
- A measuring cup
Preparation and Protection:
-
- Plastic to cover the working surface (like a plastic tablecloth)
- Old clothes and shoes (since the dyes will stain)
- Plastic Gloves
- Mask
Step-by-step Procedure
Step 1: Selecting the Shirt
- The best results come from 100% cotton shirts.
- Polyester won’t hold the dye well.
- If you use a new shirt, wash it first to remove any sizing.
Step 2: Dye Selection
- Kits from craft stores are recommended for beginners. They contain everything needed.
- For more vibrant colours, Procion dyes are advised.
- Mix dyes with warm water unless the kit specifies otherwise.
Step 3: Preparing Your Tools
- Gather all required materials.
- A soda ash solution will be needed for soaking the shirt.
Step 4: Soaking the Shirt
- Soak in warm water mixed with soda ash (and common salt) for about 10 minutes.
- After soaking, wring out the shirt thoroughly.
- The shirt should be as dry as possible to absorb more dye.
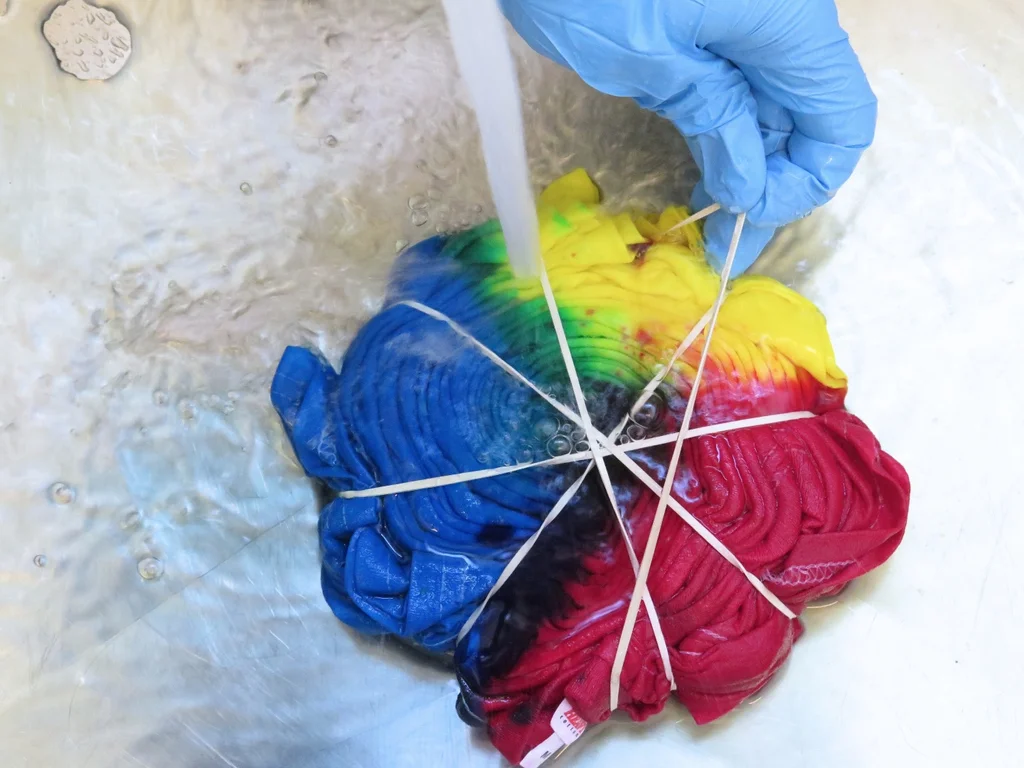
Step 5: Tying the Shirt
- Lay the shirt flat and use a dowel to create a swirl pattern.
- Wrap tightly with rubber bands to maintain the design.
Step 6: Applying the Dye
- Protect your workspace with plastic.
- Wear gloves to avoid staining your hands.
- Apply dye to the shirt in your chosen pattern, saturating well.
Step 7: Wrapping Up
- Once dyed, wrap the shirt in a plastic bag.
- Let it sit for at least 24 hours to allow the dye to bond.
Step 8: Rinse and Wash
- Rinse the shirt under cold water until it runs clear.
- Wash separately in a washing machine on its own for the first few times.
Notes:
- Mixing colours creatively can yield exciting results (e.g., combining fuchsia, turquoise, and lemon yellow can create rainbow patterns).
- Patience during the dyeing and setting process is key to vibrant results.
Experiment with patterns and colours to make each piece unique. Enjoy the process, and wear your new tie-dye shirt with pride!

Leave a Reply