
Stitch an adorable baby turban hat with this free crochet pattern combining comfort and charm, perfect for gift-giving or keeping your little one cozy in style.
Keeping a baby warm and stylish has never been easier with this adorable crochet baby turban hat pattern. This free design helps you create a soft, cozy, and beautifully designed turban hat that fits perfectly on a baby’s delicate head. Its standout feature is the elegant twisted knot at the front, giving it a timeless charm that’s perfect for photoshoots, special occasions, or adding a unique touch to everyday outfits.
Crochet Baby Turban Hat Pattern to Keep Little Ones Cozy
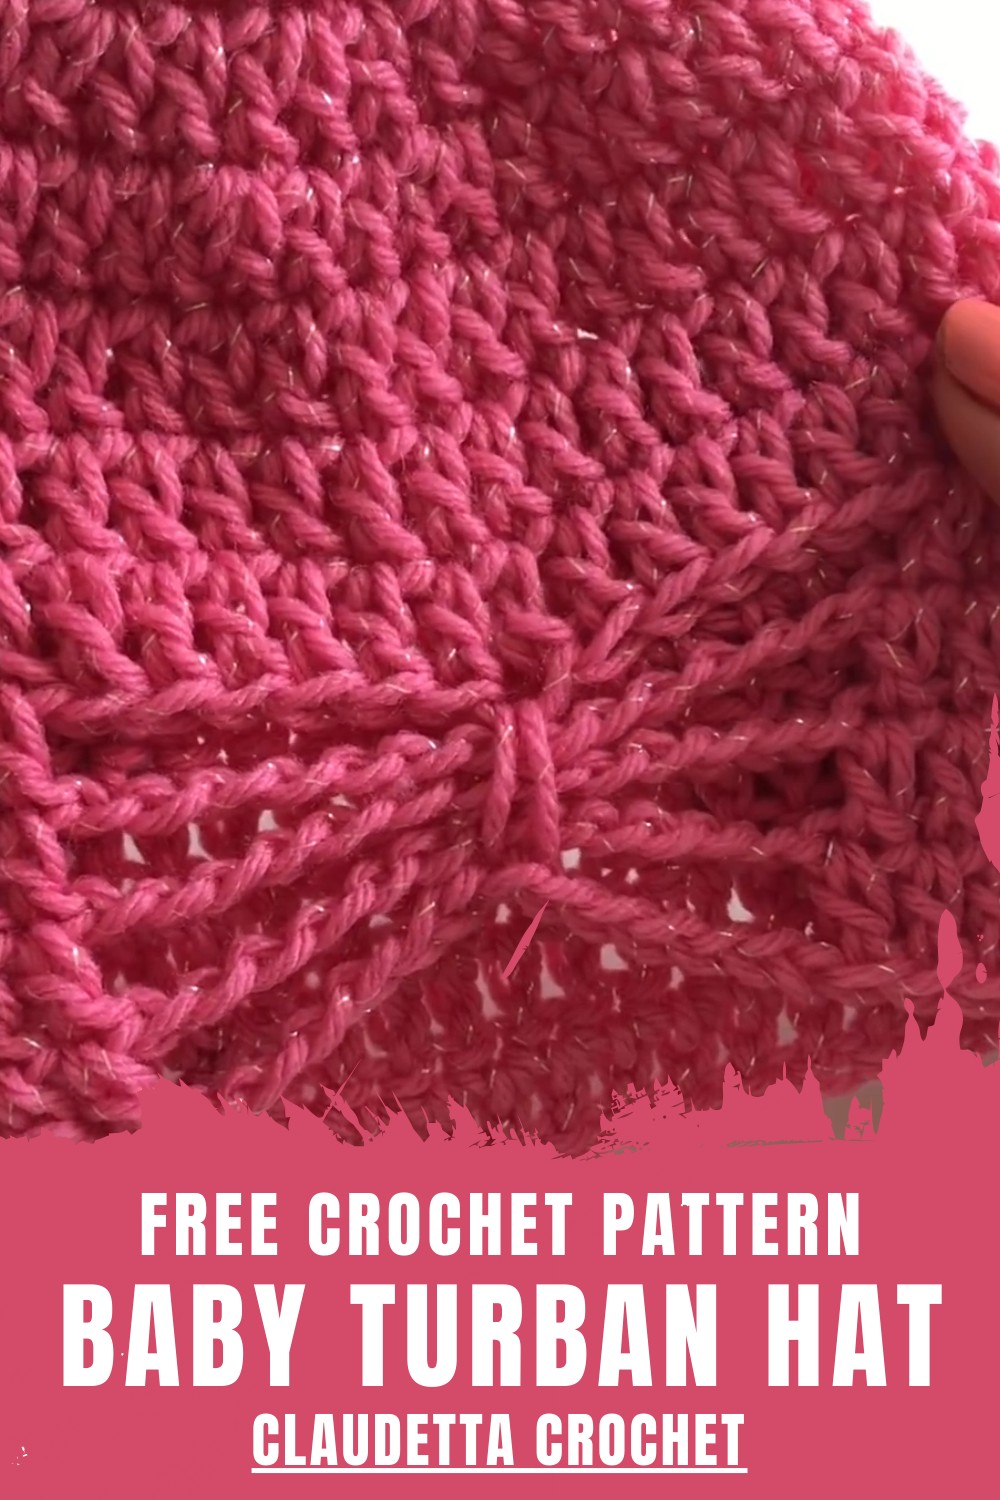
The hat’s soft texture ensures comfort, while its snug fit provides warmth during cooler days. You can make it even more special by choosing different yarn colors or adding small embellishments like bows or buttons to match the baby’s personality. Whether you are a beginner or an experienced crocheter, crafting this baby turban hat is a joyous project that results in a beautiful and practical accessory every baby will look adorable in and treasure.

Bow-Pattern Crochet Baby Hat Tutorial (Newborn – 6 Months)
This detailed step-by-step document is based on the transcription provided and will guide you through crocheting a beautiful baby hat with a bow-like texture. It’s simple, beginner-friendly, and perfect for creating a keepsake for newborns up to 6 months old.
Finished Size
Designed for newborns to 6 months, the hat offers a snug yet flexible fit due to the soft yarn and pattern structure.
Necessary Materials
- Hook: 5 mm crochet hook
- Yarn: Rico Baby Classic DK or similar (a soft yarn with shimmer or glitter effect is ideal)
- Yarn Needle: For weaving in ends.
- Scissors: For cutting yarn.
- Stitch Marker: Optional but helpful for beginners to track stitches.
Gauge
- 10 stitches x 8 rows = 4 inches in double crochet (DC).
Ensure you check your gauge, as it affects the finished size of the hat.
Special Techniques
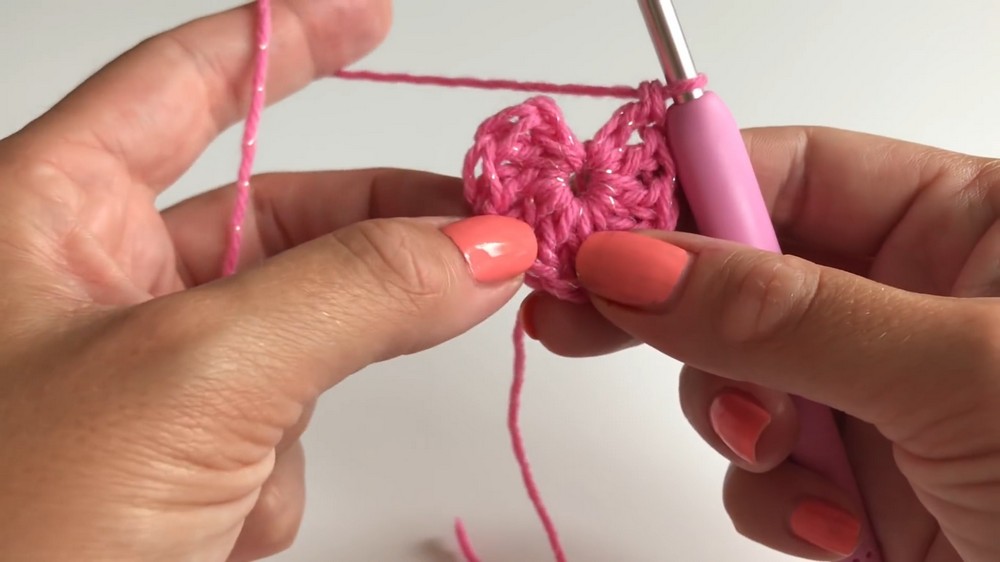
- Magic Ring: Used to begin the hat’s crown (a beginner-friendly video is referenced in the transcription for assistance).
- Double Crochet (DC): The primary stitch used.
- Slip Stitch (SL ST): For joining rounds.
- Bow Loop Detail: A unique crocheting twist that creates the bow-like effect.
Tips
- Count Your Stitches: Regularly count your stitches while increasing to ensure accuracy.
- Yarn Choice: Opt for soft, baby-friendly yarn with a slight shimmer for added charm.
- Customization: Use different colors or add a pom-pom on top for a fun variation.
- Practice the Magic Ring: Practice this technique beforehand if you’re unfamiliar.
Pattern Instructions
Step 1: Crown of the Hat
Round 1:
- Make a magic ring.
- Chain 2 (not counted as a stitch).
- Crochet 11 DC into the magic ring.
- Pull the ring tight to close.
- SL ST into the first DC to join. [Total: 11 DC]
Round 2:
- Chain 2.
- Work 2 DC into each stitch around.
- SL ST into the first DC to join. [Total: 22 DC]
Round 3:
- Chain 2.
- 2 DC in the first stitch, 1 DC in the next stitch. Repeat around.
- SL ST to join. [Total: 33 DC]
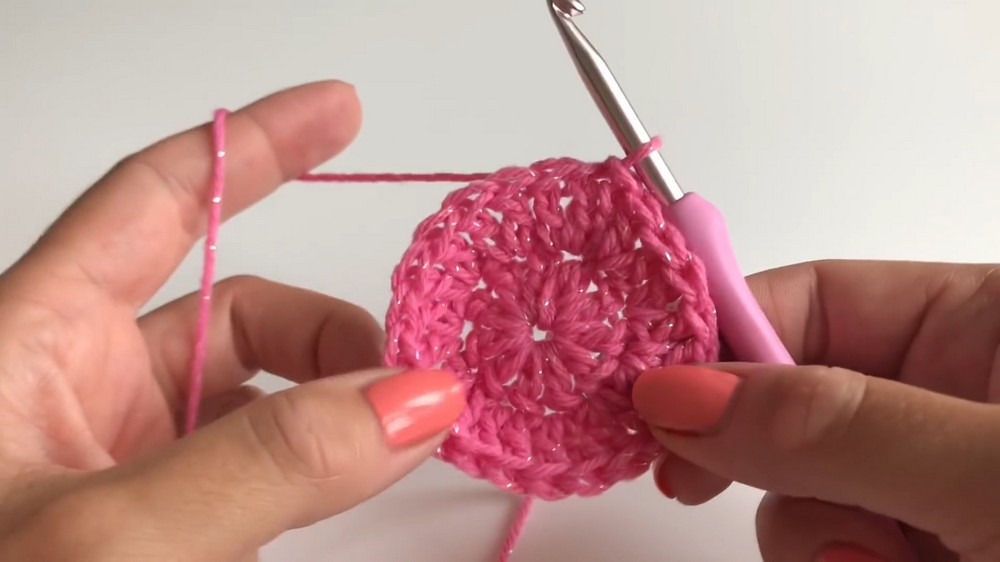
Round 4:
- Chain 2.
- 2 DC in the first stitch, 1 DC in the next 2 stitches. Repeat around.
- SL ST to join. [Total: 44 DC]
Step 2: Building the Height
Rounds 5–7:
- Chain 2.
- Work 1 DC in each stitch around.
- SL ST into the first DC to join. [44 DC per round]
After completing Round 7, the crown and body of the hat are completed.
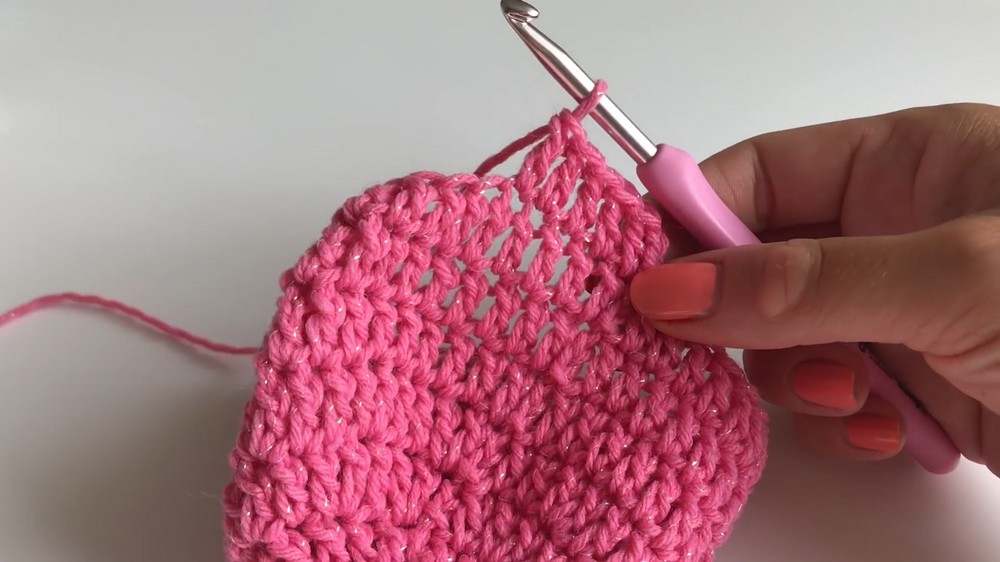
Step 3: Bow Detail
Round 8:
- Chain 2.
- DC 11 stitches.
- Chain 13 and skip the next 13 stitches.
- DC into the next stitch and continue to DC in each remaining stitch. Total: 20 DC (11 + remaining stitches).
- SL ST into the first DC to join.
Round 9:
Repeat Round 8.
Round 10:
Repeat Round 8 again. This establishes the base of the bow and the loops.
Step 4: Bow Loops and Finishing
Round 11:
- Chain 2.
- DC 11 stitches.
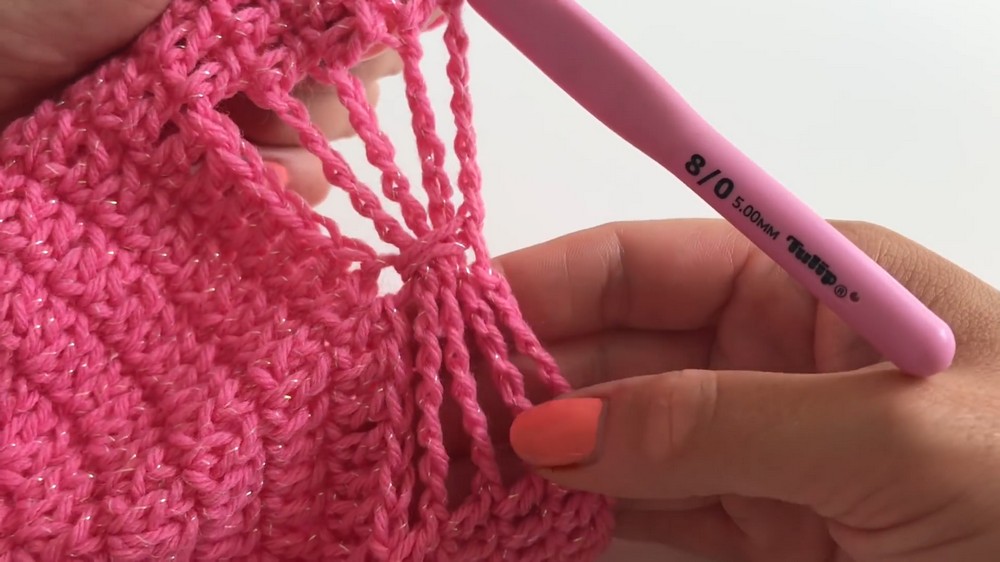
- At the 13 chains from the previous round:
- Count 7 stitches and mark the 7th chain as the center.
- Chain 6.
- Insert your hook into the 7th chain and pull up all the chained loops.
- Tighten slightly and secure with a single crochet to lock the gathered loops, forming the bow center.
- Continue DC in the remaining stitches to finish the row.
- SL ST to join and secure.
Step 5: Final Touches
- Chain 1 and fasten off.
- Weave in all ends using a yarn needle.
Customization Ideas
- Add a small pom-pom on top for an extra cute look.
- Use multicolored or ombre yarn for a fun and unique style.
- Add a satin ribbon to the center of the bow for extra flair.
Conclusion
Congratulations! You’ve completed a charming baby hat with bow detailing that’s perfect for gifting or keeping as a special handmade keepsake. This project is beginner-friendly, and with its beautiful shimmer, it’s sure to impress! Don’t forget to share photos of your finished project and explore variations to make it your own.
Leave a Reply