
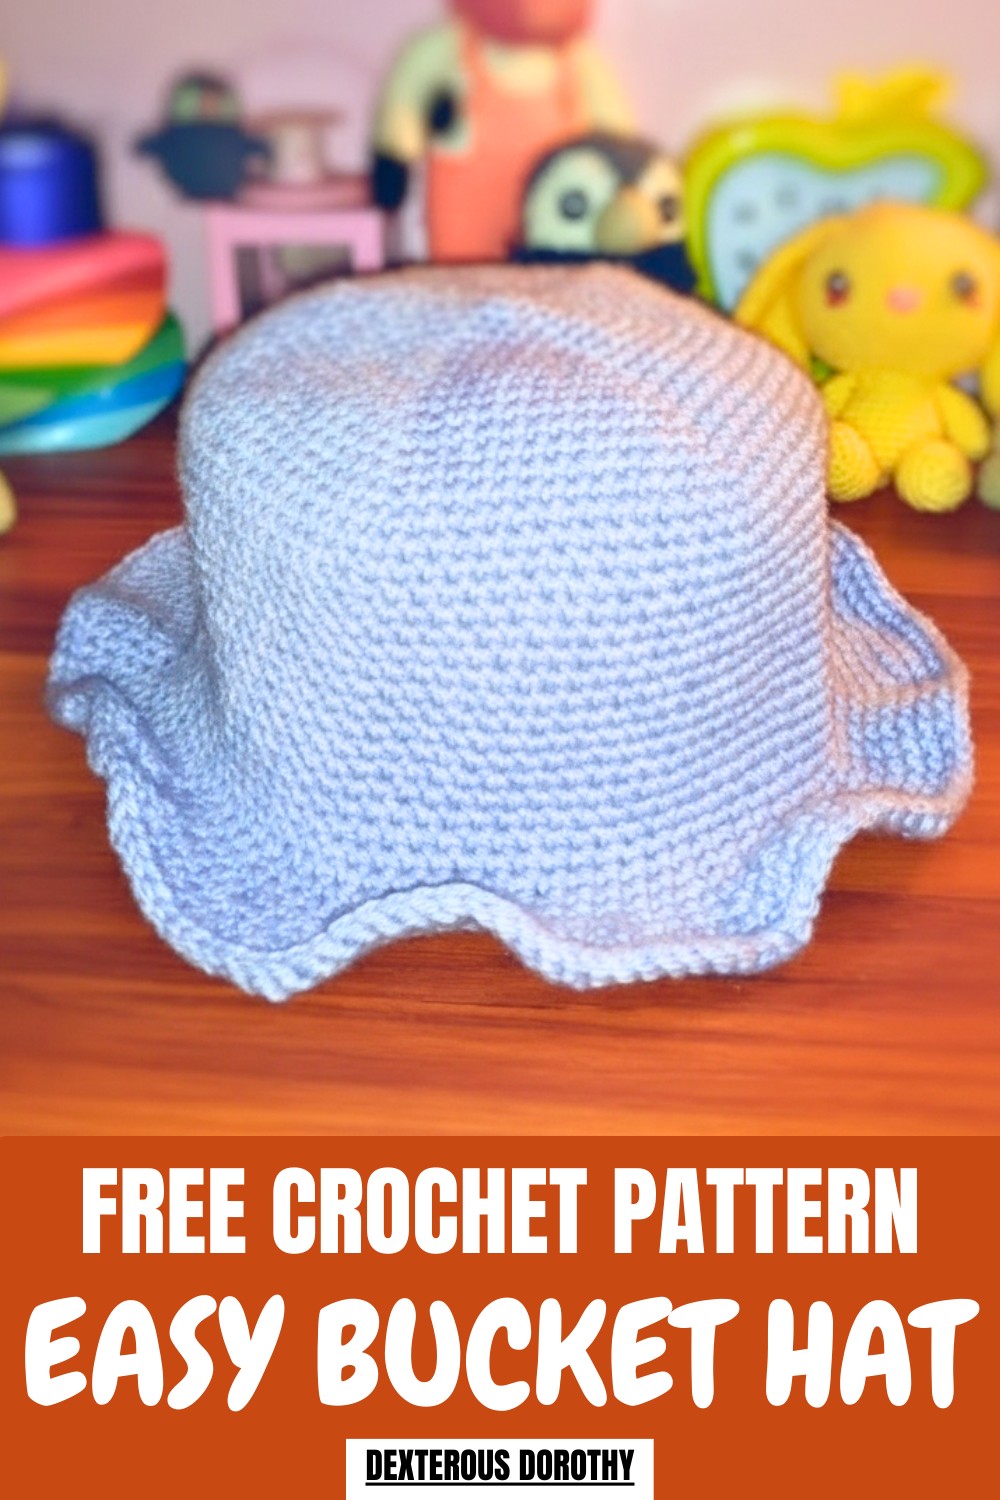
Slip into style with an easy-to-follow free crochet bucket hat pattern that’s perfect for sunny days, combining comfort, charm, and endless customization possibilities.
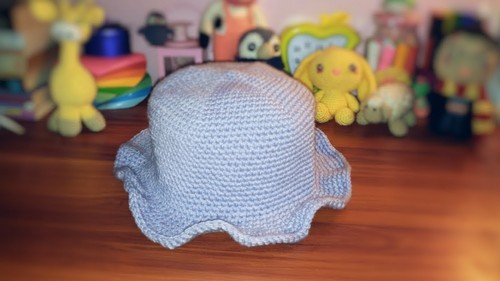
This handmade accessory is perfect for protecting your face from the sun while adding charm to your look. A crochet bucket hat stands out with its soft texture, gentle folds, and creative design that showcases both skill and beauty. Its wide brim not only offers shade but also elevates any outfit, making it ideal for casual outings, beach days, or travel. Available in bright colors or soft neutrals, it can be tailored to match different seasons and personal styles.
Crochet Bucket Hat That’s Perfect for Anytime Adventures
Comfortable to wear and easy to carry, the hat effortlessly blends function with fashion. Its unique appearance draws attention to your creativity and gives off a relaxed yet trendy vibe. Perfect for sunny afternoons or cool evenings, this hat is more than just an accessory—it is a perfect blend of style, practicality, and individuality, ensuring it becomes a standout piece in your wardrobe.
Crochet Simple Packet Hat Pattern
Materials Needed
- Yarn: A slightly thick yarn for a firm structure. Recommended: DK or worsted-weight yarn.
- Crochet Hook: Size 2.5 mm, or adjust accordingly if using a thinner yarn. (For thinner yarns, consider using 1.6 mm).
- Stitch Markers: Essential for marking the beginning of each row.
- Darning Needle: For sewing and weaving in ends.
- Scissors: For cutting yarn.
Skill Level
Intermediate to Advanced
This project involves working in the round, maintaining stitch counts, and basic sewing for finishing.
Key Abbreviations (US Crochet Terminology)
- CH: Chain
- SC: Single Crochet
- HDC: Half Double Crochet
- DC: Double Crochet
- SL ST: Slip Stitch
- ST(s): Stitch(es)
- INC: Increase (2 SC in the same stitch)
- DEC: Decrease (SC2tog, combining 2 stitches into 1)
Special Notes
- The hat is worked in continuous rounds, so do not join at the end of each round unless stated otherwise.
- Use a stitch marker to mark the beginning of each round and move it up as you complete a round.
- Adjust hook size based on the tension or yarn type.
- The pattern is customizable – adjust the foundation rounds to increase or decrease the size.
Pattern Instructions
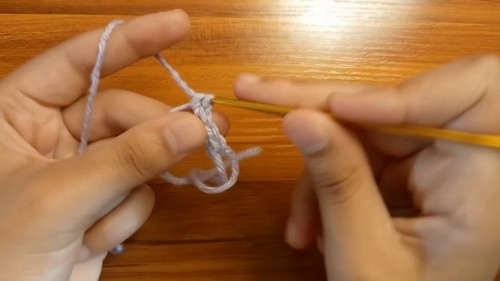
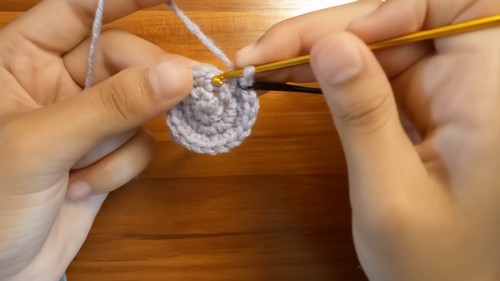
Step 1: Foundation Round
- Start with a magic ring (or chain 2 and work into the second chain from the hook).
- Round 1: Work 6 SC into the magic ring. [6 sts]
- Tighten the ring to close. Place a stitch marker in the first stitch.
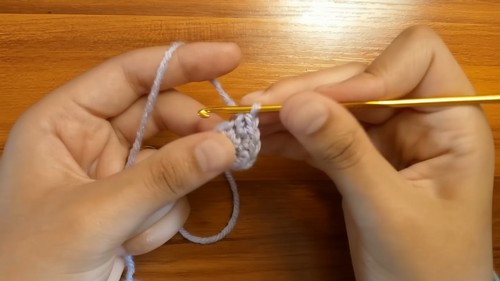
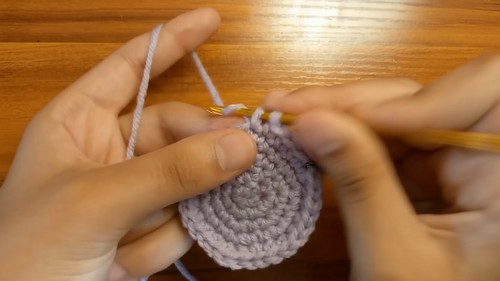
Step 2: Crown Expansion
- From here, you will increase evenly to form the crown of the hat. Adjust the increases as needed for your desired size.
- Round 2: Work 2 SC in each stitch around. [12 sts]
- Round 3: (SC in the next stitch, INC) repeat around. [18 sts]
- Round 4: (SC in the next 2 stitches, INC) repeat around. [24 sts]
- Round 5: (SC in the next 3 stitches, INC) repeat around. [30 sts]Continue following this sequence of increases for additional rounds, if needed, until the crown reaches your desired diameter for the top of the hat.
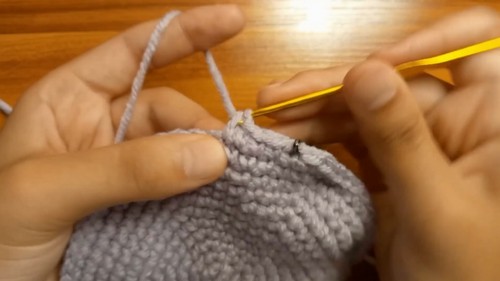
Step 3: Body of the Hat
- Once the crown is complete (typically between 5-7” in diameter, depending on size):
- Work even rounds of SC (one SC in each stitch around) to build the height of the hat.
- Continue working until the hat measures 6-7 inches from the center of the crown to the brim edge (or desired height).
Step 4: Optional Design
For texture or pattern variations:
- Alternate HDC and SC in each stitch for one or more rows.
- Create ribbed rounds by working BL (Back Loop Only) SC around.
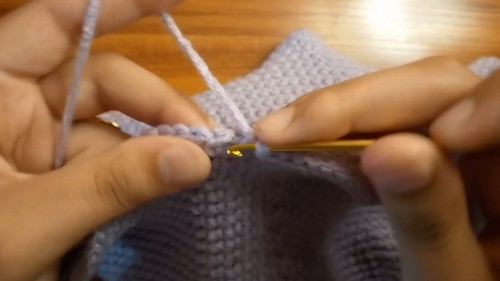
Step 5: Finishing the Brim
- For a firm brim, work the final 3-4 rounds in HDC or DC.
- For a rolled brim, add extra rounds of SC and fold the brim upward.
- Slip Stitch to the first stitch of the round and fasten off.
Step 6: Weaving in Ends
- Use the darning needle to weave in all loose ends on the inside of the hat securely.
- Block the hat slightly if needed to shape it properly.
Tips
- Customization: Increase or decrease the crown’s diameter to fit different head sizes (child, teen, adult).
- Use a lighter yarn for a summer hat and a thicker yarn for a cozy winter option.
- If it feels too tight, use a slightly larger crochet hook for looser stitches.
Conclusion
Congratulations on completing your Crochet Pocket Hat! The simple yet versatile design makes it perfect for various styles and uses. Whether made as a gift or for personal use, this project is sure to be loved. Use vibrant colors and textures to make unique variations, and don’t forget to share your creations!
Pattern Corrections
If encountered:
- Shape doesn’t appear rounded after the crown: Revisit the increase rounds and add more SC rows between increases for a gradual transition.
- Uneven brim: Ensure you’re finishing with even stitch tension and consider blocking the hat slightly.
Leave a Reply