
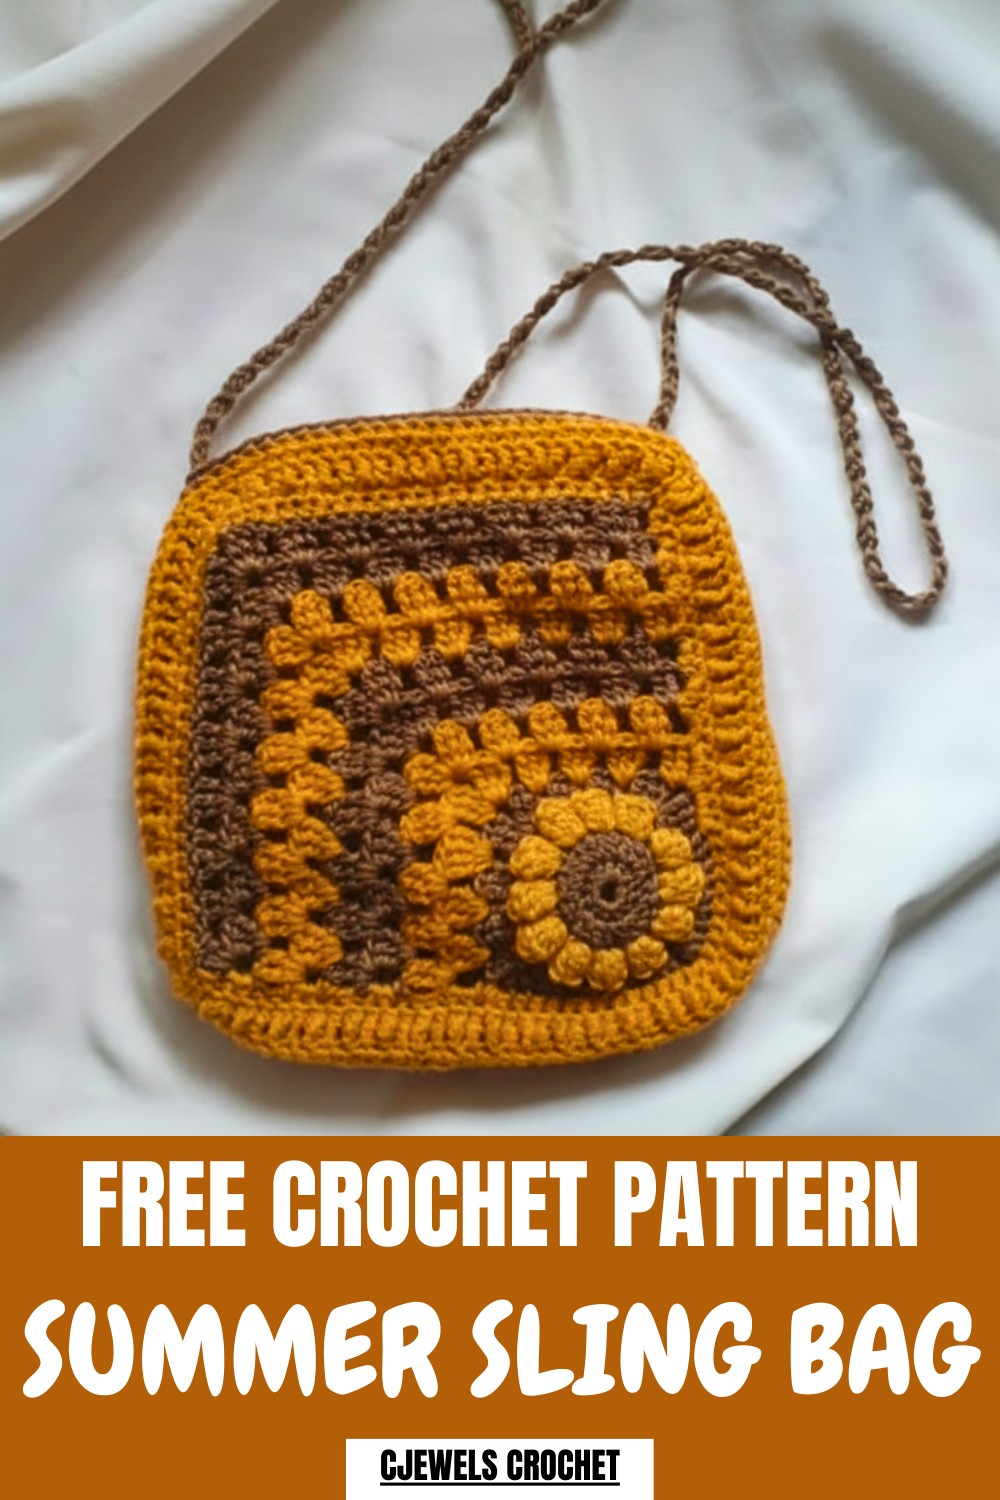
Create your own trendy summer accessory with this Free Crochet Summer Sling Bag Pattern, perfect for carrying your essentials in style and comfort all season long.
A lightweight and stylish bag is a perfect companion for sunny outings, and this sling bag fits the bill effortlessly. Featuring the Free Crochet Summer Sling Bag Pattern, it offers simplicity and charm in every stitch. Designed with delicate yet sturdy crochet textures, the bag delivers both functionality and beauty. Its soft, breathable design makes it ideal for carrying essentials to the beach, market, or casual strolls while staying comfortable and chic.
Crochet Free Summer Sling Bag for Sunny Days
The pattern allows for customization, letting you play with colors and sizes to suit your vibe. Whether paired with a summer dress or casual wear, its handmade touch adds uniqueness to any look. Perfect for beginners and crochet enthusiasts alike, this pattern is easy to follow, even for those new to crocheting. Create a one-of-a-kind accessory that blends practicality with style while celebrating your creativity and individuality.
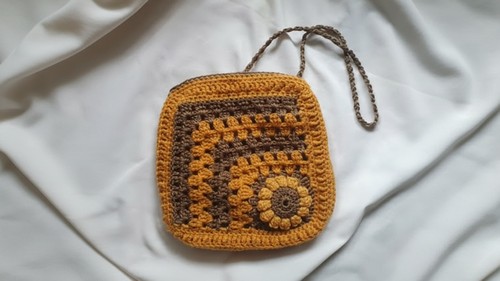
Crochet Summer Sling Bag Pattern
Finished Size
- Bag dimensions: Approximately 10 inches (25 cm) in diameter (can be adjusted based on personalization).
- Strap length: Adjustable as per your preference.
Materials
- Yarn: Medium-weight/size 4 yarn (cotton or acrylic preferred):
- Main Bag Colors: Two colors of your choice (e.g., Color A for base and edging, Color B for decorative rows)
- Optional Flower Center Color
- Crochet Hook: 4mm (U.S. size G) or the recommended size for your yarn.
- Tapestry Needle: For weaving in ends and sewing parts together.
- Scissors
- Stitch Markers: Highly recommended for marking the beginning of rounds.
- Measuring Tape: To check dimensions.
Special Techniques
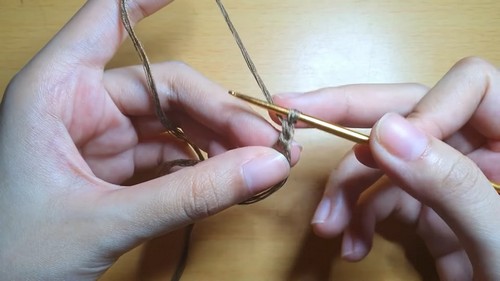
- Magic Ring: A circular loop used instead of chaining to start round projects.
- Treble Crochet (TrC): Yarn over twice, insert hook into designated stitch, yarn over and pull up a loop, yarn over and pull through 2 loops three times.
- Front Post Treble Crochet (FPTC): Wrap yarn over twice, insert hook around the post of a stitch from the previous row, pull yarn through, and work the stitch as a treble crochet.
- Cluster Stitch: A group of five treble crochets worked in one space and joined at the top for a petal-like shape.
Pattern Instructions
Base of the Bag (Circular Bottom)
- Start with the Magic Ring:
- Make a magic ring and secure.
- Chain 1, then work 12 half double crochets (HDC) into the ring.
- Tighten the ring by pulling the starting yarn end.
- Slip stitch (sl st) to the first HDC to close.
[Stitch count: 12 HDC]
- Round 2:
- Chain 2 (counts as first DC).
- Work 2 double crochets (DC) in each stitch around.
- Add 1 DC in the final stitch.
- Join with a slip stitch.
[Stitch count: 25 DC]
- Switch Colors for Texture:
- Leave previous color unfastened. Tie the second color onto your working yarn.
- Complete the slip stitch into Color A using the second color (Color B).
- Chain 3.
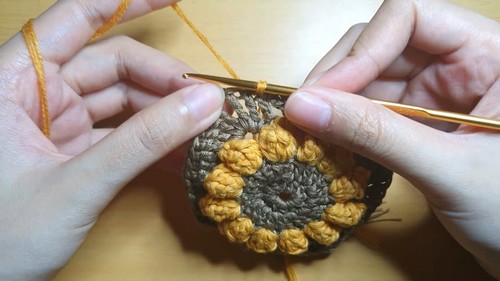
- Cluster Rows for Petal Design:
- Begin cluster petals: Yarn over twice. Work five treble crochets (TrC) into the designated stitch but do not complete them entirely. After all 5 TrC are partially done, release the loop, insert your hook through the first chain stitch, and pull the loop through.
- Chain 3, skip one stitch, and repeat the cluster in the next stitch.
- Continue all around, forming twelve petal clusters.
- Change back to Color A at the end of the round.

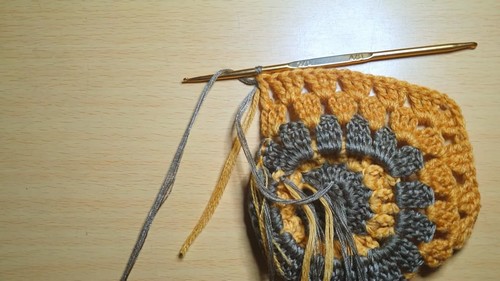
Body of the Bag
- Turning Rows into a Square:
- Corners (Round 1):
- Start in the chain-3 space of a petal. Work: 3 TrC, chain 2, 3 TrC into the same space for the first corner.
- Clusters (Between Corners):
- Work clusters of 3 TrC in each chain-3 space between corners.
- After two clusters, create another corner.
- Repeat this sequence for 4 corners total. The foundation now shows the beginnings of a square shape.
- Corners (Round 1):
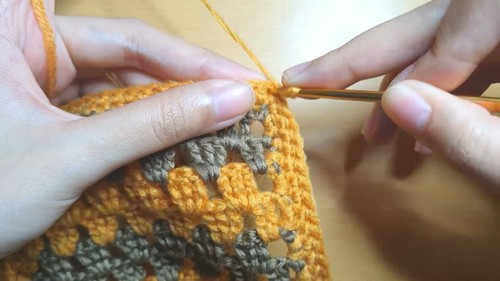
- Straight Sides on Subsequent Rows:
- For each new side, work clusters of 3 TrC between existing clusters.
- At the corners, work 3 TrC, chain 2, 3 TrC to maintain the square shape.
- Repeat until the square reaches your preferred size (e.g., 8 rows for the main design).
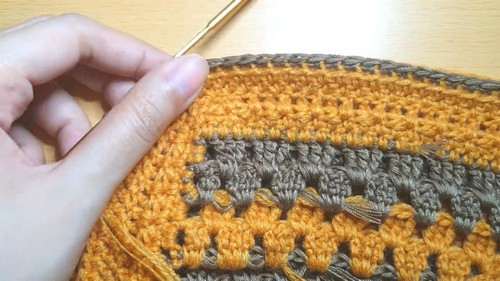
Edging
- Edging (Round 1):
- Switch to Color B.
- Work half double crochets (HDC) around the entire square.
- For corners: Place 2 HDC in the chain-2 spaces.
- Edging (Round 2):
- Continue with HDC, working 1 stitch in each previous HDC.
- Texture Detail:
- Optional row of Front Post Treble Crochet (FPTC): Alternate between 1 regular double crochet and 1 FPTC to create a textured lattice effect.
Making the Strap
- Strap Base:
- At a designated corner, chain 2 and begin the strap directly connected to the square.
- Create the strap using chain 2, single crochet (SC) in the same space. Repeat this to form a sturdy strap.
- Adjust length by repeating until the desired strap length is reached.
- Attach Strap End:
- Slip stitch to the corner on the opposite square or side to attach.
Attaching the Two Bag Panels
- Single Crochet Joining:
- Align the two squares with the wrong sides facing each other.
- Begin joining with single crochet (SC) around the edges, starting at one corner.
- Create clean edges by matching stitches precisely while crocheting.
- Leave the top open for the bag opening.
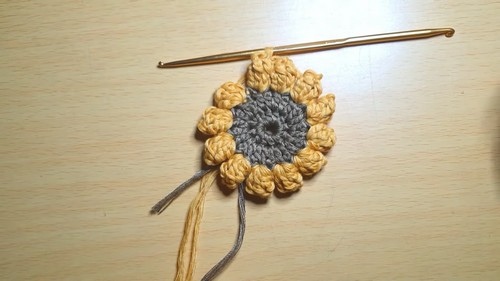
Optional Decorative Flower
- Create the Flower Center:
- Start with a magic ring and place 14 double crochets (DC) into the ring. Pull tight and secure.
- Change to a second yarn color for petals.
- Create Petals:
- Work 7 sets of shell clusters (3 treble crochets each) evenly around the flower center.
- Leave a long tail for sewing.
- Attach the Flower: Sew the flower to the bag’s front using the yarn’s tail.
Finishing the Pattern
- Secure and weave in all loose ends with a tapestry needle.
- Steam block the bag to give perfect shape and dimension.
- Check the joins, strap attachment, and edging for security.
Customization Ideas
- Colors: Alternate colors between rows for a striped effect, or use gradient yarns for a seamless ombre look.
- Size Alteration: Adjust the number of clusters in the body for a smaller or larger bag.
- Additional Details: Add tassels, buttons, or pom-poms for extra flair.
Final Words
Congratulations on completing your Summer Sling Bag! Its sturdy design and aesthetic appeal make it perfect for summer outings or as a thoughtful handmade gift. Keep experimenting with colors and textures to create bags tailored to your unique style.
Leave a Reply