
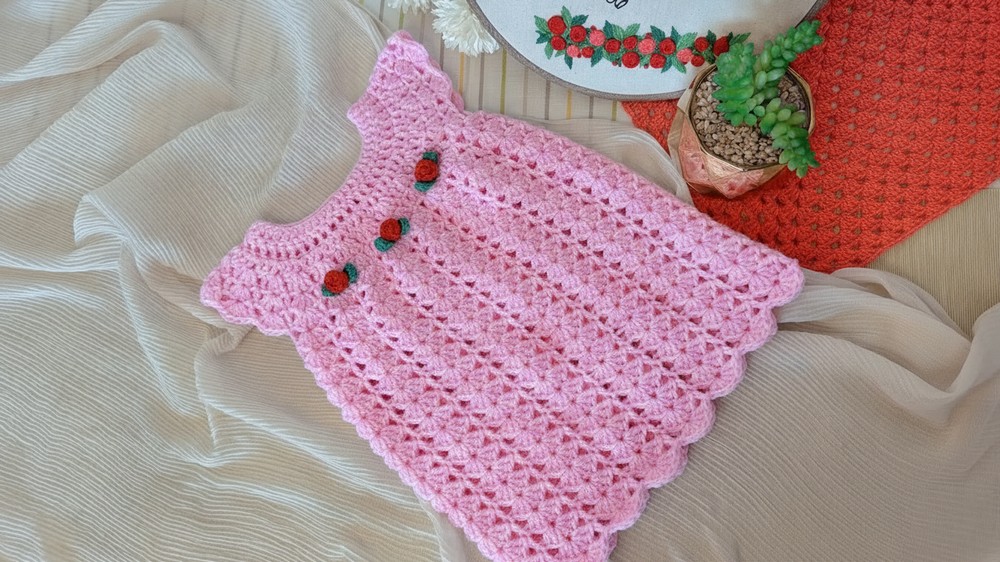
Create an adorable outfit with this Free Crochet Baby Dress Pattern, featuring soft stitches and sweet details that make every little moment extra special and cozy.
A handmade baby dress is not just adorable but also a perfect way to show love and care through creativity. Using the Free Crochet Baby Dress Pattern, you can craft a delicate, soft, and beautiful outfit that’s both stylish and comfortable for little ones. This dress is designed to be gentle on a baby’s sensitive skin while showcasing charming crochet textures and elegant details.
Free Crochet Baby Dress Pattern That’s Easy and Stylish
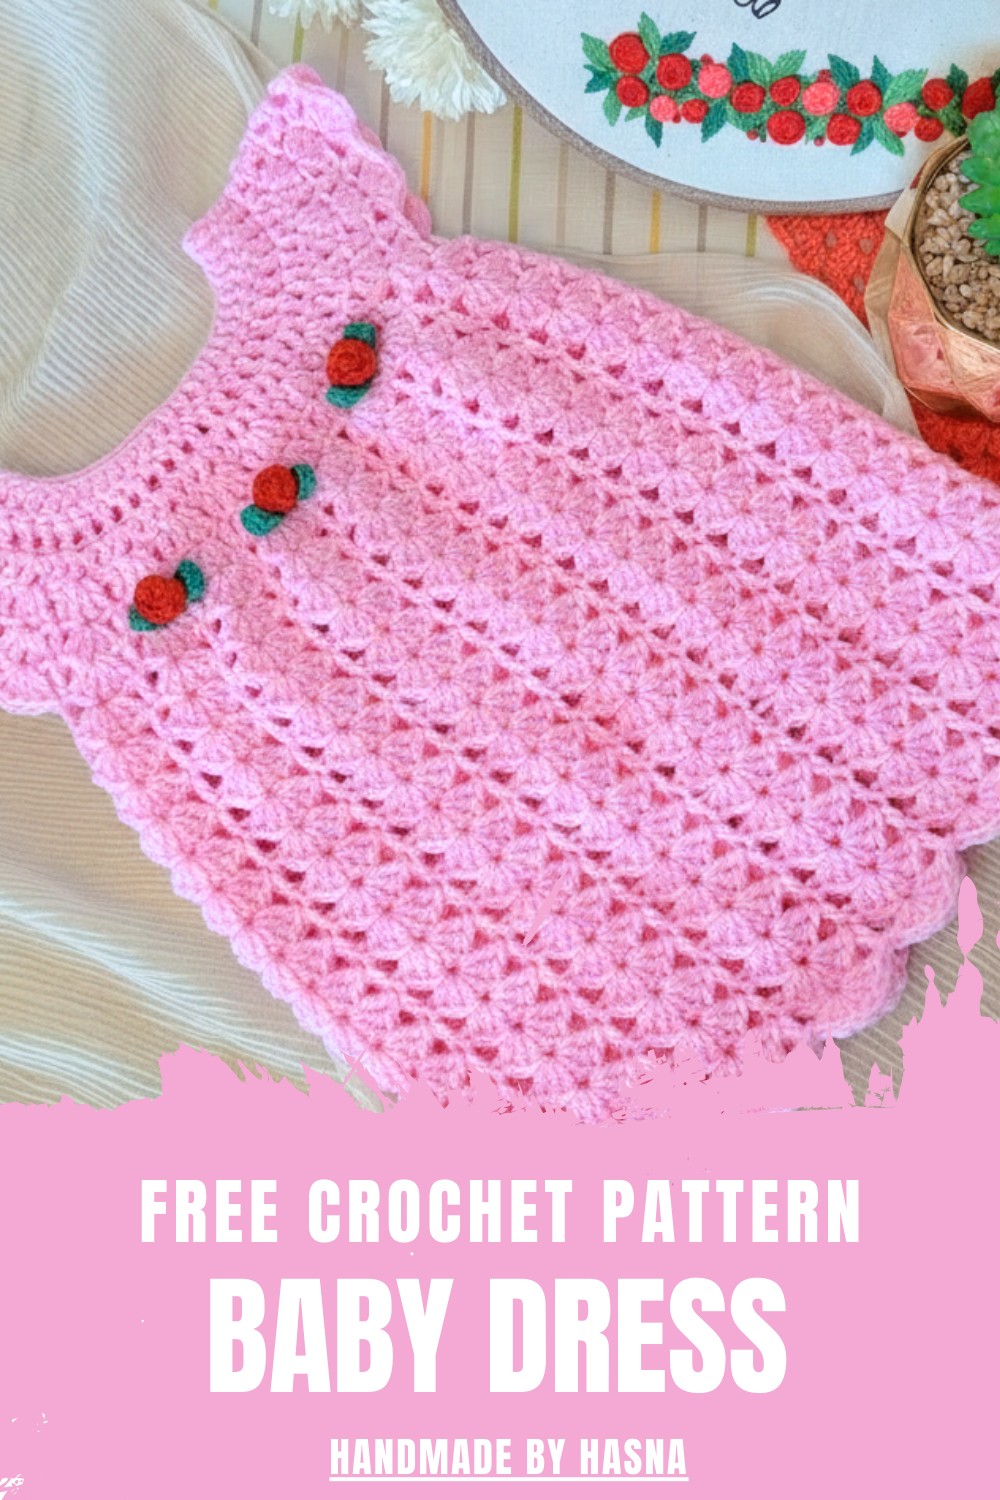
Perfect for special occasions like birthdays, photoshoots, or family gatherings, it helps your child stand out while feeling cozy all day. The lightweight design keeps the baby cool, making it suitable for any season. Whether you choose soft pastel shades or vibrant colors, the pattern can be personalized to match your style. The process is simple and enjoyable, even for beginners, making this dress a delightful project to cherish and a keepsake that will bring smiles for years to come.
Materials
- Yarn: Baby-weight or light DK yarn (approximately size 3). Soft acrylic or cotton-blend recommended.
- Hook: 5.5 mm (as heard several times in the transcription).
- Notions:
- Scissors
- Tapestry needle (for weaving in ends)
- Stitch markers (useful to mark the beginning of rounds or raglan points)
- Optional: Buttons, ribbon, or appliqués for embellishment (e.g., flowers mentioned at the end).
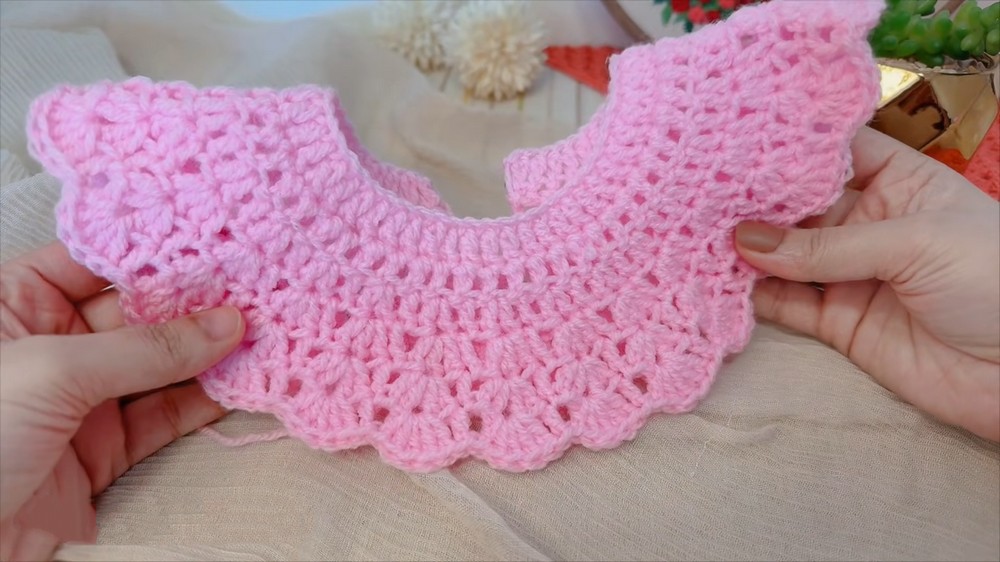
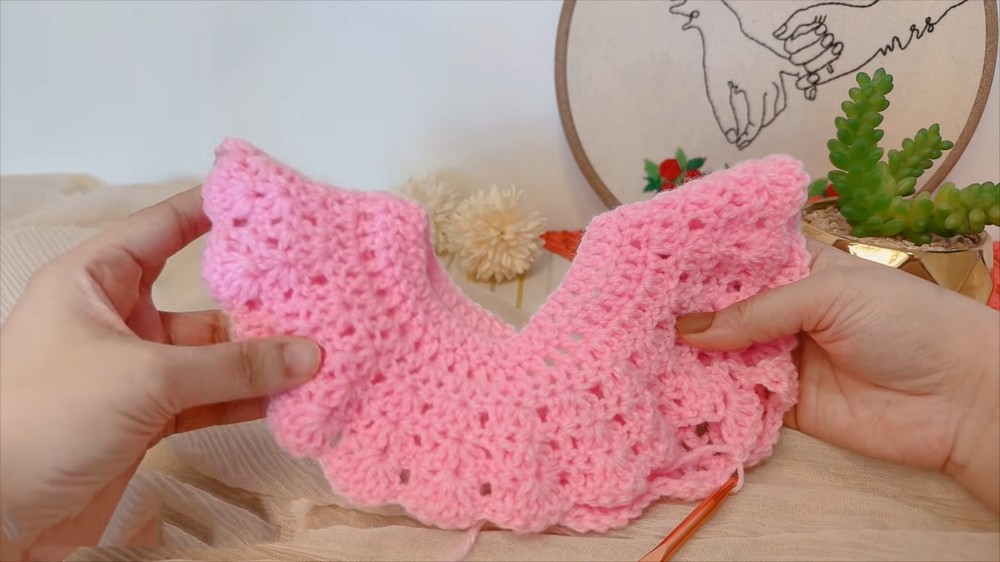
2. Finished Size (Approximate)
- Intended size: 2–6 months.
- This is a yoke (top part) that can be used for a baby dress, cardigan, or top.
- Exact circumference and length are not stated in the audio, but for 2–6 months:
- Neck circumference: roughly 24–26 cm (9.5–10.25 in)
- Chest circumference: 44–46 cm (17–18 in) after increasing and then working body.
Use this pattern as a base and try the yoke against a measurement chart or a baby garment to confirm fit.
3. Abbreviations (US Terms)
- ch = chain
- sl st = slip stitch
- sc = single crochet
- dc = double crochet
- st(s) = stitch(es)
- sp = space
4. Special Techniques
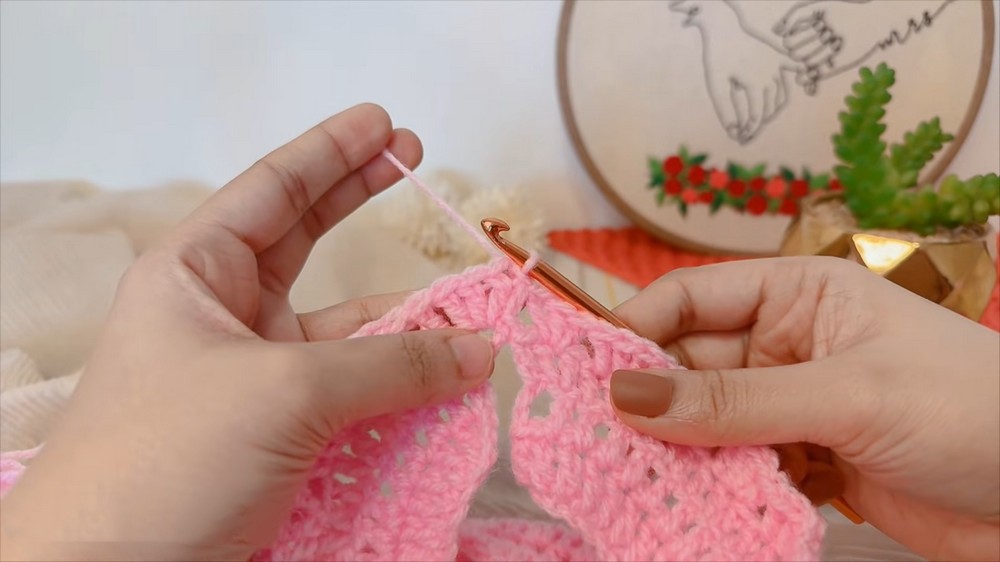
- Working in Rows vs Rounds
The transcription alternates between the words round and row. The increases form a flat yoke. It can be worked in joined rounds or turned rows; the audio suggests joining at the end of rounds. - Increase Pattern
- Rounds are built from a foundation of 52 dc.
- Increases are worked in a systematic pattern: alternating between 1 dc and 2 dc in one stitch, then later grouped into “shells” of 3, 4, 5 and 6 dc.
- Shell Groups (“Humps”)
The speaker refers to “humps” and “sets,” which correspond to:- 1 dc in one stitch
- followed by a shell of multiple dc (3, 4, 5, then 6 dc in the next stitch or space).
These give the yoke its decorative, wavy structure.
5. Pattern – Yoke (2–6 Months)
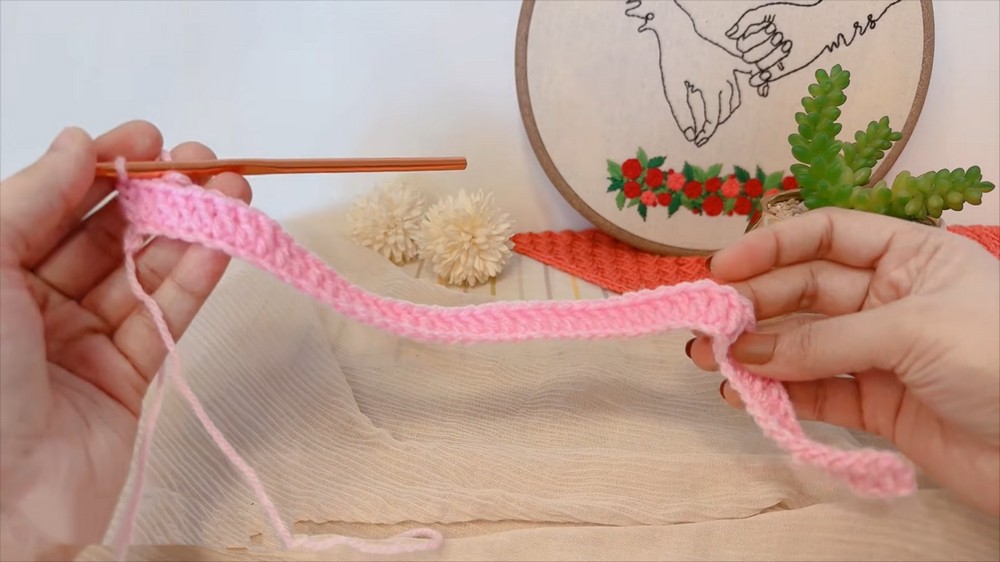
Foundation Chain
- Chain 54.
The transcription clearly mentions: “54 chain… 1 2 3 4 5 54 chain.” - Row/Round 1 (Foundation Double Crochet Row):
- Starting in the 4th chain from hook, work 1 dc.
- Continue placing 1 dc in each chain across.
- You should have 52 dc total (the initial skipped chains count as the first dc, plus 51 more dc).
- Join with a sl st to form a round (if you are making a circular yoke). If you are making an open yoke (for a cardigan), do not join; just turn at the end.
Transcript: “total 52… complete 52 stitches round two…”
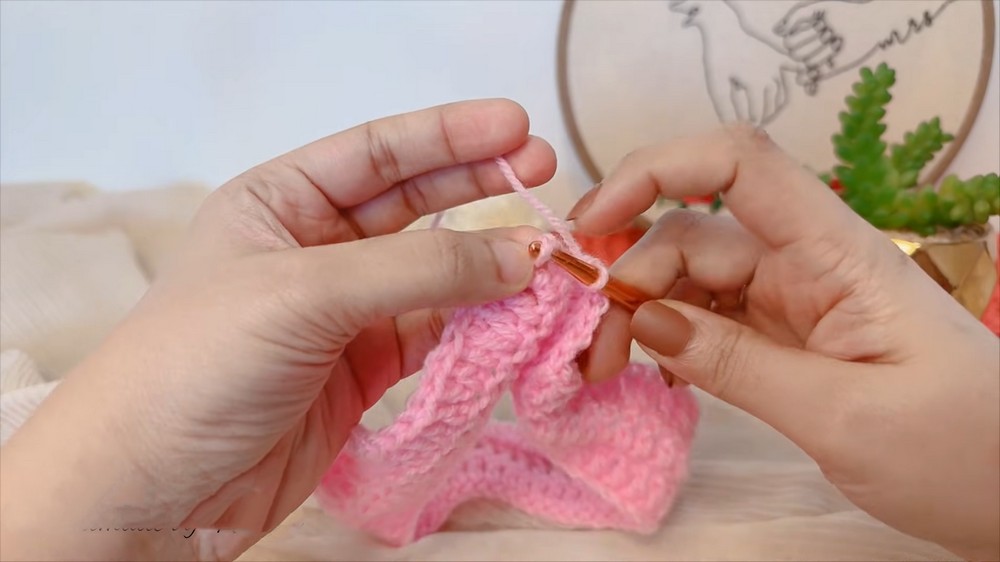
Round 2 – Set Up Round (Even)
- Round 2:
- Ch 3 (counts as 1 dc).
- Work 1 dc in each stitch around.
- Join with a sl st to top of ch-3.
- Stitch count remains 52 dc.
Transcript: “round two start chain three… complete 52 stitches round two.”
Round 3 – First Increase Pattern (1 dc, 2 dc)
- Round 3:
- Ch 3 (counts as dc).
- Pattern:
- 1 dc in next st,
- 2 dc in next st (increase).
- Repeat (1 dc, 2 dc in next st) around.
- Join with sl st to top of ch-3.
Transcript: “next stitch one double crochet one double crochet next stitch two double crochet same stitch… one, two, next one two, one two, one two… round three end.”
This round increases the total stitch count (exact final count is not explicitly given, but the pattern is clear).
Round 4 – Shells of 3 dc
Now the pattern shifts into groups of 3 dc.
- Round 4 – 3-dc Shells:
- Ch 3 (counts as dc).
- Pattern:
- Work 3 dc in one stitch (this is your first “shell” of 3).
- 1 dc in next stitch.
- 1 dc in next stitch (depending on how the designer spaces them; the audio repeatedly mentions “first double crochet, second double crochet, third double crochet three double crochet in next”).
- Repeat the shell pattern around, maintaining a consistent spacing of shells and individual dc.
From the audio:
- “first double crochet second double crochet third double crochet three double crochet in next…”
This suggests that you have segments like: - 3 dc cluster in one stitch,
- then a few single dc between them.
Because the transcription is clipped, you will need to maintain the logic: evenly space the 3-dc shells around without dramatically changing the total number of stitches.
Round 5 – Shells of 4 dc
- Round 5 – 4-dc Shells:
- Ch 3.
- Pattern:
- Work 4 dc in one stitch (shell of 4).
- 1 dc in the next stitch (or next few stitches).
- Repeat shell of 4 and single dc across the round, mirroring the pattern from Round 4 but now using 4 dc shells instead of 3.
Transcript: “round five first double crochet second double crochet third double crochet fourth double crochet same space…”
Round 6 – Shells of 5 dc
- Round 6 – 5-dc Shells:
- Ch 3.
- Pattern:
- Work 5 dc in one stitch (shell of 5).
- 1 dc in next stitch.
- Repeat all around.
Transcript: “round six… five double crochet one double crochet five double crochet… first double crochet second double crochet third double crochet fourth double crochet fifth double crochet next one double crochet…”
Round 7 – Four Sets of “1 dc, 5 dc”
- Round 7 – Set of 1 dc + 5 dc (4 Sets):
- Ch 3.
- The speaker says: “four sets of one double crochet five double crochet total four sets… last fourth set one double crochet five double crochet.”
- So, structure one side of the yoke as:
- (1 dc in one stitch, then 5 dc in next stitch) = one set.
- Work 4 such sets across.
This suggests that Round 7 begins to separate front, back and neck portions (she mentions “front portion, neck, back”).
From the audio:
- “front portion neck back…”
So at this point the yoke is being divided mentally into:
- a front section built from several sets of (1 dc, 5 dc),
- then neck shaping,
- then the back section.
Exact quantity of stitches per section is not fully audible, but the repeated formula “one double crochet, five double crochet” continues.
Rounds 8+ – More Sets & Larger Shells (6 dc)
From ~34:00 onward the speaker describes:
- “eight sets of one double crochet, five crochet…”
- “middle six double crochet one 2 3 4 5 6…”
- “one double crochet six double crochet one double crochet six double crochet…”
This implies:
- Round 8 and onward – Shells of 6 dc with 1-dc Separators:
General pattern:
- (1 dc in one stitch, then a shell of 5 or 6 dc in the next) repeated multiple sets across the front and back.
- The “middle six double crochet” at the neckline could be a straight section without increases—this is often used to shape a boat neck or round neck:
- 1 dc
- 6 dc shell
- 1 dc
- 6 dc shell… etc.
Because the transcription is incomplete, here is a reasonable, usable structure for you to continue:

Suggested Standardized Continuation
You can turn this into a classic shell yoke like this:
- After establishing the 5-dc shells (Round 6), you can define the raglan points:
Example:
- Divide your stitches into 8 major pattern groups:
- (1 dc, 5 dc shell) × 4 for the front,
- (1 dc, 5 dc shell) × 4 for the back (mirrored),
- some stitches between used as underarm or shoulder shaping.
However, since the exact division is not fully available, a practical suggestion is:
- Once you reach the shell size you like (5 dc or 6 dc), stop increasing and simply work straight without adding more stitches for several rows to form the yoke depth.
- Then separate for sleeves (if this is a dress/top) or stop if this pattern is for a decorative round.
6. Suggestions About the Pattern
- If you want a clear, reliable baby yoke pattern:
- Use the first three rounds as written (foundation + even round + simple (1 dc, 2 dc) increase round).
- Then pick a standard shell-yoke pattern (for example, shells of 3 or 5 dc separated by 1 dc) and follow a known formula for 2–6 months.
- Maintaining Symmetry:
- Use stitch markers to divide the yoke into:
- Front, back, and sleeves (4 sections).
- Ensure each front/back section has equal numbers of shells and the sleeves are equal as well.
- Use stitch markers to divide the yoke into:
- Adjusting Size:
- For larger sizes, increase more rounds before you switch to shells, or add more shells around.
- For smaller sizes, stop increases earlier or use smaller shells (3 dc instead of 5 or 6).
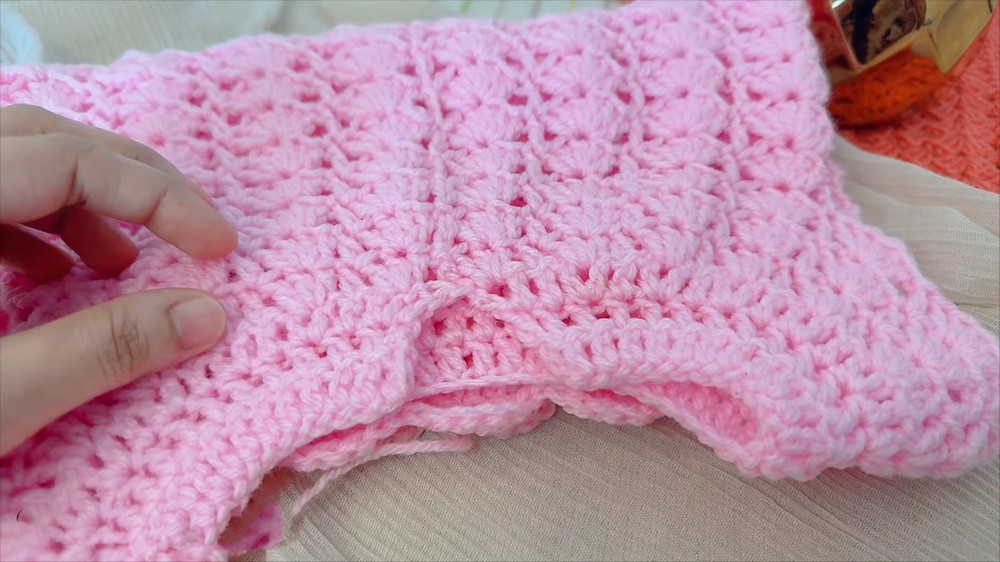
7. Finishing
Since the video seems to end after establishing the yoke structure and talking about “flowers” and additional details:
- Once your yoke is the desired width and depth:
- For a dress:
- Join under the arms and continue working in rounds for the skirt/body (any pattern: simple dc or shell stitch).
- For a sweater/cardigan:
- Separate sleeves and body.
- Work sleeves in rounds and the body in rows or rounds as desired.
- For a dress:
- Edge Finishing:
- Add a round or two of single crochet (sc) or reverse single crochet (crab stitch) at neck, sleeves, and hem for a neat finish.
- You can add picots or scallops at the edge for a more decorative look.
- Flowers / Embellishments:
- The audio mentions “flowers” near the end.
- You can make simple 5-petal flowers (magic ring, 5 × [sc, hdc, dc, hdc, sc] in ring) and sew them on the yoke.
- Weave in all ends carefully with a tapestry needle.
8. Tips to Maintain the Pattern
- Count Frequently:
Because of so many shells and sets (1 dc, 5 dc, etc.), it is easy to miscount. Count your shells and total dc regularly. - Use Stitch Markers:
- Mark every raglan line or beginning of a set to avoid shifting patterns.
- Keep Shell Size Consistent:
- Once you decide that your main shell is 5 dc (or 6 dc), keep it the same throughout the yoke unless you intentionally change it.
- Check Fit:
- After a few rounds of shells, measure the yoke around a baby-sized mannequin, existing garment, or a measurement chart to confirm the neck and chest are appropriate.
9. Final Words
The transcription you provided outlines a decorative shell-based yoke suitable for a 2–6 month baby. The exact wording is fragmented, but the core ideas are clear:
- Start with a foundation of 52 dc.
- Work an even round.
- Increase with a (1 dc, 2 dc) pattern.
- Evolve into decorative shells: first 3 dc, then 4 dc, then 5 dc, and potentially 6 dc shells, separated by single dc stitches.
Leave a Reply