
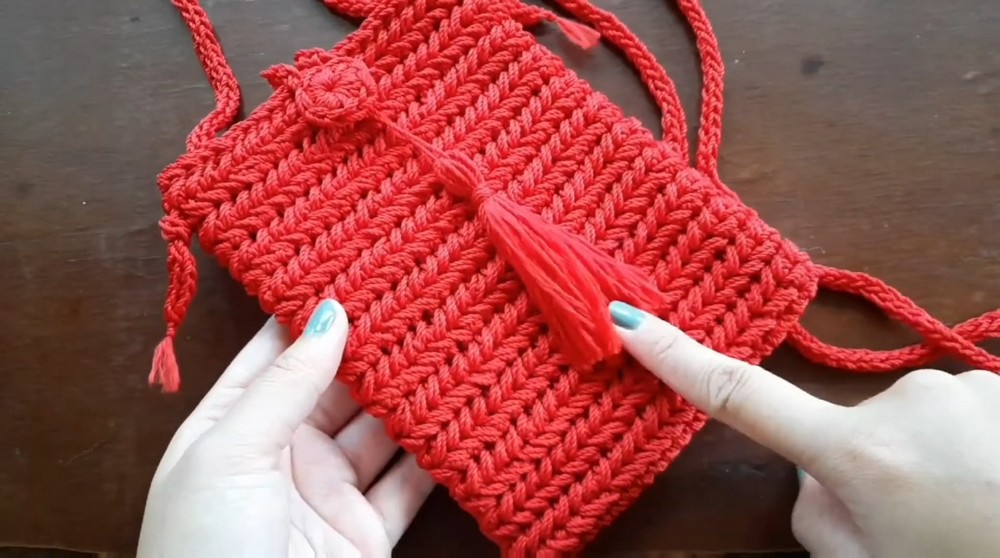
Fashion your own stylish way to keep your phone safe and handy with this free crochet phone bag pattern that is perfect for daily use.
Carrying your phone safely can be a lovely and simple joy for everyone. Beautiful colors and soft yarn turn ordinary into something eye-catching and special with a crochet phone bag pattern. A little bag like this keeps your phone close and easy to find so you never have to search through big bags or worry about dropping your phone. With a crochet phone bag pattern your phone gets a cozy home that is gentle on its surface and strong enough to protect it from small bumps.
Free Crochet Phone Bag Pattern for Hands-Free Carrying
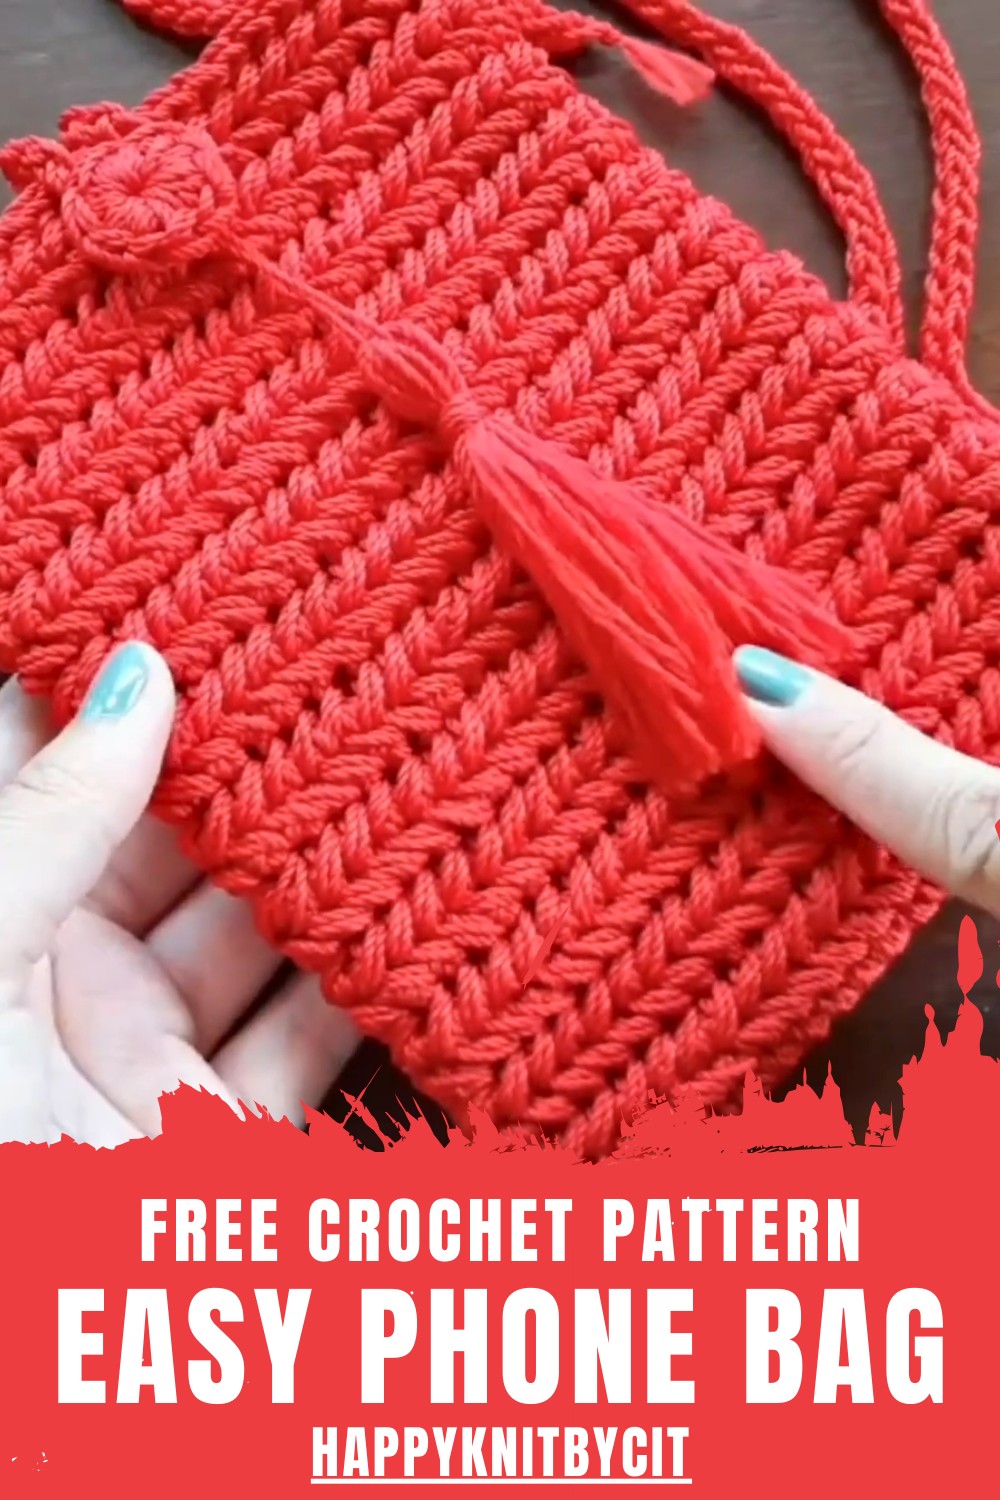
The bag hangs comfortably with a strap over your shoulder or around your neck making it easy to use both hands whenever you need. A pattern is available in fun styles and shapes making each bag different for every person. This useful and trendy accessory brightens any look while giving peace of mind. Every bag tells a story through its stitches blending beauty and smart design for everyone to enjoy.
Free Crochet Phone Case Pattern
Materials List
- Yarn: 1 skein PolyCherry “Small Ply” (or similar small ply/blended acrylic yarn). Double strand is used for a sturdier result.
- Hook: 4.0 mm crochet hook
- Stitch Markers: 2 (pins or safety pins acceptable)
- Scissors
- Tapestry/Yarn Needle for weaving ends
- Button: Handmade or ready button for case closure
- Optional: Decorative accessories, strap or chain for crossbody use
Key Abbreviations (US Terms)
- ch: chain
- sc: single crochet
- sl st: slip stitch
- st(s): stitch(es)
- rep: repeat
- ( ): work instructions within parentheses in the same stitch or space
Special Notes
- The phone case is worked in rounds for a seamless finish.
- Double the yarn throughout for a thicker pouch.
- Adjust foundation chains to fit your phone size.
- Do not crochet too tightly, especially when working the herringbone stitch.
Step-By-Step Pattern
1. Foundation & Base
- Using two strands of yarn together and a 4.0mm hook, chain 22 (or adjust to the width of your phone).
- Chain 1 extra (serves as turning chain).
- Single crochet (sc) in the 2nd chain from the hook and in each chain across (total 22 sc).
- Place a stitch marker in the first stitch of the row to keep track of your rounds.
- At the last chain, sc 3 more times in the same last stitch (for a total of 4 sc in the last stitch; this turns your work for the other side of the base).
- Continue single crocheting along the opposite side of the foundation chain.
- In the first chain (start of row), make 2 sc in that stitch (to round out the base).
- Join with a slip stitch to the next st. Now, you have an oval base.
2. Working in the Round
- Chain 1, turn (optional depending on which side you prefer).
- Single crochet in each stitch around (mark the first stitch of each round with your stitch marker).
- When reaching the ends, work 3 sc into the end stitches to maintain a rounded base.
- Continue until the base edge reaches the desired depth for your phone.
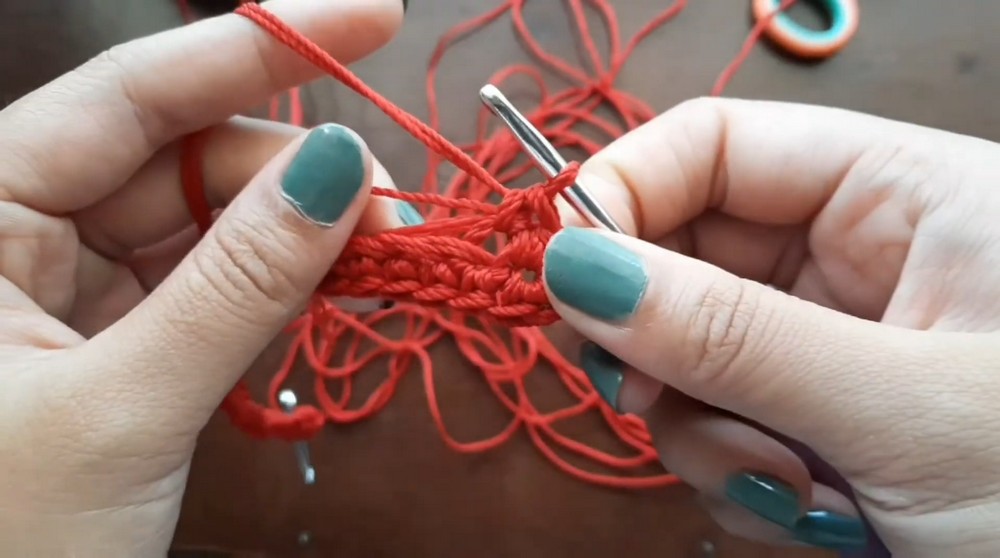
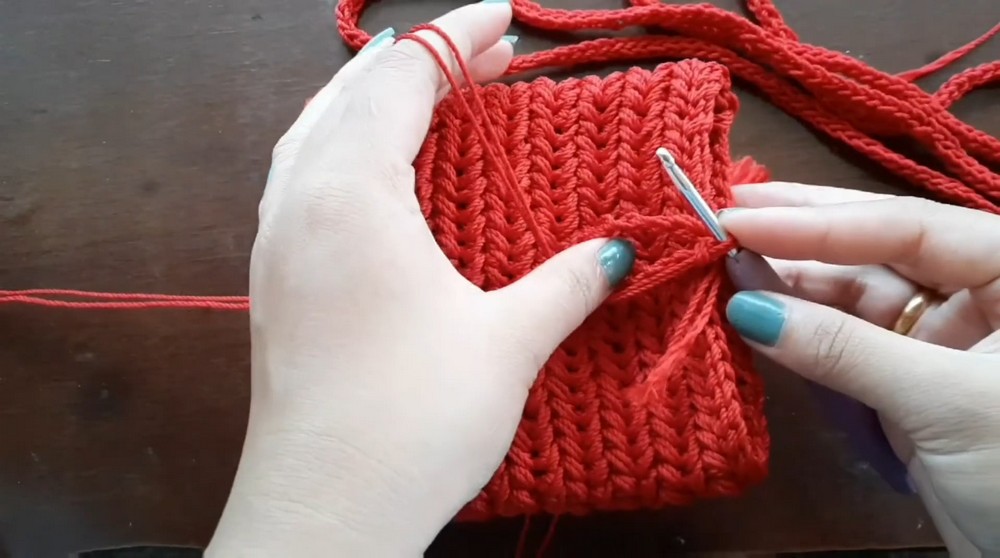
3. Herringbone Stitch Body
- Begin herringbone stitch:
- Insert hook into the next stitch.
- Yarn over, pull up a loop (2 loops on hook).
- Insert hook into the next stitch, yarn over, pull up a loop (3 loops on hook).
- Yarn over, pull through all 3 loops.
- Place marker in the first stitch of this round as a reference.
- Work herringbone stitch in each stitch around.
- Move up your stitch marker to the first stitch of each new round.
- For every round, repeat the herringbone stitch around.
- Alternate direction every round or two if you prefer a balanced “herringbone” look, turning your work if desired.
- Continue rounds until your case covers your phone (approx. 12 “herringbone” motifs, or 24 rounds, depending on your pattern and phone size).
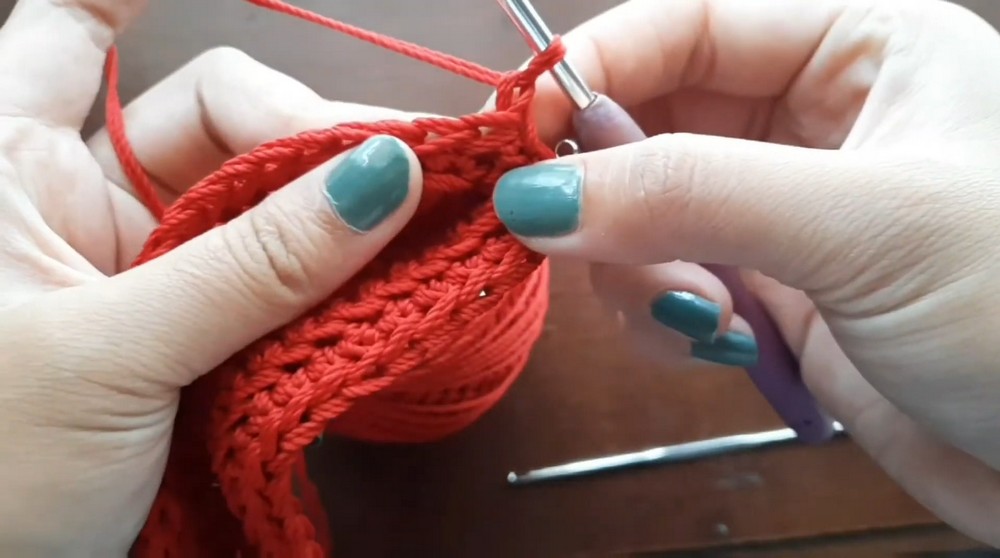
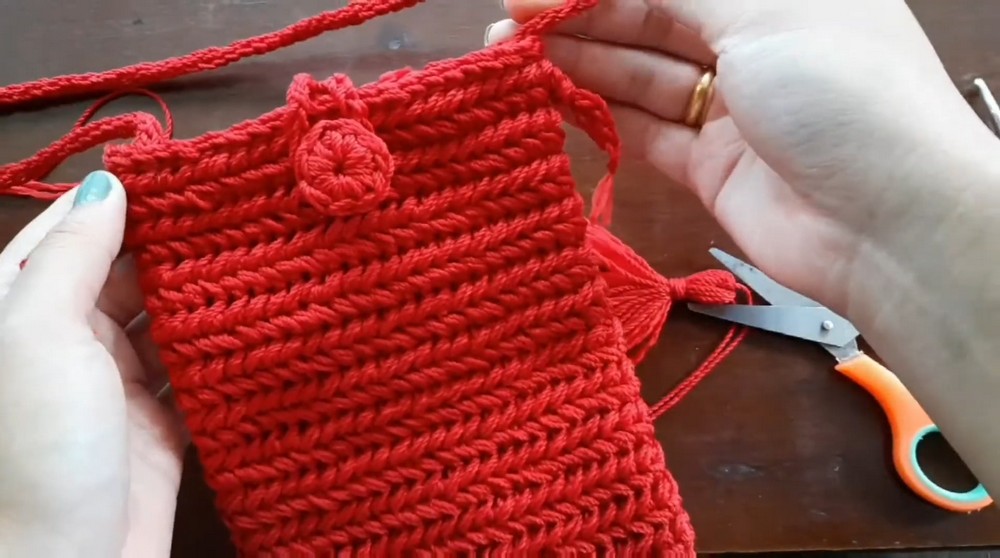
4. Finishing the Top
- When satisfied with the height, finish the last round and join with sl st.
- Fasten off, leaving a long tail to weave in.
- Use a tapestry/yarn needle to weave in ends, securing them neatly inside the case.
5. Button Loop & Closure
- Attach new yarn at the center of the back opening’s edge.
- Chain 15 (or enough to go around your selected button).
- Sl st to the starting point, forming a closure loop.
- Fasten off and weave in ends.
- Sew a button onto the front side, in line with the chain loop.
6. Optional Strap & Final Touches
- To add a strap: Attach yarn to one upper corner, ch to desired length, attach to opposite corner, sl st to secure, fasten off, and weave in ends.
- Add decorative accessories as desired.
Conclusion
Your crochet phone case is now complete! This handy pouch is sturdy, stylish, and can be customized to any phone size. The double-yarn and herringbone stitch provide both texture and durability, while the closure features keep your device secure.
Pattern Correction & Tips
- Correction: Adjust starting chain for larger or smaller phones; always check size before starting body rounds.
- Tip: Keep stitches loose for easier insertion/removal of the phone.
- Tip: Use contrasting yarn for the button loop or strap for visual interest.
- If yarn unravels, use sharp scissors to trim neatly before weaving in.
- Add inner lining for extra phone protection if desired.
Leave a Reply