
Celebrate spring with this Crochet Tulip Flower Pattern, bringing cheerful blooms and a fresh, vibrant touch to any project or décor.
Adding a splash of color and elegance to any project, this floral crochet design captures the charm of spring in every stitch. The Crochet Tulip Flower Pattern creates beautifully detailed petals that look lifelike and stylish, perfect for home décor, accessories, or personalized gifts. Its flexibility makes it ideal for embellishing hats, scarves, bags, cushions, or even wall hangings, giving your creations a fresh and creative touch.
Sweet Crochet Tulip Flowers for Home Decor
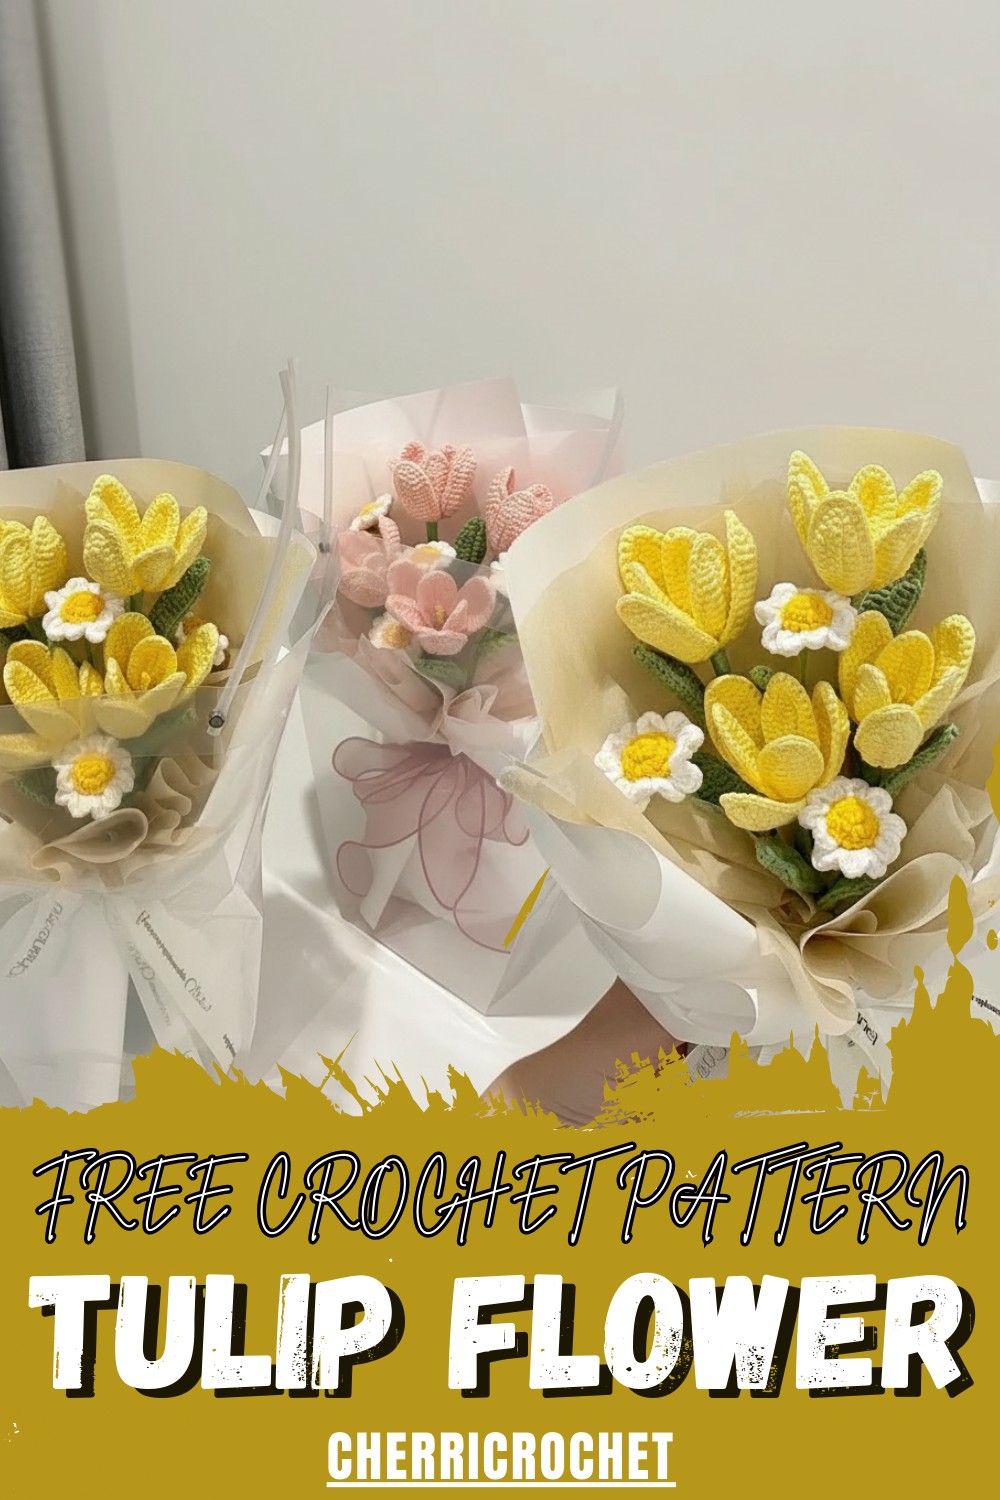
One major advantage is its durability—unlike real flowers, these tulips stay vibrant and intact for years, allowing you to enjoy them endlessly. The pattern is also beginner-friendly, helping crafters develop their skills while producing eye-catching results. With the option to experiment with colors and sizes, each tulip can be customized to suit any style or theme. Combining beauty, practicality, and versatility, the Crochet Tulip Flower Pattern transforms simple projects into charming, standout pieces that delight everyone.

Crocheting a Flower with Petals and Leaves
Materials Needed
To follow along with this tutorial, you’ll need:
- Yarn: Appropriate for flower petals and leaves.
- Crochet Hook: Size suitable for your chosen yarn.
- Craft Wire: 20 cm and 30 cm lengths for petals and leaves, respectively.
- Floral Stem: 40 cm stem for assembling the flower.
- Glue: To secure components during assembly.
- Scissors: For cutting yarn cleanly.
- Needle: For weaving in loose ends.
Step-by-Step Instructions
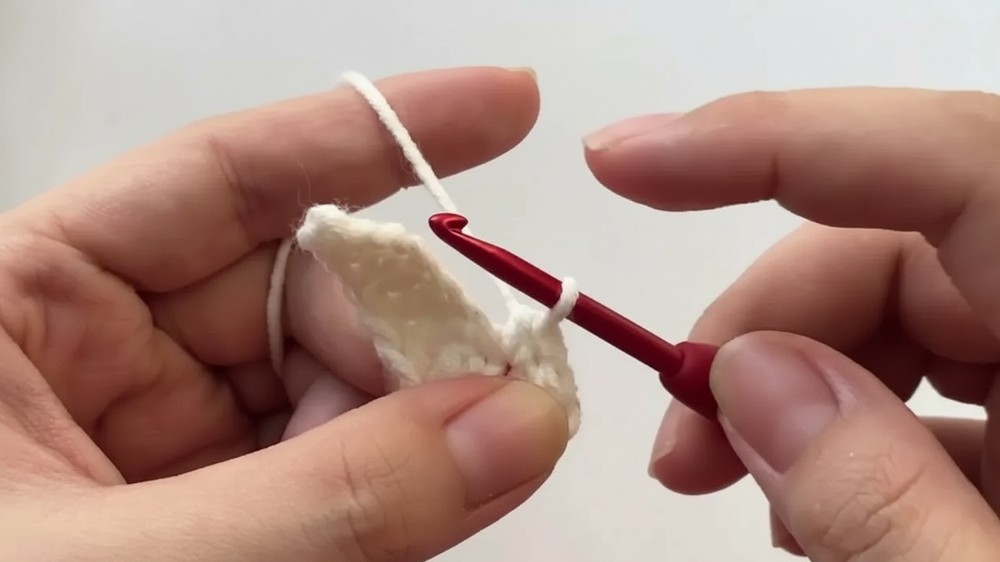
1. Making the Small Petals
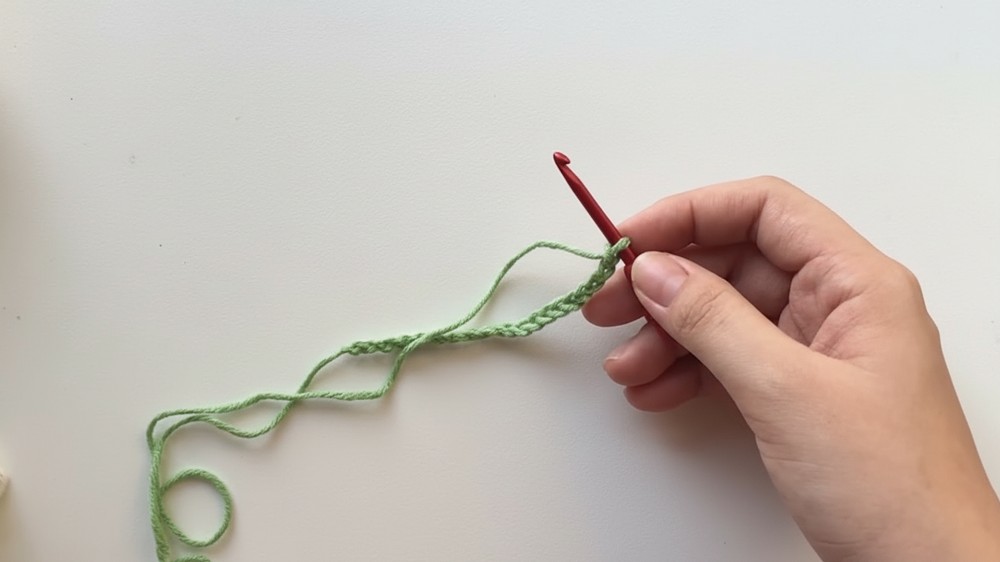
- Start with a slip knot and chain 11 stitches.
- Crochet from the second stitch from the hook. This creates different stitches:
- One slip stitch.
- One single crochet.
- One half double crochet.
- One double crochet.
- Three double crochets in each of the next three stitches.
- Reverse the pattern: One half double crochet, one single crochet, and two slip stitches at the top.
- Work on the opposite side:
- Repeat the same pattern (single crochet -> half double crochet -> double crochets).
- Crochet over the tail for a neat finish.
- Insert and crochet over 20 cm craft wire for each petal.
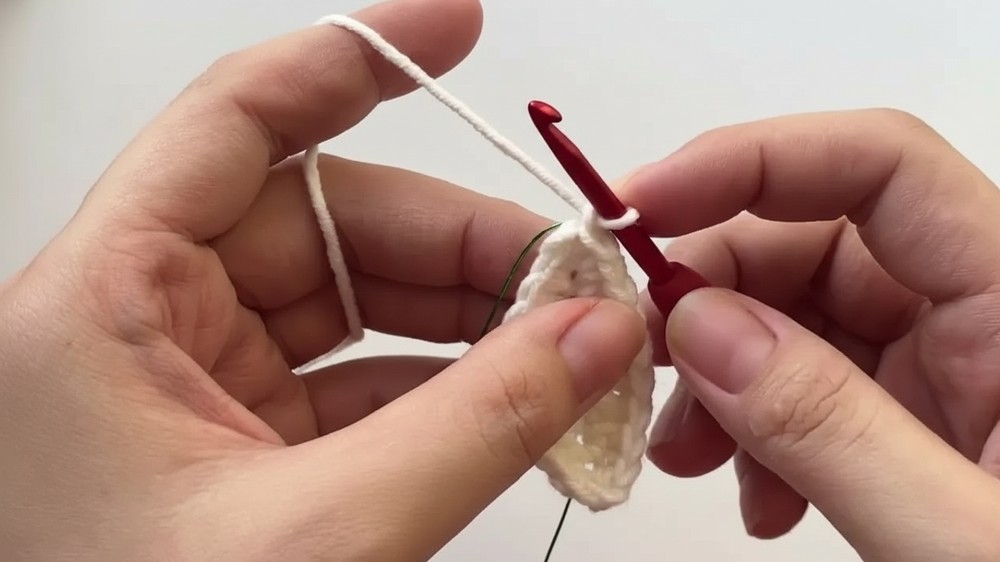
2. Making the Large Petals
- Start with a slip knot and chain 13 stitches.
- Crochet similarly to the small petal but with added stitches:
- One slip stitch.
- One single crochet.
- One half double crochet.
- Six double crochets instead of four in the center stitches.
- Reverse the pattern: One half double crochet, one single crochet, and two slip stitches.
- Work on the opposite side, repeating the pattern.
- Use a 30 cm craft wire for these petals and crochet over it.
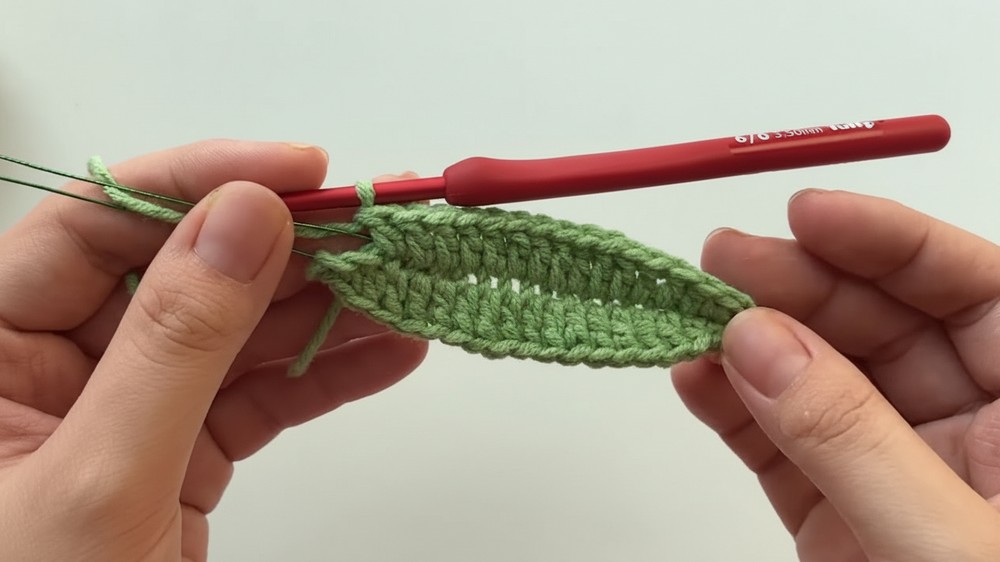
3. Making the Leaf
- Start with a slip knot and chain 19 stitches.
- Chain the last stitch over a 30 cm wire.
- Crochet along the wire:
- One slip stitch.
- One single crochet.
- One half double crochet.
- 13 double crochets for the center area.
- Reverse the pattern upward: One half double crochet, one single crochet, and three single crochets in the top stitch.
- Work on the opposite side, mirroring the same stitches along the wire.
- Cut off and adjust the shape of the leaf for a more natural look.
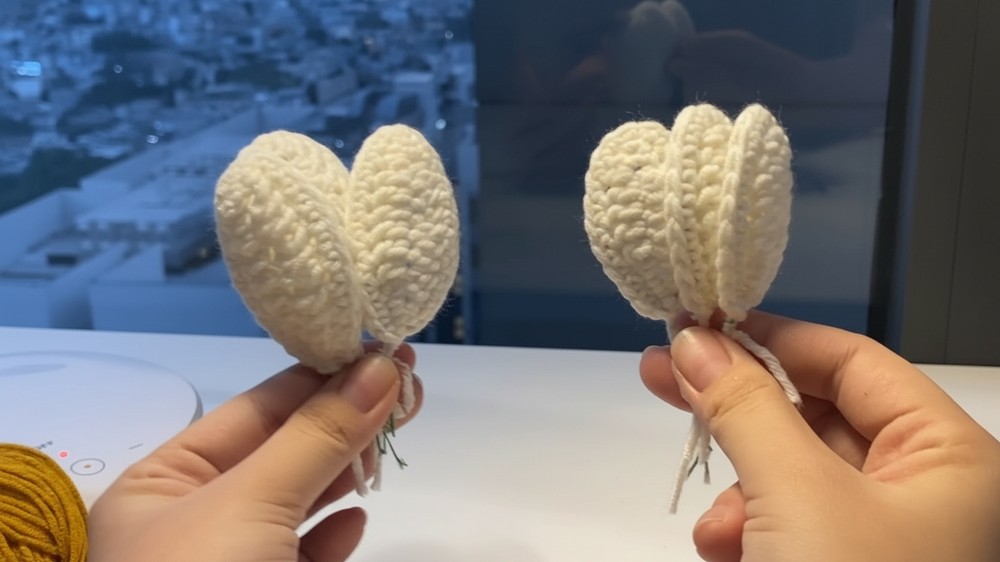
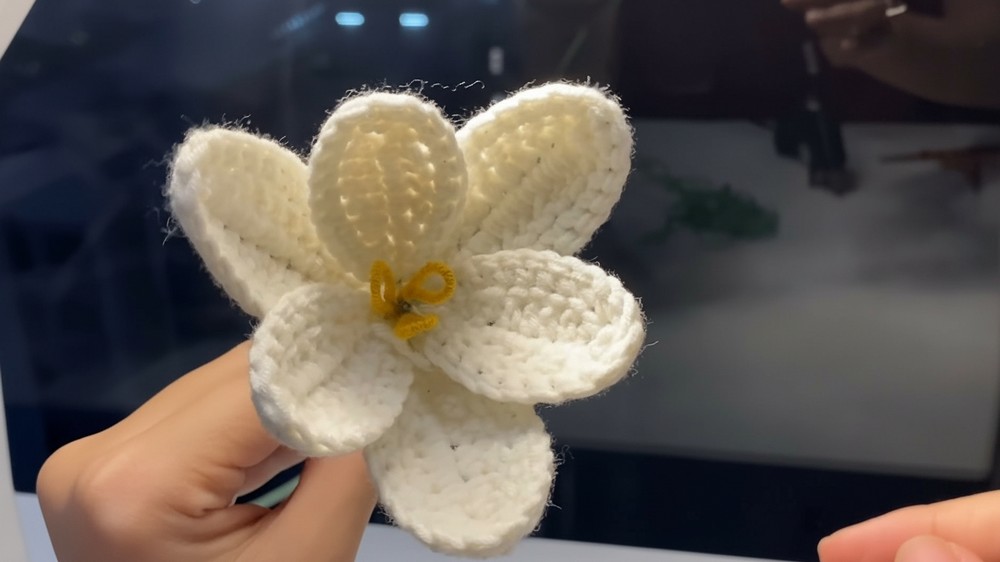
4. Assembling the Flower
- Use the floral stem (40 cm) as the base and assemble all components:
- Glue three stamens to the top of the floral stem.
- Attach three small petals evenly around the stamens.
- Place and secure the three large petals to form the outer part of the flower.
- Wrap green yarn around the stem, finishing with the leaf placement.
- Tighten and secure using glue and adjust the flower for a realistic shape.
Special Features
- Structural Wire Framework: The use of craft wire makes the petals and leaves sturdy, easier to shape, and more lifelike.
- Layering Technique: The overlapping of small and large petals adds depth and dimension to the flower design.
- Assembly Guide: The tutorial includes a clear assembly process that connects all parts seamlessly.
Level of Difficulty
The tutorial is designed for beginner to intermediate crocheters. Basic crochet stitches such as slip stitches, single crochet, half double crochet, and double crochet are used, making it accessible for those with some experience in crochet.
Challenges:
- Working with craft wire requires some care and patience, especially when crocheting over the wire.
- Adjusting leaf and petal shapes may take a bit of practice.
Tutor’s Suggestions
- Start Slowly: If you’re new to crocheting over wire, take your time to ensure it stays in place.
- Count Stitches Carefully: Always double-check the number of chains and stitches to maintain symmetry.
- Finish Neatly: Weave in loose ends carefully for a polished and professional look.
Uses and Applications
- Home Décor: Use the crocheted flowers for centerpieces, wall decorations, or vases.
- Gift Ideas: Create a bouquet or standalone flower as a personalized gift.
- Craft Projects: Combine with other crocheted pieces to make unique designs or art.
Pro Tip for Success
When crocheting over the wire, always hold both the yarn and wire firmly but gently. This will give you smooth stitches while ensuring the wire remains hidden.
Conclusion
This video offers a wonderful tutorial for crafting a charming crocheted flower complete with petals, leaves, and stems. The combination of yarn and craft wire creates a realistic and sturdy result that’s both practical and decorative. Whether you’re an experienced crocheter or a beginner looking to challenge yourself, this project teaches valuable techniques and provides a lovely finished product. Try experimenting with yarn colors and wire placements to customize your flower!
Leave a Reply