
Begin cozy styling with this Crochet Honeycomb Hat Pattern add rich texture snug fit and stylish warmth for winter outfits gifts comfort
Cozy accessory for the colder months is easily achieved by following a Crochet Honeycomb Hat pattern that results in a beautiful, textured finish. This project is highly beneficial for those seeking a high-end look without the complexity, as it provides a thick, insulated fabric that traps heat much better than standard flat stitches. Its primary specialty is its reversible nature, offering two distinct looks in one garment, making it a versatile staple for winter outings, morning commutes, or as a stylish gift for loved ones.
Luxe Crochet Honeycomb Hat Pattern for Cold Days
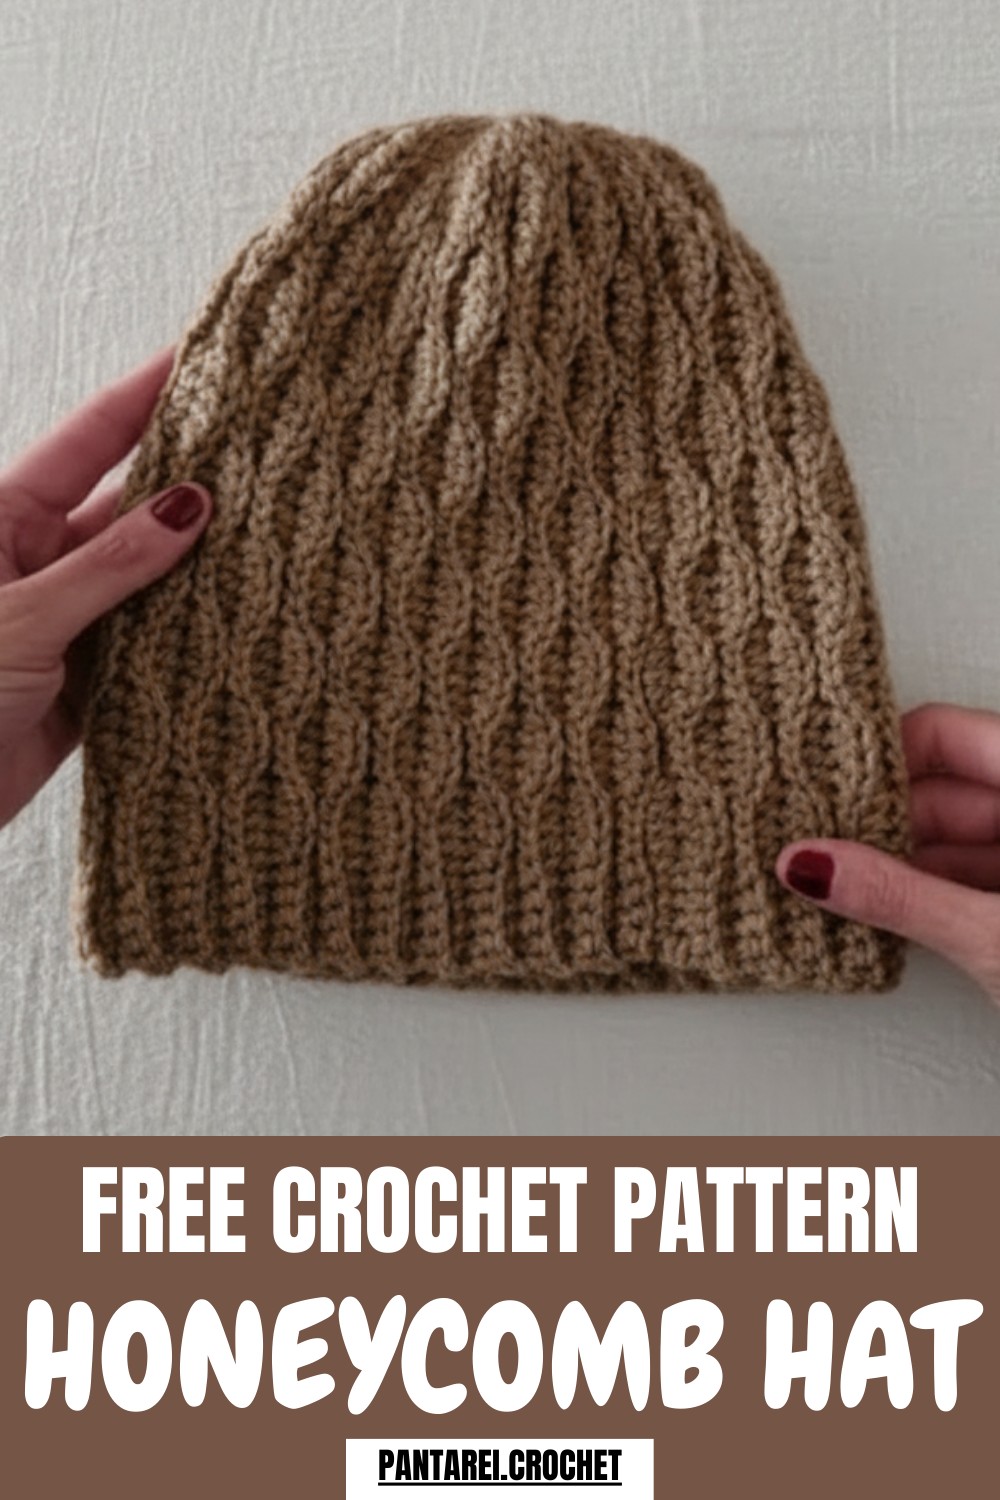
The standout specialty of this design is the invisible seam technique, which joins the piece so perfectly that the geometric texture remains completely uninterrupted around the head. Because the pattern creates a dense, “bubbled” structure, the hat is exceptionally durable and holds its shape even after multiple washes.
Materials
-
Yarn: 4/7 Acrylic wool (medium weight).
-
Hook: 3.75 mm or 4.0 mm crochet hook.
-
Tools: Tapestry needle, stitch markers, measuring tape, and scissors.

It is perfect for use in freezing temperatures where extra protection is needed, yet it remains breathable enough for daily wear. This handmade item serves as a perfect blend of modern fashion and functional winter gear, ensuring you stay warm while looking effortlessly sophisticated.

To begin, create a foundation of 45 chains using a 4mm hook and soft acrylic yarn to ensure a soft and flexible drape.
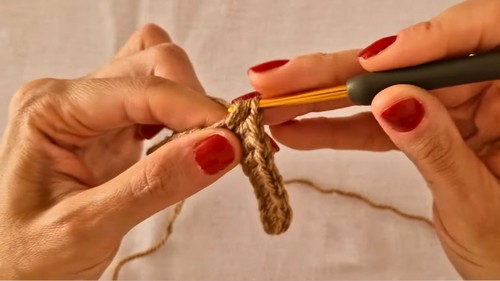
The texture is built by alternating between five single crochets, four half double crochets, and four slip stitches across the row.

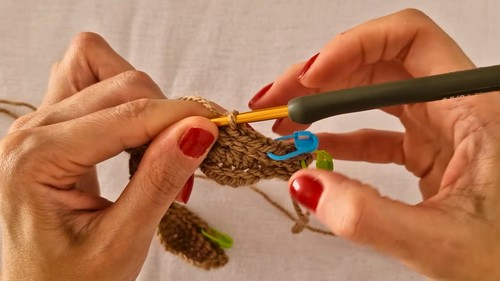
For the second row, work in “mirror” fashion by repeating the same stitch counts while only grabbing the back loops to create a stretchy, ribbed effect.
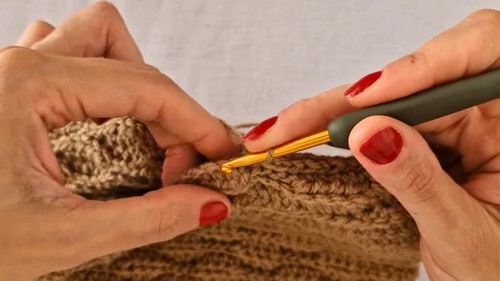
To form the characteristic honeycomb shapes, switch the placement of your stitches every two rows: where you previously worked slip stitches, you now work half double crochets, and vice versa.
FREE Crochet Honeycomb Hat Pattern
Special Features & Key Information
-
Special Features: The “Mirroring” technique creates a reversible, thick texture. The tapered crown (using permanent slip stitches) ensures the hat doesn’t look overly bulky or “pointy” at the top.
-
Level of Difficulty: Easy/Beginner. It only uses three basic stitches (sc, hdc, sl st) and back-loop techniques.
-
Uses: Perfect for winter warmth, holiday gifts, or a quick crochet project for personal use.
-
Tutor’s Suggestions:
-
Use stitch markers on the first and last stitches of the crown section, as slip stitches can be difficult to see and easy to lose.
-
Check your measurements frequently; the pattern is very elastic, so the hat should be slightly smaller than your head circumference for a snug fit.
-
Pro-Tip
To ensure the bottom edge of your beanie looks neat and professional, always crochet the very last single crochet of the rim through both loops (instead of just the back loop). This creates a firm, straight edge that won’t stretch out or become wavy over time.
Conclusion
The Textured Crochet Beanie is a rewarding project that combines simplicity with a sophisticated look. By mastering the 4-row stitch shift, you can create a high-quality, elastic hat that rivals store-bought versions. This pattern is a fantastic way to practice stitch placement and garment construction while creating something truly cozy!
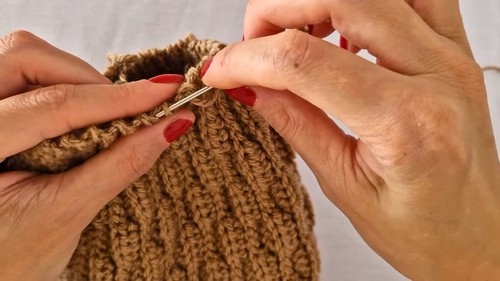
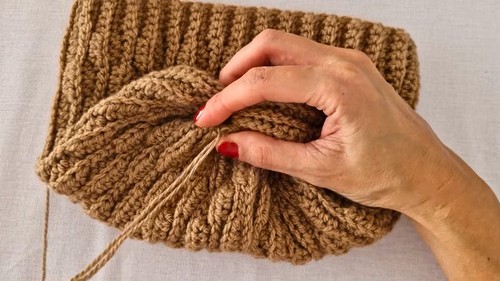
Step-by-Step Details
The beanie features a repeating textured pattern that creates a “bubble” or ribbed effect, making it thick and warm. You knit the hat sideways as a flat rectangle, then join the ends and cinch the top to form the classic beanie shape. The design includes a specialized crown section with consistent slip stitches to reduce bulk at the top of the head.
Leave a Reply