
Create a stunning Crochet Graduation Cap Pattern that celebrates achievements with fun, memorable style for gifts or party décor.
Many ordinary decorations for graduation parties feel generic and lack personal charm, but this handmade cap adds creativity and meaning to any celebration. The Crochet Graduation Cap pattern creates a miniature mortarboard with a square top and tassel, giving it a classic yet playful appearance.
Elegant Crochet Graduation Cap Pattern for Proud Graduates

Its handmade design stands out compared to mass-produced items, making it perfect for table centerpieces, gift packaging, or as a keepsake for graduates.
Lightweight and made with simple yarn, this pattern is beginner-friendly while still offering room for customization, such as adjusting colors, size, or yarn type to match school themes or personal preferences.
Beyond its visual appeal, the cap is functional, it can hold small treats, notes, or party favors, adding both style and practicality to celebrations.
Its neat stitches and well-defined shape give it a polished, professional look while maintaining a warm, handmade charm.
Ideal for crocheting enthusiasts who want to create memorable and meaningful items, this pattern also helps improve crochet skills. Combining beauty, versatility, and purpose, the Crochet Graduation Cap pattern transforms ordinary graduation décor into something special, thoughtful, and fun for graduates and guests alike.
In this tutorial, Patoys shows you how to crochet a clever Graduation Cap (Birrete) that serves as a gift box or candy holder. It’s a perfect way to present jewelry, treats, or even a graduation ring in a personalized, handmade way.
Introduction
The project consists of two main parts: a cylindrical base and a square lid. The cap is designed to be functional, measuring about 6 cm in diameter at the base and 4 cm in height. It features a traditional tassel and a reinforced structure to ensure it keeps its shape while holding gifts inside.
General Information
-
Materials:
-
Yarn: 100% Cotton mercerized yarn (2 mm thickness) in Black and Gold.
-
Hook: 2.5 mm crochet hook.
-
Recycled Items: A plastic yogurt lid (to reinforce the base and top).
-
Tools: Scissors, yarn needle, and a homemade starch mixture (water and cornstarch) for stiffening.
-
-
Difficulty Level: Easy to Intermediate. The crochet stitches are basic, but the construction involves shaping corners and stiffening the fabric.
-
Uses: Candy holder, jewelry gift box, or a graduation party favor.
Step-by-Step Details
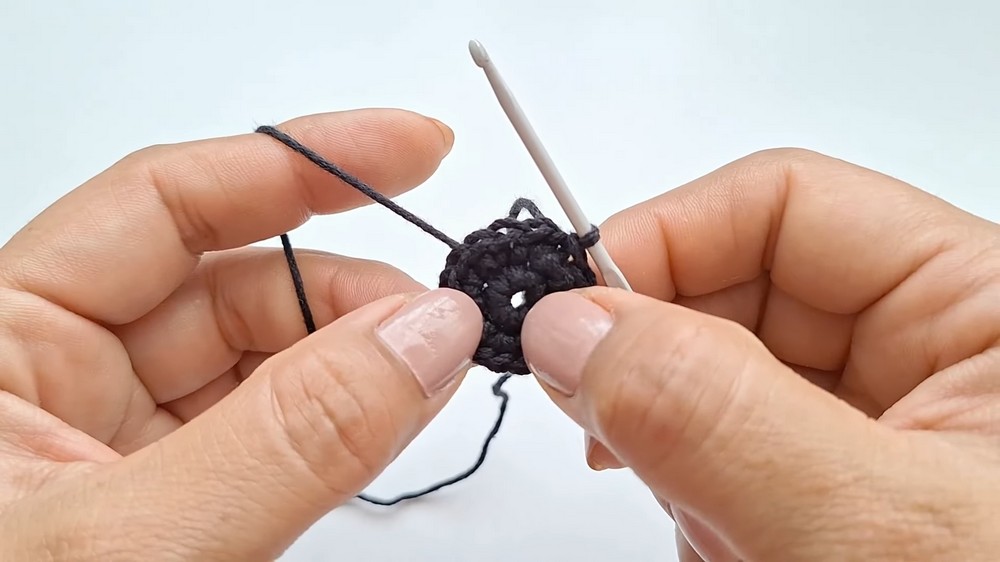
1. The Base (The Cup)
-
Foundation: Start with a magic ring and 8 single crochets (sc). [01:09]
-
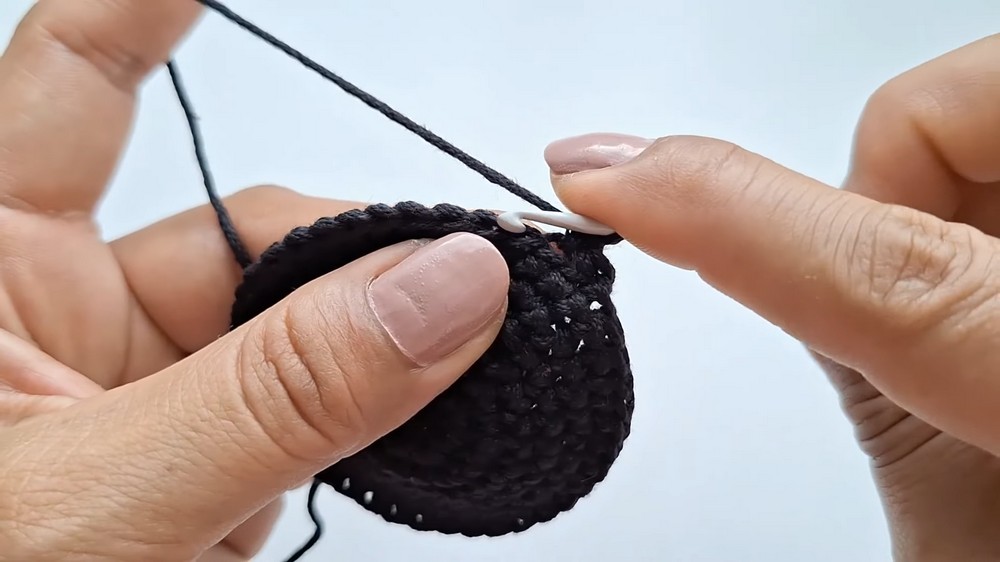
Expansion: Increase in every stitch to reach 16, then 24, 32, and finally 40 stitches. [02:08]
-
Shaping the Bottom: Crochet one round in the back loops only to create a sharp edge that allows the base to sit flat. [06:15]
-
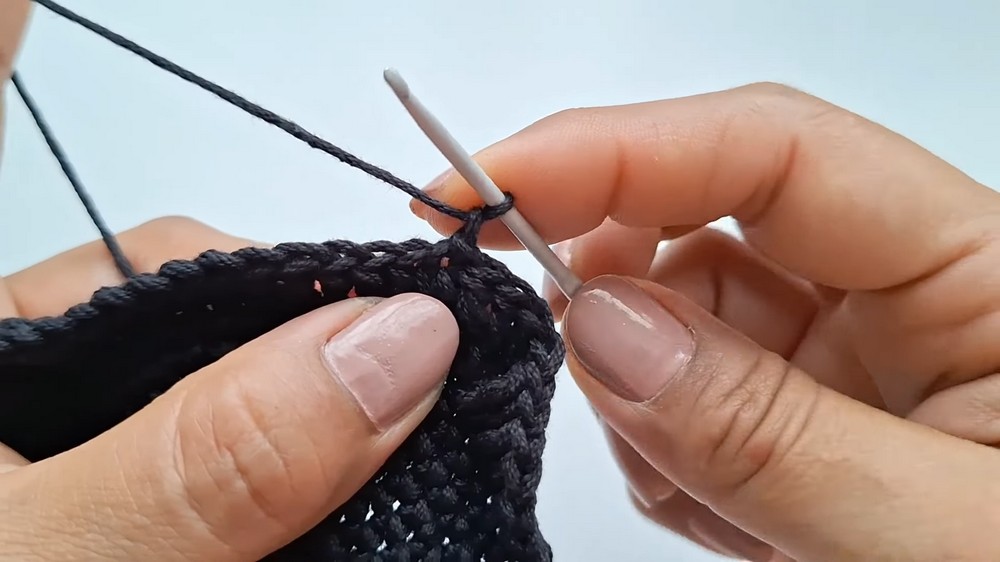
The Body: Work several rounds of plain sc (approx. 7 rows) to build the height of the cup. [07:21]
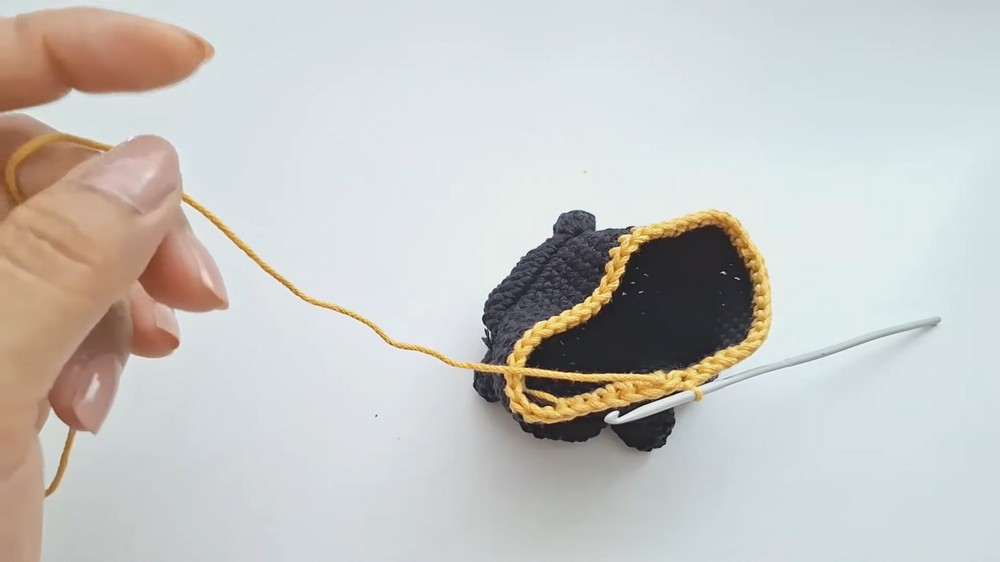
2. The Square Top (The Mortarboard)
-
Foundation: Follow the same circular pattern as the base until you have 48 stitches. [09:47]
-
Creating Corners: In the next round, use the front loops only. The tutor uses a combination of 9 plain stitches followed by a sequence of “2 dc in one, 4 treble crochets in one, 2 dc in one” to force the circle into a square shape with sharp corners. [11:47]
-
The Lip: Work a few rounds of sc downwards from the center of the square to create the “plug” that fits into the base. [19:06]
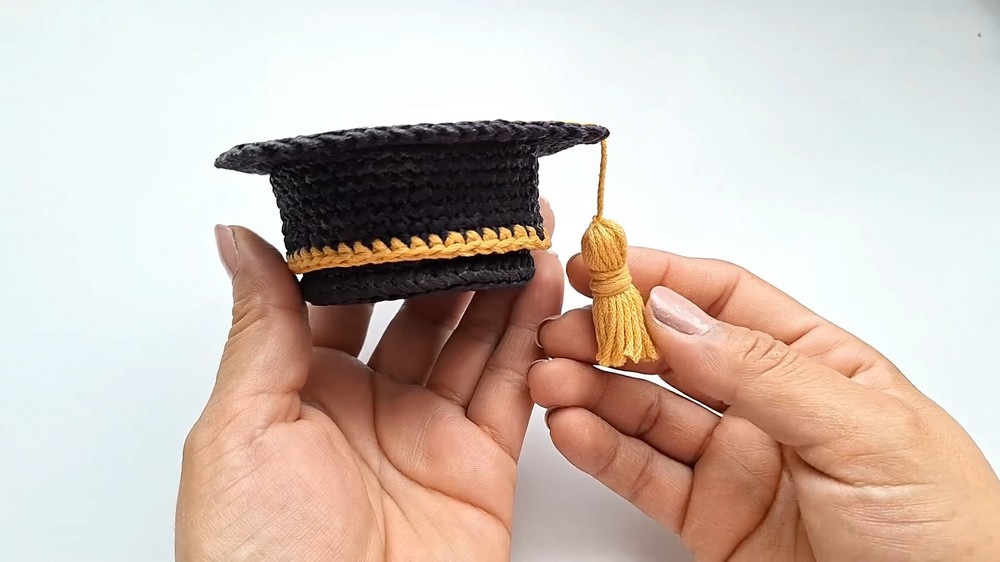
3. The Tassel
-
Creation: Wrap gold yarn around a small piece of cardboard (about 8 cm) approximately 10–12 times. [23:21]
-
Finishing: Tie the top and middle to form the tassel shape, then sew it into the center of the square top so it hangs off the side. [26:46]
4. Reinforcement and Stiffening
-
Structure: Trace and cut circular/square pieces from a plastic lid and place them inside the crochet pieces. [27:43]
-
Stiffening Solution: The tutor explains how to make a “cornstarch glue” (water + cornstarch boiled until thick). Apply this mixture to the hat to make it rigid once it dries. [29:20]
Special Features
-
Dual Functionality: It’s not just an ornament; the top is removable, making it a surprise container for graduation gifts.
-
Hidden Reinforcement: The use of recycled plastic lids inside the fabric ensures the cap stays perfectly flat and doesn’t sag over time.
Tutor’s Suggestions
-
Flattening the Base: To make the base sit perfectly, the tutor suggests manually folding the fabric along the back-loop-only line to “train” the shape. [09:08]
-
Starch Application: Compress the fabric with your fingers after applying the starch mixture to ensure it penetrates the fibers deeply for maximum rigidity. [30:52]
Conclusion
This graduation cap is a unique and thoughtful project that combines crochet with functional craft. By following the stiffening steps, you transform a soft yarn project into a sturdy, professional-looking souvenir that celebrates a major milestone.
Final Tip: If you are giving this as a gift, line the inside with a small piece of black felt. This hides the plastic reinforcement and gives the “box” a luxury feel when it’s opened.
Leave a Reply