
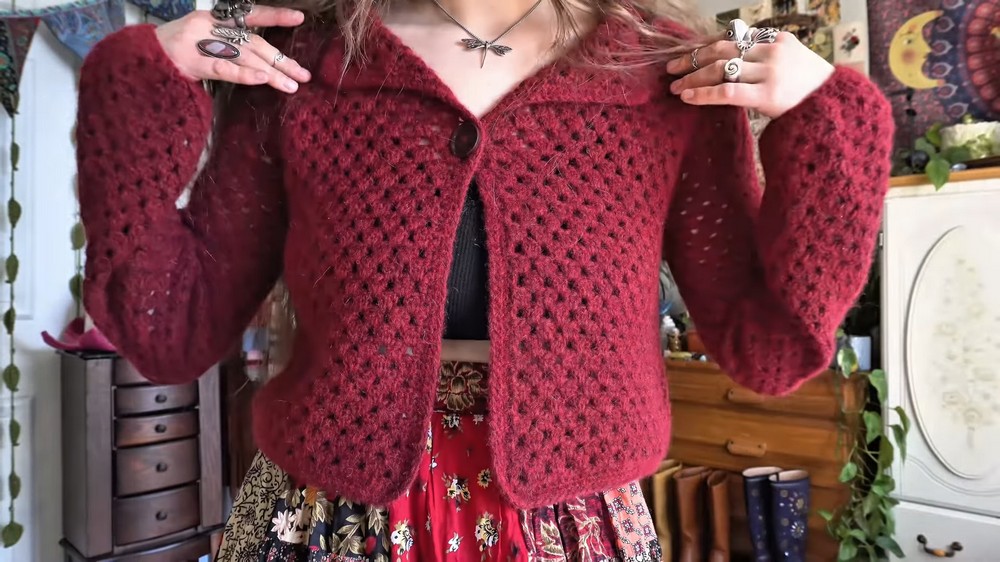
crochet collared cardiganIntroduce a fresh twist to your wardrobe with a crochet collared cardigan that combines charm and style, offering countless opportunities for personal flair.
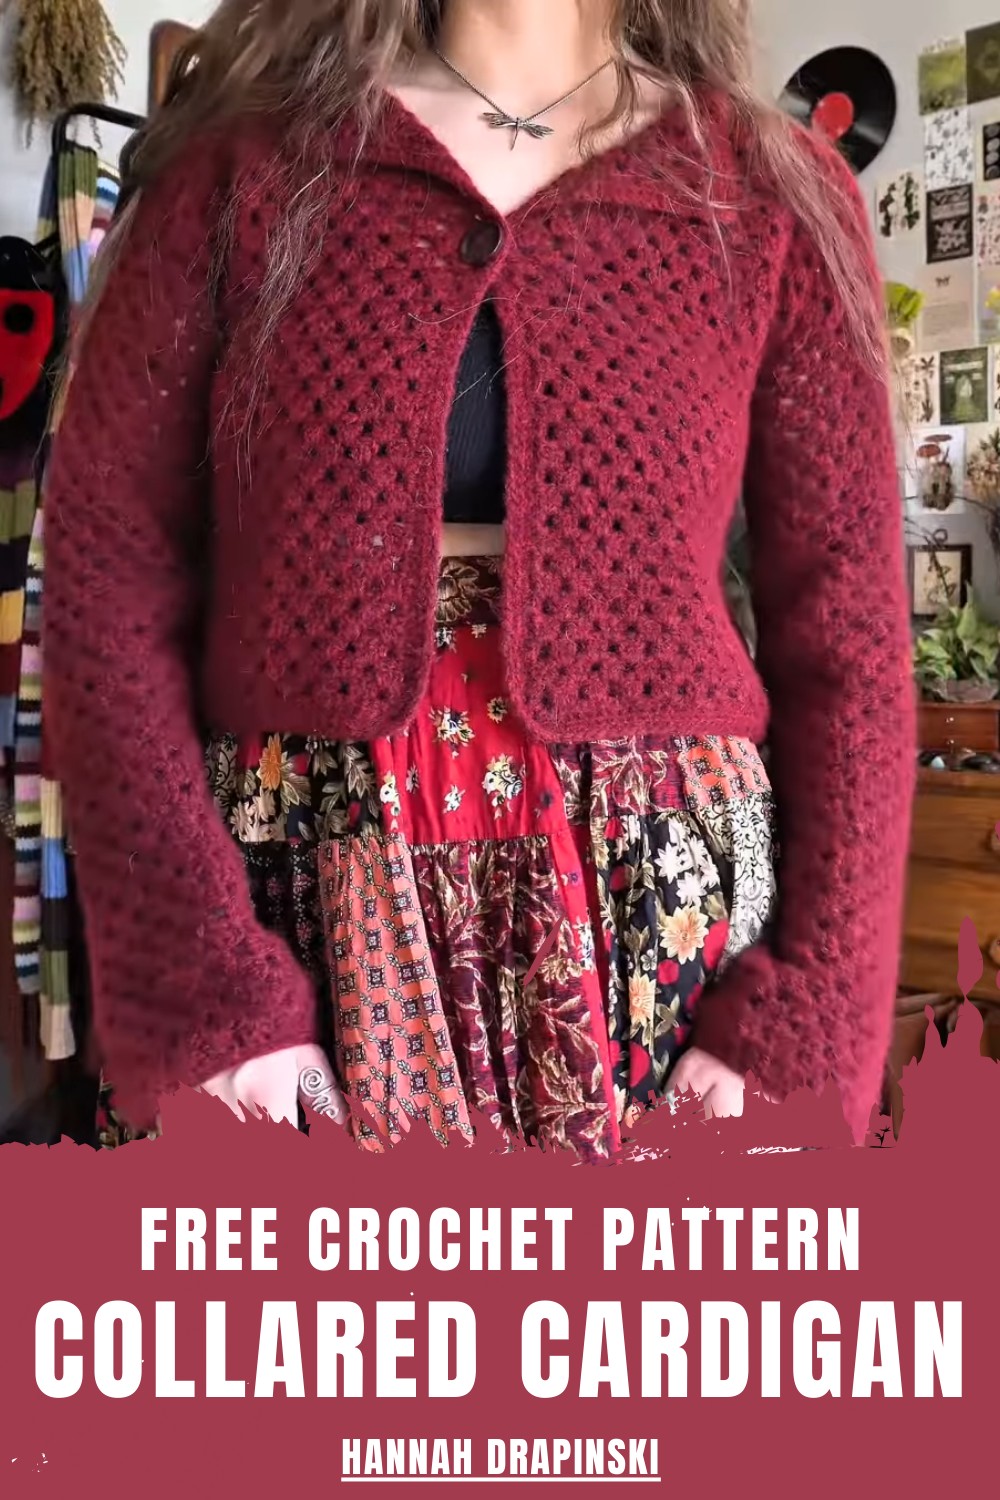
Warm Crochet Collared Cardigan Pattern Great for Wearing
Wrapping yourself in a handmade piece that’s both chic and comfortable. A crochet collared cardigan is the perfect project to bring your crochet skills to life while creating something truly special. From choosing the perfect yarn to watching the collar take shape, this pattern is full of opportunities to infuse your own style.
Add bold buttons, textured stitches, or vibrant colors to make it uniquely yours. Whether dressing up for a day out or layering on a cozy evening, this cardigan is as practical as it is beautiful.
Let each stitch guide you toward a timeless wardrobe piece you’ll love for years to come!
Finished Size:
The size will depend on your desired fit:
- Oversized/boxy fit: Choose a back panel width wider than shoulder-to-shoulder measurement.
- Slim fit: Chain to match your shoulder-to-shoulder measurement.
The cardigan is easily customizable by adjusting the chain length and row count.
Materials:
- Yarn:
- Size 4 medium weight yarn (e.g., acrylic or a comparable fiber).
- Use scrap yarn for a colorful or patchwork option.
- Crochet Hooks:
- 6.0 mm hook for the base cardigan and granny stitch.
- 5.0 mm hook (optional) for the collar and finishing details if needed for firmer edges.
- Tapestry Needle
- Stitch Markers
- Scissors
- Optional: Button(s) if adding closure.
Gauge:
- Granny Stitch: 2 clusters of (3 DC, skip 2) = 2 inches.
- Double Crochet (DC) rows: 4 rows = 2 inches.
Note: Gauge will determine the width and length of your panels.
Special Techniques:
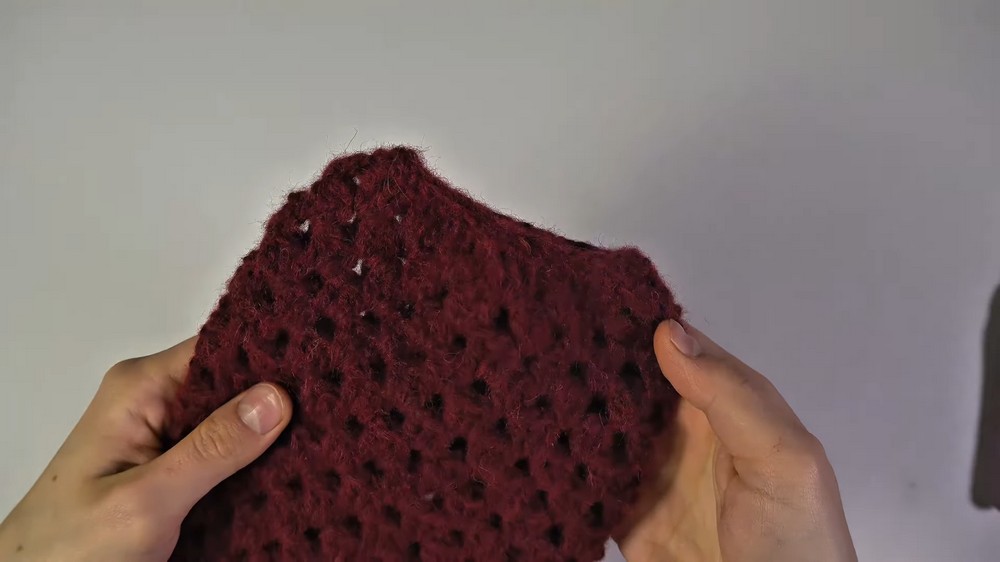
Granny Stitch Clusters:
- A cluster consists of three double crochets worked into the same space.
Single Crochet Decrease:
- Insert hook into first stitch, pull up a loop.
- Insert hook into the next stitch, pull up a loop.
- Yarn over, pull through all three loops on the hook.
Crochet Collared Cardigan Pattern Instructions
1. Back Panel
Step 1: Foundation Chain and First Row
- Determine Chain Length:
- For an oversized, boxy fit: Chain to reach desired width for a dropped-shoulder style (e.g., 69 chains).
- Ensure the chain is a multiple of 3 for the granny stitch pattern.
- Add 2 extra chains for turning.
- Row 1:
- Work 1 single crochet (SC) into the 2nd chain from the hook.
- SC in each chain across.
- Chain 2 (counts as a DC), turn.
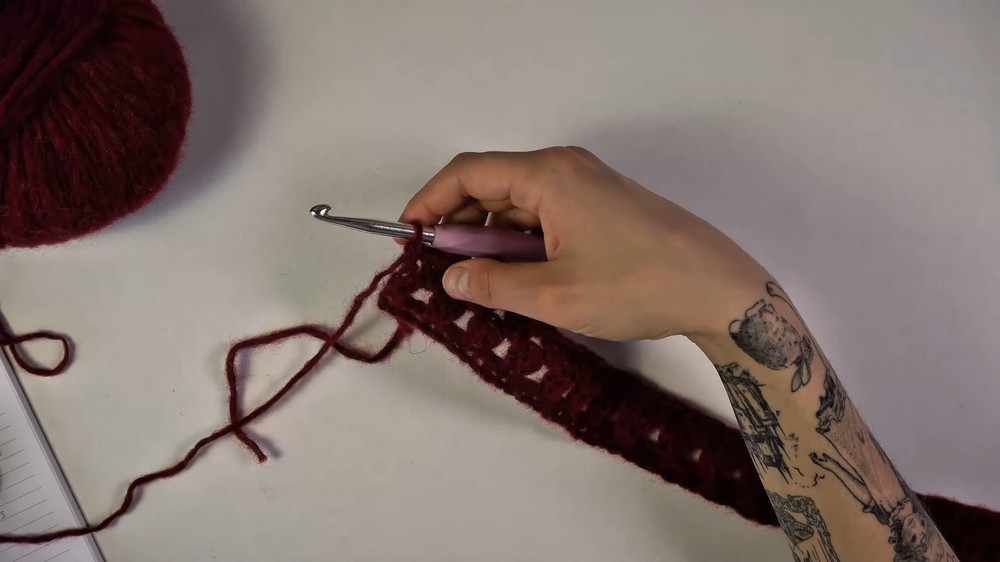
Step 2: Granny Stitch Rows
- Row 2 (Granny Pattern Foundation):
- Work 1 DC into the same stitch as the Ch-2.
- Skip 2 stitches, work 3 DC (cluster) into the next stitch.
- Repeat * across the row.
- At the end of the row, skip 2 stitches and 2 DC into the last stitch.
- Ch 2, turn.
- Row 3 (Granny Cluster Row):
- Ch 2, turn.
- Work 3 DC clusters into each space between clusters from the previous row.
- At the end, 1 DC into the top of the beginning Ch-2.
Step 3: Row Repeat for Length
- Repeat Rows 2 and 3 alternately until the back panel measures your desired length before attaching the side panels.
2. Side Panels
- Determine Chain Length:
- Back panel width ÷ 2, rounded down to the nearest multiple of 3.
- Add 2 extra turning chains.
- Example: Back panel foundation chain = 69 chains → 69 ÷ 2 = 34.5 → Round down to 33.
- Work the Side Panel Rows:
- Follow the exact same instructions as the back panel but stop sooner to leave space for the neckline and collar.
- Example: If the back panel has 37 total rows, the side panels should have 31 rows. The remaining 6 rows will form the neckline space.

3. Assembly
Step 1: Attach Side Panels to Back Panel
- Use the whip stitch method to seam:
- Lay the panels flat with right sides facing.
- Sew the top edges of each side panel to the back panel.
- Ensure neat alignment of stitches for a clean finish.
Step 2: Seam the Sides
- Leave a gap at the top for the armholes:
- Standard armhole width = 6 inches, but adjust as needed.
- Mark the armhole gap with stitch markers to ensure uniformity.
- Use the whip stitch method to seam the sides from the bottom hem to the armhole marker.

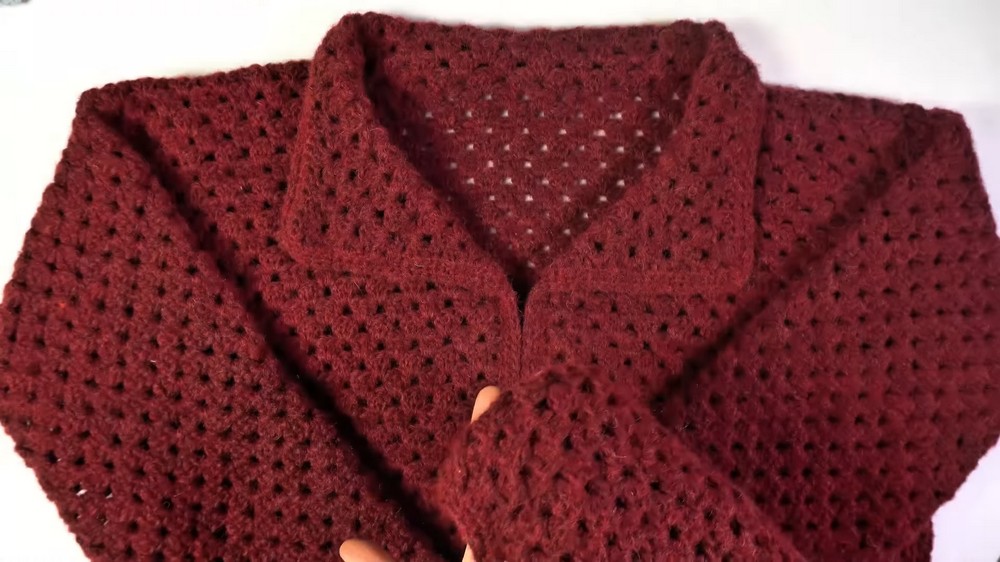
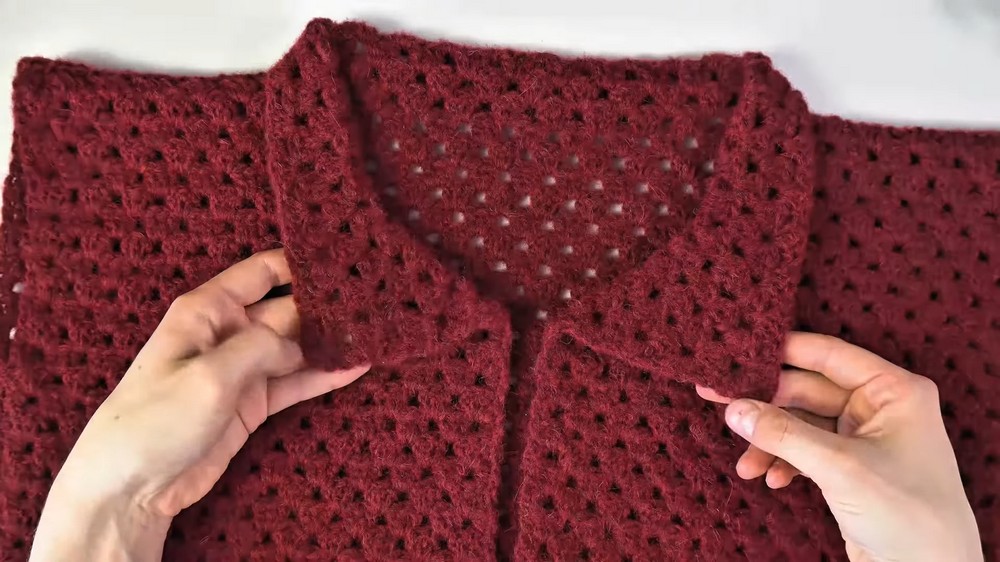
4. Collar
- Join Yarn at Top Edge:
- Start at the center back of the neckline by inserting your hook into a chain-2 space.
- Join with a slip knot, chain 2 (counts as a DC).
- Work Granny Stitch:
- Row 1: Extend granny clusters around the neckline. In “awkward” spaces, create clusters as evenly as possible for a cohesive design.
- Rows 2 & 3: Repeat the granny pattern, ensuring a neat and even appearance along the edges.
- Determine Collar Length:
- Add as many rows as desired to achieve the length of your collar. Fold over for a structured or “Peter Pan” collar.
5. Sleeves
- Join Yarn at Armhole Seam:
- Attach yarn at the bottom of the armhole (armpit area).
- Work Granny Stitch:
- Round 1: Work 3 DC clusters into the chain spaces around the armhole. Skip over seams.
- Slip stitch to join the round.
- Continue in Rounds:
- Repeat granny stitch rounds (Rows 2 and 3 repeat) until the sleeve reaches your desired length.
- Optional Cuffed Sleeve:
- Switch to single crochet.
- Work decreases (1 SC decrease every 4 stitches) gradually to taper the sleeve.
- Finish with a row of tight single crochet for a fitted cuff.
6. Bottom Hem and Border
- Single Crochet Hem:
- Join yarn to the bottom hem.
- Work 1 SC into each stitch across the bottom.
- Continue SC evenly along the sides and back.
- Complete 2-3 additional rows of single crochet for a polished, sturdy border.
Finishing Steps
- Weave in Ends:
- Use a tapestry needle to securely weave in all loose yarn ends.
- Blocking (Highly Recommended):
- Wet or steam block your cardigan to even out the stitches and improve the drape.
- Add Button (Optional):
- Sew a single button at the top of the cardigan or create buttonholes for multiple closures.
Final Words and Tips
- Experiment with Colors: Use scrap yarn or multiple shades for a vibrant, patchwork design.
- Adjust Fit: Customize by altering the foundation chains and row counts.
- Be Patient: Seam your panels carefully to maintain symmetry.
- Use Lightweight Yarn for Summer Versions: If creating this cardigan for warmer weather, switch to a size 3 lightweight yarn.
Leave a Reply