
Stitch a soft, charming handmade star with this Free crochet Stars Amigurumi Pattern perfect for gifts, décor, or playful keychains in minutes.
Making this adorable star is easier than it looks, and the results are instantly rewarding. Soft, plump, and full of charm, it works beautifully as a tiny plush, a keychain, or a cute addition to a baby mobile. Its simple, rounded shape gives it a friendly, huggable appearance, perfect for adding a touch of handmade magic to any space.
Easy Crochet Stars Amigurumi Pattern for Cozy Joy

The pattern uses basic crochet stitches like magic rings and single crochet, so beginners can finish a star quickly while enjoying a satisfying, creative project. You can choose any yarn color to match your style or mood—pastels for a dreamy nursery, bright shades for playful accents, or warm neutrals for cozy home décor.
Materials
Gather the following items to create your crocheted stars:
-
Yarn: 2 mm cotton yarn (the example uses the Amigurumi Círculo brand).
-
Crochet Hook: A 2.75 mm or 3 mm crochet hook.
-
Tools: A yarn needle for weaving in ends, scissors, stitch markers, and stuffing material (fiberfill or similar).
Uses
-
Decorations: Use the stars to decorate nurseries, baby cribs, or children’s rooms.
-
Craft Projects: Attach them to keychains or bags.
-
Embellishments: Use them as appliques to decorate blankets, bags, or clothing.
-
Amigurumi Detail: Incorporate them into larger amigurumi projects as accessories.
Level of Difficulty
Easy to Intermediate. You should be comfortable with basic stitches (Single Crochet and Slip Stitch) and the technique of crocheting in a spiral. The most crucial part is maintaining an accurate stitch count for the base and understanding the short-row technique used to create the points.
Tutor’s Suggestions
-
Yarn Recommendation: The cotton yarn used is recommended for a 2.5 mm to 4.5 mm hook, so using a 2.75 mm or 3 mm hook works well to keep the stitches tight for amigurumi.
-
Magic Ring: Use a double magic ring to start your base. This creates a secure center that is less likely to come undone.
-
Filling Technique: Stuff the star with the fiberfill before you completely close the last point. This makes the filling process easier and ensures an even, full shape.
-
Joining Pieces: When joining the two pieces with Single Crochet, work the stitches normally, but ensure you place an increase (two SC) at the tip of each star point for a neat turn and a well-defined point.
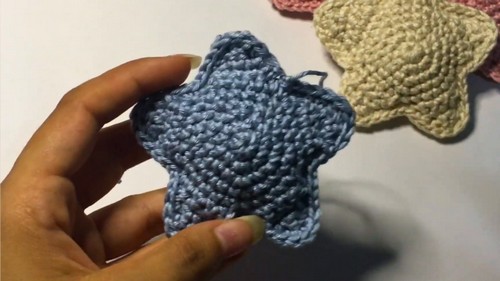
Crochet Stars Amigurumi

Once completed, these stars are soft, squeezable, and versatile. A small bunch can transform a shelf, create a fun gift set, or become charming charms for bags and keys.

Special Features
-
Five-Pointed Shape: The design achieves the classic five-pointed star shape using a simple method of short rows worked directly onto a circular base.
-
3D Amigurumi: The technique uses two identical flat pieces joined together and stuffed, resulting in a soft, 3D finished item.
-
Spiral Technique: The star base is crocheted in a continuous spiral, ensuring a seamless look before the points are added.

The project encourages creativity, provides a relaxing way to spend time, and results in a handmade piece full of character.

In just a short session, yarn and hook turn into a little star that’s visually delightful, functional, and fun.

Whether for gifting, decorating, or personal enjoyment, this project adds a sprinkle of joy and a dash of charm to everyday life.
Conclusion
You have successfully completed a sweet and soft Amigurumi Star! By carefully following the steps for the base and the short rows for the points, you have created a lovely, padded decoration that is ready to bring a touch of handmade charm to any space.
Tip
Before joining the two pieces, take a moment to lay them flat and stretch them gently. This small action helps ensure both pieces are exactly the same size and the edges align perfectly, which makes the final joining and stuffing process much smoother.
Leave a Reply