
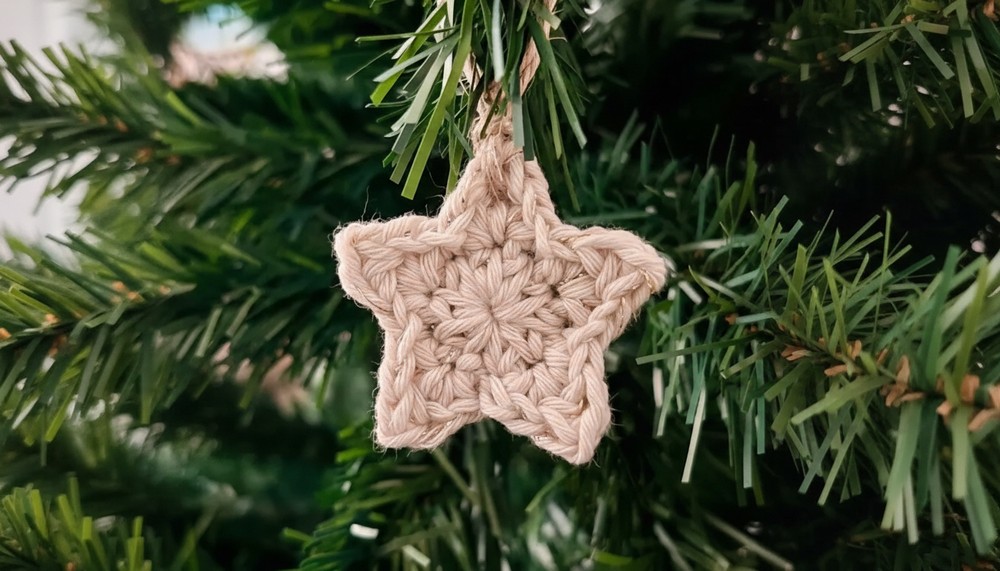
Learn The Easy Crochet Tree Star Pattern to Brighten Your Celebration
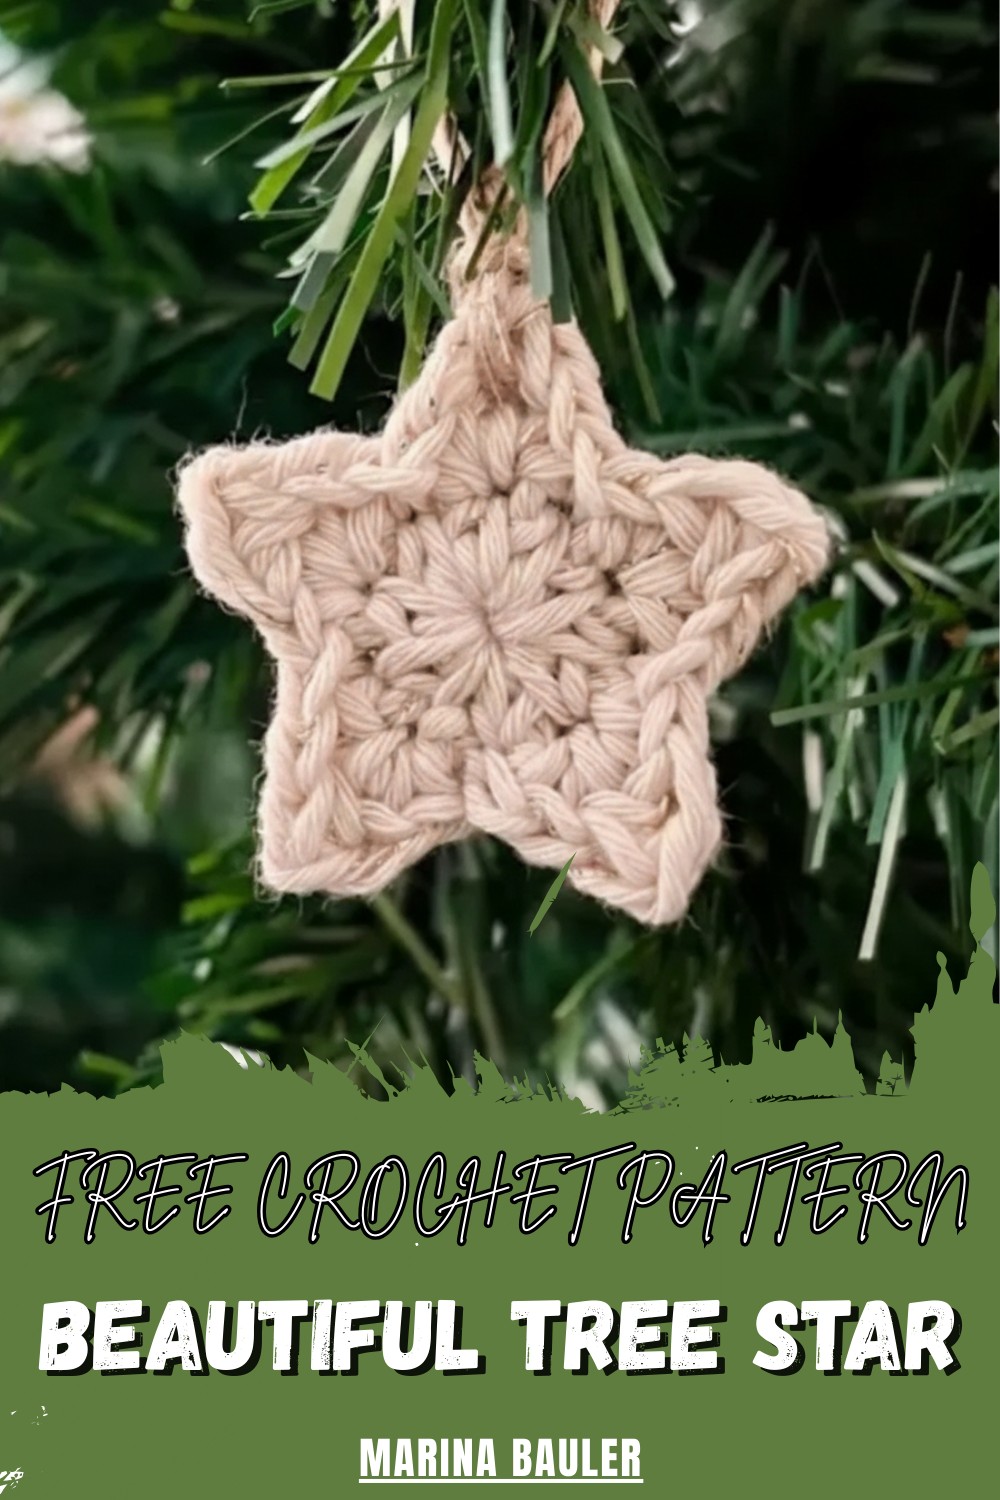
With its seamless pattern, the star’s soft texture and lightweight pattern make it perfect for hanging on a tree or displaying in various sizes as part of your seasonal décor. Personalizing the star with different colors or finishes enhances its charm, ensuring each piece is unique.
Keep your stitches tight and consistent for a neater finish, and consider adding a drop of fabric glue to secure knots. This timeless pattern ensures you’ll have a versatile, handmade holiday decoration that radiates warmth.
Materials Needed
- Yarn: Medium-weight yarn in your preferred color (e.g., gold, white, silver, or holiday colors). Cotton, acrylic, or sparkly yarn works well.
- Crochet Hook: Use the hook size recommended for your yarn (commonly 4mm to 5mm for this type of project).
- Tapestry Needle: For weaving in ends when finished.
- Scissors: For cutting the yarn.
- Optional: Embellishments like beads, sequins, or buttons for added decoration.
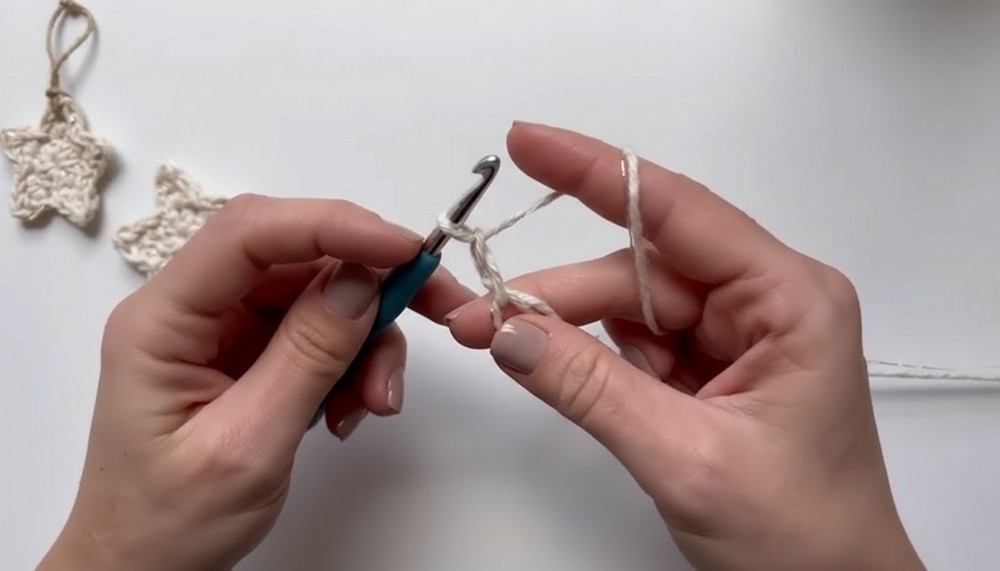
To begin, stitchers first crochet a magic ring, using two yarn types together for added strength and sparkle, though individual yarns work well too.
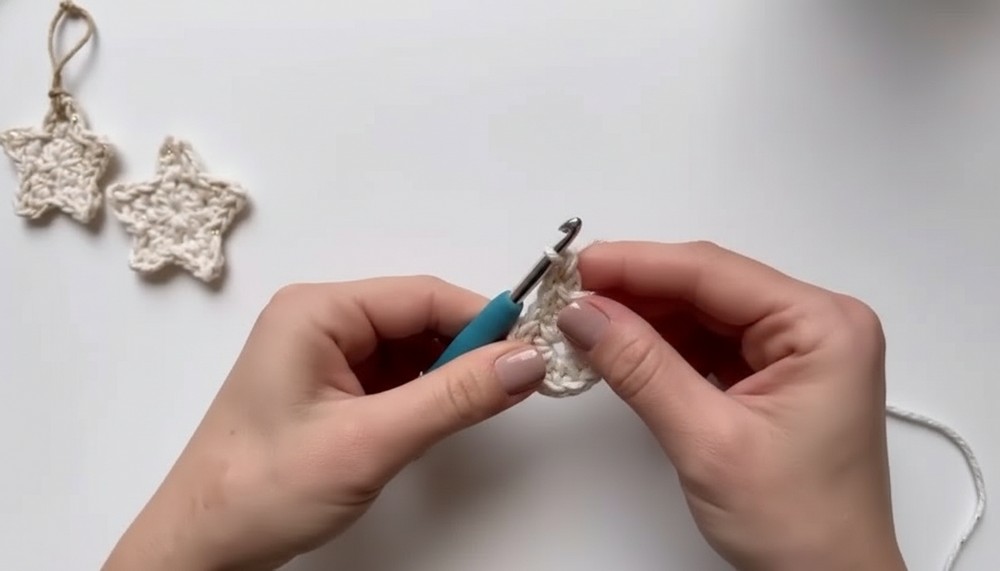
Inside the ring, make ten half-double crochets and tie off tightly to close the center. Next comes forming the star’s five points.Each point requires a single crochet, double crochet, and a carefully placed slip stitch, which gives the star its signature sharp edges.
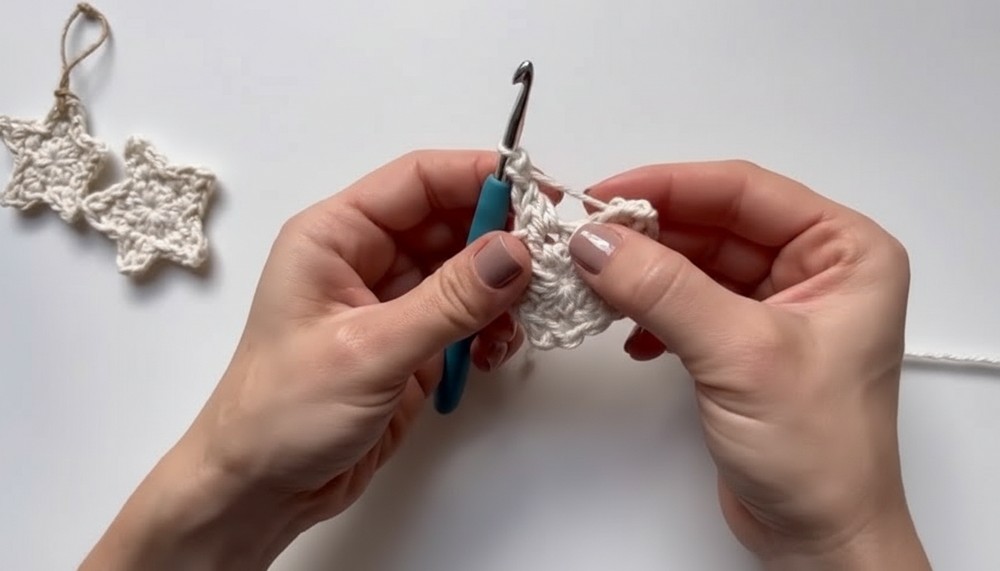
Repeating these steps ensures symmetry across all five points. The center hole is tightened further with the end yarn and neatly knotted from the back for a polished result.
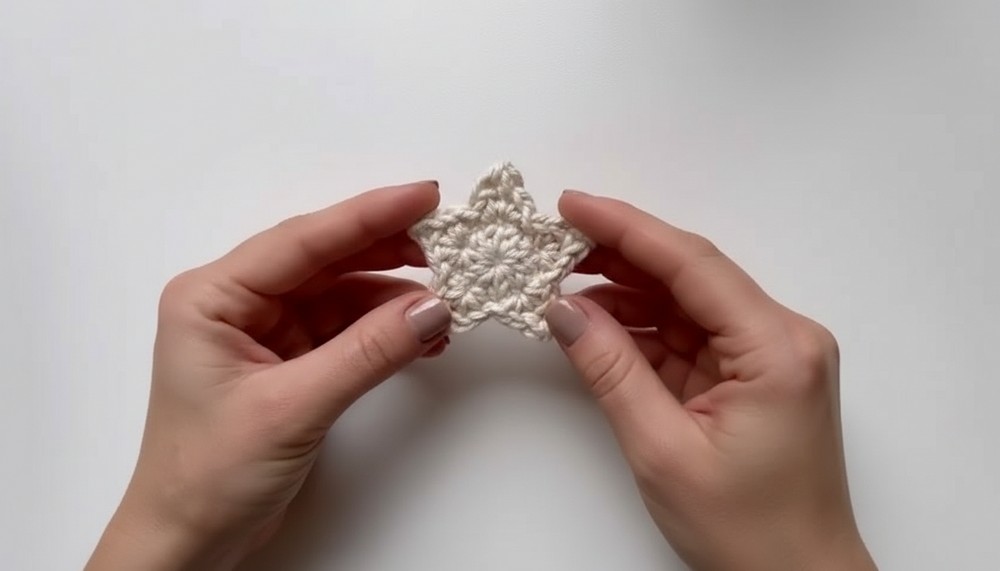
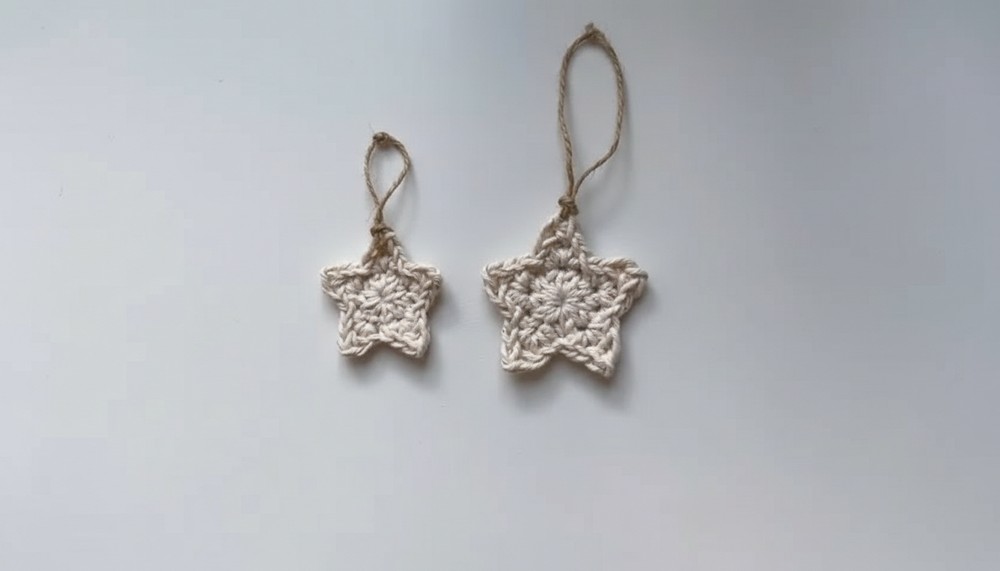
Add a loop made from thread or string to the top for hanging. Adjust the six-centimeter star’s size by using smaller or larger hooks and yarn types.
Special Features
- Customizable Size: You can adjust the star’s size to fit your needs by simply using thicker yarn or adding more rows.
- Quick and Easy: This pattern can be completed in under an hour, making it perfect for last-minute holiday decorations.
- Versatile Design: Use different colors, yarns, or embellishments to suit your festive style.
Level of Difficulty
Easy (Beginner-Friendly)
This pattern requires basic crochet skills, such as the ability to create chains, single crochet (sc), double crochet (dc), and slip stitches (sl st). No complex techniques are needed, making it ideal for beginners who want to try their hand at festive crochet projects.
Uses and Applications
- Christmas Ornaments: Hang the stars from your Christmas tree to create a homemade aesthetic.
- Star Toppers: Use larger yarn for a tree topper centerpiece.
- Gift Decoration: Attach small handmade stars to your gifts for a personal touch.
- Garlands: Combine multiple stars to crochet a beautiful garland.
- Holiday Crochets: Great for decorating holiday wreaths, shelves, or windows.
Tutor’s Suggestions
- Blocking Your Star for a Polished Look: If you want a crisp, professional look, block your star by laying it flat, lightly stretching it into shape, and pinning it down. Spray it with water and let it dry completely before using.
- For extra stiffness, coat the finished star in a light layer of fabric stiffener mixed with glue and water (optional for ornaments or toppers).
- If you’re adding embellishments like beads or sequins, sew or glue them onto the finished star for a little sparkle.
Tip
For a traditional holiday vibe, use red, green, or gold yarns. For a more modern, minimalist touch, opt for white, cream, or metallic shades like silver or rose gold. You can also create multicolor stars by changing yarn colors for each row or star point.
Step-by-Step Detail
Crocheted tree stars are a beautiful and decorative way to add a handmade touch to your holiday décor. These stars can be used as Christmas tree toppers, ornaments, or festive additions to gifts or garlands. In this tutorial, we’ll learn a step-by-step pattern of a simple crochet tree star that is beginner-friendly but also enjoyable for seasoned crocheters.
Conclusion
Crocheting a tree star pattern is a simple and fun way to personalize your holiday décor. This versatile project is not only beginner-friendly but also quick enough to make several stars in one sitting. Whether you’re decorating your tree, gifting handmade ornaments, or sprucing up your holiday home, this pattern is a festive way to celebrate the season with a crochety, heartfelt touch.
Leave a Reply