
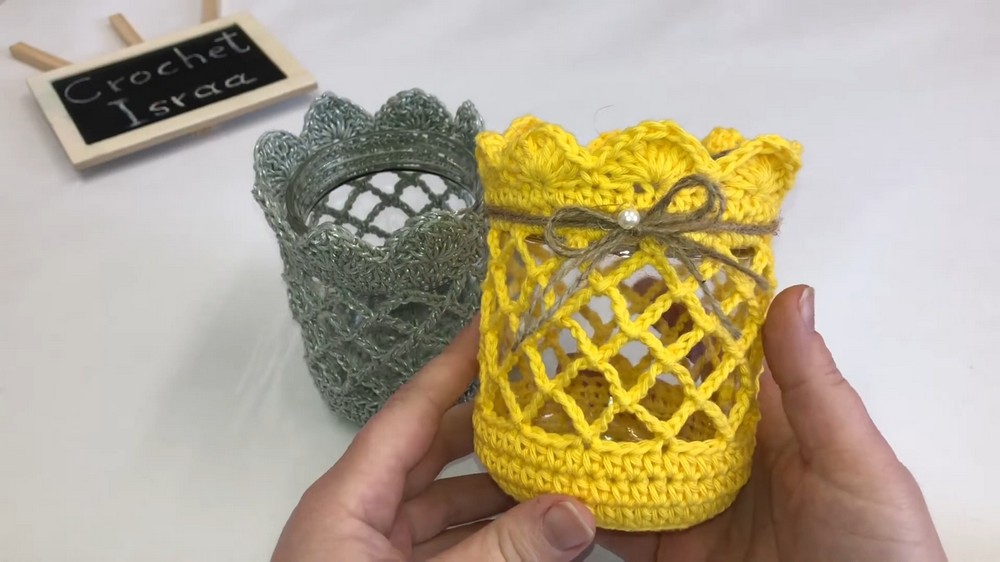
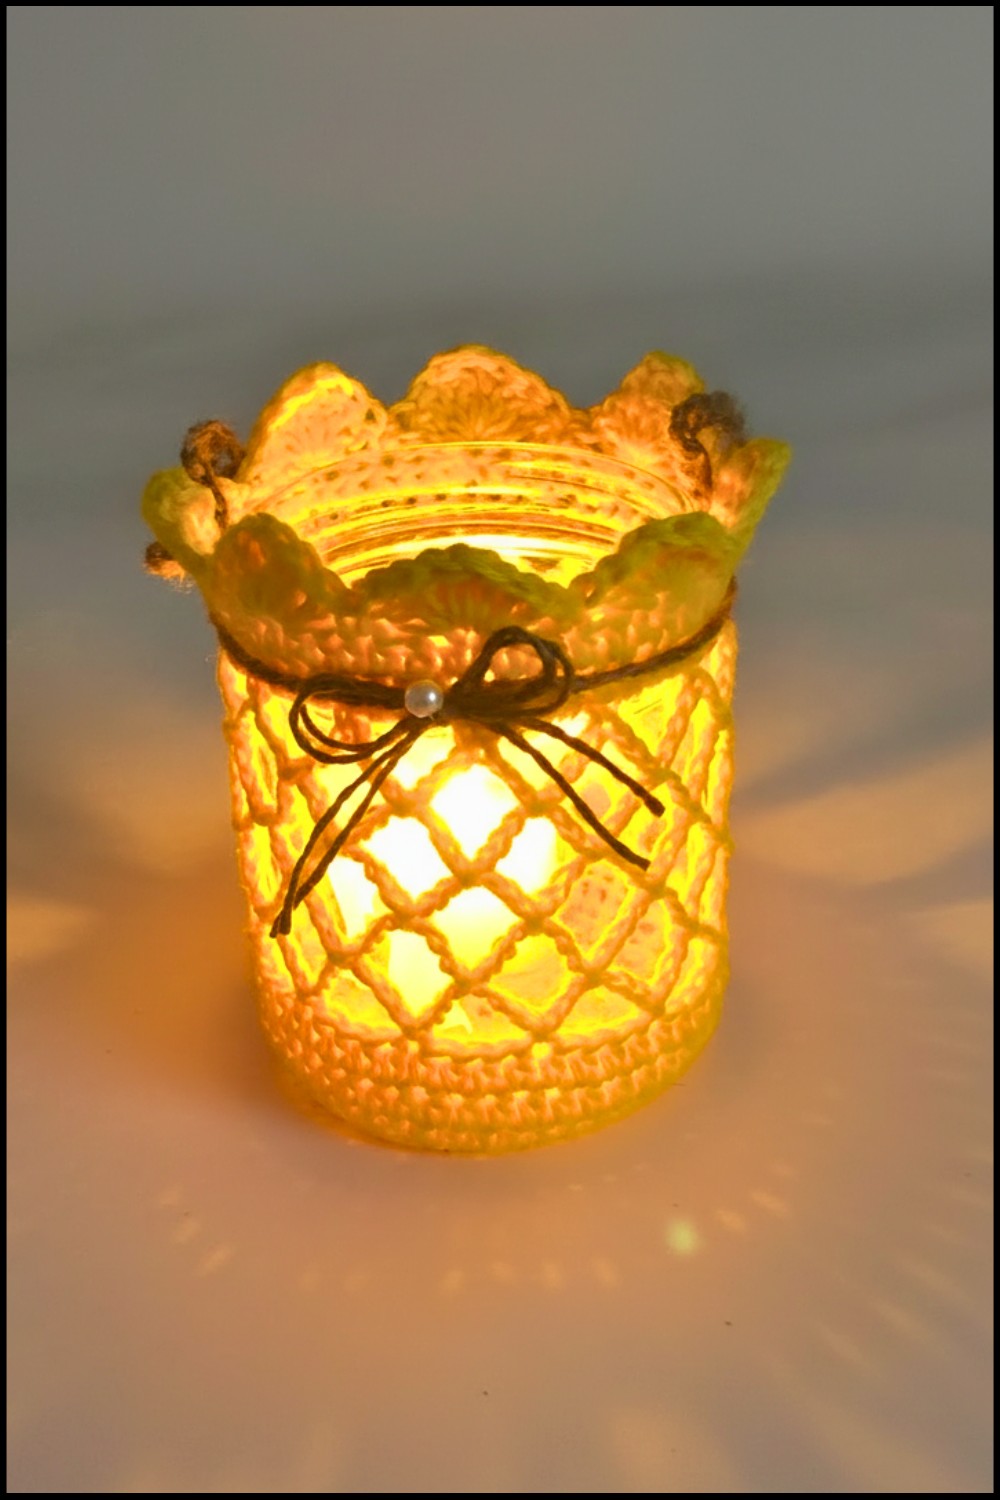
Light up your space with this crochet lantern pattern that fills any room with charm and unique style while offering a magical inviting vibe.
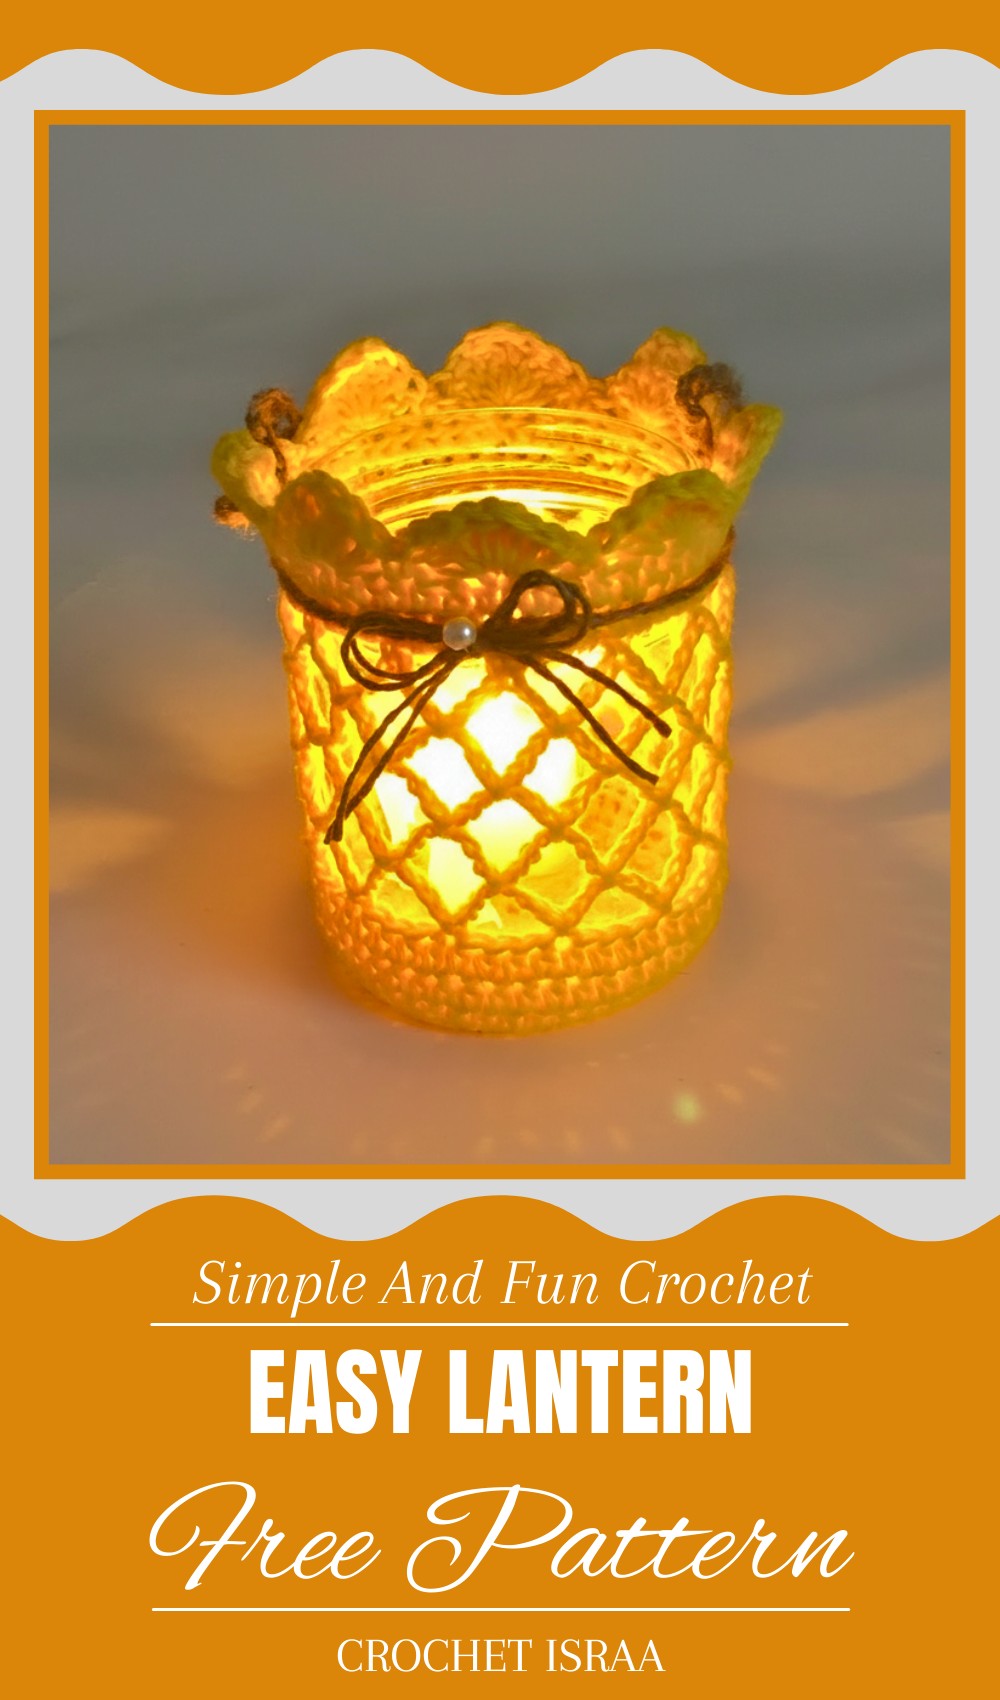
Transform any space into a haven of charm and warmth with the soft glow of a crochet lantern. A crochet lantern pattern is perfect for enhancing the ambiance—whether for an intimate dinner, a festive celebration, or simply adding a cozy touch to your home. The intricate crochet design casts delicate shadows, elevating the atmosphere and bringing a unique aesthetic. It can be displayed on a patio, used as a centerpiece, or incorporated into seasonal decor.
Dream crochet lantern pattern for lighting that stands out
Fully customizable, you can select your preferred colors, size, and design to suit your style or theme. Aside from being visually stunning, this lantern is reusable, making it an eco-friendly option for decor. Providing both style and functionality, this elegant piece can transform everyday spaces into something exceptional. Perfect for any occasion, it adds a lasting impression to the setting.
Materials
- Yarn:
- Cotton yarn, 100%
- Hook: 3.5 mm crochet hook
- Notions:
- Scissors
- Stitch markers (optional)
- Optional Items:
- Glass jar with dimensions:
- Height: 9.5 cm
- Diameter: 6.5 cm
- Candle
- Glass jar with dimensions:
Skill Level
Intermediate: This pattern involves working in rounds, back loop stitches, treble crochet, and patterns requiring stitch placement precision.
Key Abbreviations
- ch: Chain
- sl st: Slip Stitch
- sc: Single Crochet
- hdc: Half Double Crochet
- dc: Double Crochet
- tr: Treble Crochet
Note: Pattern uses US crochet terminology. Count stitches carefully in each round to ensure accuracy.
Special Notes
- Select a glass jar size that fits the given pattern or adapt the number of rounds accordingly.
- For a secure handle and neat edges, ensure your tension stays consistent throughout the pattern.
- Mark the first stitch of each round as needed for clarity when joining with slip stitches.
Pattern Instructions
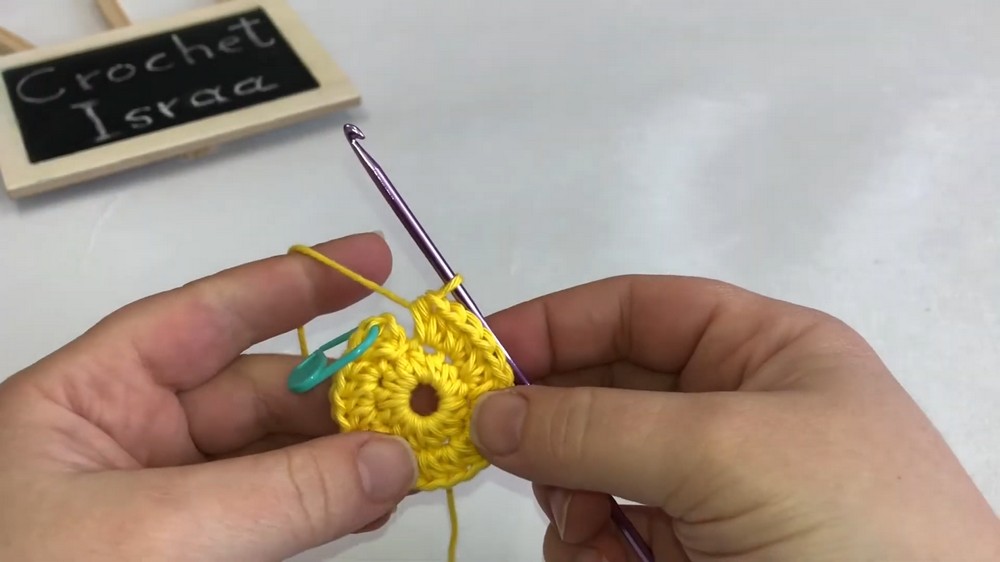
Step 1: Base
- Begin with a magic circle; work 2 ch inside the circle.
Round 1:
- Work 12 hdc inside the circle. Tighten the circle.
- Join with a sl st in the first stitch.
Round 2:
- Ch 2.
- Work 2 hdc (increase) into the same stitch.
- Work 2 hdc in each stitch around. (24 hdc)
- Join with a sl st in the first stitch.
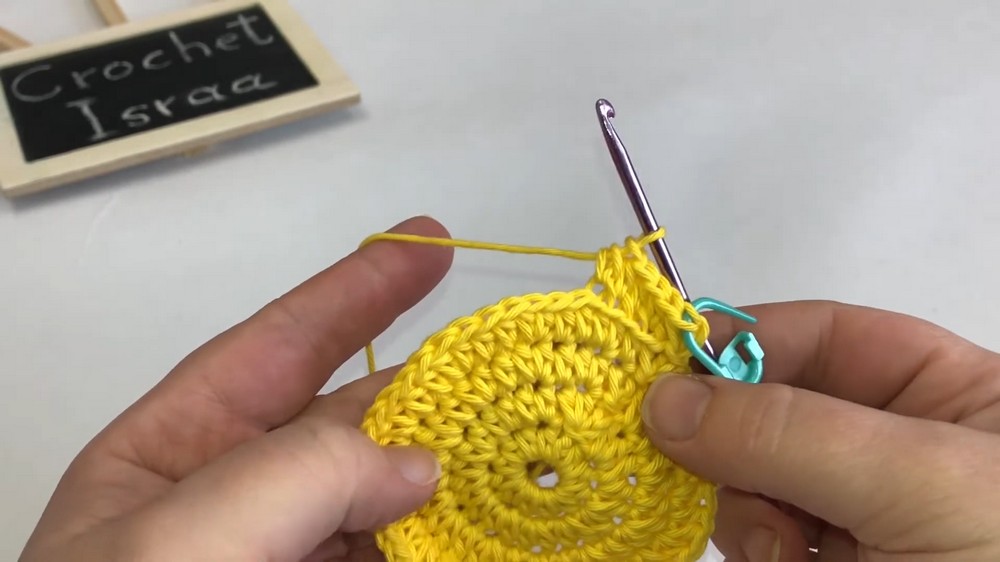
Round 3:
- Ch 2.
- Work 1 hdc into the same stitch.
- In the next stitch, work 2 hdc (increase).
- Repeat: 1 hdc in next stitch, 2 hdc in the next stitch around. (36 hdc)
- Join with a sl st in the first stitch.
Round 4:
- Ch 2.
- Work 1 hdc into the same stitch.
- In the next stitch, work 1 hdc.
- In the third stitch, work 2 hdc (increase).
- Repeat: 1 hdc in next two stitches, 2 hdc in the third stitch around. (48 hdc)
- Join with a sl st in the first stitch.
Step 2: Body
Round 5:
- Ch 2.
- Work 1 hdc into the same stitch.
- Work 1 hdc into each stitch in the back loop only. (48 hdc)
- Join with a sl st in the first stitch.
Rounds 6-7:
- Ch 2.
- Work 1 hdc into the same stitch.
- Work 1 hdc in each stitch.
- Join with a sl st in the first stitch.
Round 8:
- Ch 7.
- Skip 3 stitches.
- Work sl st in the fourth stitch.
- Repeat: Ch 7, skip 3 stitches, sl st into the fourth stitch around.
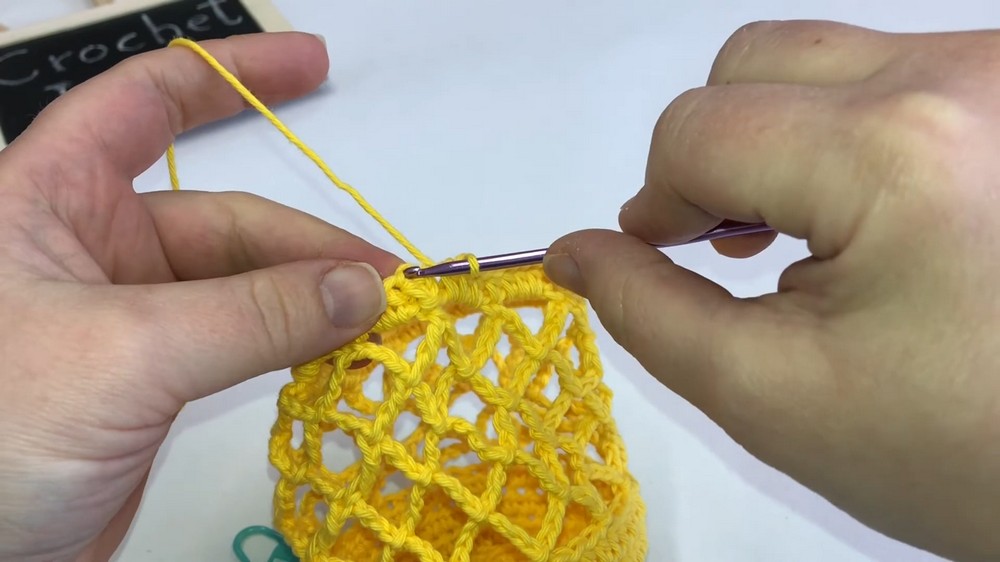
Step 3: Trellis Design
Rounds 9-12:
- Ch 7.
- Sl st into the next 7-ch space.
- Repeat: Ch 7, sl st into the next 7-ch space around.

Round 13:
- Ch 4.
- Skip 3 chains.
- Work sc into the fourth chain.
- Repeat: Ch 3, skip 3 chains, sc into the fourth chain around.
- Join with a sl st in the first chain.
Round 14:
- Ch 2.
- Work 1 hdc into the same stitch.
- In the 3-ch space, work 3 hdc.
- Work 1 hdc over the sc.
- Repeat: 3 hdc in the next 3-ch space, 1 hdc over the sc around. (48 hdc)
- Join with a sl st in the first stitch.
Round 15:
- Ch 2.
- Work 1 hdc into the same stitch.
- Work 1 hdc in every stitch around.
- Join with a sl st in the first stitch.
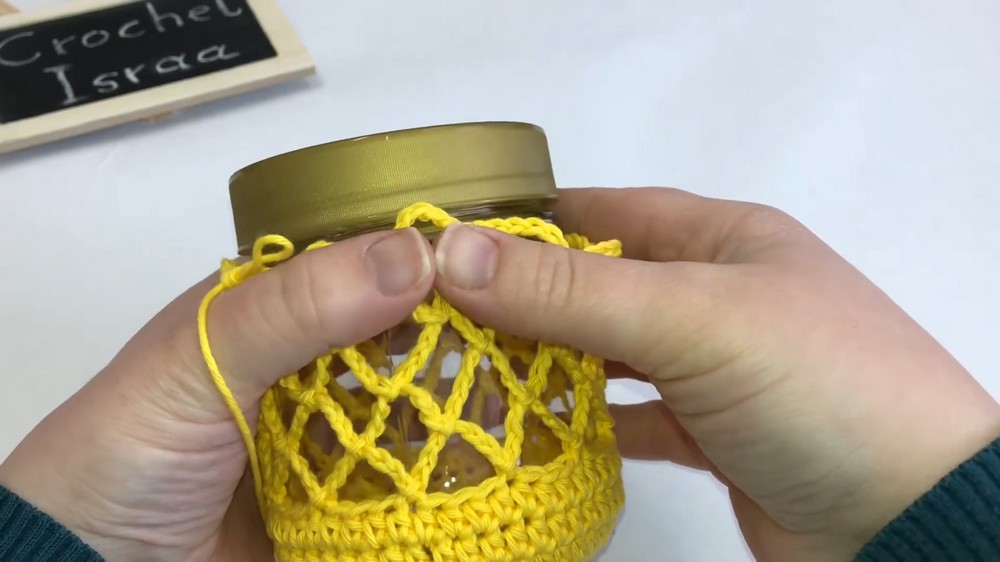
Step 4: Decorative Edge
Last Round:
- Ch 1.
- Work 1 sc into the same stitch.
- Skip 2 stitches.
- In the third stitch, work:
- 3 dc
- 2 tr
- 3 dc
- Skip 2 stitches.
- In the third stitch, work 1 sc.
- Repeat the process to the end of the round.
- Join with a sl st in the first stitch.
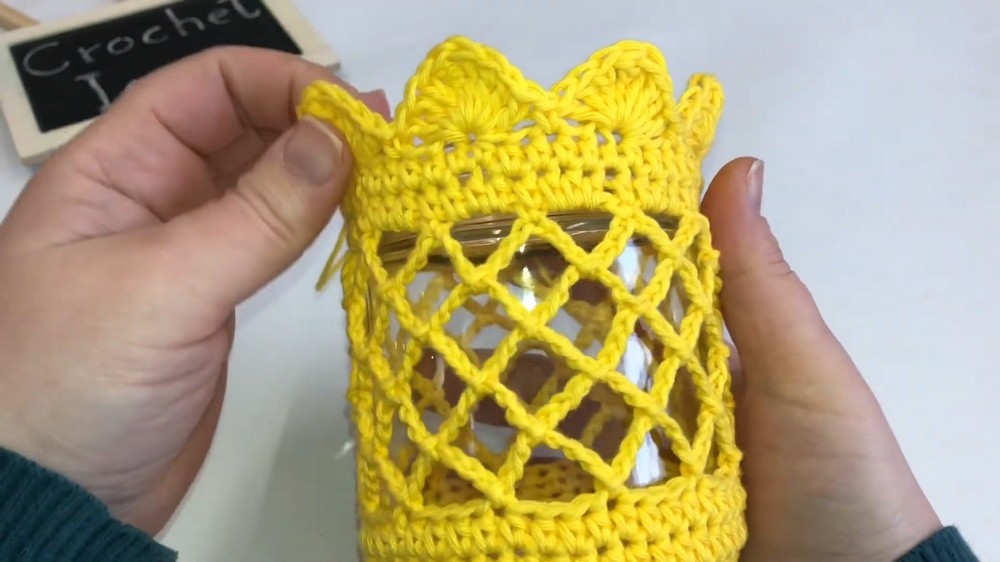
Step 5: Finishing
- Fasten off and cut your yarn.
- Weave in all loose ends.
- Place the completed crochet cover on the glass jar and ensure a snug fit.
Tips for Success
- Tighten stitches if using thinner yarns to ensure the cover hugs the jar tightly.
- To adapt the pattern for larger jars, increase evenly in the base rounds for a wider diameter.
Pattern Corrections
- If you notice loops are uneven in the trellis design, ensure to count stitches properly so that skipped stitches remain consistent.
Conclusion
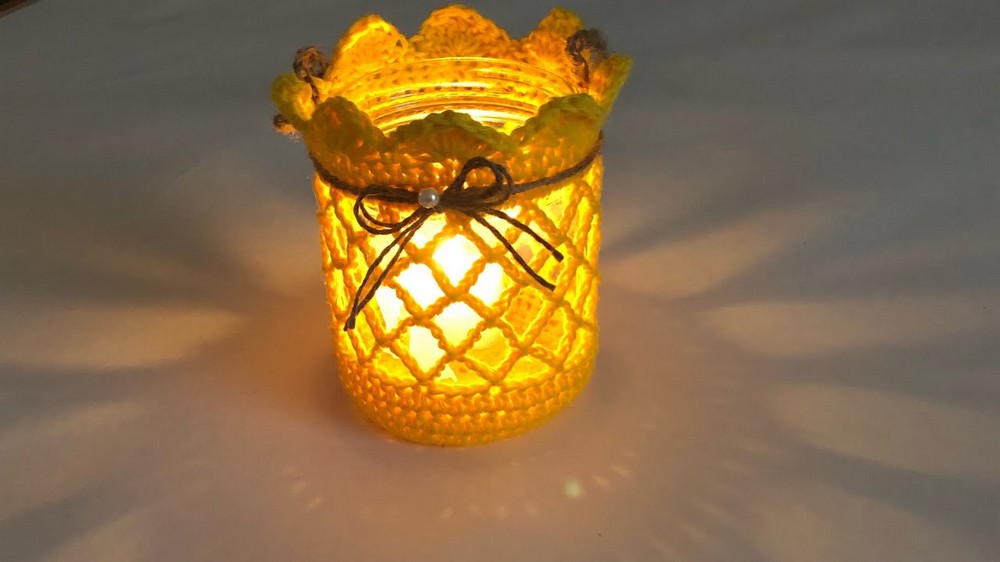
Your crochet candle holder/jar cover is complete! With its beautiful design and functional handle, this crochet piece adds a perfect glow to your home décor. Whether you gift it or keep it for yourself, it’s sure to make a lasting impression.
Leave a Reply