
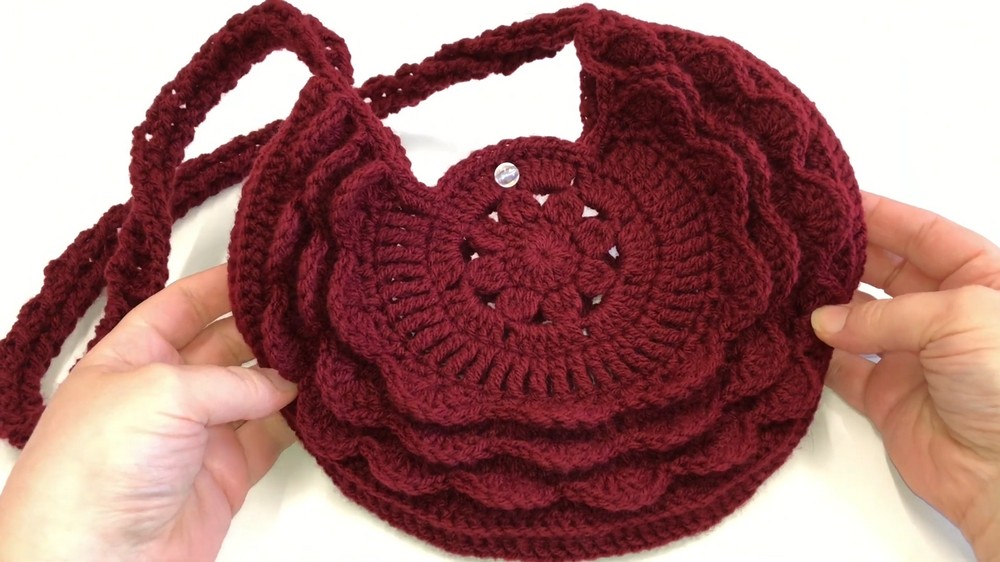
Experience the joy of making with crochet bag pattern that’s for organizing your essentials while adding a touch of creativity to your style.
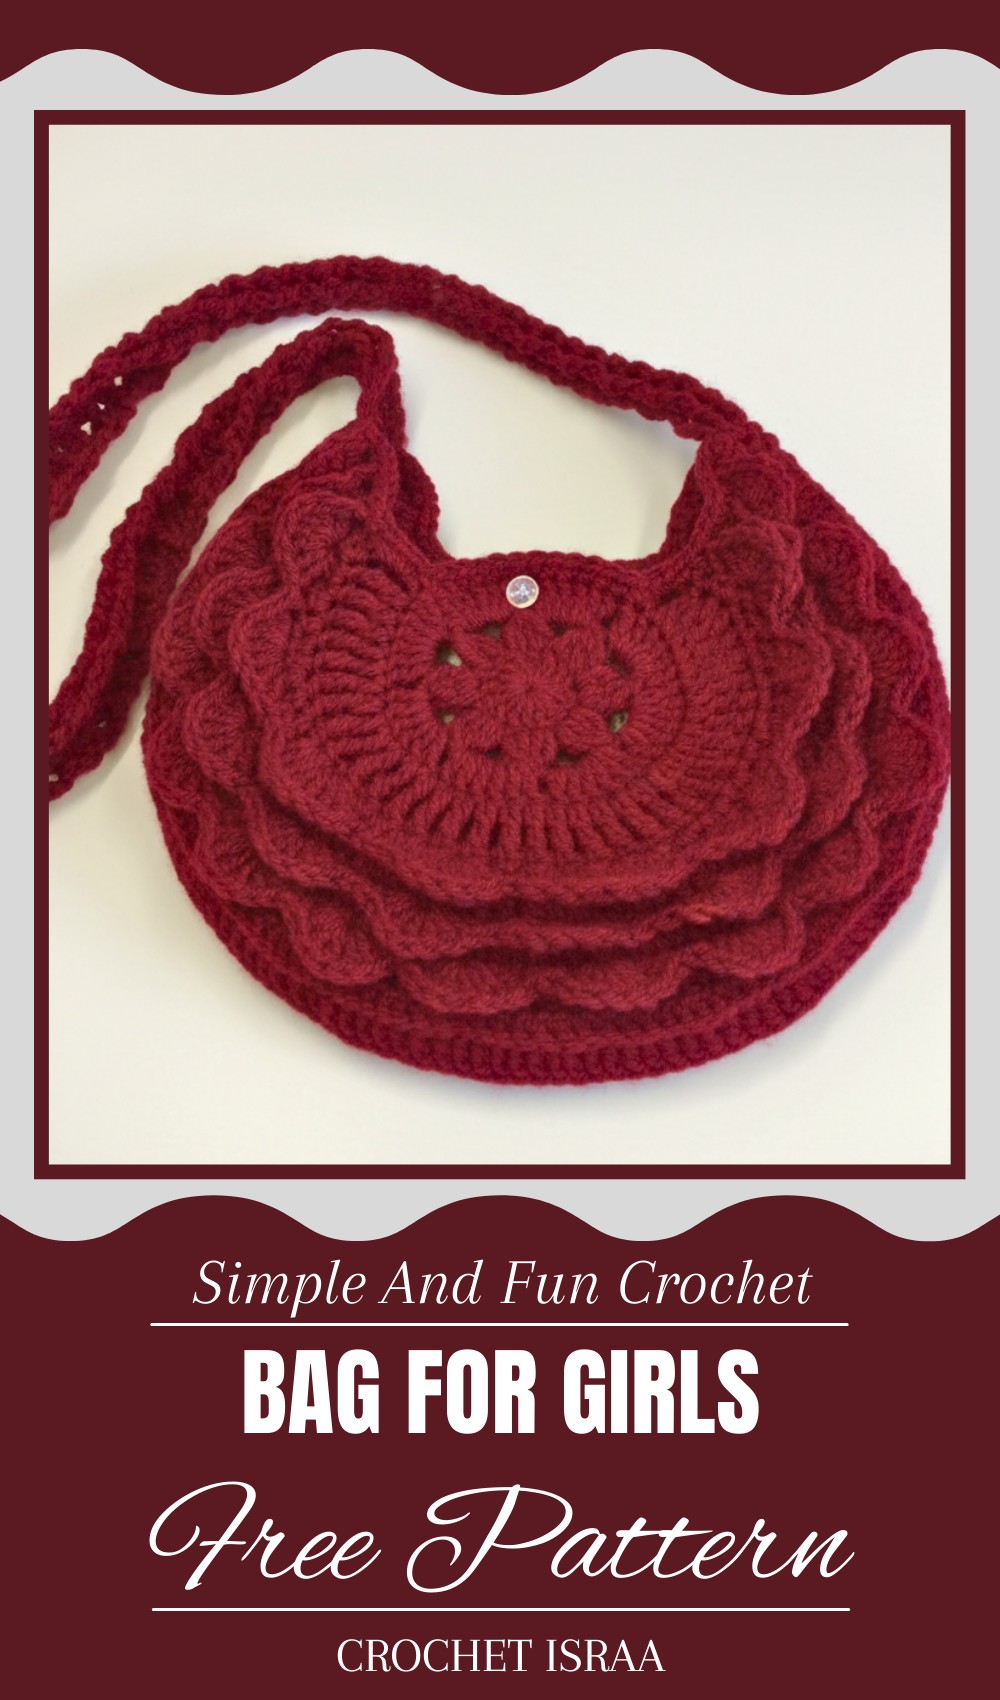
Looking for a beautiful and practical way to express your creativity? A crochet bag pattern is the perfect solution! This stunning bag combines functionality with style, making it ideal for any occasion. Whether you’re heading out for a casual day, a quick shopping trip, or even a beach outing, it’s perfect for carrying essentials like your keys, wallet, and small accessories.
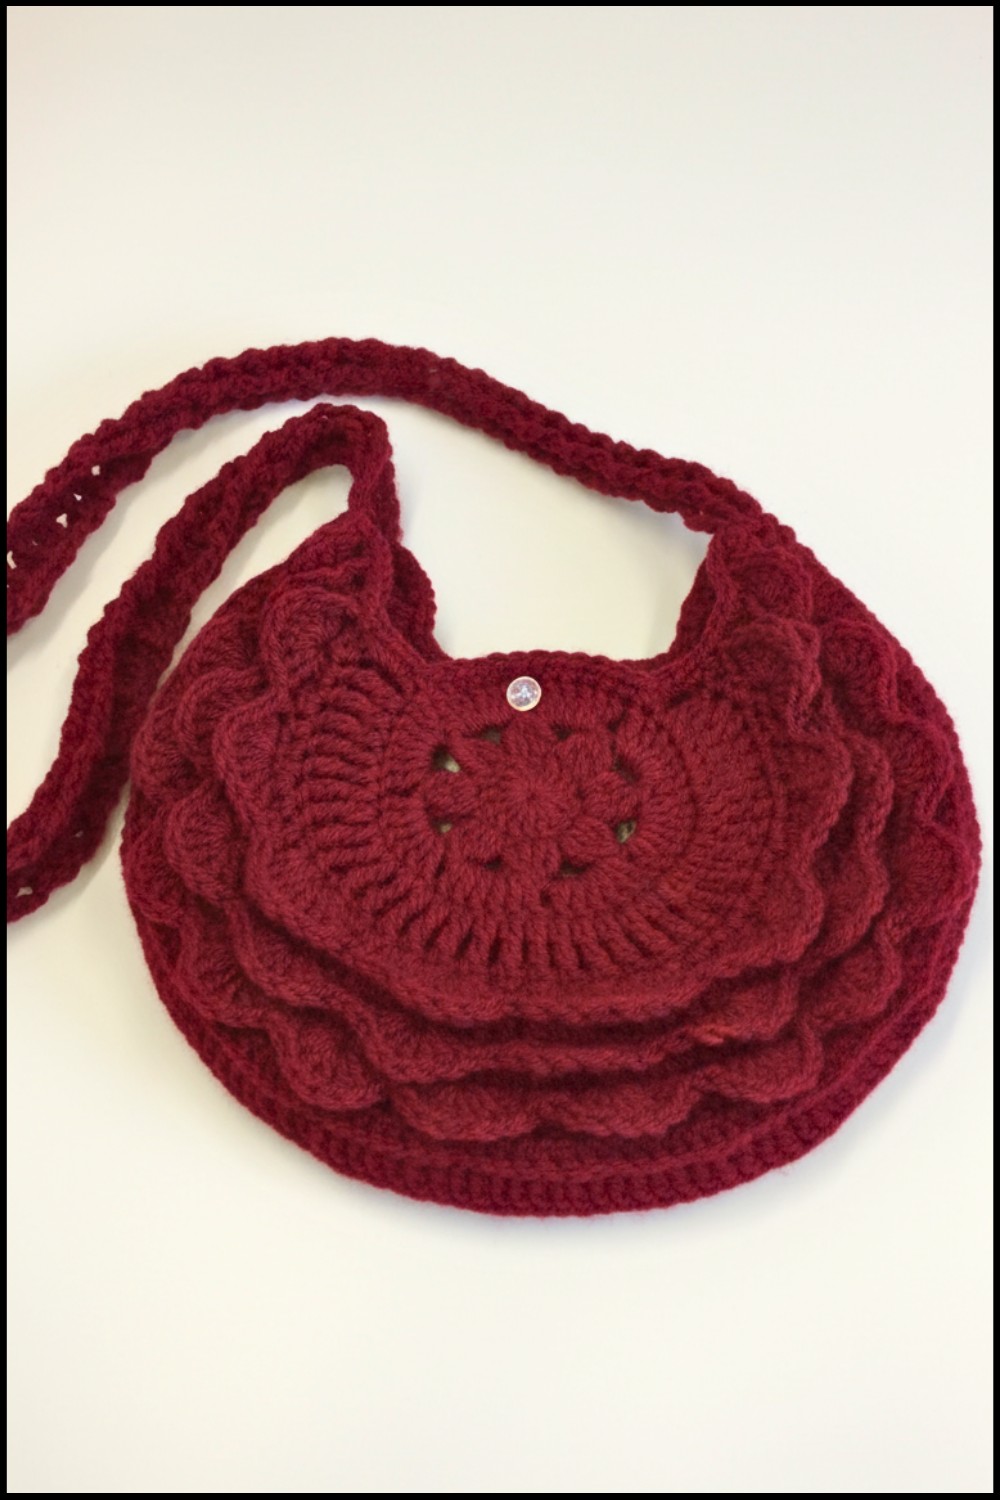
Must-Try Crochet Bag Pattern for Every Handmade Lover
Its handmade charm and soft, durable texture add a unique touch to your personal style, while customizable designs let you choose colors and sizes that match your taste. Not only is it practical, but it also makes a thoughtful gift for someone special, filled with personality and love. From simple designs to intricate details, this bag fits perfectly into any wardrobe and setting. Enjoy the beauty and versatility of this wonderful creation that is as stylish as it is functional!
Crochet Bag / Purse Pattern
Materials Needed
- Yarn: 100% Cotton (Lightweight or DK yarn recommended).
- Hook: 4.0 mm crochet hook.
- Notions:
- Scissors.
- Tapestry needle for sewing ends.
- Silicone glue or sewing thread for attaching decorations (if using).
- A pearl or button (optional).
Skill Level
Intermediate: This project involves working in rounds, cluster stitches, shaping, and creating post-stitches.
Key Abbreviations
- ch: Chain.
- sc: Single Crochet.
- hdc: Half Double Crochet.
- dc: Double Crochet.
- tr: Treble Crochet.
- sl st: Slip Stitch.
- inc: Increase — work 2 stitches into the same stitch.
- bpdc: Back Post Double Crochet.
- fpdc: Front Post Double Crochet.
- Cluster Stitch: Yarn over, insert hook, pull through, yarn over, pull through 2 loops. Repeat until there are 4 loops on the hook, yarn over and pull through all loops.
Special Notes
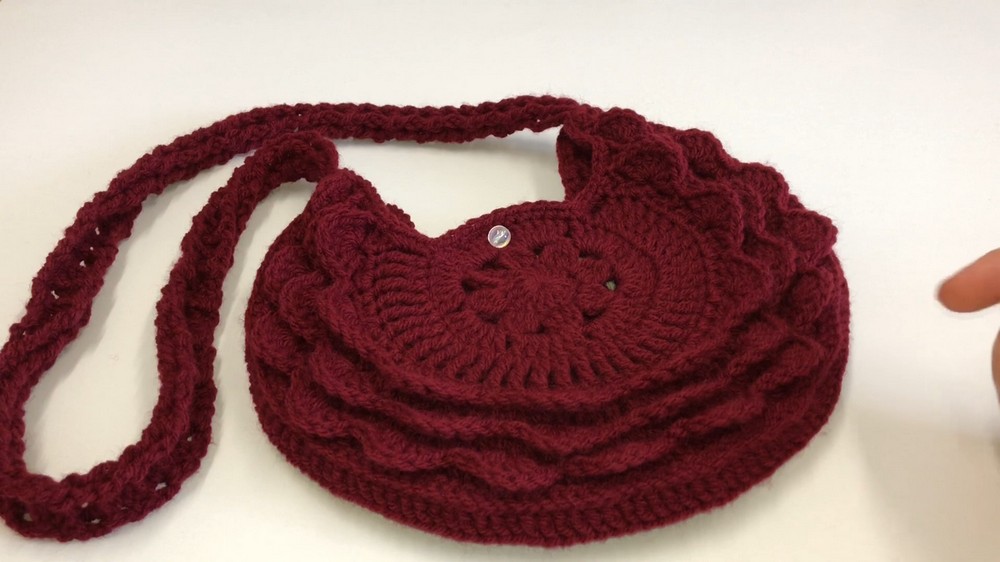
- The bag is made in two identical pieces and then sewn together.
- Test your tension to ensure proper shaping and symmetry.
- Use stitch markers if necessary to track the start of rounds or pattern repeats.
Pattern Instructions
Step 1: Bag Body – First Side
Foundation:
- Start with a slip knot.
- Ch 7, and join with a sl st to form a circle.
Round 1:
- Ch 3 (counts as the first dc).
- Work 15 dc into the circle.
- Including the starting chain, you should have 16 stitches total.
- Join with a sl st in the first chain 3.
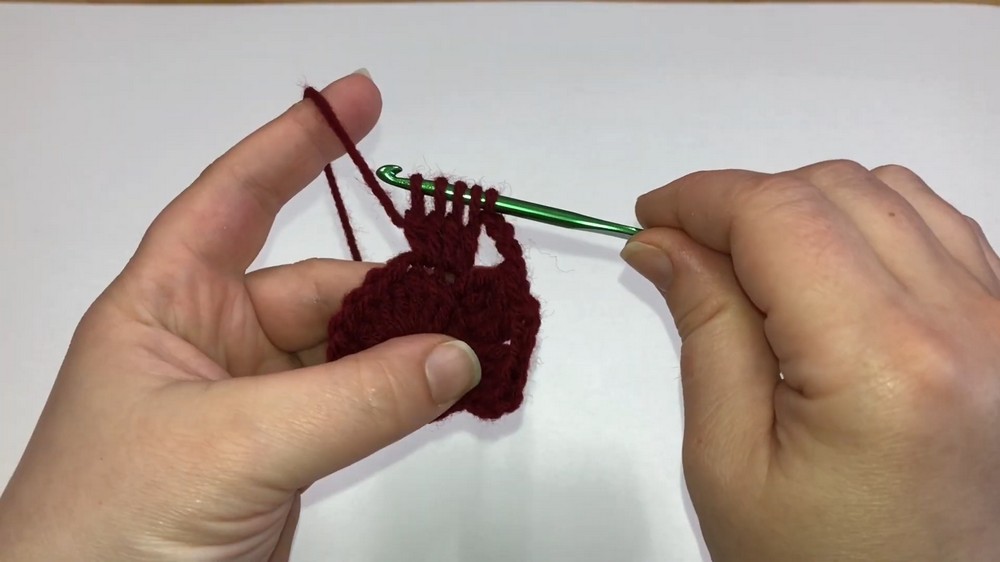
Round 2:
- Ch 3.
- Work a Cluster Stitch in the same stitch and the next stitch.
- Ch 4, then work Cluster Stitches in every 2 stitches around.
- Ch 4 between each Cluster Stitch group.
- Join with a sl st in the first stitch to complete the round.
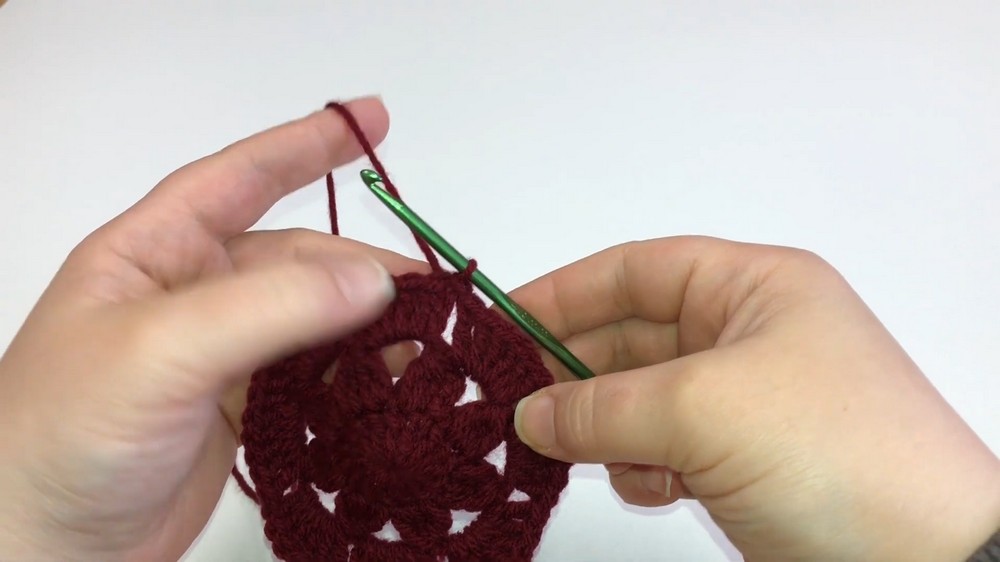
Round 3:
- Make a sl st, then ch 3.
- In each ch-4 space, work 6 dc.
- Continue working 6 dc in each ch-4 space around.
- Join with a sl st in the first chain 3.
Round 4:
- Ch 4 (counts as the first tr).
- Work 1 tr in each stitch around.
- Skip the last 12 stitches to leave an opening for the top of the bag.
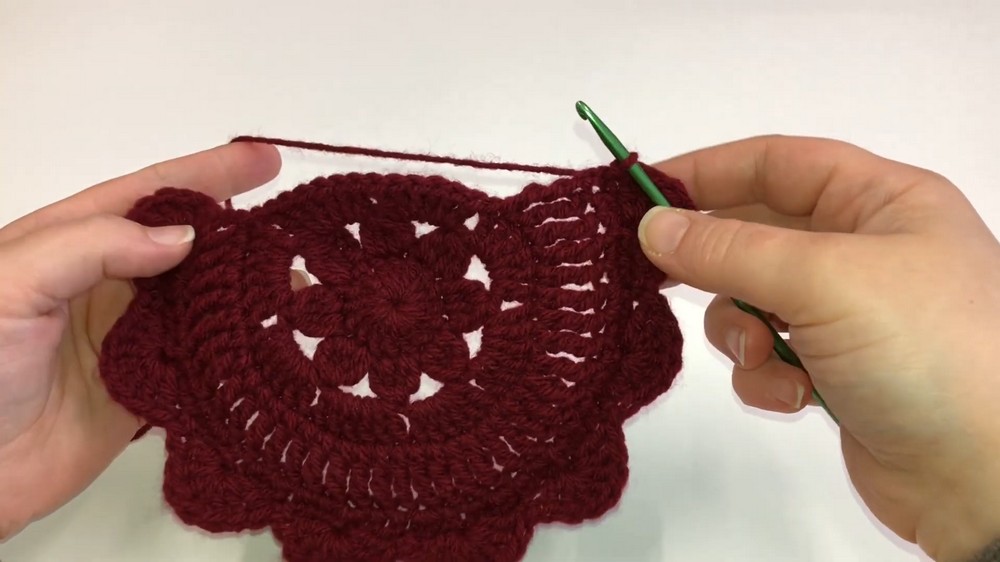
Step 2: Creating the Bag Flap
Round 5:
- Ch 2, turn your work.
- Work 1 hdc in the next stitch.
- In the next stitch, work hdc inc.
- Work 1 hdc in the next 2 stitches.
- In the third stitch, work hdc inc.
- Repeat this sequence (1 hdc for 2 stitches, hdc inc) to the end of the round.
Round 6:
- Ch 1, turn your work.
- Skip the first 2 stitches.
- In the third stitch, work 7 dc.
- Skip the next 2 stitches, and work a sc in the third stitch.
- Repeat (7 dc in the third stitch, sc in the third stitch) to the end of the round.
Round 7:
- Ch 3, turn your work.
- In the next stitch, work 1 dc.
- In the subsequent stitch, work dc inc.
- Work 1 dc in the next 2 stitches, and then dc inc in the third stitch.
- Repeat this sequence (1 dc in 2 stitches, dc inc) to the end of the row.
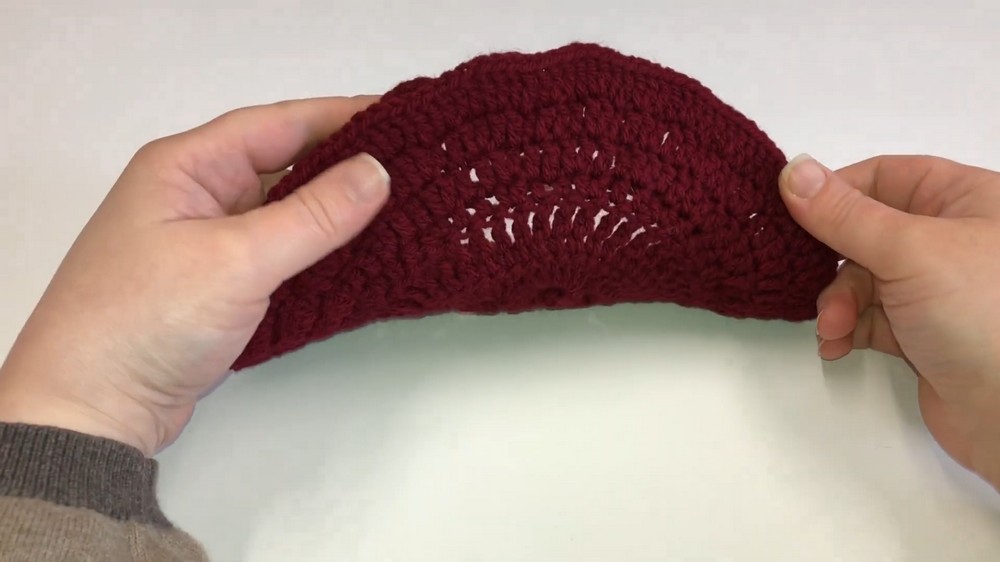
Round 8-11:
Repeat Rounds 6 and 7, alternating between the two.
Last Round:
- Ch 3, turn your work.
- Work 1 bpdc in each stitch around, creating a textured edge for the flap.
- Fasten off and cut your yarn.
Step 3: Second Side
Repeat Steps 1 and 2 to create the second identical side of the bag.
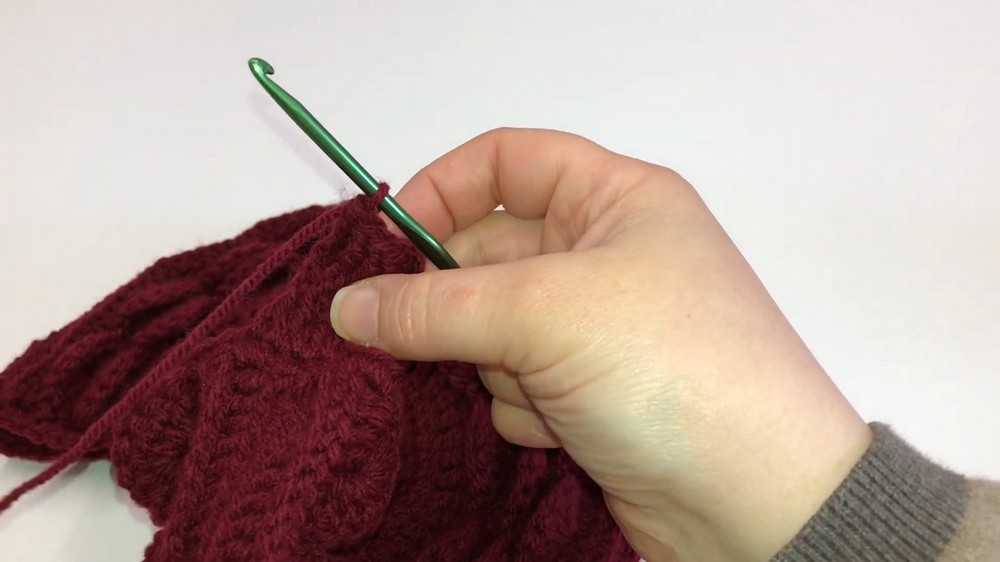
Step 4: Assembly
- Sewing the Two Sides: Place the two pieces together and sew along the edges using a tapestry needle or sl st around the edges with yarn. Leave the top flap open.
- Edging:
- Insert your hook at any point along the edge.
- Ch 1, then work 1 sc in each stitch, including:
- 2 sc in the dc spaces.
- 3 sc in the treble spaces.
- Continue around the edge. Join with a sl st in the first stitch to close.
Step 5: Handle
Row 1:
- Ch 3, then work 1 dc in the next 4 stitches.
- Turn your work.
Row 2:
- Ch 3, then work 1 bpdc in the next 4 stitches.
- Turn your work.
Row 3:
- Ch 3, then work 1 fpdc in the next 4 stitches.
- Turn your work.
Repeat Rows 2 and 3 until the handle reaches your desired length. Fasten off and attach the handle securely to the bag.
Tips for Success
- Use a stitch marker to track the start and end of rounds.
- Keep an even tension throughout for symmetry.
- Personalize the bag with accessories like beads, buttons, or pearls.
Conclusion
Congratulations on completing your crochet bag/purse! This easy yet stylish bag makes a great accessory for everyday use or as a gift. The addition of textured stitches in the body and flap give it a unique finish. Experiment with colors, yarn types, or embellishments to make it your own.
Pattern Corrections
- Ensure you count stitches carefully in the flap to maintain the correct shaping. Use flat blocking if needed to smooth any curling edges before assembly.
Leave a Reply