
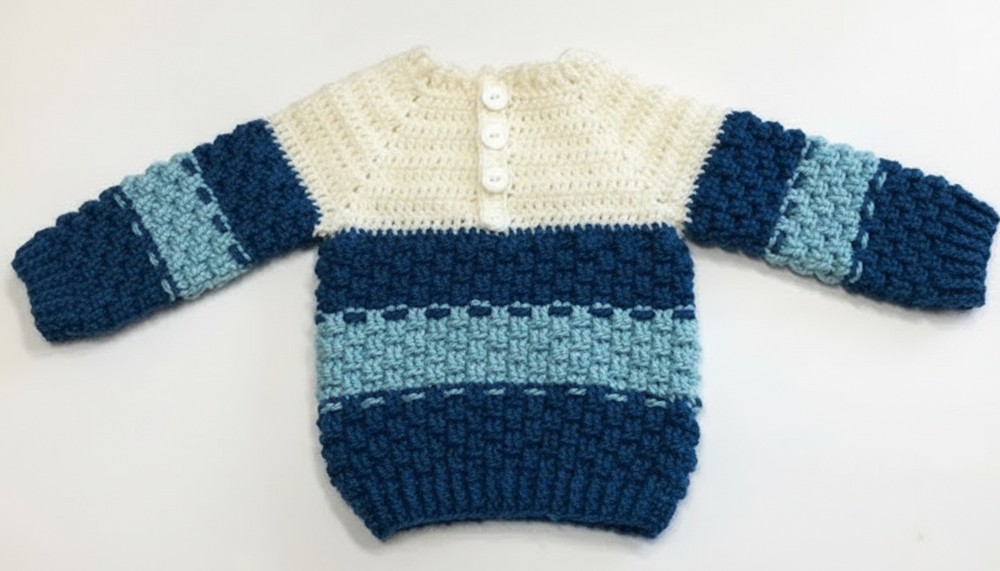
Step into cozy comfort with this easy-to-follow crochet pullover pattern that combine style and warmth for everyday wear in all seasons.
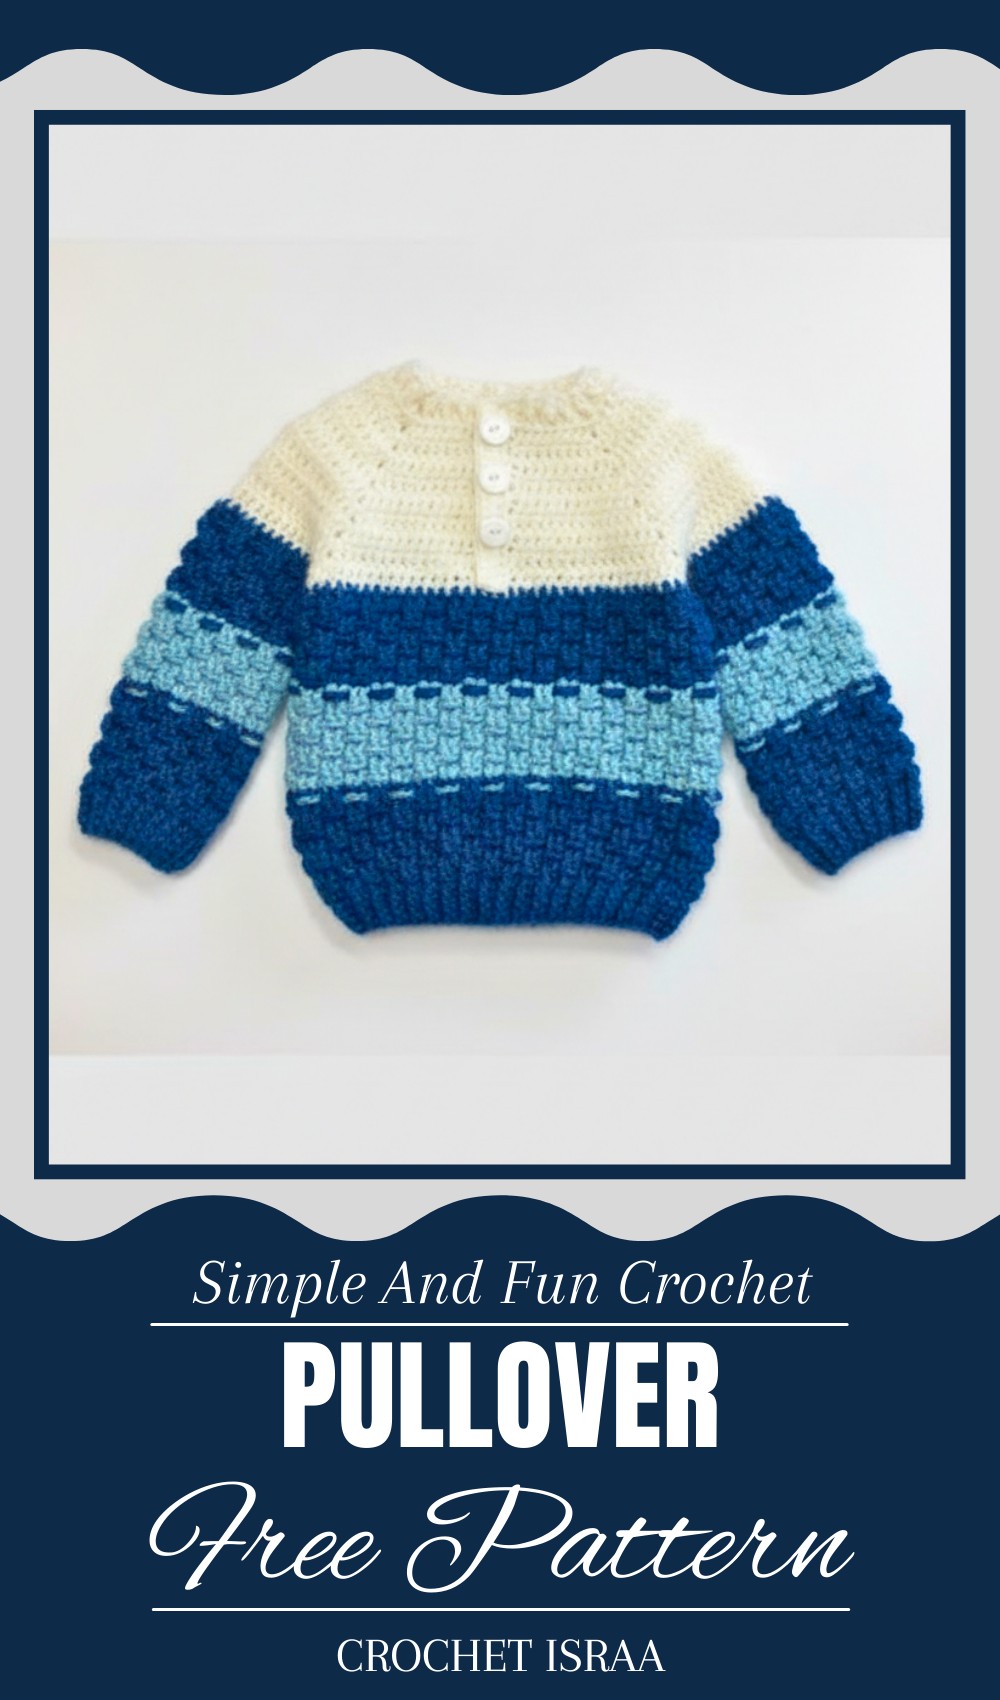
What could be more delightful than enveloping yourself in something cozy and stylish? A crochet pullover offers just that—a blend of comfort and elegance that suits any occasion perfectly. Whether it’s for a casual outing, a relaxing evening indoors, or a brisk morning walk, these pullovers fit seamlessly into everyday life. With their intricate designs and soft textures, they transform simple threads into wearable art that is both functional and beautiful.
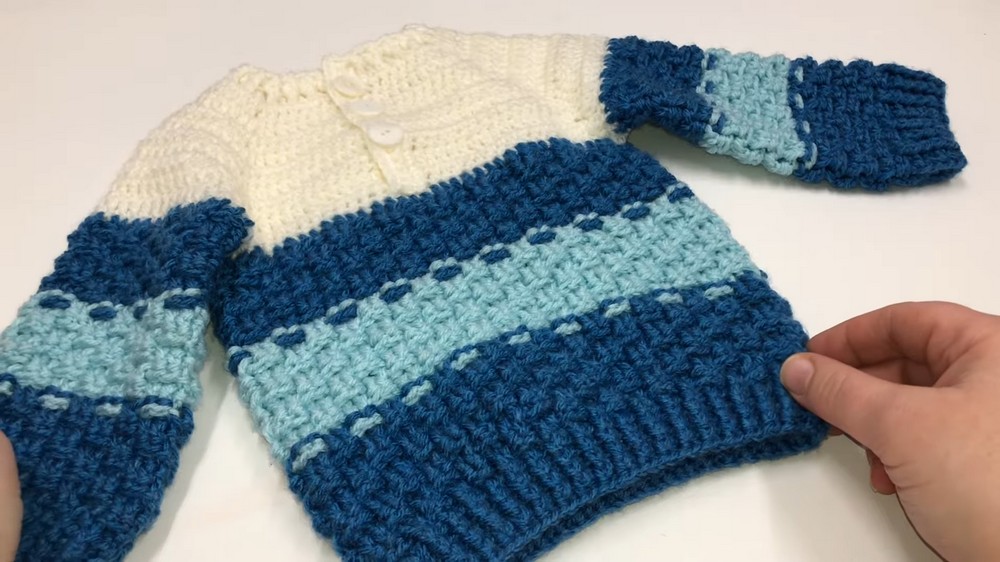
Effortless Crochet Pullover Patterns for Every Season
Various styles for all seasons—light and breezy for spring or warm and snug for winter—they can be paired effortlessly with jeans, skirts, or leggings to suit any personal style. Making one allows for self-expression and adds a touch of uniqueness to your wardrobe. Whether worn by you or gifted to someone dear, a crochet pullover stands as a timeless piece that combines modern fashion with enduring comfort.
Materials List
- Yarn: Choose soft, warm yarn such as 100% acrylic (approx. 250-300g depending on size).
- Hooks:
- 4 mm crochet hook for the body.
- 3.5 mm crochet hook for the edges and ribbing.
- Extras:
- Stitch markers.
- Scissors.
- Tapestry needle for sewing and weaving in ends.
Skill Level
Intermediate. This pattern includes working with front/back post stitches, shaping, and constructing sections of the sweater.
Key Abbreviations (US Terminology)
- ch: chain
- dc: double crochet
- fpdc: front post double crochet
- bpdc: back post double crochet
- hdc: half double crochet
- fphdc: front post half double crochet
- bphdc: back post half double crochet
- sc: single crochet
- sl st: slip stitch
- dec: decrease
Special Notes
- Adjusting Sizes: For sizing up, ensure the starting chain count is a multiple of 4, adding chains in increments of 4.
- Use stitch markers to highlight chain spaces and important points for shaping.
- Ensure even tension throughout, especially in basket weave and ribbed sections.
Sizing Chart
- 0-6 months: Starting chain 54, approx. 11 cm height before dividing.
- For larger sizes, refer to the following for starting chains:
- 12 months: 62 chains.
- 18 months: 70 chains.
- 2 years: 78 chains.
- 4 years: 86 chains.
- 6 years: 94 chains.
- 8 years: 102 chains.
Pattern Instructions (0-6 months size)
Step 1: Starting the Yoke
- Foundation Chain
- Start with a slip knot and chain 54.
- Add 2 chains for turning purposes.
- Row 1
- Work 1 dc in the 3rd chain from the hook.
- Continue working dc in each of the next 8 chains. (You should have 8 dc).
- Ch 1, skip the next chain, and work 1 dc in the next chain. (Mark this chain-1 space).
- Work 1 dc in each of the next 10 chains (11 dc).
- Ch 1, skip the next chain, and work 1 dc in the following chain.
- Work 1 dc in the next 15 chains (16 dc).
- Ch 1, skip the next chain, work 1 dc in the next chain.
- Work dc in the next 10 chains (11 dc).
- Ch 1, work dc in the final 8 chains (8 dc).
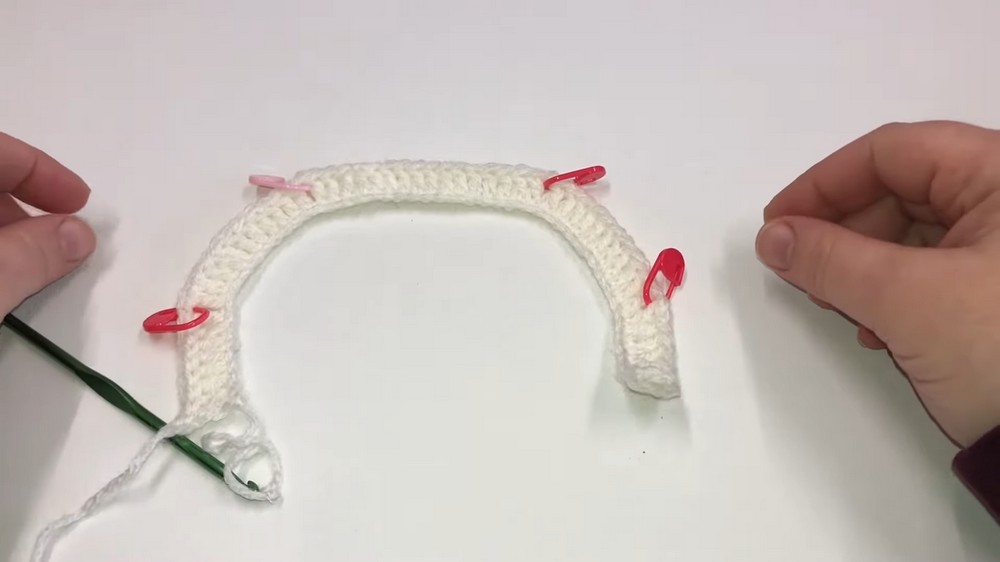
Rows 2-9: Shaping the Yoke with Increases
- Ch 2, turn.
- Work 1 dc in the same stitch.
- Work 1 dc in each stitch across until the ch-1 space.
- In each ch-1 space, work: (1 dc, ch 1, 1 dc). Replace the marker in the new ch-1 space.
- Continue working dc across, adding increases at the chain-1 spaces.
- Repeat Row 2 until you have completed 9 rows and the yoke measures approximately 11 cm.
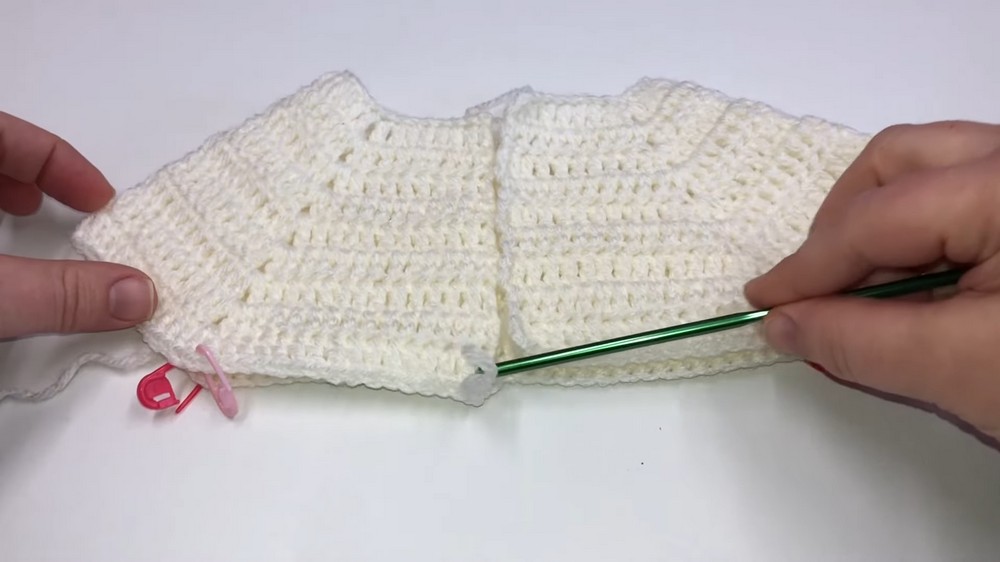
Row 10: Dividing for the Body
- Ch 2, turn.
- Work 1 dc in each stitch until the first ch-1 space.
- In the ch-1 space, work 2 dc, ch 2.
- Skip all stitches to the next ch-1 space, then work 2 dc in the next ch-1 space.
- Complete the row by working 1 dc in each stitch to the end.
At the end of this row, you should have 72 total stitches for the body.
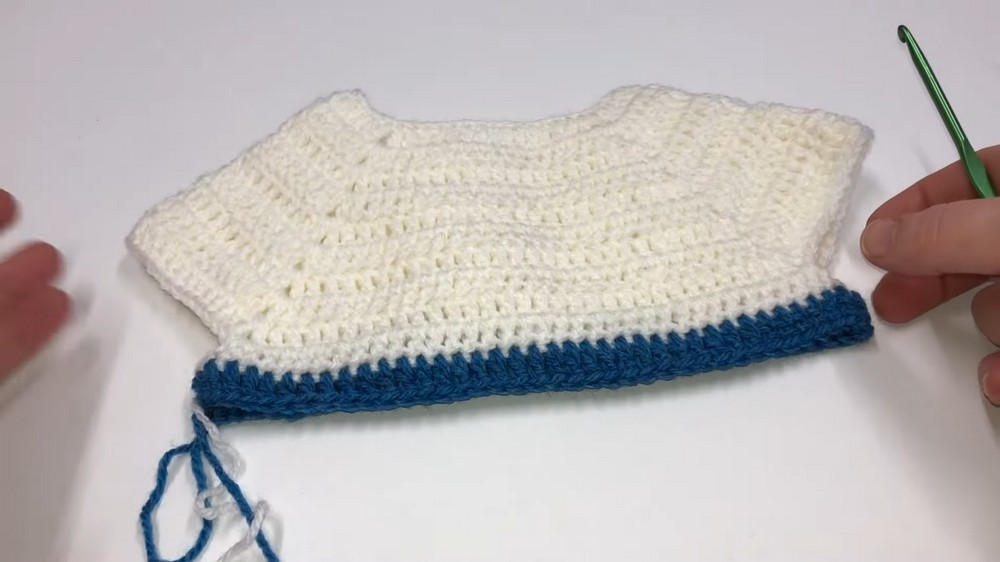
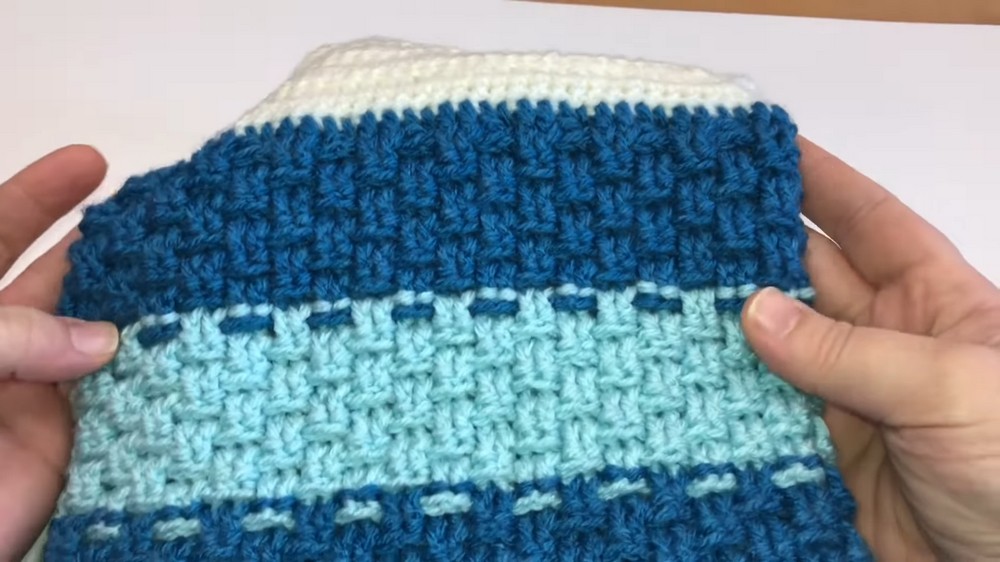
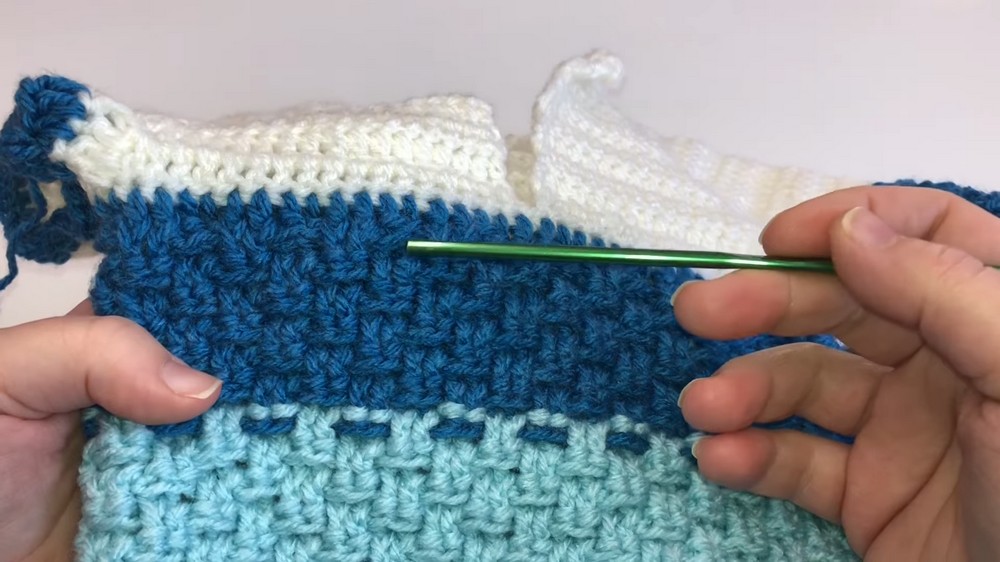
Body Section (Basket Weave Stitch: 30 cm)
- Round 1:
- Join yarn in the first stitch with a sl st to work in the round.
- Ch 2, work 1 dc in each stitch around. Join with a sl st to the first dc.
- Basket Weave Stitch (Rounds 2-40):
- Round 2: Work fpdc in the first stitch, fpdc in the next stitch, bpdc in the next two stitches.
- Repeat the (2 fpdc, 2 bpdc) pattern around. Join with a sl st.
- Round 3: Reverse the order: bpdc in the first two stitches, fpdc in the next two stitches.
- Repeat this textured pattern alternating every two rounds until the body measures 30 cm.
- Round 2: Work fpdc in the first stitch, fpdc in the next stitch, bpdc in the next two stitches.
Step 3: Ribbing
- Switch to the 3.5 mm hook.
- Last 5 Rounds: Work front post half double crochet (fphdc) and back post half double crochet (bphdc) alternately around for ribbing.
Step 4: Sleeves
- Attach yarn at the armhole (center of the underarm).
- Work dc evenly around the armhole and join with a sl st.
- Begin the basket weave stitch as described for the body.
- Work the sleeves until they measure 30 cm, then finish with fphdc/bphdc ribbing for 2 cm.
Step 5: Neckline
- Use a 3.5 mm hook to create a ribbed neckline.
- Work around the neck opening in fphdc/bphdc for 3-4 rounds for a snug neckband.
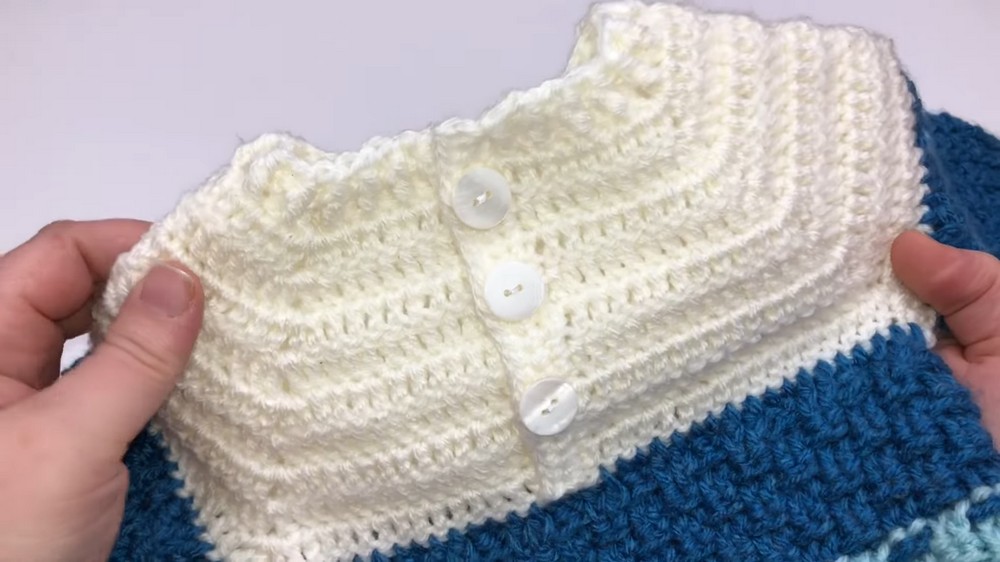
Step 6: Button Band (Optional for Back Closure)
- Attach yarn at the edge of the neckline opening.
- Work sc evenly along the edge.
- Create buttonholes by chaining 2 and skipping 1 stitch, spacing as needed for buttons.
- Turn and work another row of sc for reinforcement.
Conclusion
Your crochet pullover sweater is now complete! It’s designed to be cozy for winter with its basket weave texture and versatile sizing. The snug ribbing and neat neckline make it comfortable and stylish for children from 0-6 months up to 8 years.
Pattern Corrections
- Adjusting the starting chain is crucial for accurate sizes. Ensure it’s a multiple of 4.
- Check stitch counts at the end of rows to maintain proper shaping.
Tips
- Blocking: Block your finished sweater lightly to ensure stitches lay flat and the texture stands out.
- Colors: Experiment by using different colors for the ribbing or basket weave stitch for visual interest.

Leave a Reply