
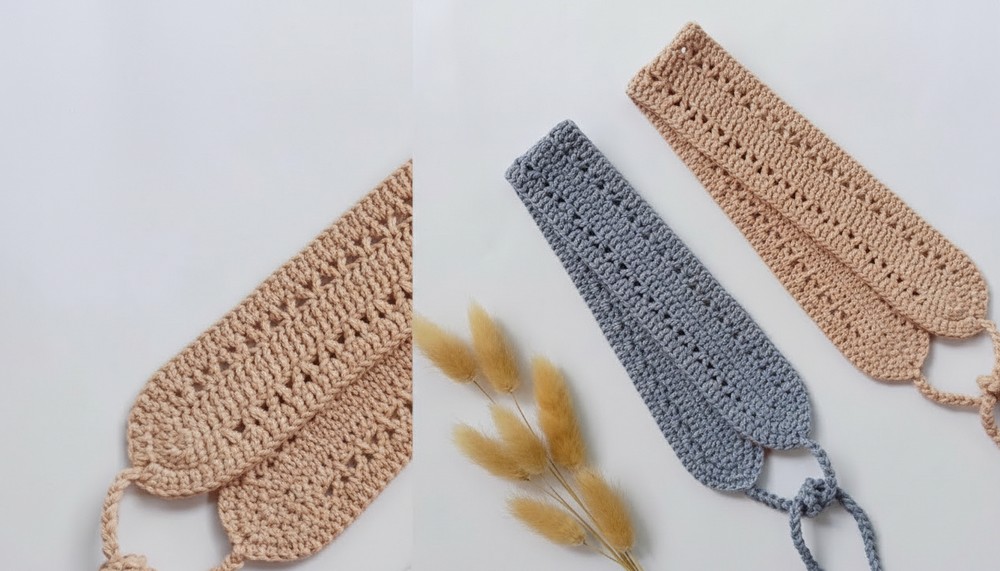
Wear a stylish accessory with this Crochet Headband Pattern, a charming piece that keeps hair neat while enhancing any outfit effortlessly.
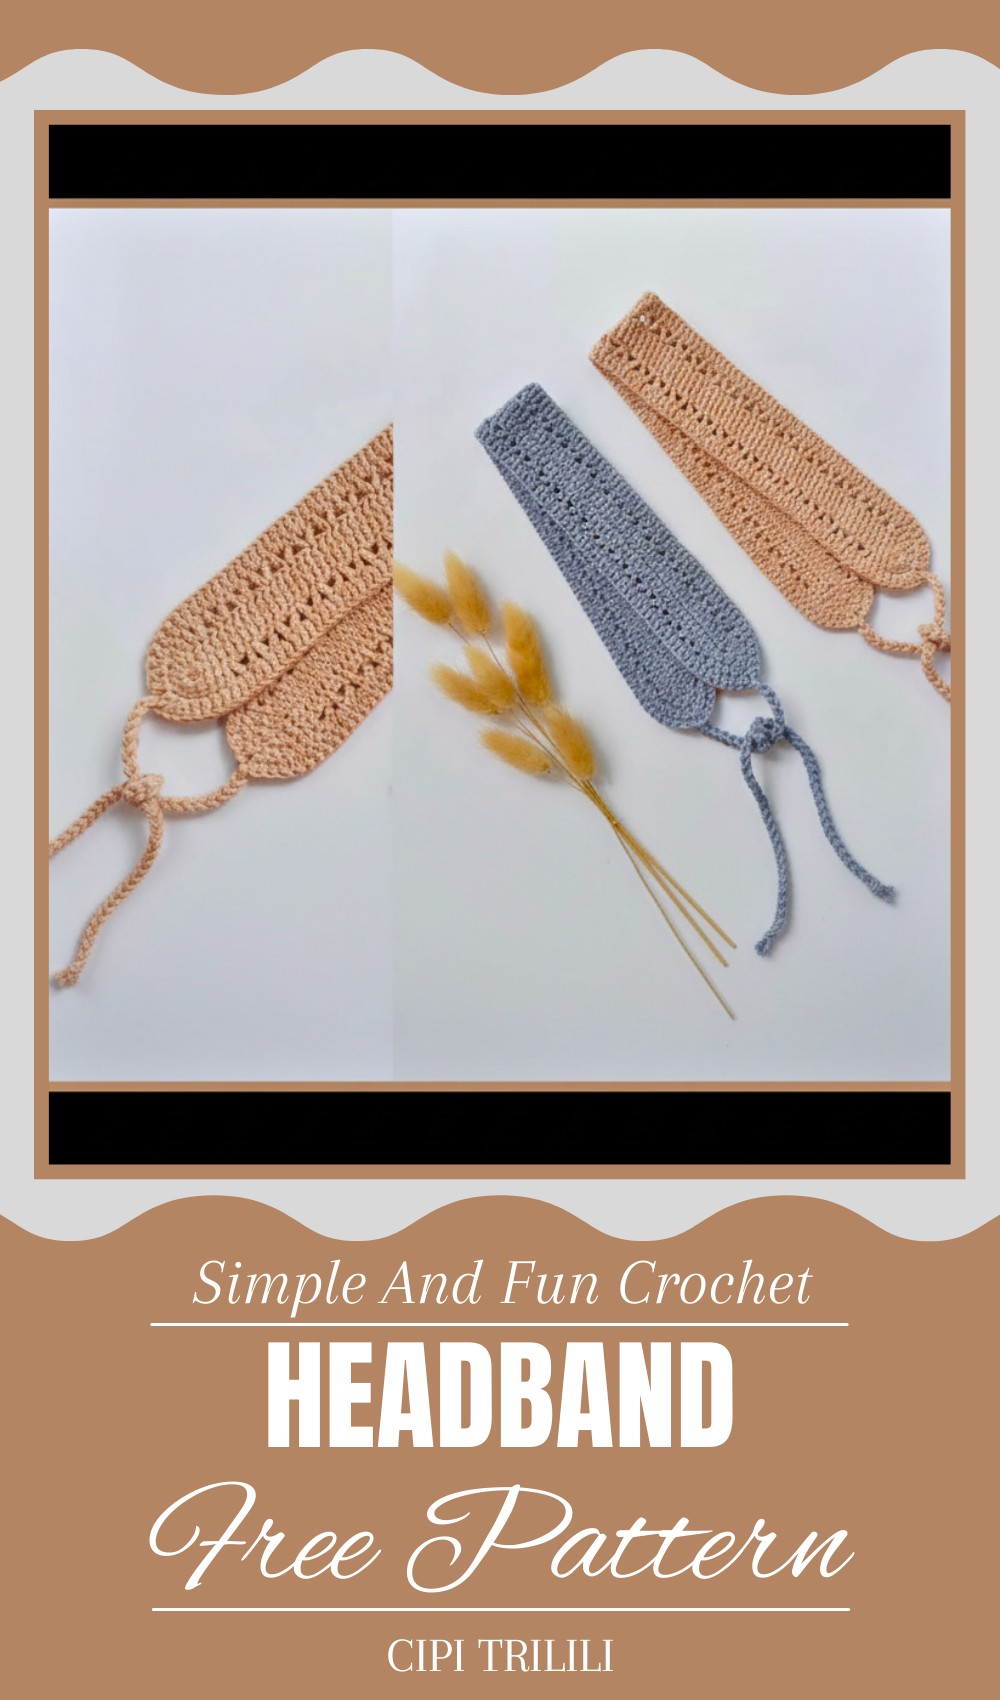
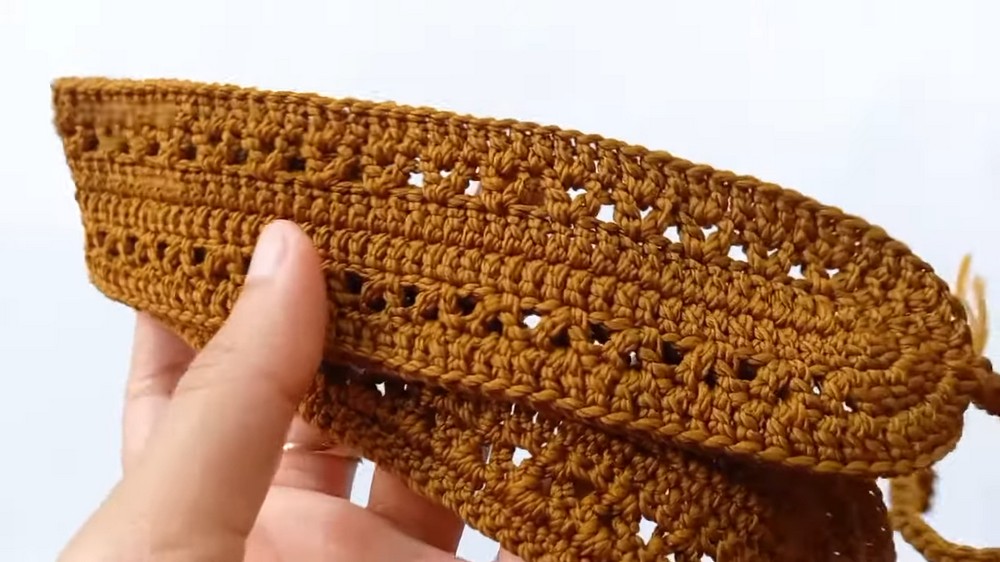
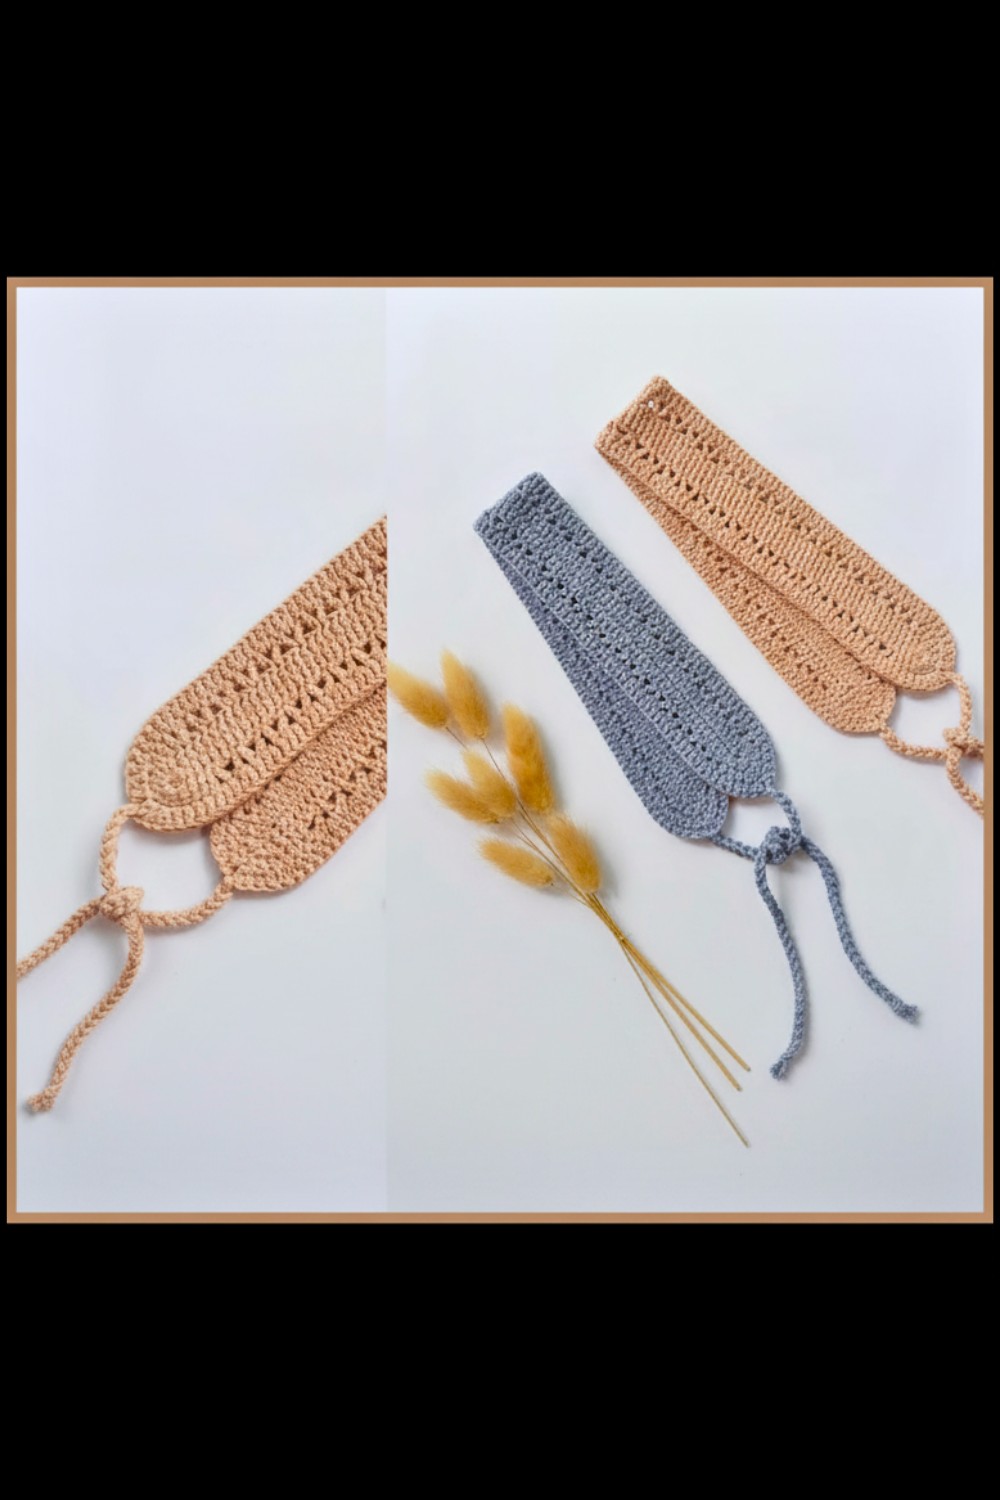
Even a tiny accessory can transform an outfit and make it look special. A Crochet Headband pattern helps you create a soft and pretty headband that feels gentle on the head and adds a touch of charm. This handmade headband are perfect for many occasions like daily wear, family gatherings, festivals, or fun parties. The smooth yarn keeps hair neat without discomfort, and the delicate stitches give it a simple yet elegant look.
Bold Crochet Headband Pattern Perfect for Statement Accessories
You can choose soft pastel shades for a calm and sweet style or bright colors for a cheerful and lively feel. It also make thoughtful gifts for friends, sisters, or little children, showing care and creativity. Lightweight and easy to wear, these headbands bring both comfort and beauty. Each piece is handmade with love, turning a simple accessory into something unique, stylish, and full of charm for anyone who wears it.
Materials List
- Yarn: Polycherry brand polyester yarn
- Crochet Hook: Tulip number 3 (3.0 mm)
- Optional Items:
- Tulip number 4 (4.0 mm) crochet hook for chain rope
Skill Level
Intermediate to Advanced
Key Abbreviations
- ch: chain
- dc: double crochet
- sl st: slip stitch
- st: stitch
- sk: skip
Special Notes
- This pattern is written in US crochet terminology.
- Ensure to keep an even tension throughout the project for uniformity.
- It’s advisable to read through the entire pattern before starting.
Pattern Instructions
Step 1: Create the Foundation Chain
- Slip Knot: Begin with a slipknot.
- Chains: Make a foundation chain of 110 chains. This will create a piece approximately 40 centimeters long.
- Note: Ensure the chains are even and not too tight.
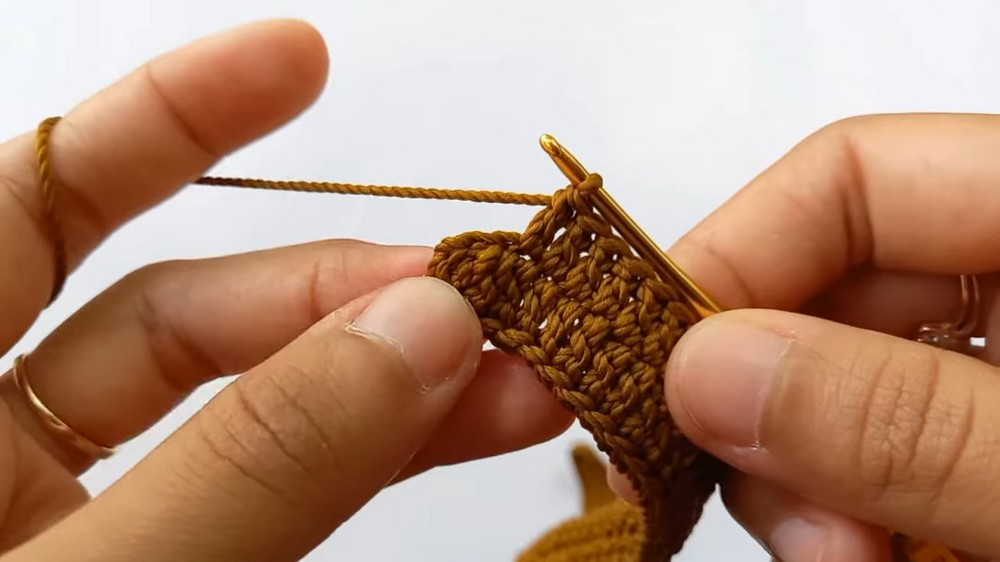
Step 2: Starting the First Row
- Double Crochet Base:
- Start with a dc in the third chain from the hook.
- In the same chain, make another dc.
- Continue making dc in each chain across.
- End of Row: Leave one chain unworked at the end.
Step 3: Turning the End of the Row
- 5 dc Cluster:
- In the last chain, make 5 dc.
Step 4: Completing the First Row
- Double Crochet:
- Continue making dc into each chain across the opposite side.
- End of Row: Complete with 2 dc in the last chain.
- Slip Stitch: End with a sl st.

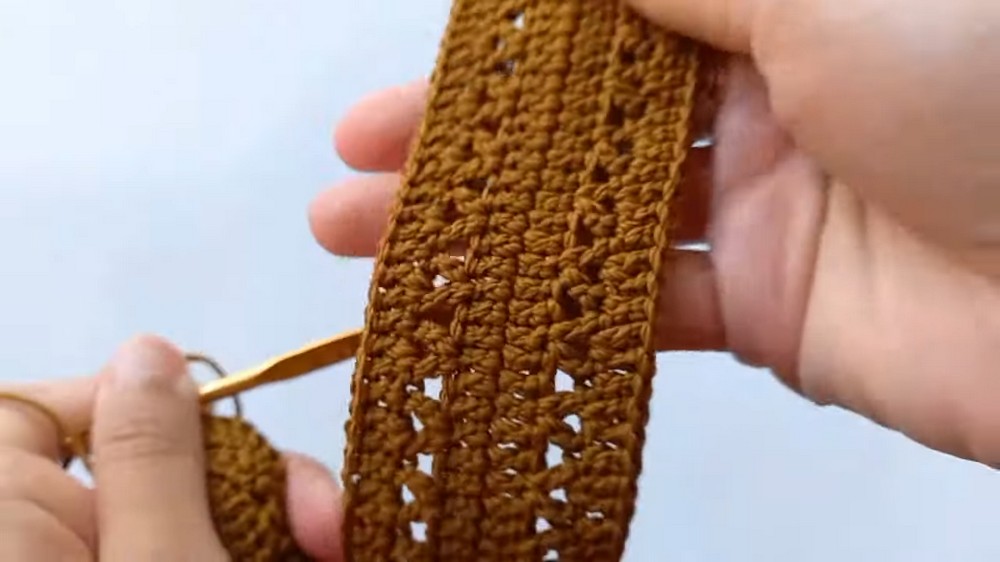
Step 5: Second Row Setup
- Chain and Double Crochet:
- Chain 2.
- Start with a dc in the first st.
- Repeat another dc in the same st.
- Double Crochet Next:
- Continue making 2 dc in each st across.
- Pattern Repeat:
- Make one ch and one dc in the same stitch.
- Skip 2 stitches, and then repeat dc, ch, dc in the same stitch.
- Continue this pattern until the end.
Step 6: Handling the Curve
- 5 dc Turn:
- On the curve, make 5 dc clustered together.
- Continue the pattern as established.
Step 7: Building Up
- Continue working in rows:
- Making sure to match the dc clusters and skipping st.
- Always end with sl st and ch 2 at the beginning of rows.
- Repeat steps as needed.
Step 8: Finishing the Rattle
- Chain Rope:
- With a 4 mm hook, chain until you reach about one meter.
- Final Touch:
- Slip Stitch: Finalize and secure all ends.
- Tie and Cut: Ensure ends are neatly tied and cut.
Conclusion
Creating the Crochet Baby Rattle involves closely following the pattern sequence to ensure perfect curves and edges. Detailed attention to chains and st skipping during the process result in a professional finish.
Pattern Correction:
For any issues, always review the steps and compare your work periodically.
Tip:
Use stitch markers to help with counting chains and maintaining pattern consistency, especially for newly skipped stitches.
Leave a Reply