
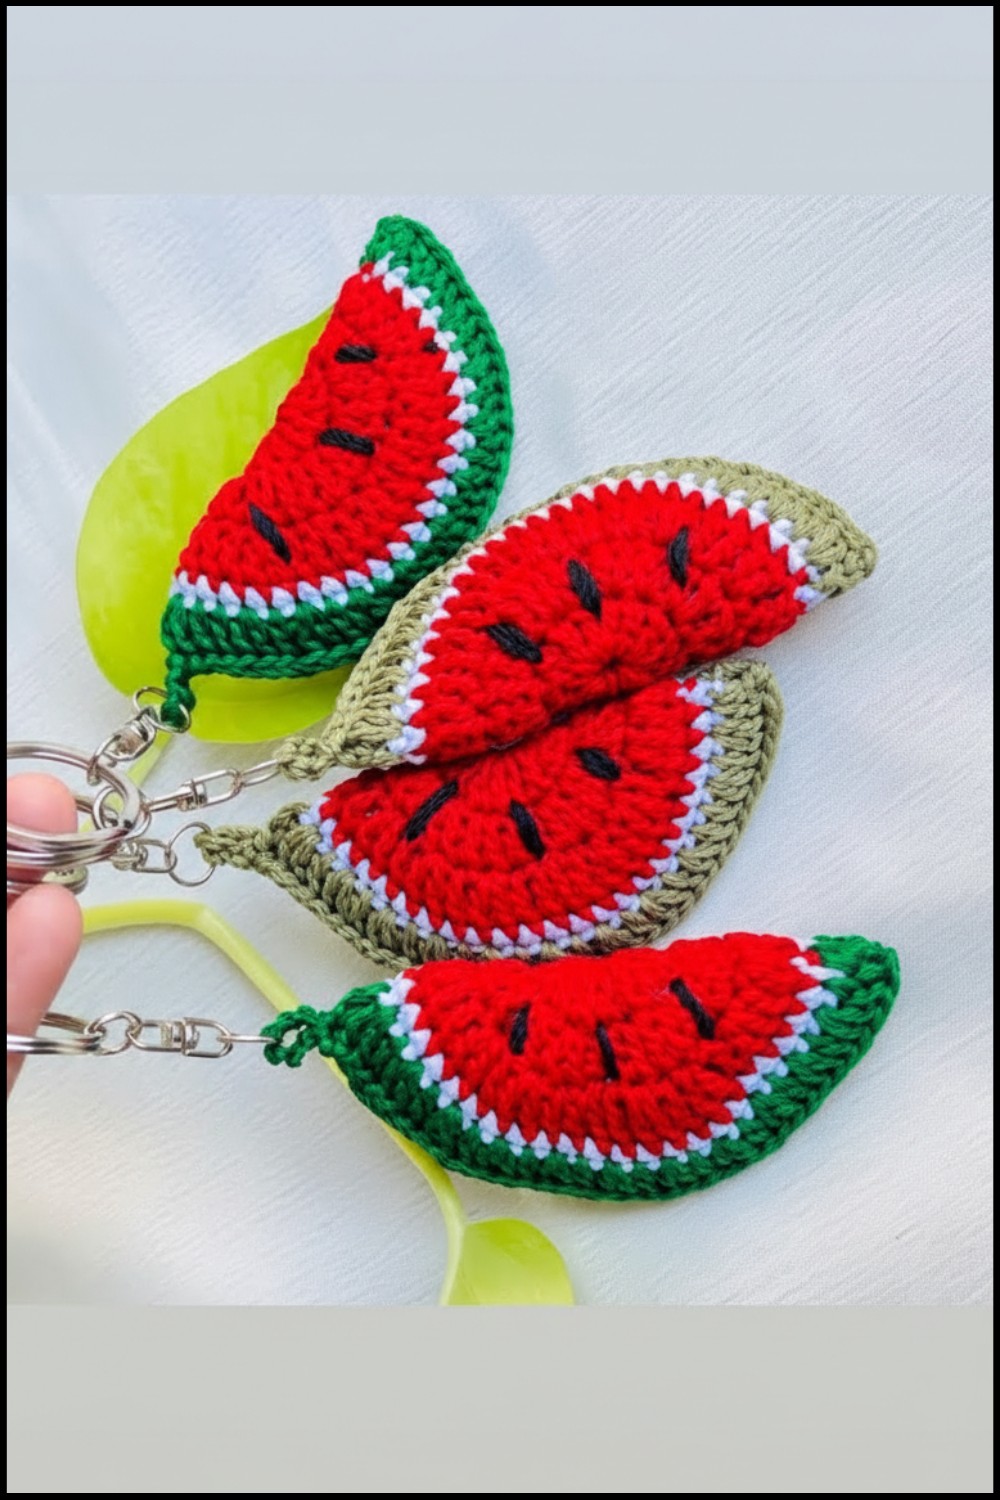
Fruity vibes meet creativity with this crochet watermelon keychain pattern—perfect for bringing a pop of whimsy to your everyday accessories.

This colorful and charming project turns an ordinary object into something special and joyful. Inspired by the refreshing beauty of watermelon, its vibrant red center, crisp white border, and bold green rind make it stand out, while tiny black-threaded seeds add a realistic and playful touch. Whether used as a keychain or a decorative piece on your bag, it’s a delightful way to add character and fun to your everyday items.
Brighten Crochet Watermelon Keychain Pattern for Your Accessories
Lightweight and easy to carry, this piece serves as a lovely handmade gift for friends or a creative project you can sell at markets. It’s perfect for anyone who appreciates small, unique designs that reflect personality and style. Accessible for both beginners and advanced crocheters, crocheting this design is an enjoyable experience, turning simple materials into a bright and cheerful keepsake. Each stitch carries the warmth of creativity and the charm of summer vibes.

Materials List
- Yarn: Polyester thread or poly cherry yarn in the following colors:
- Red (watermelon flesh)
- White (middle border)
- Green (rind)
- Black (seeds)
- Crochet Hook: Tulip 3.0 mm
- Tapestry Needle: For sewing details and threads.
- Scissors: For cutting threads.
- Lighter: To seal and tidy yarn ends, especially polyester yarn.
- Keychain Ring: To attach the keychain.
- Stitch Marker (optional): To keep track of stitch positions.
Skill Level
Intermediate
Key Abbreviations (US Terminology)
- ch: Chain
- sc: Single Crochet
- dc: Double Crochet
- sl st: Slip Stitch
- MR: Magic Ring
Special Notes
- Ensure proper tension when working with polyester thread for a neat and tidy appearance.
- Count stitches carefully in each round to maintain even increases.
- Burn yarn ends gently when working with polyester thread to avoid smudging or over-melting.
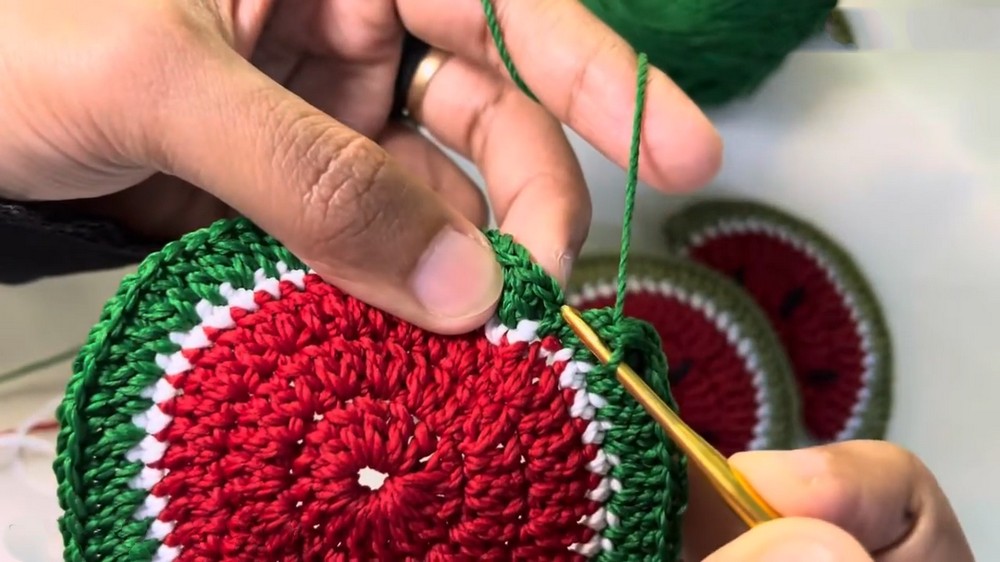
Pattern Instructions
Part 1: Watermelon Base
Step 1: Create the Magic Ring
- Start by making a slip knot and chaining 4 (ch 4).
- Form a loop (Magic Ring) by sl st into the first chain.
- Ensure the Magic Ring is tight and secured.
Step 2: Round 1
- Ch 3 (counts as one dc) and work 15 dc inside the Magic Ring.
- The total number of stitches (including the initial chain-3) should be 16 dc.
- Pull the Magic Ring tightly to close the center.
- Sl st into the third chain of the beginning ch-3 to finish the round.
- Total stitches: 16 dc.

Part 2: Expanding the Watermelon Slice
Step 1: Round 2
- Begin by tidying up the loose thread from the Magic Ring (cut and burn the ends lightly).
- Start with 1 sc in the next stitch and make 2 ch (counts as one dc).
- Work 1 dc into the same stitch (to create dc increase).
- Continue filling each stitch with 2 dc (dc increase) until the end of the round.
- Ensure every stitch is filled with an increase (2 dc per stitch).
- Sl st into the second chain of the beginning ch-2.
- Total stitches: 32 dc.

Step 2: Round 3
- Begin with 1 sc and ch 2 (counts as one dc) in the first stitch.
- Work the following pattern:
- 1 dc in the next stitch.
- 2 dc (dc increase) in the following stitch.
- Repeat the pattern [1 dc, dc increase] to the end of the round.
- Sl st into the second chain of the beginning ch-2.
- Total stitches: 46 dc.
Part 3: Adding the Borders
Step 1: Round 4 (White Yarn)
- Before finishing the last stitch of Round 3, pull through with white yarn to prepare for the color change.
- Work 1 sc in each stitch across the round.
- Ensure the loose white thread is incorporated neatly at the back of your work.
- Sl st into the last stitch.
- Total stitches: 46 sc.

Step 2: Round 5 (Green Yarn)
- Change to green yarn by pulling through with green before the last stitch of the previous round.
- Begin with 1 sc and ch 2 (counts as one dc) in the first stitch.
- Work the following pattern:
- 1 dc in the next stitch.
- 2 dc (dc increase) in the following stitch.
- Repeat the pattern [1 dc, dc increase] to the end of the round.
- Sl st into the second chain of the beginning ch-2.
- Total stitches: 64 dc.

Part 4: Shaping the Slice
- Fold the circular piece into a semi-circle (watermelon shape).
- Ensure the last sl st from Round 5 is positioned at the edge of the fold.
- Use sl st to sew the edges together:
- Insert a sl st into each stitch from both sides (front and back).


Part 5: Adding Keychain Hanger
- At the top center of the watermelon, make 8 chains (ch 8) or adjust the length based on your preference.
- Sl st back into the same stitch to form a hanging loop.
- Cut the yarn and sew the loose end securely into the watermelon piece using a tapestry needle.
Part 6: Adding Watermelon Seeds
- Using black yarn, sew small triangular “seed shapes” onto the red section of the watermelon using a tapestry needle:
- Insert the needle from behind, create the seed shape, and then fasten securely from the back.
- Add as many seeds as desired, evenly spaced.

Part 7: Attaching the Keychain
- Place a keychain ring through the hanging loop created in Round 5.
- Ensure it is securely attached.

Conclusion
You’ve successfully created a cute and vibrant watermelon keychain! This design incorporates multiple colors and simple stitches, making it beginner-friendly but visually appealing. You can gift, sell, or use it yourself for a fun accessory.
Pattern Corrections
- Count stitches carefully in each round to ensure accurate shaping.
- Make sure the sl st edges align perfectly when folding the watermelon slice.
Tips for Success
- Use a lighter sparingly to seal loose polyester threads without damaging the stitching.
- If working with cotton yarn, weave loose ends tightly instead of burning them.
- Add optional embellishments, like beads or glitter thread, for an extra decorative touch.
Leave a Reply