
Enhance your outfit with this Crochet Flower Bouquet Top Pattern shaping a lovely top for casual summer wear and relaxed everyday looks.
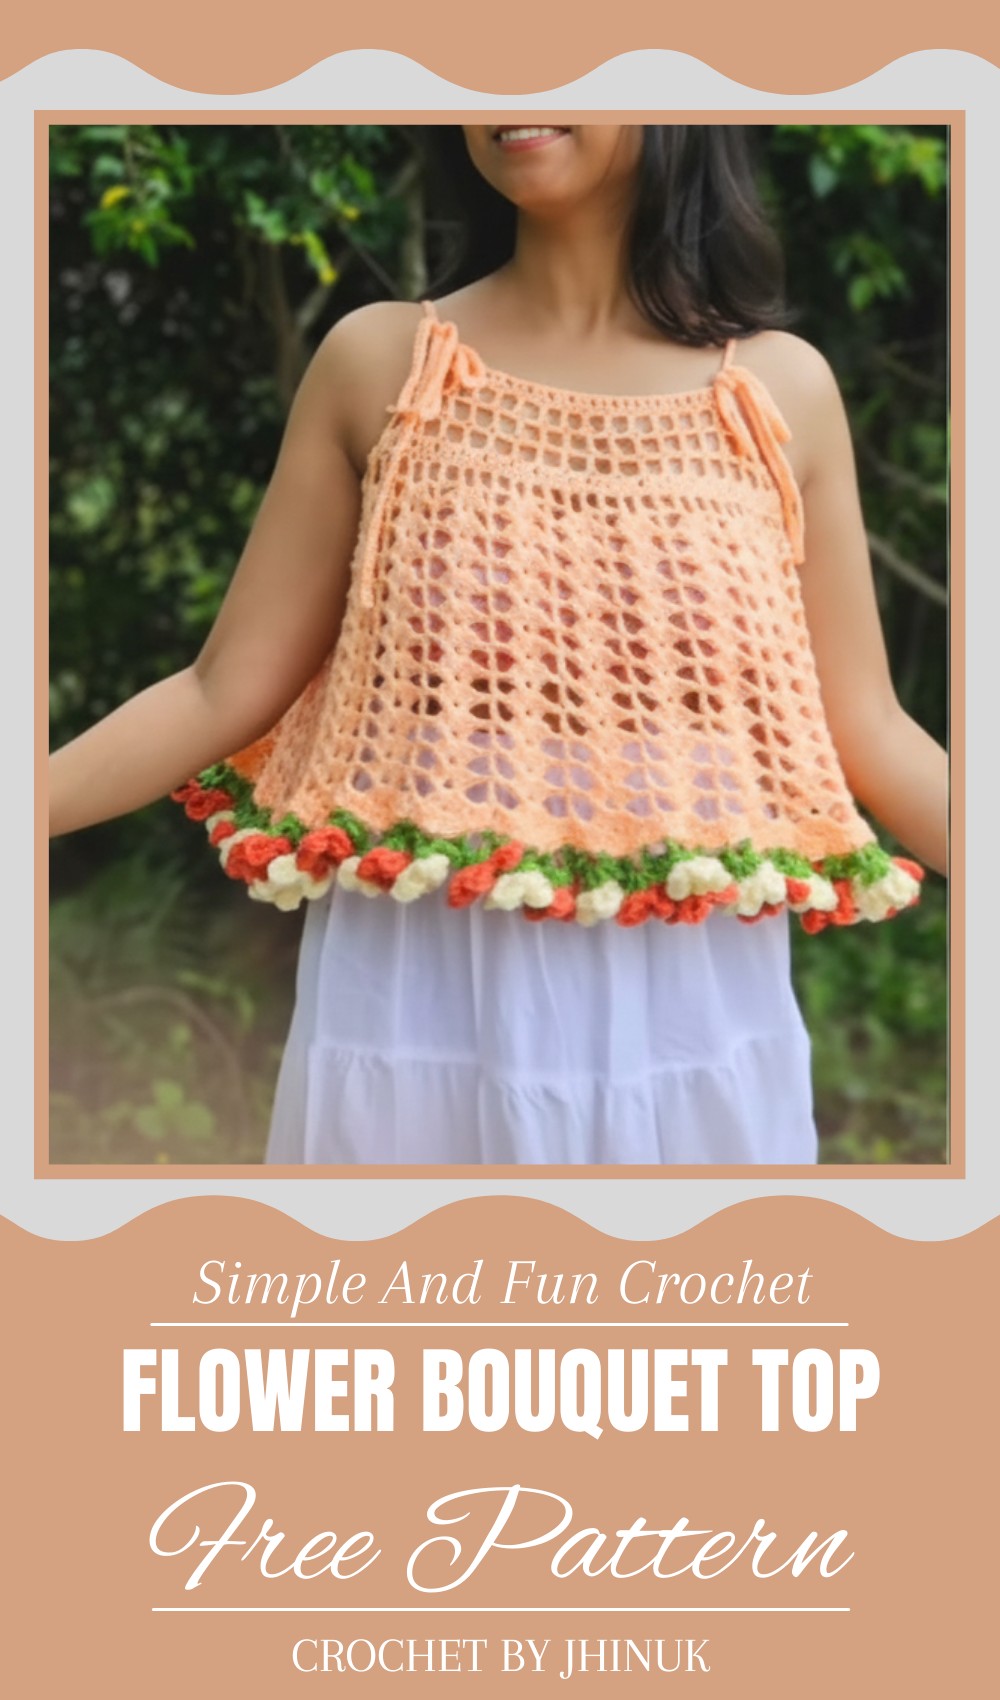
Playful Crochet Flower Bouquet Top Pattern for Unique Fashion
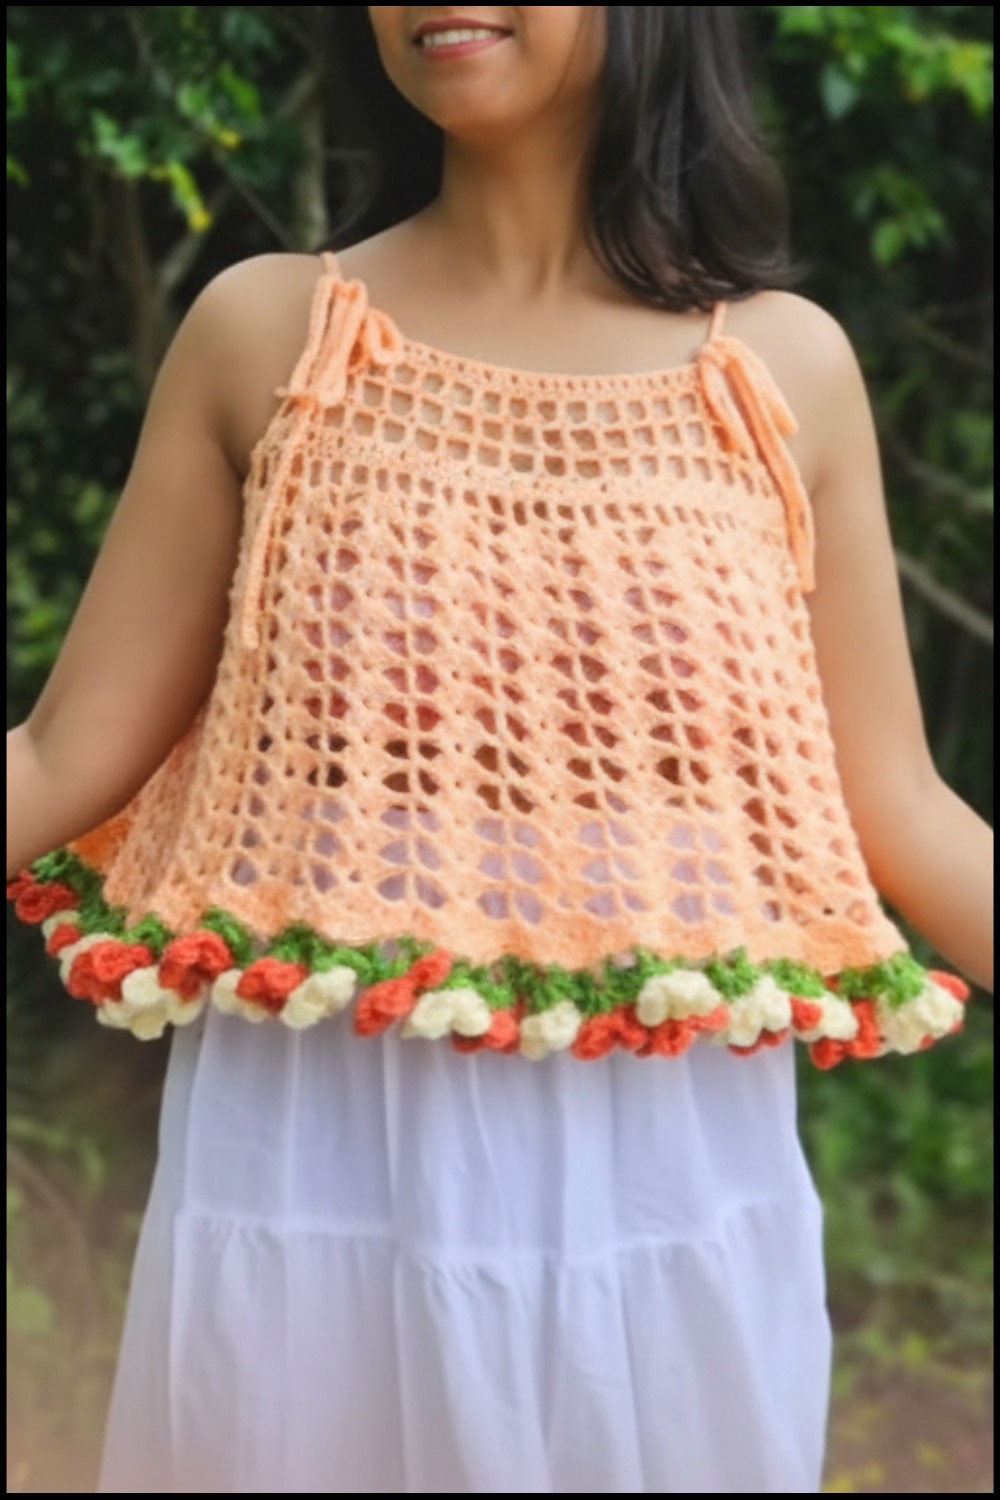
A design filled with the beauty of flowers brings elegance and creativity to life. The crochet flower bouquet top pattern showcases stunning floral arrangements that come together to form a truly unique and eye-catching top. Each flower, built with vibrant colors and textures, adds delicate charm to the overall look. Perfect for garden parties, events, or even casual outings, this beautiful pattern allows you to celebrate nature in your clothing.
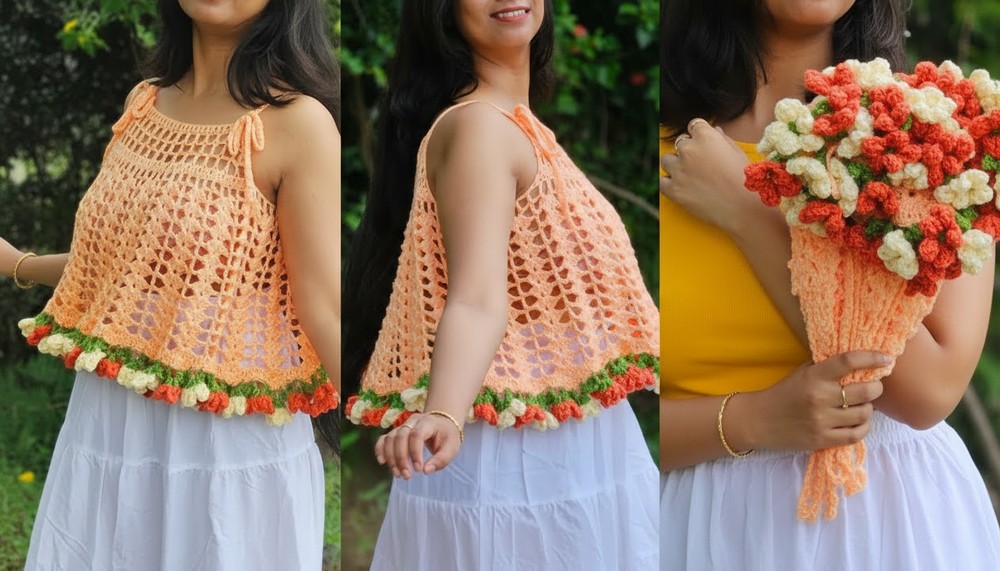
It’s lightweight and stylish, making it a great option for warm summer days or layering during other seasons. This floral-inspired design is not only comfortable but also versatile, offering endless possibilities to pair with skirts, jeans, or shorts. Wearing this piece will undoubtedly make you stand out and add a personal touch to your wardrobe. Whether you gift it or keep it, the crochet flower bouquet top pattern blends fashion and the soft charm of flowers beautifully!
Materials Needed
Yarn
- Main Body: Lightweight acrylic yarn in peach or your chosen main color.
- Flowers: Contrasting yarn (e.g., orange or another vibrant shade).
- Leaves: Green-colored yarn for leaves.
Hook Size
- 5 mm Crochet Hook.
Other Tools
- Yarn Needle: For weaving in ends and assembling pieces.
- Scissors: For trimming excess yarn.
Key Abbreviations (U.S. Crochet Terminology)
- ch: Chain
- sc: Single Crochet
- sl st: Slip Stitch
- dc: Double Crochet
- tr: Treble Crochet (yarn over 2x and pull through 2 loops at a time)
- sp: Space
Customization Ideas
- Length: Adjust the number of rows for the body panels to create a crop top or full-length version.
- Flowers: Use multicolor yarn for flowers to create a vibrant, realistic bouquet effect.
- Straps: Adjust strap length to create halter tops or cross-back styles.
Special Notes
- Tension Control: Maintain consistent tension for even stitches.
- Blocking: Steam block the panels before sewing for a polished finish.
- Read Ahead: Familiarize yourself with the repeat patterns before starting.
Step-by-Step Pattern
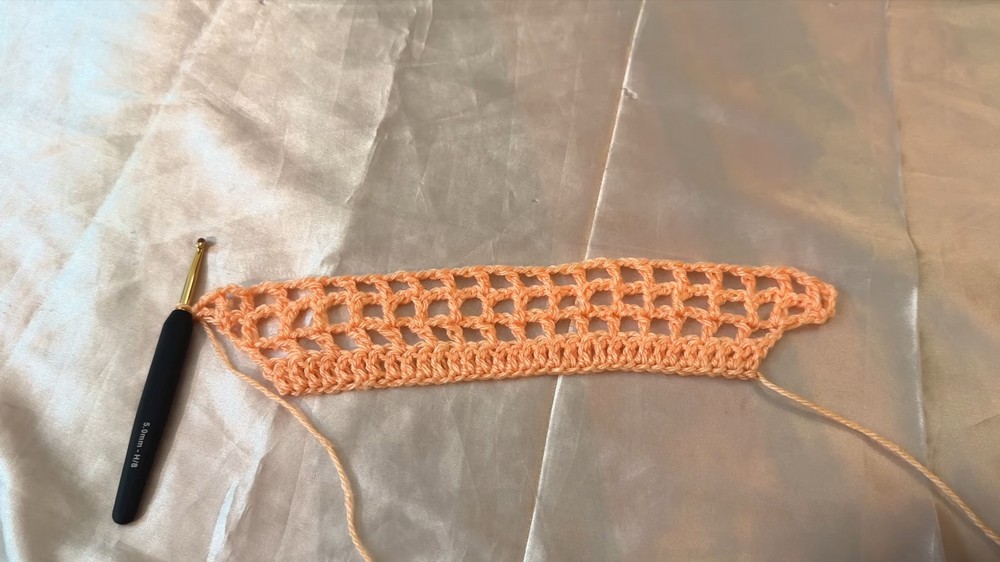
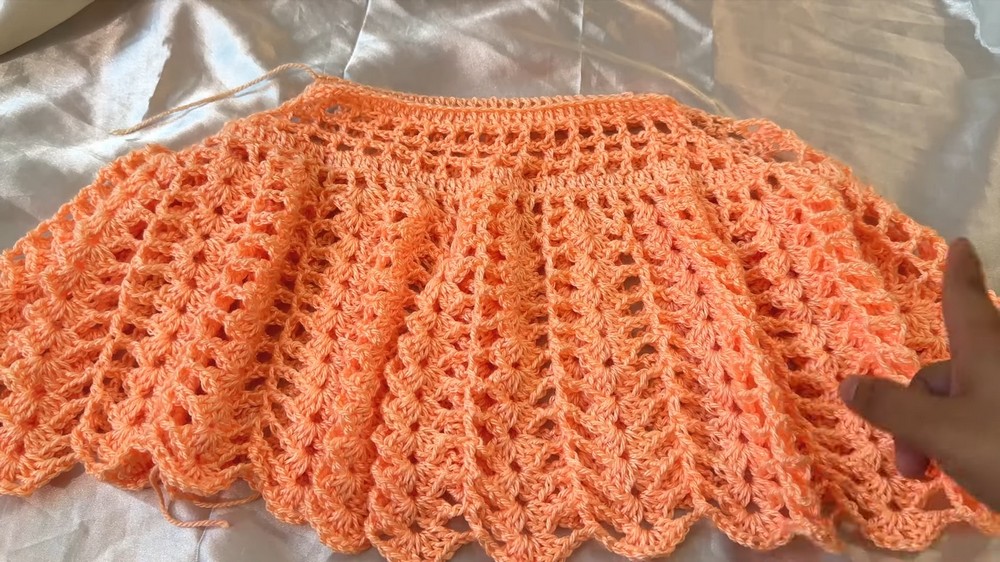
Main Body Panels
Foundation Chain
- Create a slip knot and chain:
- 35 chains for small to medium sizes.
- 39 chains for large to extra-large sizes.
Row 1: Double Crochet Base
- Skip the first 3 chains, place 1 dc into the fourth chain.
- Continue working 1 dc into each chain across.
- At the end of the row, you should have:
- 33 dc for size small/medium.
- 37 dc for size large/extra-large.
Row 2: Mesh Row
- Ch 5, turn your work (this counts as 1 dc + 2 ch).
- Skip the next stitch, and place 1 dc into the following stitch.
- Repeat: Ch 2, skip 1 st, dc in next st.
- Complete the row with 1 dc into the last stitch.
Row 3: Begin Shell Stitch Foundation
- Ch 5, turn work. Place 1 dc into the same first stitch (creates dc, ch 2, dc at the start).
- Ch 2, dc on top of the next dc from the previous row, repeat across:
- Chain 2 spaces will form the framework for shell stitches.
- At the end, place (dc, ch 2, dc) into the last stitch.
Rows 4–12: Repeat Row 3.
- Ensure the edges are consistent with the initial stitch structure.
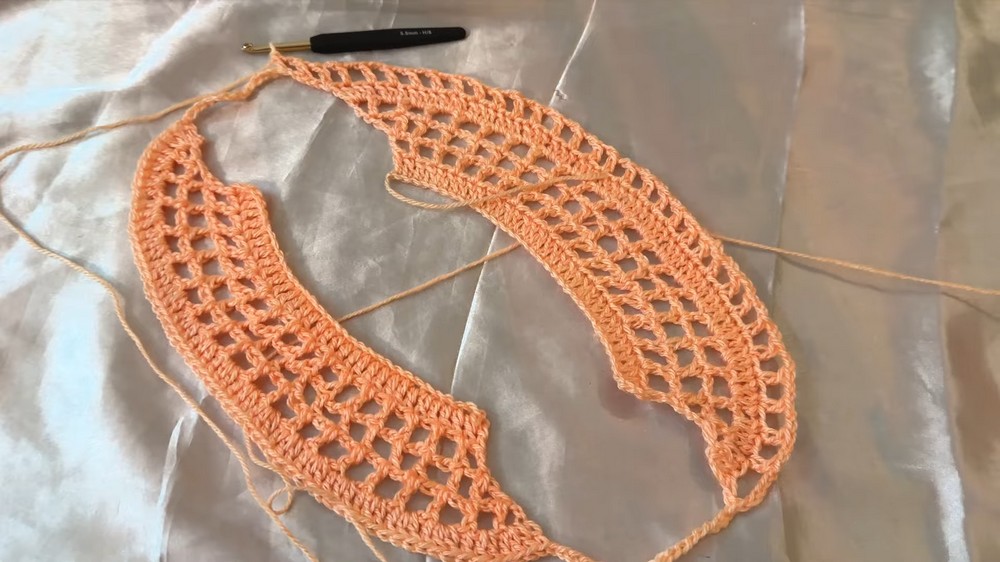
Creating and Joining Panels
- Make two identical panels.
- Cut the yarn on the first panel and weave in the ends.
- Do not cut the yarn on the second panel; continue working with it.
- Joining Panels:
- After completing the last row of the second panel, ch 17 and join to the first stitch of the other panel with 1 dc.
- Continue working as Row 1 across the first panel.
- After reaching the end of the panel, ch 17 and join back to the second panel with 1 dc at its first stitch.
Create Shell Rounds
Round 1: Mesh Shell Row
- Ch 5, turn, and begin working in the round.
- Ch 2, skip 1 stitch, and dc into the next stitch.
- Continue across the row and into the chain-17 sections:
- Work dc into every third chain, separated by ch 2.
- Join the round with a sl st into the beginning ch-5.
Round 2: Shell Formation
- Ch 3, skip the first ch-2 sp, and in the next ch-2 sp, create a shell:
- 3 dc, ch 2, 3 dc into the same space.
- Ch 2, dc on top of the next dc, ch 2, and repeat shell pattern into every alternate ch-2 sp.
- Slip stitch to close the round.
Rounds 3–12: Repeat Shell Row
- Work shells on top of previous shell stitches.
- For smaller tops, reduce the total number of rounds (e.g., 8 rounds for a crop top).
Finishing Touches
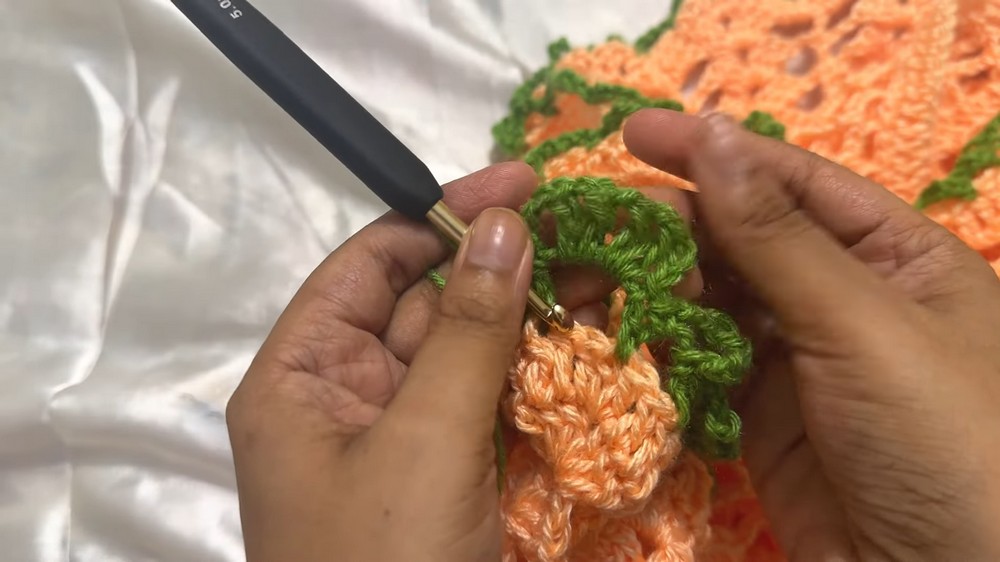
Add Flowers
- Attach Yarn: Tie flower-colored yarn into the first space of the shell.
- Petals:
- Work 1 sc in the space, ch 2.
- Make 3 treble crochets into the same space, followed by ch 2.
- Finish the petal with 1 sc in the same space.
- Repeat to create 5 petals in each flower space.
- To shape the flower, twist the petals together and secure with a sl st in the starting stitch.
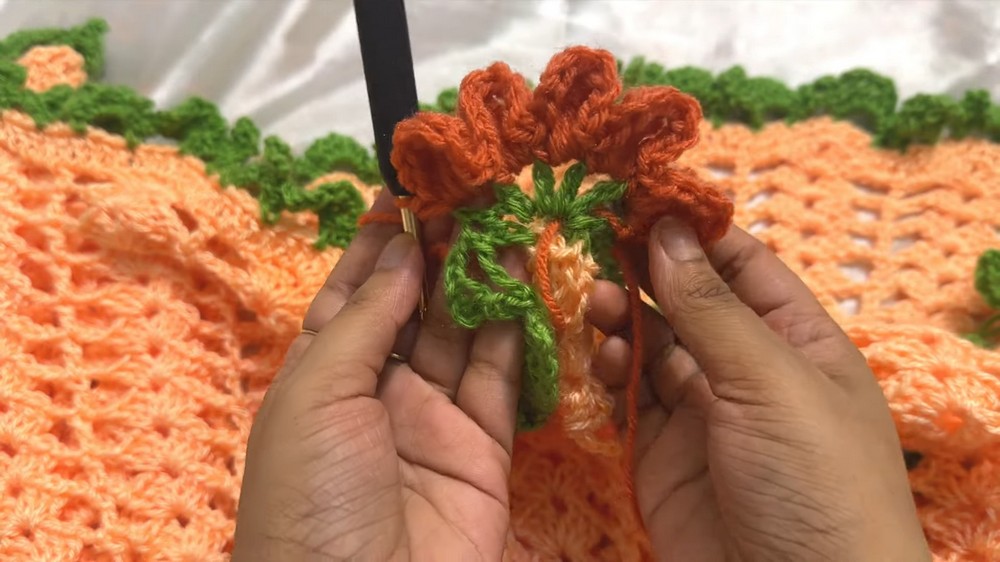
Add Leaves
- In the next available space next to each flower:
- Sc, ch 7, and sl st into the 4th chain from the hook.
- Ch 3 and place a sc into the same space to create a leaf.
- Alternate between flowers and leaves around the base.
Add Straps
- Attach yarn to each panel’s corner.
- Ch 80 (or as long as you desire for the straps).
- Slip stitch back along the chain for a neat finish.
- Repeat for all four corners.Conclusion
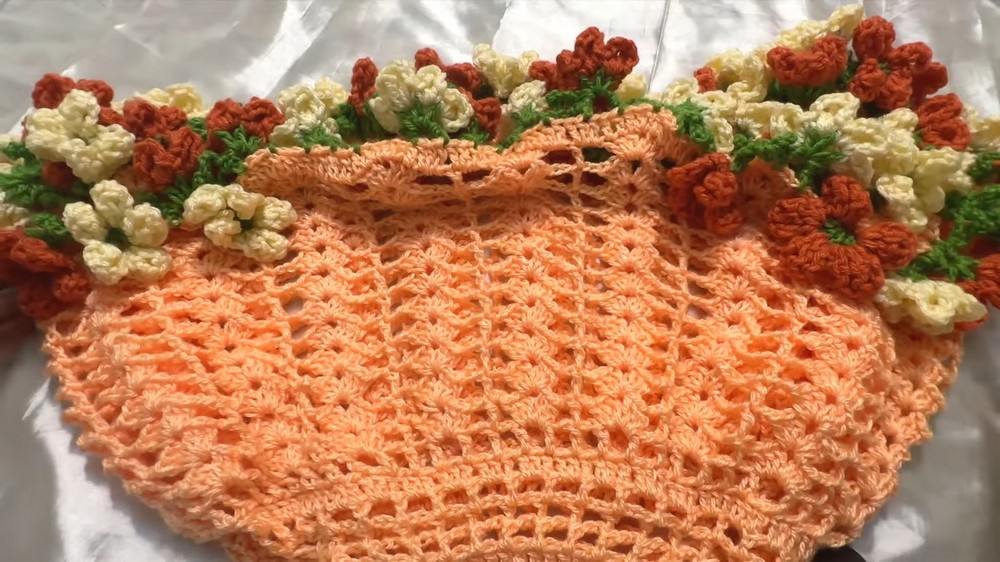
Your Flower Bouquet Top is now ready! This versatile design stands out with its beautiful flower and leaf detailing, making it ideal for casual outings or special occasions. Customize its length, colors, and strap styles to your liking, and wear it as a bold statement piece.
Pattern Corrections and Tips
- Panel Edges: For cleaner edges, ensure the starting and ending stitches of each row match.
- Flower Count: Adjust flower placement spacing for better alignment.
- Practice Shells: Shell stitching may take some practice; refer back to initial rounds to improve consistency.
Leave a Reply