
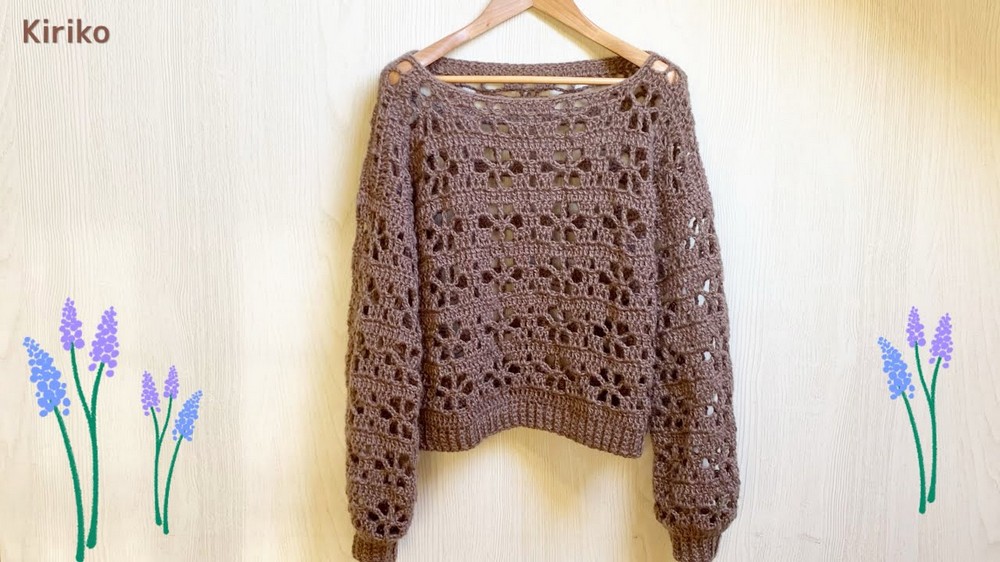
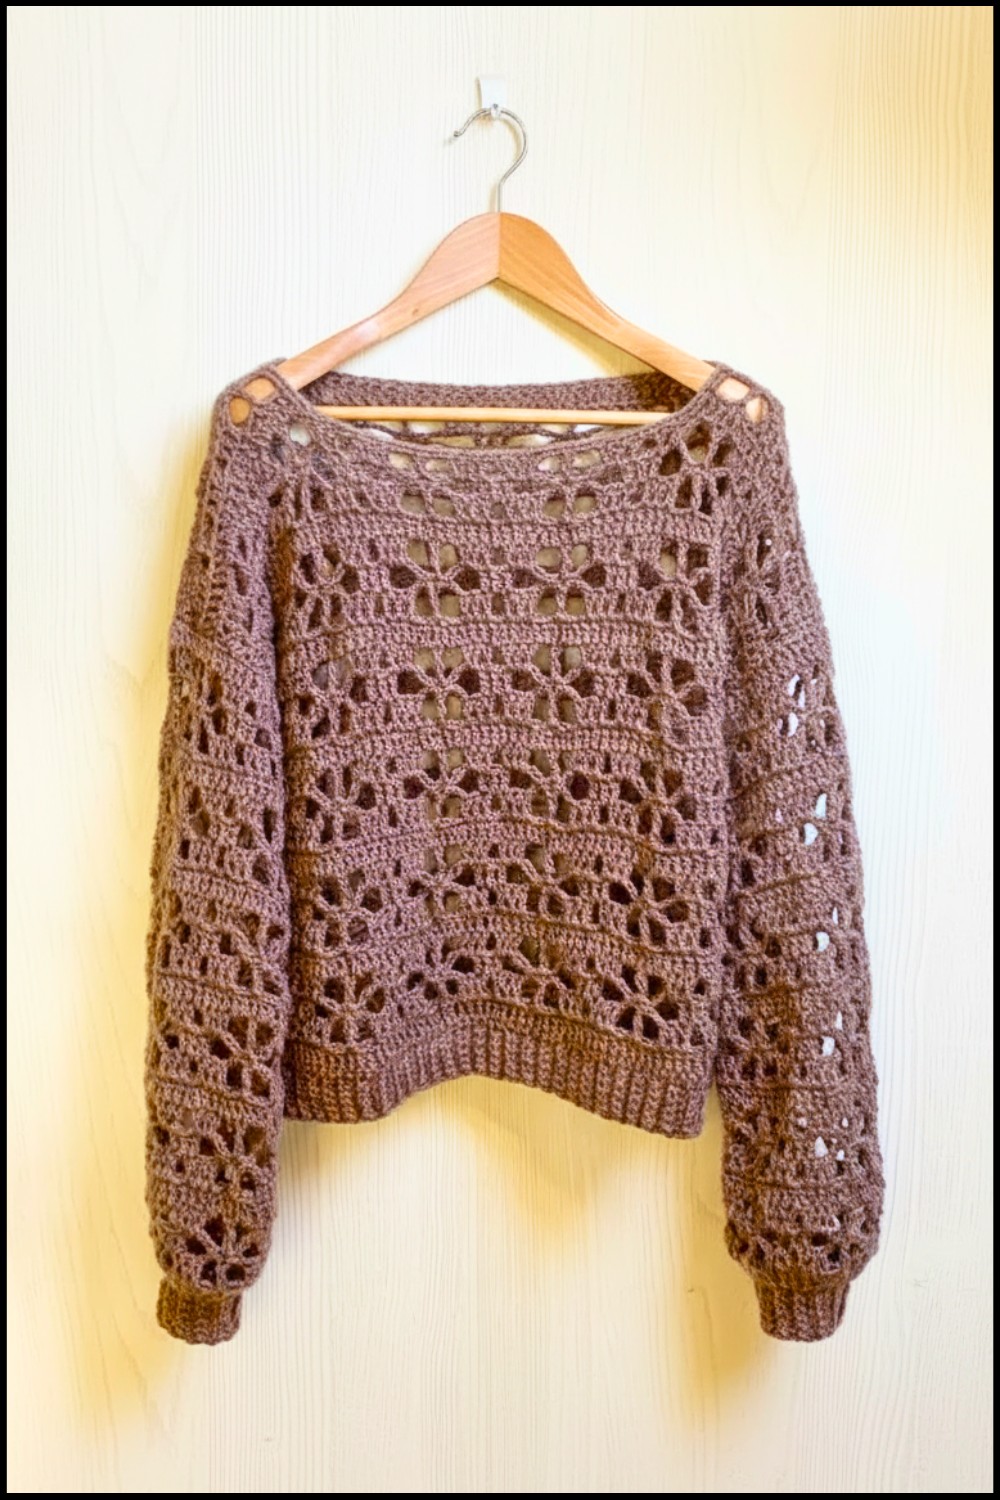
Layer your outfits with this Crochet Lacy Sweater Pattern as a lightweight and elegant piece for adding style and comfort to everyday wear.
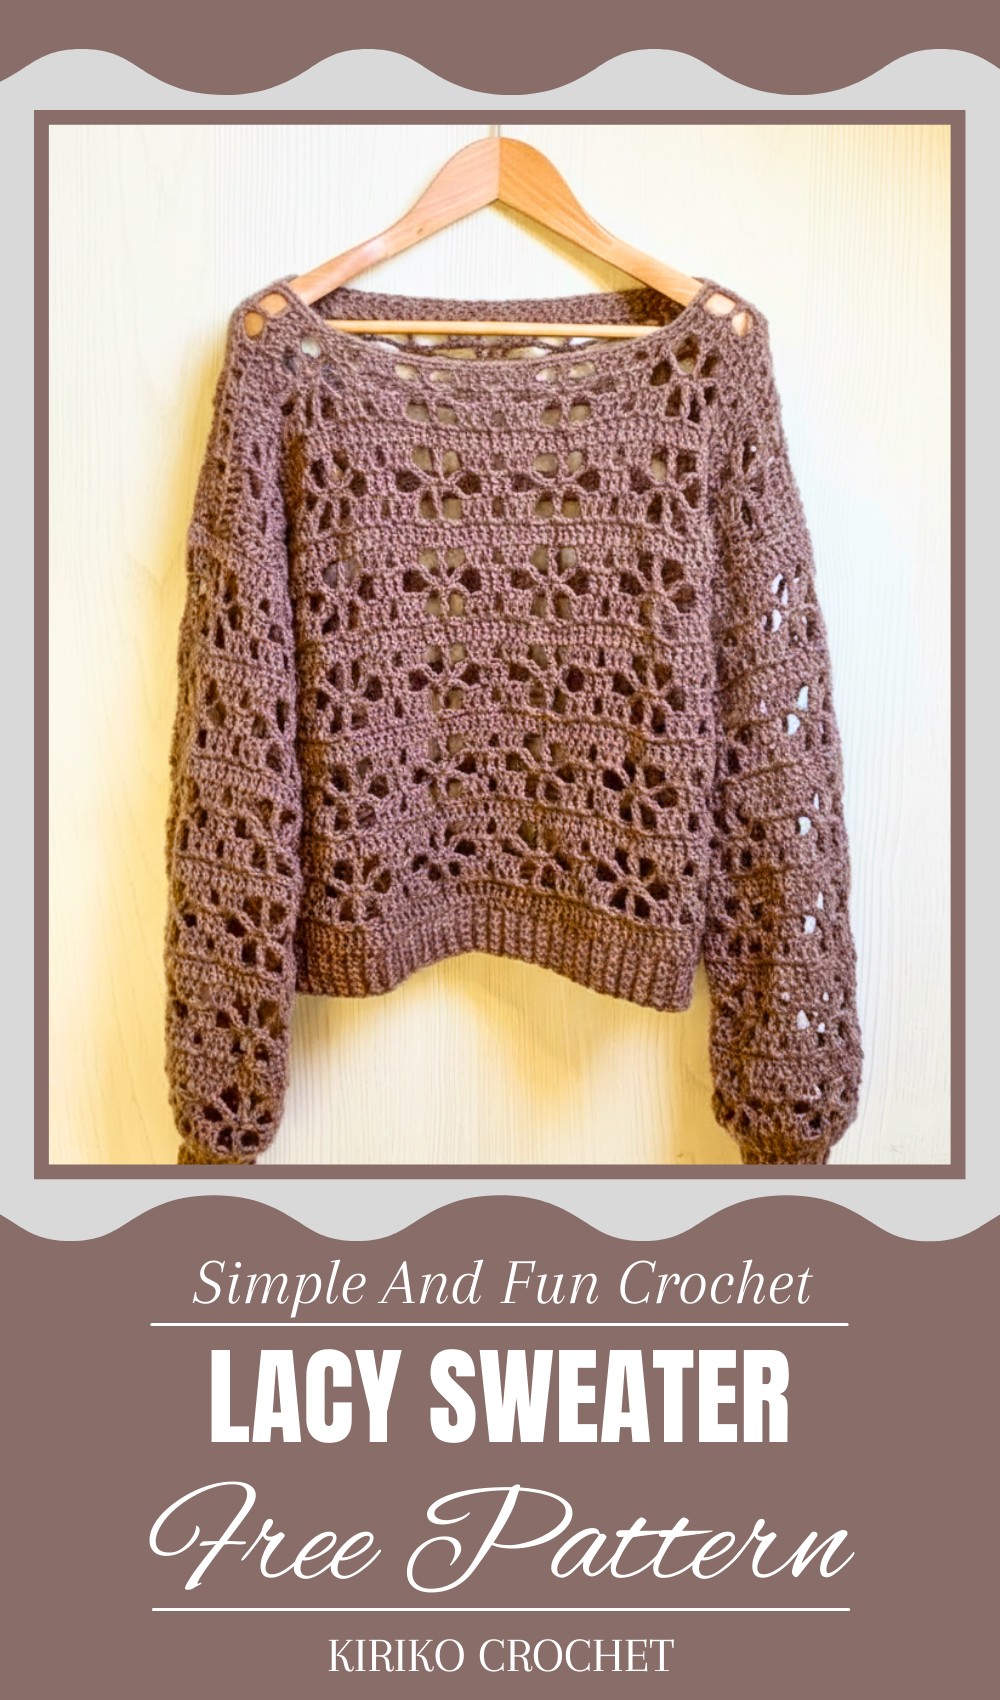
Feminine Crochet Lacy Sweater Pattern You’ll Wear Everywhere
A lacy sweater is a lightweight garment featuring intricate, decorative patterns resembling lace. This Crochet Lacy Sweater Pattern is breathable and versatile, making it suitable for a variety of styles and occasions. It can be worn casually with jeans or layered over a dress for a more elegant look. Its delicate and airy design makes it ideal for year-round use, providing comfort in warmer weather and serving as a stylish layer during colder months.
When choosing a lacy sweater, it’s important to consider the density of the pattern. Open-knit styles work well for warm weather, while thicker, more structured designs are better suited for cooler temperatures. Many lacy sweaters feature fine details that enhance their uniqueness, making them a fashionable addition or a thoughtful gift. Proper care, such as washing on a delicate cycle or hand washing, helps preserve the sweater’s shape and intricate design over time.
Materials
- Yarn: “Fluffy” from Daiso (or any similar 100% acrylic yarn).
- Weight: 35g
- Length: 107m
- Suggested hook size: 7mm crochet hook
- Crochet Hook: 6.0mm (Size 10 is used for this pattern for a more open texture).
- Optional Tools:
- Marker (to track rows and sections).
- Closed needle (for sewing and weaving in ends).
Key Abbreviations
- ch: Chain
- sc: Single Crochet
- dc: Double Crochet
- sl st: Slip Stitch
Customization Ideas
- Width Adjustments: Adjust the width of the sweater by increasing or decreasing the number of rows. Maintain multiples of 12 rows for floral patterns.
- Length Adjustments: Add or remove floral rows for shorter or longer sweater lengths.
- Sleeves: Customize sleeve width or length by adjusting rows, stitches, and patterns according to your preference.
Step-by-Step Pattern
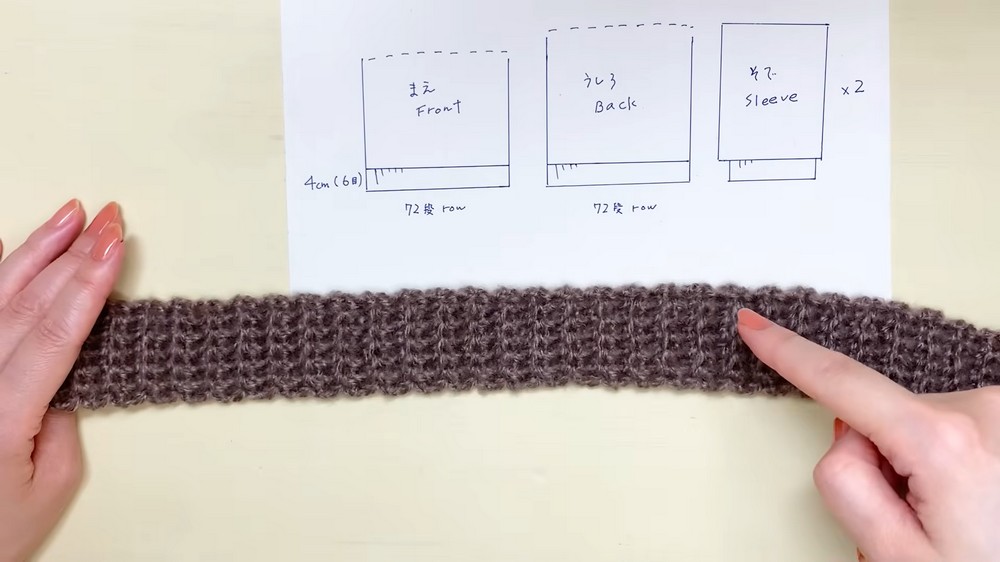
Step 1: Create Ribbed Panel (Back Body)
- Foundation Row: Make 6 chains, ensuring the yarn ends are long for sewing later.
- 6 chains = ~4cm in length.
- For customization, adjust chain length based on preference.
- Row 1: Make 1 chain, turn your work.
- Work 1 sc into the second chain from the hook.
- Repeat sc across the row.
- Row 2 Onwards: Turn your work after completing each row.
- For each row: Insert hook into the back loop (only one strand of yarn) for a ribbed texture.
- Repeat this process for a total of 72 rows.
- Ensure evenness: Start and end on opposite sides.
- Customization:
- Maintain multiples of 12 rows for floral patterns.
- Width reference (approx.): 57cm.
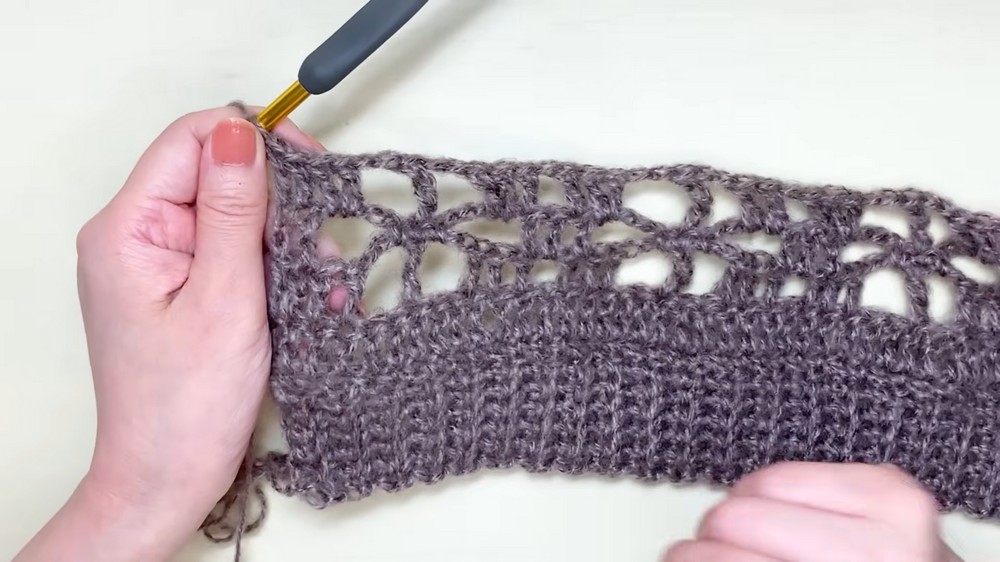
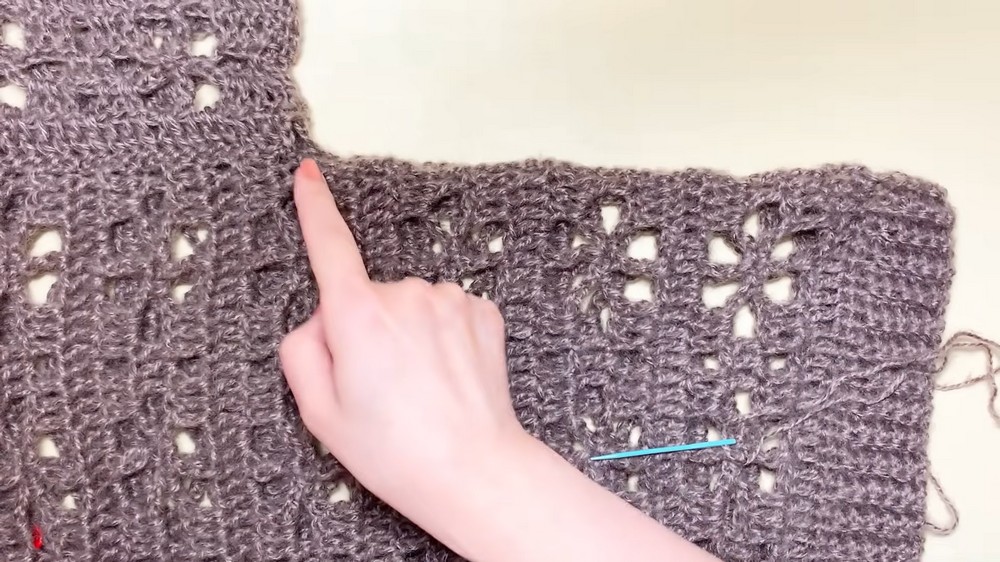
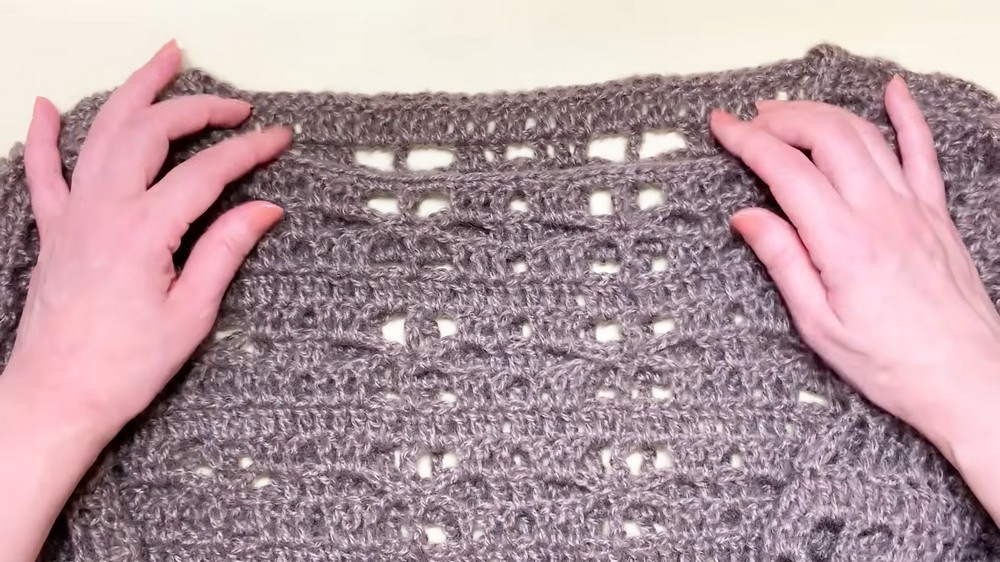
Step 2: Establish Flower Pattern (Back Body)
Foundation Double Crochet Rows
- Row 1: Work 72 sc along the edge of the ribbing. This creates the base for double crochets.
- Row 2: Work 72 dc. Start the row with 3 chains (counts as the first dc).
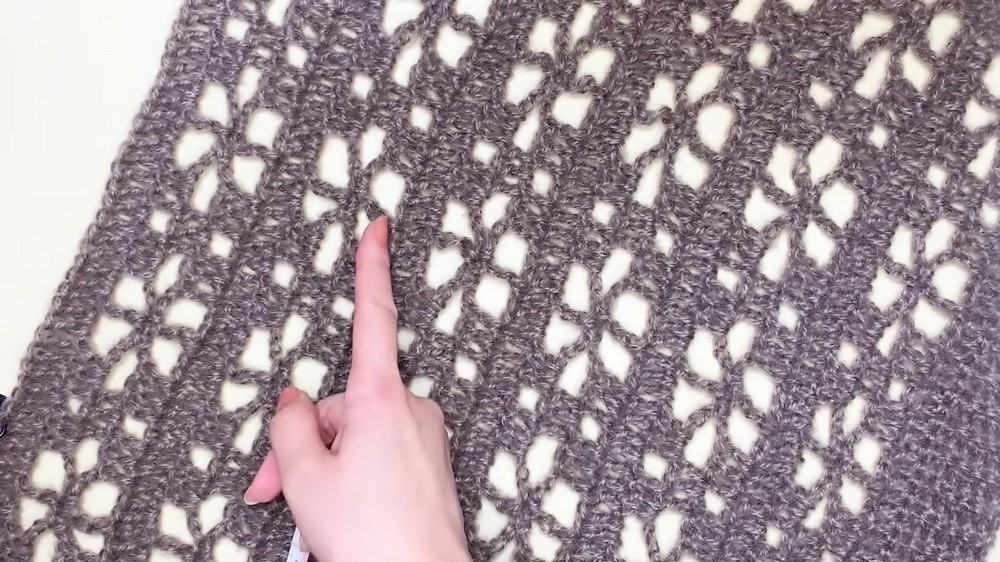
Patterned Rows (Flower Design)
- Begin with 3 chains (counts as the first dc).
- Crochet 3 dc, followed by 2 chains.
- Skip 2 base stitches, then work a dc in the third stitch.
- Repeat the pattern:
- [3 dc, 2 chains, skip 2 stitches] across the row.
- Follow this process for 6 rows to create the floral design.
- Repeat for the desired number of floral rows based on length preference.
Double Crochet Bridge Rows
- After completing floral rows, work 2-3 rows of dc (plain stitch) on top to balance the design and form the shape.
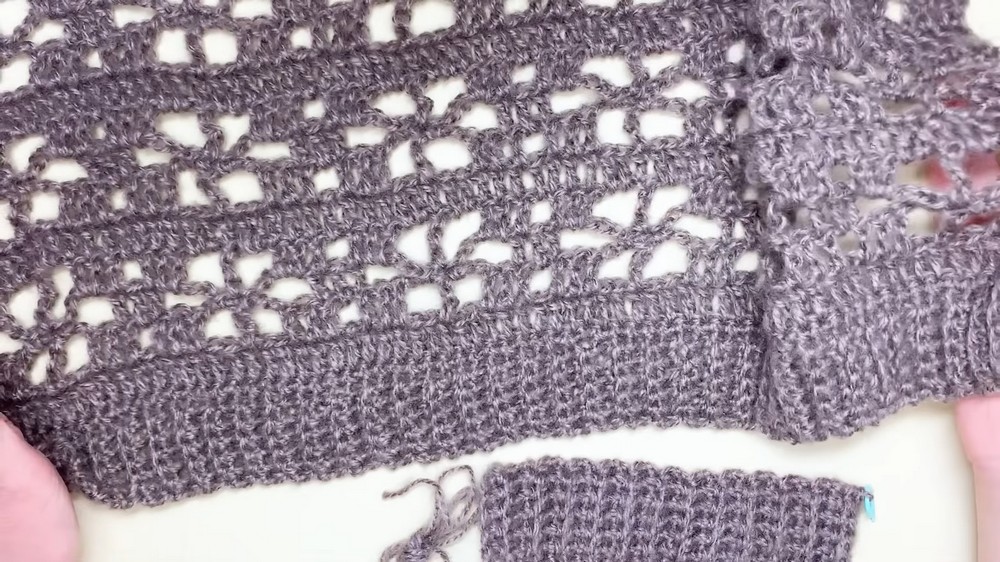
Step 3: Front Body Configuration
- Follow the same rib and floral pattern for the front body.
- Shorten the front body by 1 row of flowers compared to the back body. Ensure symmetry.
- Use markers to denote crucial sections (such as corners and key stitches).
Step 4: Sleeves
Ribbing (Sleeve Cuffs)
- Foundation: Work 24 rows of ribbed stitches like the back body.
- Adjust the cuff length for a tighter or looser fit.
Floral Pattern (Sleeve)
- Establish 49 dc for the first foundation rows above the ribbing.
- For customization: Multiply by 12 stitches + 1 for different widths or lengths.
- Work floral patterns as per the back body instruction, shortening to 4 rows of flowers for puff sleeves.
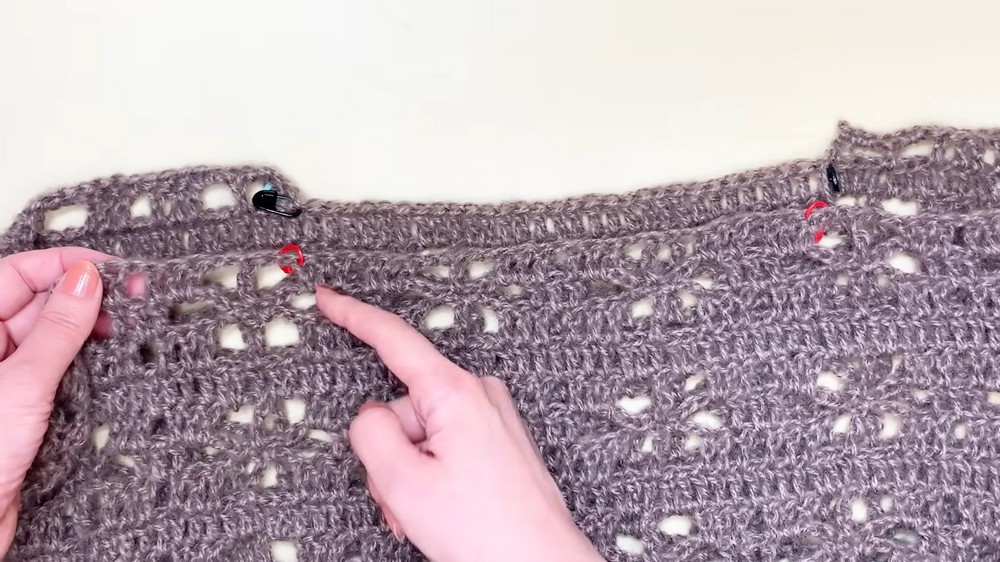
Step 5: Assembly and Sewing
Sew Body Panels (Shoulders)
- Align the back and front panels with the wrong sides facing out.
- Sew the shoulder seams using the remaining thread foot.
- Insert the needle through the two strands of the single crochet.
- Ensure tight but non-constricting stitches.
Attach Sleeves
- Align the sleeve edges with the shoulder seams (use markers or clips).
- Sew using the same method as the shoulders.
Sew Sides
- Start from the bottom side seam and continue up to the sleeves.
- Turn the sweater right side out and sew the seams neatly.
Step 6: Edging and Finishing
- Bottom Edging:
- Work sc across the bottom edge for a polished look.
- Create 3 sc for each corner or uneven section to maintain shape.
- Hide Loose Ends:
- Use a needle to weave in all remaining thread ends. Ensure they are secure and concealed.
Special Notes
- Tension Check: Ensure your stitches are even throughout to avoid a distorted or uneven sweater.
- Length Measurement: Adjust based on desired fit (slim or loose).
Conclusion
This floral crochet sweater pattern blends functionality with beauty, offering a versatile garment that works for various seasons. With its lightweight and openwork design, you’ll create a standout piece of clothing. Follow the assembly and sewing carefully for the best results.
Pattern Correction & Tips
Corrections:
- In case your stitch counts differ during floral rows, adjust the stitches evenly at the end of the row using dc or sc.
Tips:
- Use stitch markers generously to prevent missed rows or uneven alignment.
- Test your gauge at the beginning, especially if opting for a different yarn or hook size.
Leave a Reply