
Protect your favorite reads with this Free Crochet Book Cover Pattern that offers a snug fit keeps pages safe and adds charm to every book.
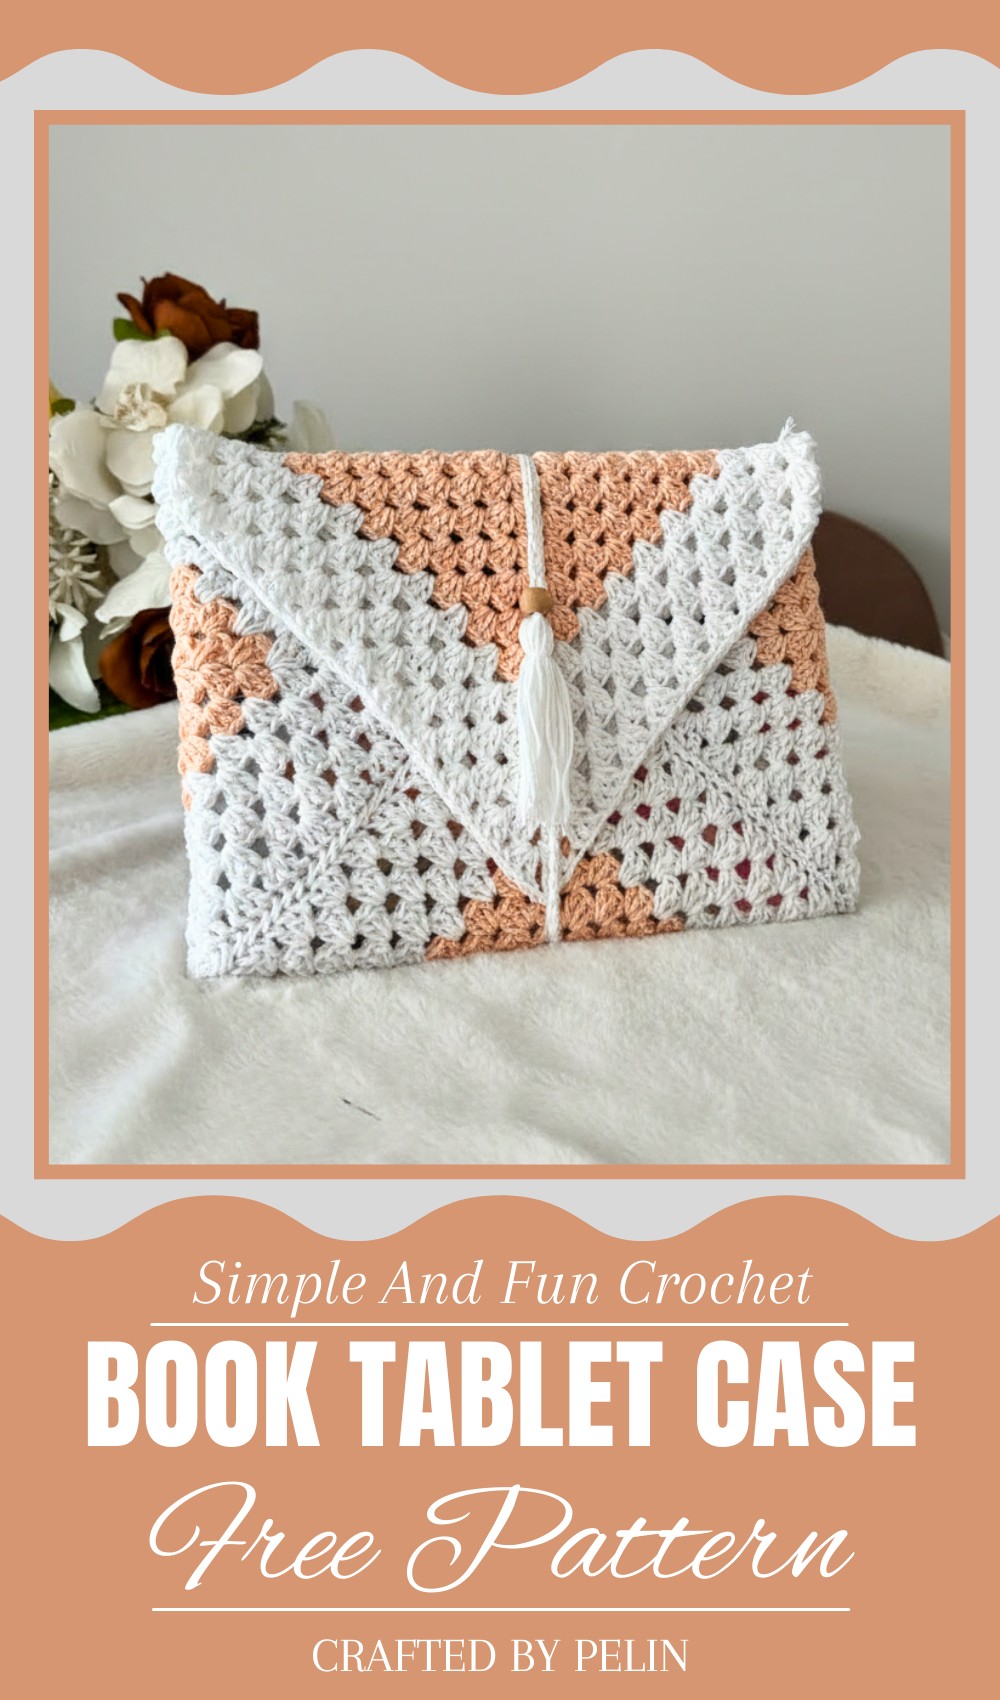
Creative Crochet Book Cover Pattern for Personalized Notebooks
Adding a handmade touch to your favorite book makes it even more special. A crochet book cover pattern is not only a practical way to protect your book from wear and tear but also a beautiful way to give it style and character. Made with colorful yarns and unique designs, this cover can transform an ordinary book into something truly eye-catching. Whether it’s a novel, diary, journal, or even a notebook, this cover adds a touch of elegance and individuality.
Using a crochet book cover pattern, you can create one that fits perfectly, making it ideal for personal use, gifting, or adding charm to your workspace or bookshelf. Be it for school, the office, or home, this cover is versatile and customizable. With handmade care and creativity in every stitch, a crochet book cover not only protects your book but turns it into a reflection of your style and personality!
Materials
Yarn:
- Cotton Yarn:
- 50g balls of cotton yarn in two colors.
- Suggested colors: Powder pink and white.
Hook Size: 3.5mm crochet hook (size 6).
Tools:
- Scissors: For cutting ends neatly.
- Plastic Needle: For sewing seams.
- Bead: Optional, for embellishing the tassel.
Key Abbreviations
- ch: Chain
- dc: Double Crochet
- sl st: Slip Stitch
Customization Ideas
- Dimensions: Adjust the number of rows or stitches to fit larger or smaller books, notebooks, or devices.
- Colors: Use contrasting or gradient yarn for artistic flair.
- Closure Options: Instead of a chain tie, you could use buttons, snaps, or Velcro for functionality.
- Details: Tassels, beads, or embroidered designs can add decorative charm to your book cover.
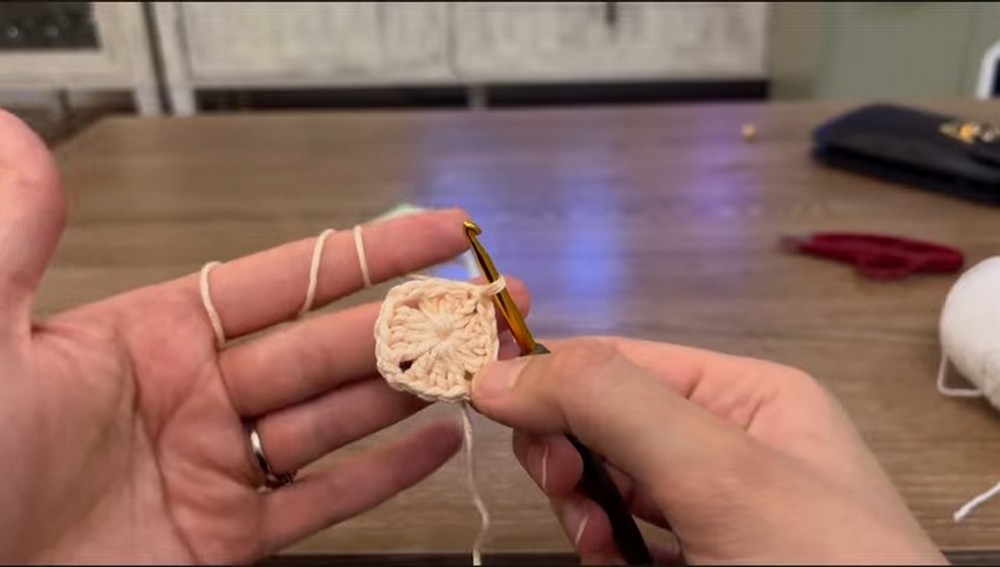
Detailed Pattern
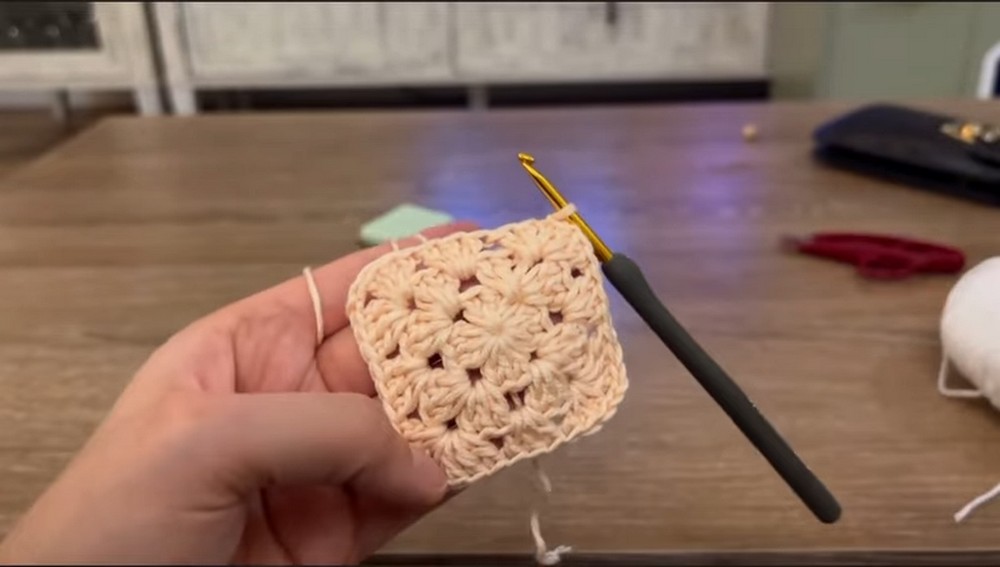
Step 1: Magic Ring Start
- Create a Magic Ring:
- Wrap the yarn around your finger once.
- Insert your hook under the yarn, pull up a loop, and form the magic ring.
- Foundation Chains:
- Make 3 chains (counts as the first dc).
- First Group of Double Crochets:
- Into the magic ring, work 2 dc (makes a total of 3 with the foundation chain).
- Spacer Chains:
- Chain 2, then work another group of 3 dc into the magic ring.
- Repeat this process 4 times for a total of four groups of 3 dc, separated by 2 chains.
- Closing Row 1:
- Pull the magic ring tight to close the center gap.
- Insert your hook into the top of the 3 initial chains, pull up a loop, and slip stitch to finish the first row.
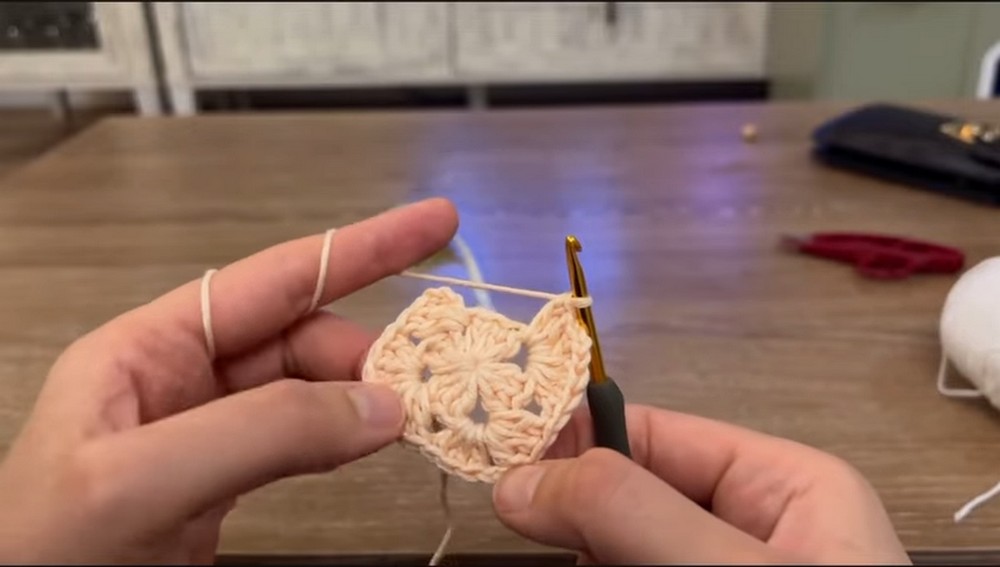
Step 2: Expanding the Motif (Corner Groups)
Row 2:
- Foundation Chains:
- Chain 3 (counts as the first dc).
- Work Corner Points:
- In each chain-2 space from Row 1, work 3 dc, 2 ch, 3 dc (this forms a corner group).
- Spacer Chains and Slip Stitch to Close:
- Between corner groups, chain 0 (move directly to the next chain-2 space).
- At the end of the row, slip stitch into the top of the initial chain-3 and fasten off.
Step 3: Adding Intermediate Points
Row 3:
- Foundation Chains:
- Chain 3 (counts as the first dc).
- Intermediate Points:
- Work 3 dc into the space between the corner groups.
- Corner Points:
- Work 3 dc, 2 ch, 3 dc into each chain-2 space for corner points.
- Continue:
- Alternate between intermediate points (3 dc) and corner points (3 dc, 2 ch, 3 dc).
- Do not chain between intermediate points—only yarn over.
- Closing Row 3:
- Slip stitch into the top of the chain-3 and fasten off.
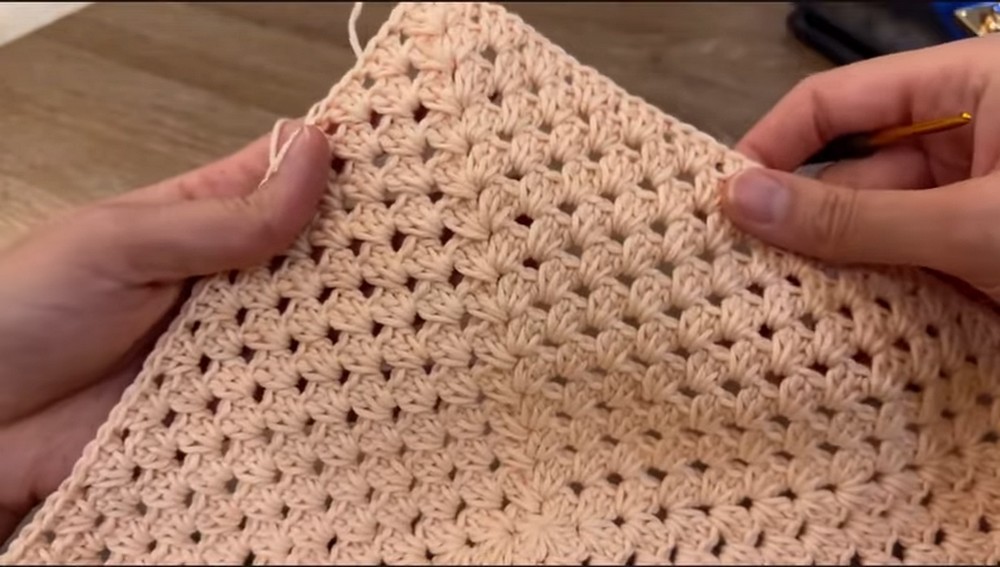
Step 4: Repeat Rows
Rows 4 and Beyond:
- The number of intermediate points increases each row.
- Row 4 will have 2 intermediate points.
- Row 5 will have 3 intermediate points, and so on.
- Continue adding rows following the same process:
- Alternating between corner points (3 dc, 2 ch, 3 dc) and intermediate points (3 dc).
- Switch colors every few rows for contrast if desired.
- Work until the desired size is achieved (approximately 35 cm long for a standard book cover).
Step 5: Connecting Strap
- Chain Strap:
- After finishing the main motif, create a chain strap approximately 85 cm long.
- Fasten Off:
- Cut the yarn, leaving a small tail, and hide it by weaving it through neighboring stitches with a plastic needle.
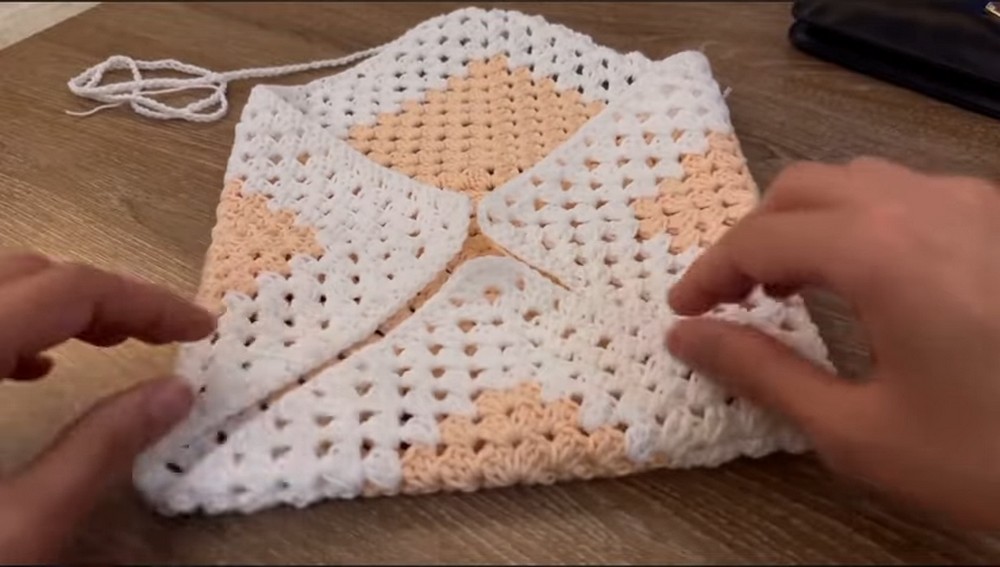
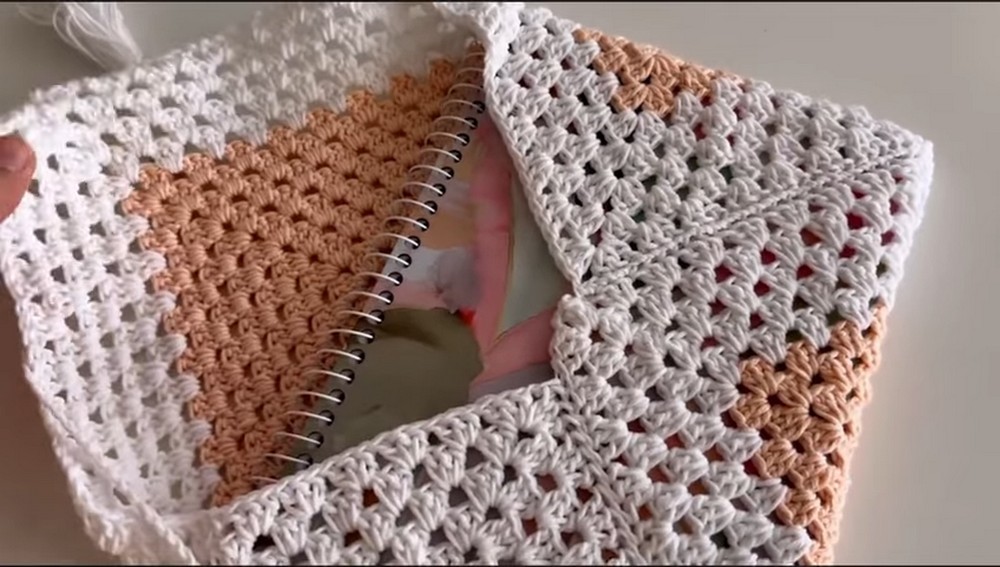
Step 6: Assembly
- Fold Motif:
- Fold the motif lengthwise such that the edges come together to create a sleeve for the book.
- Align Edges:
- Use pins or clips to align edges before sewing. Do not fold the corners entirely inward; leave small gaps for sewing intermediate points.
- Sew Edges:
- Thread the yarn onto a needle and sew along the aligned edges using a whipstitch.
- To maintain symmetry, sew into the top of the stitches.
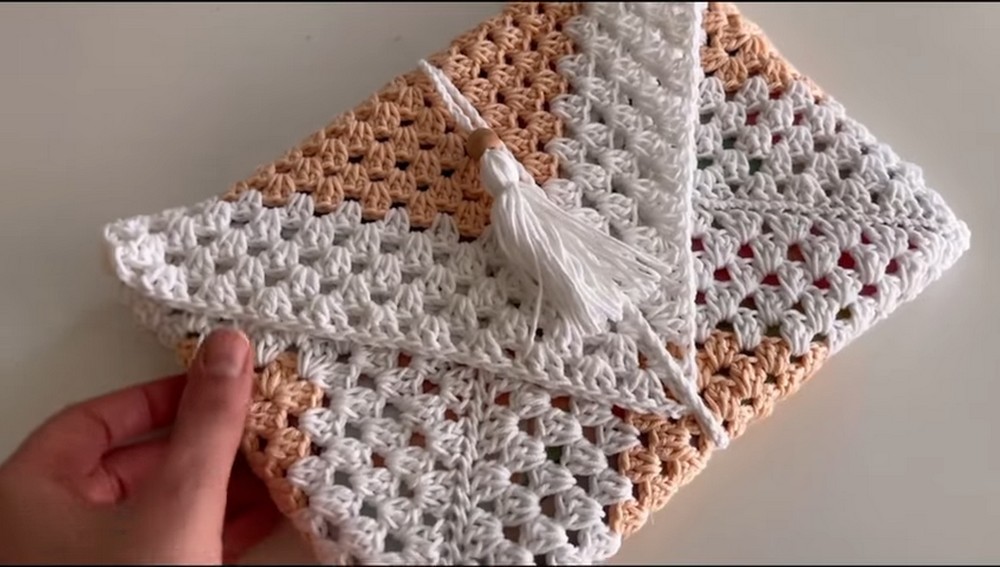
Step 7: Optional Tassel Detail
- Create Tassel:
- Wrap one color of yarn around a flat object (such as a book or piece of cardboard) about 20-30 times.
- Tie the top with yarn, trim the bottom loops, and secure with a bead or a tight knot.
- Attach to Chain:
- Tie the tassel securely to the end of the chain strap.
Special Notes
- Color Changes: Always start the new color at the next corner point rather than the end of the row to avoid visible overlaps.
- Strap Options: You can adjust the length of the strap or omit it entirely for simpler designs.
Conclusion
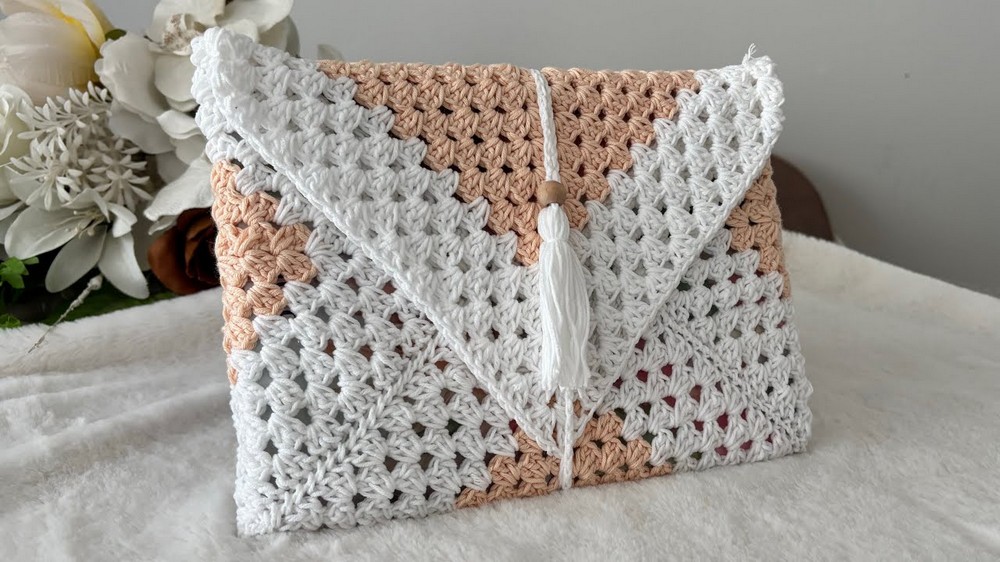
This elegant crochet book cover is an easy project suitable for beginners and advanced crocheters alike. Its versatile dimensions and strap design allow you to repurpose it as a laptop sleeve, tablet cover, or notebook protector. The optional tassel adds a decorative finishing touch, and the use of contrasting colors provides visual interest.
Corrections and Tips
Pattern Corrections:
- If corners look uneven, double-check the number of chains between groups while working corners.
Tips:
- Secure Color Changes: Wrap yarn tightly when switching colors to prevent gaps.
- Block the Cover: Use a steam iron and a damp cloth to block the cover, ensuring neat corners and a smooth surface.
- Measurement Adjustments: Use the book or device you’re covering as a guide to measure size.

Leave a Reply