
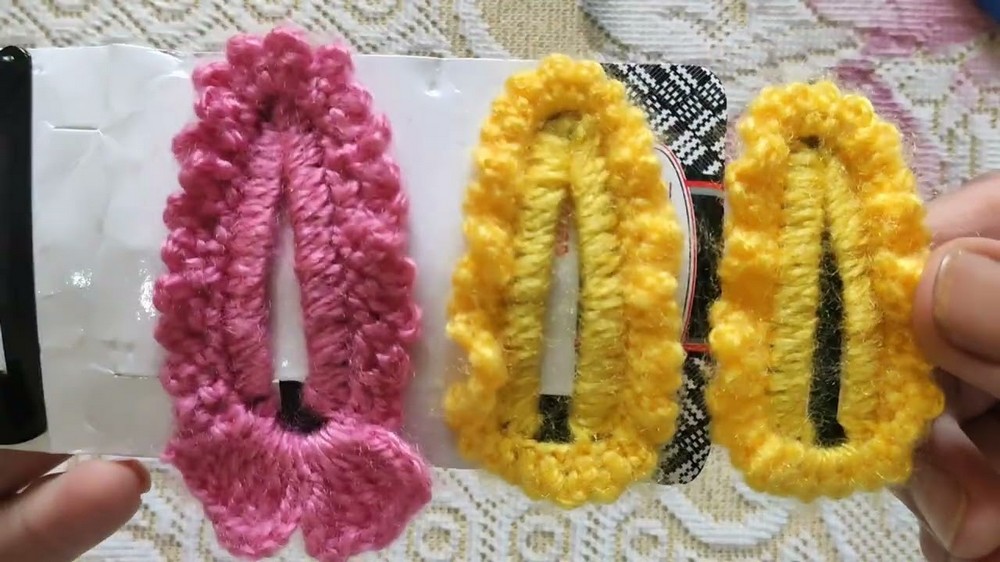
Elevate your style with stylish crochet hair clip pattern that perfect for any occasion and easy to make, adding a unique touch to your look.
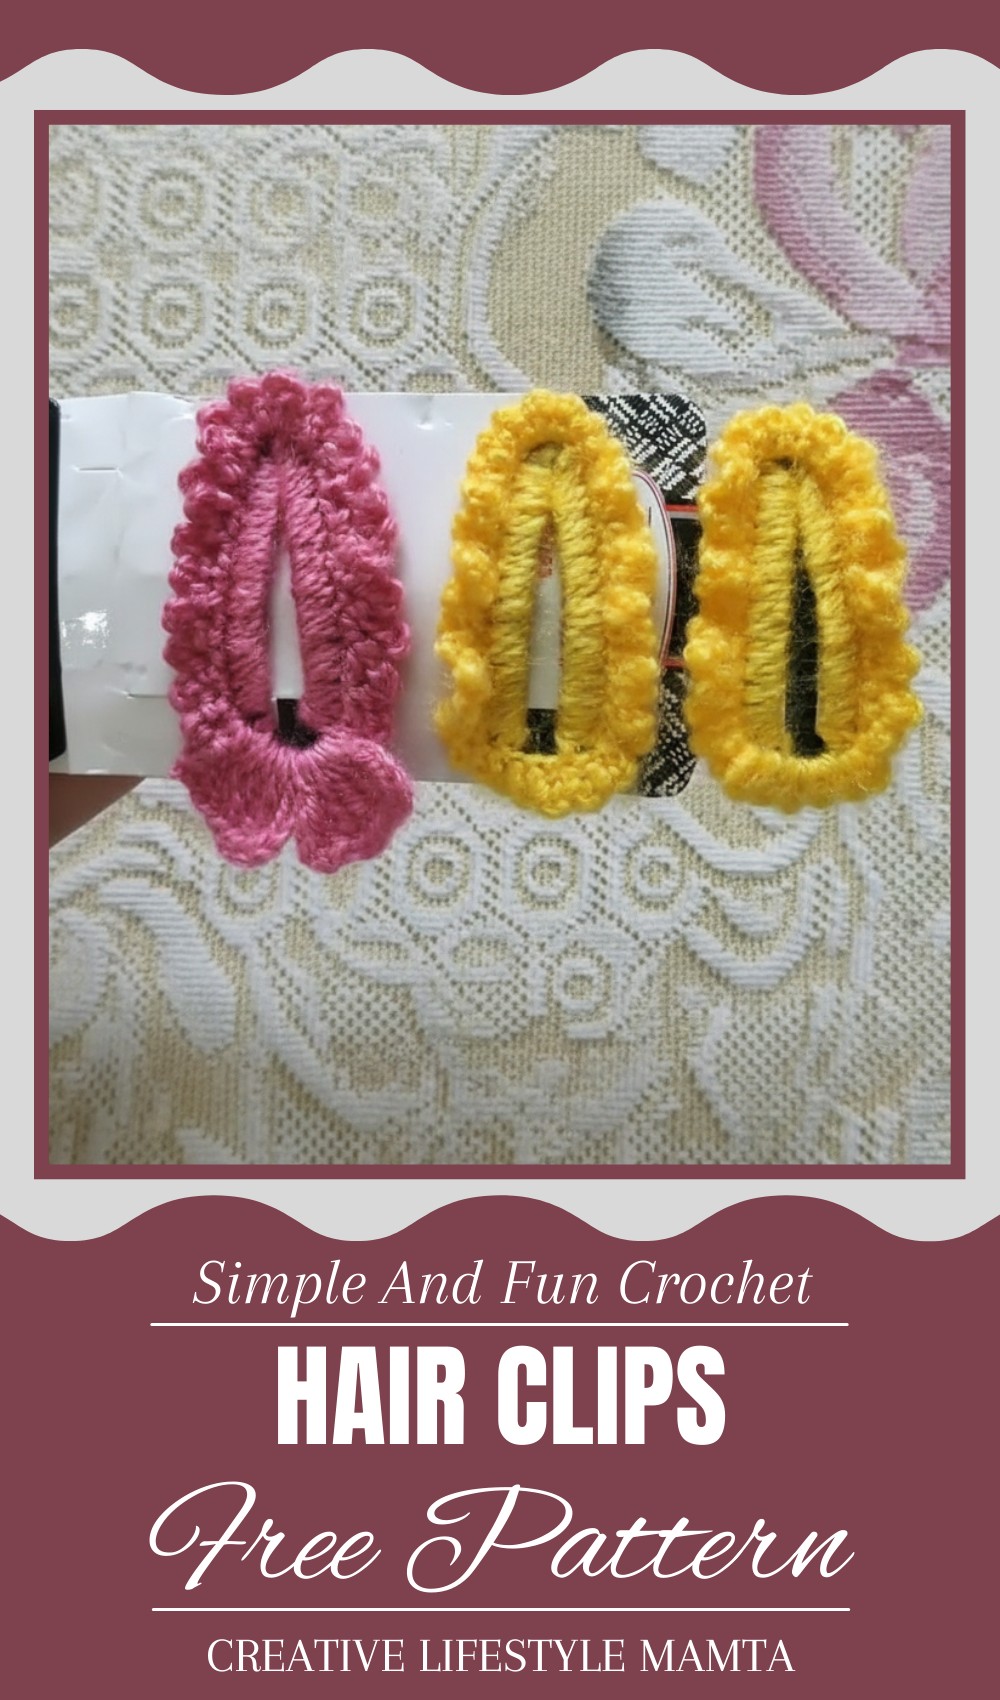
Crochet hair clip pattern are the perfect way to turn simple accessories into tiny works of art that bring joy and style into your life. Imagine creating your own dazzling clips in your favorite colors, little flowers, bows, or even quirky shapes that stand out wherever you go. Whether you’re getting ready for a big event like a wedding or just want to add a fun touch to your everyday look, this handmade clip are so versatile and full of charm.
Vintage Crochet Hair Clip Pattern with a Modern Twist
Its more than just hair accessories—they’re a way to express your creativity and make something truly unique! Plus, Its make thoughtful, heartwarming gifts for friends and family. With crochet hair clip pattern, you can take simple materials and turn them into something beautiful, fun, and totally you.
Materials Required
To make your beautiful crochet hair clip, gather the following materials:
- Yarn: Fine cotton or crochet thread (size 10 or similar for delicate work).
- Base Color: For the main clip area (e.g., yellow).
- Secondary Color: For petals or decoration (e.g., pink or contrasting color).
- Hook Size: 1.75 mm crochet hook.
- Hair Clip: Plain, flat metal hair clip (any size).
- Scissors: For trimming thread.
- Tapestry Needle: For weaving ends.
Key Abbreviations (US Terminology):
- CH: Chain
- SC: Single Crochet
- SL ST: Slip Stitch
- TR: Triple (Treble) Crochet
- ST(S): Stitch(es)
Special Notes:
- Matching Yarn and Clip: Choose fine yarn or crochet thread that easily fits around the selected clip and provides a neat finish.
- Adjusting Petals: For larger clips, you can lengthen the chains or adjust the number of petals in the decorative section.
- Tension: Keep your stitching tight enough to fit snugly around the clip for a professional finish.
Crochet Hair Clip Pattern
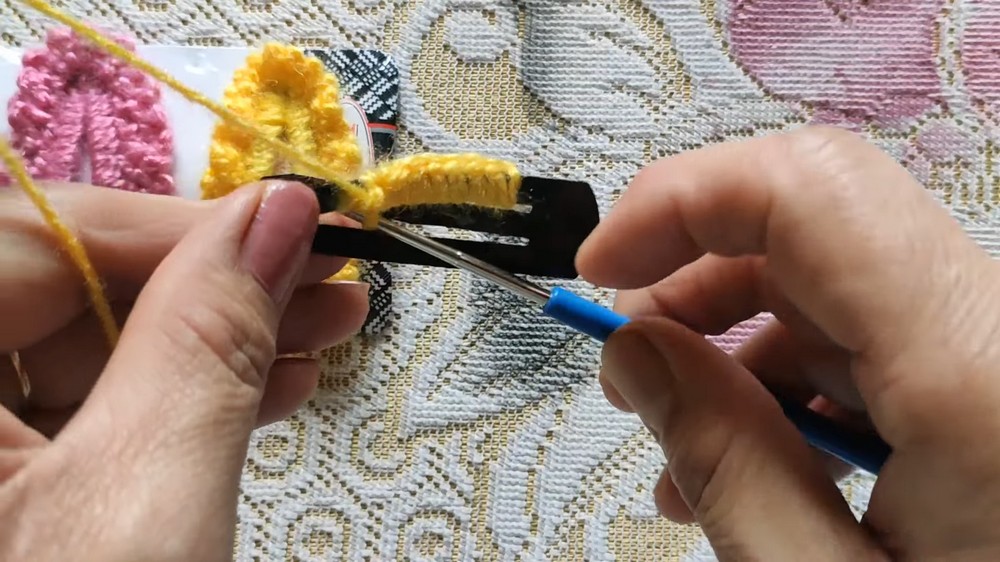
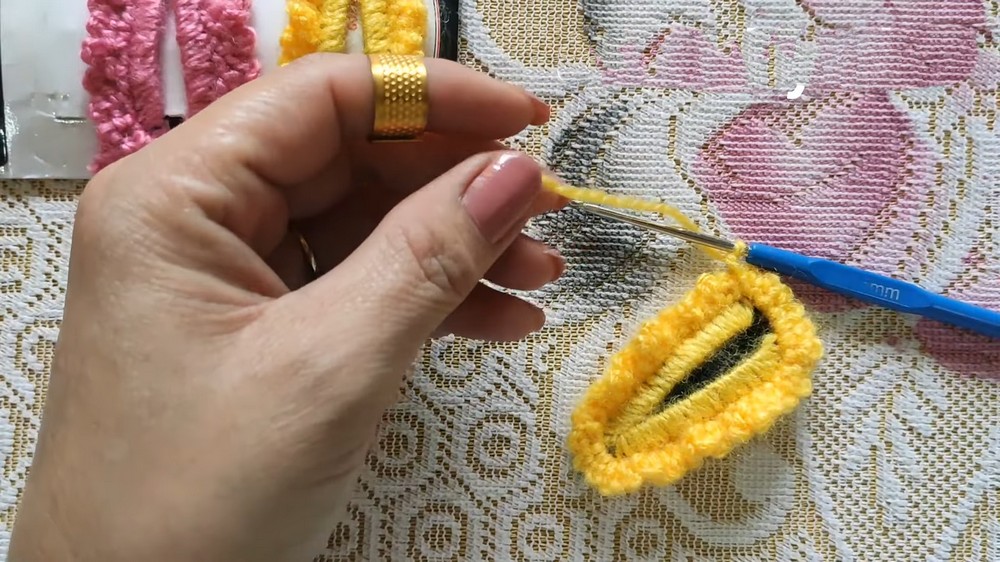
Step 1: Base Cover for the Clip
- Foundation Row:
- Attach your yarn to the edge of the hair clip using a slip knot.
- Work 15 SC stitches closely along one side of the clip to cover it snugly. Ensure that the stitches slide neatly around the metal edge of the clip.
- Chain:
- After fitting the first side, CH 2, and turn your work to the other side.
- Second Side:
- Work 15 SC along the opposite side of the clip, pulling yarn through to create a clean edge. Insert the hook into the stitches from the edge of the clip and secure tightly to ensure the yarn fits seamlessly.
Tip: Double-check both edges for even coverage before proceeding.
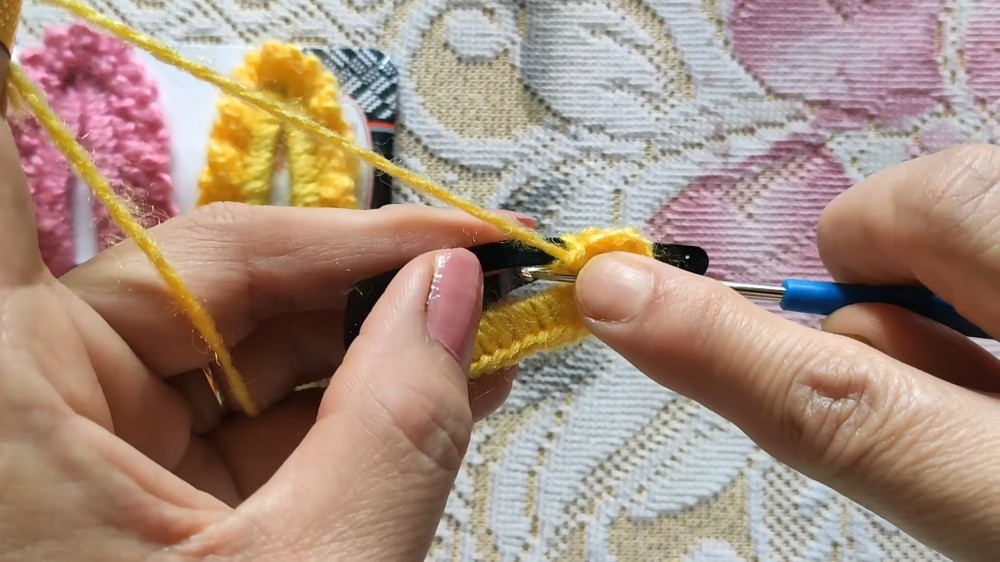
Step 2: Decorative Petals on the Base
- Adding Petals (First Row):
- CH 4, then slip stitch (SL ST) into the next stitch on the base to create a small loop.
- Repeat: CH 4, SL ST into the next ST, skipping one stitch as needed, until you reach the end of the row. Each loop forms the foundation for a petal (approximately 4–5 petals for smaller clips).
- Second Row (Petal Fill):
- Attach your contrasting yarn (e.g., pink) and work into each loop:
- CH 4,
- Work 5 TR stitches into the loop,
- CH 4, SL ST into the next petal loop.
- Repeat this for each loop along the edge until each petal is filled with TR stitches, creating a floral effect.
- Attach your contrasting yarn (e.g., pink) and work into each loop:

Step 3: Back Petals for Fullness
- Foundation Row (Back Petals):
- Turn the clip over to the base and work the petals for the back row.
- CH 5 and SL ST on the back side to create your loops (approximately 4–5 loops).
- Back Petals Fill:
- Into each loop, work:
- CH 4,
- 5 TR stitches,
- CH 4, SL ST back into the loop.
This creates a layered petal effect.
- Into each loop, work:

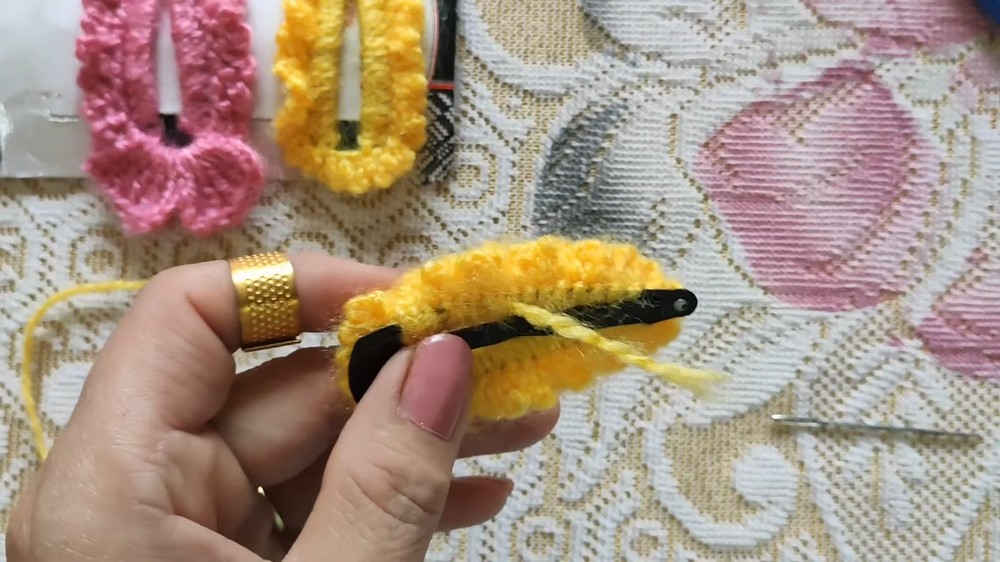
Step 4: Secure the Thread
- After completing the petals, weave the remaining thread into the back using a tapestry needle to secure all ends. Ensure no threads are visible on either side for a clean finish.
- Trim any excess yarn.
Step 5: Optional Variations
- Alternate Petal Sizes:
- For a varied look, you can alternate between CH 3 (smaller petals) and CH 5 (larger petals).
- Additional Decorations:
- Sew small beads or use a contrasting yarn for additional floral details in the center of the petals.
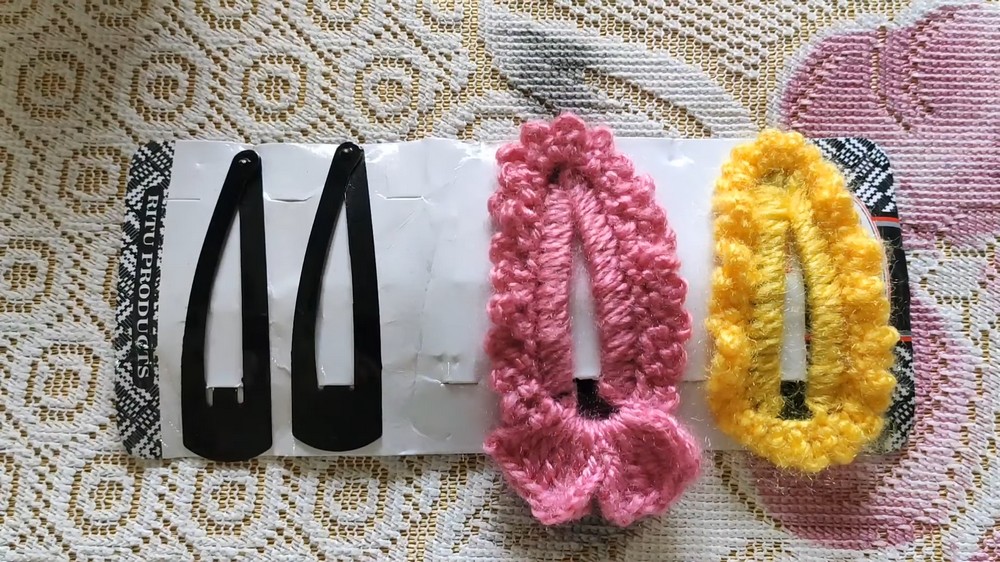
Conclusion
Congratulations! Your crochet hair clip is now complete. This delicate and customizable accessory can elevate any hairstyle, making it a perfect gift or personal embellishment. Feel free to experiment with different colors, petal sizes, or even additional layers to create a unique look!
Pattern Corrections and Tips
- Ensure Coverage: If the clip isn’t fully covered at the edges, add more SC stitches in the base row until the metal is entirely hidden.
- Matching Colors: Use yarn or thread colors that match the metal base for a cohesive and polished look.
- Back Petals: To enhance the design, slightly stagger the back-row petals to create a layered flower style.
Pro Tip:
If you want a firmer finish, spray the petals lightly with starch spray and shape them while drying. This ensures the petals retain their structure and stand out beautifully.

Leave a Reply