
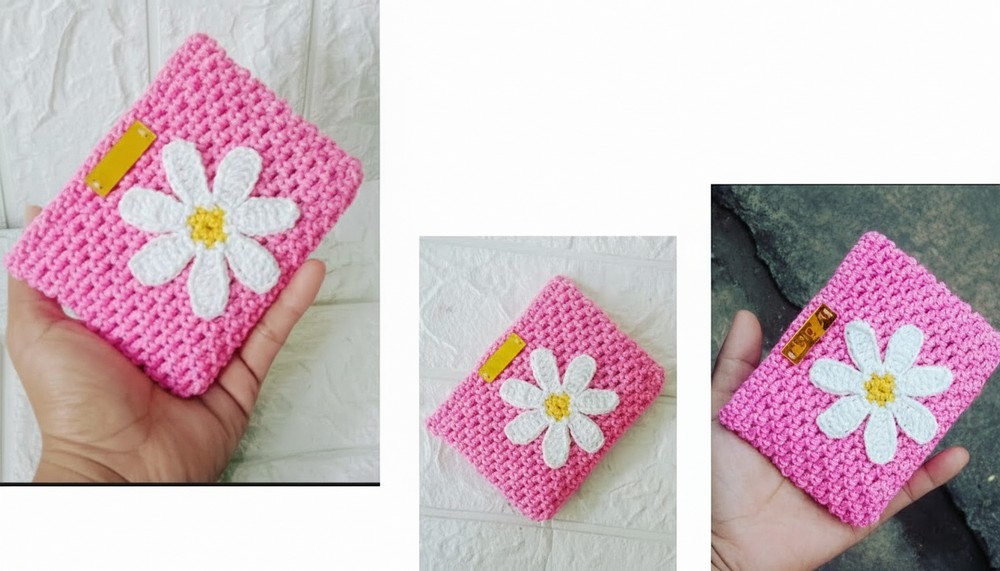
Stay organized with a beautiful crochet card holder pattern perfect for keeping your essentials neat and unique every day in a creative way.
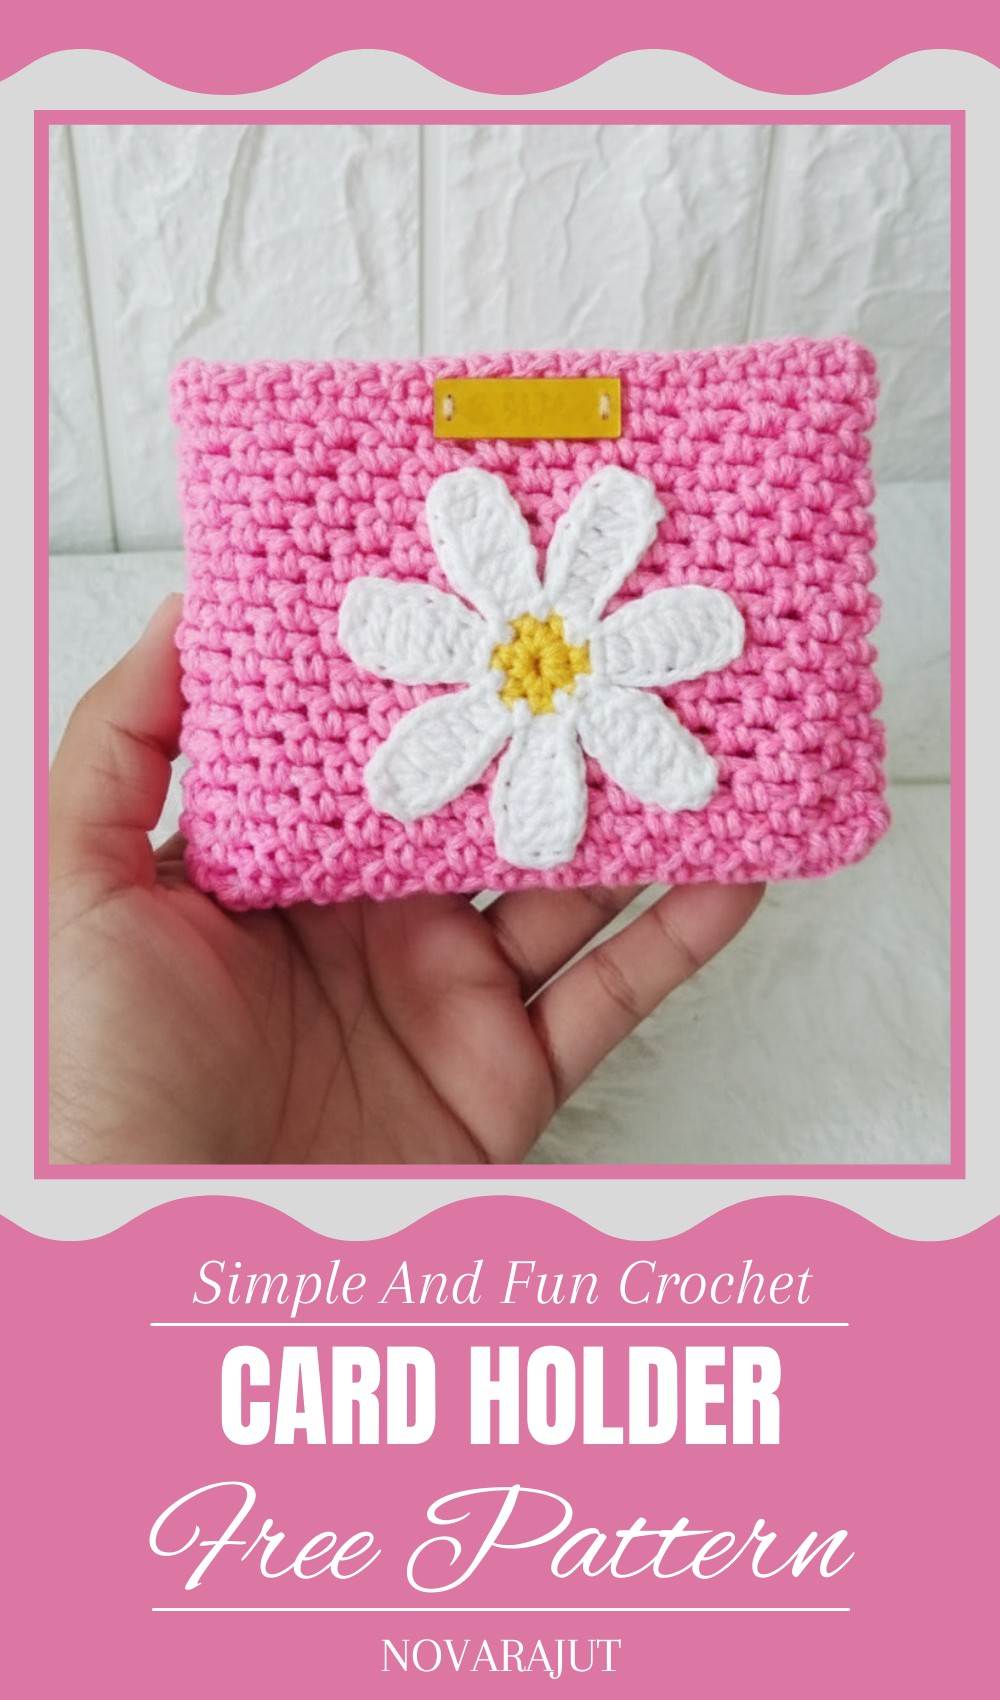
Looking for a creative way to keep your cards organized? A crochet card holder pattern is a beautiful and practical option to try. Not only does it help you store credit cards, business cards, or IDs securely, but it also adds a touch of handmade charm to your everyday life. Its lightweight design makes it easy to carry anywhere, whether you’re running errands, heading to work, or traveling.
Cozy Crochet Card Holder Pattern for Keeping Things Safe
With endless yarn colors and patterns to choose from, you can create a card holder that matches your personal style. Plus, it’s not just for yourself—it makes a perfect thoughtful gift for friends or family. Crochet card holder combine beauty and function, giving you a chance to showcase your crochet skills while designing something valuable and unique. From vibrant colors to soft pastels, this little project is an easy way to add creativity and organization to your daily essentials.
Materials Required
Yarn and Tools:
- Yarn Type:
- Poly-shiny thread (polykilap) for a glossy and durable finish.
- Alternative: Nylon or cotton yarn (medium-weight, size 4 yarn).
- Hook Size: Approximately 3.0mm crochet hook, adjusted based on thread thickness.
- Scissors: For trimming yarn ends.
- Stitch Markers: Helpful for identifying specific points during shaping.
- Buttons: Either standard-sized buttons or magnetic buttons for closure.
- Glue: Optional for attaching decorations, such as flowers.
Optional Decorations:
- Flower appliqué: Knitted or crocheted flower decorations (such as daisies) for embellishment.
Key Abbreviations (US Terminology)
- SC: Single Crochet
- SL ST: Slip Stitch
- CH: Chain
- BLO: Back Loop Only
- DEC: Decrease (SC2TOG or combining stitches).
- ST(S): Stitch(es)
Special Notes
- Tension: Maintain consistent tension for neat edges and uniform stitches.
- Size Adjustments: Modify the width or height by increasing the starting chain or adding rows. For oversized wallets, ensure proportional closure with larger buttons or magnets.
- Finishing Details: Secure loose ends firmly using a tapestry needle and avoid visible knots. If using nylon yarn, burn ends lightly for durability.
Step-by-Step Crochet Card Holder Wallet Pattern
Step 1: Create the Foundation (Base)
Foundation Chain:
- Leave a 70cm tail of yarn and make a slip knot.
- Work 23 CH to create the initial chain.
Row 1 (SC Base Row):
- Work SC into the 2nd CH from the hook.
- Continue working SC into each CH, creating 23 STS total.
- CH 1, turn your work.
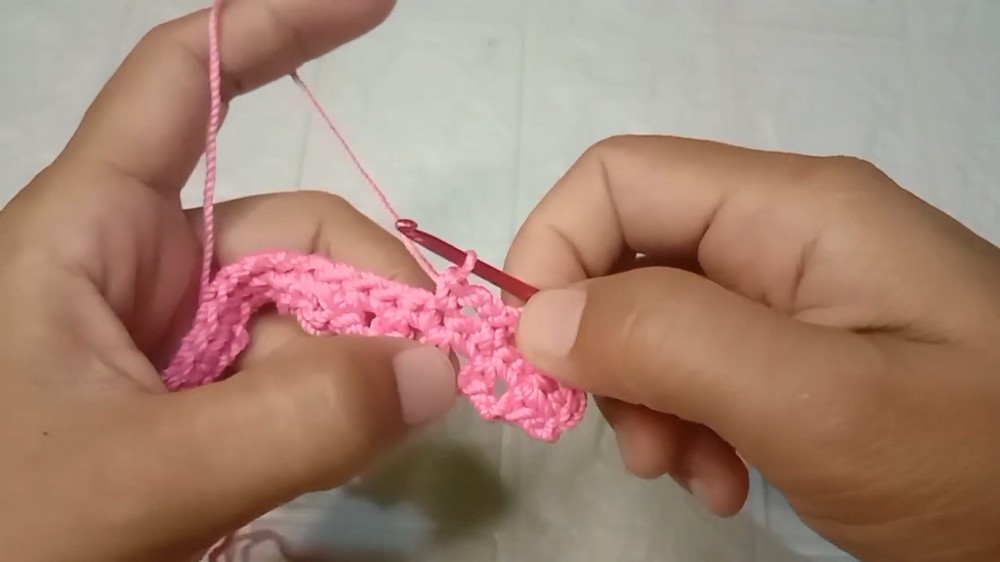
Step 2: Create the Main Texture
Row 2 (Chain Spaces):
- Skip the first stitch, and into the next, work 1 SC.
- CH 2, skip one ST, work 1 SC into the next ST.
- Repeat this CH 2, skip 1 ST, SC across the row.
- CH 2 at the end, turn.
Row 3 (Texture Development):
- Into the chain spaces (CH 2 spaces) created in the previous row:
- Work SC into the chain space.
- CH 2, skip to the next chain space and SC.
- Repeat this stitch pattern across. Place SC STS parallel to the previous row’s SC stitches for alignment.
- CH 2, turn your work.
Repeat Row 3:
- Continue working this alternating SC + CH 2 in chain spaces for texture.
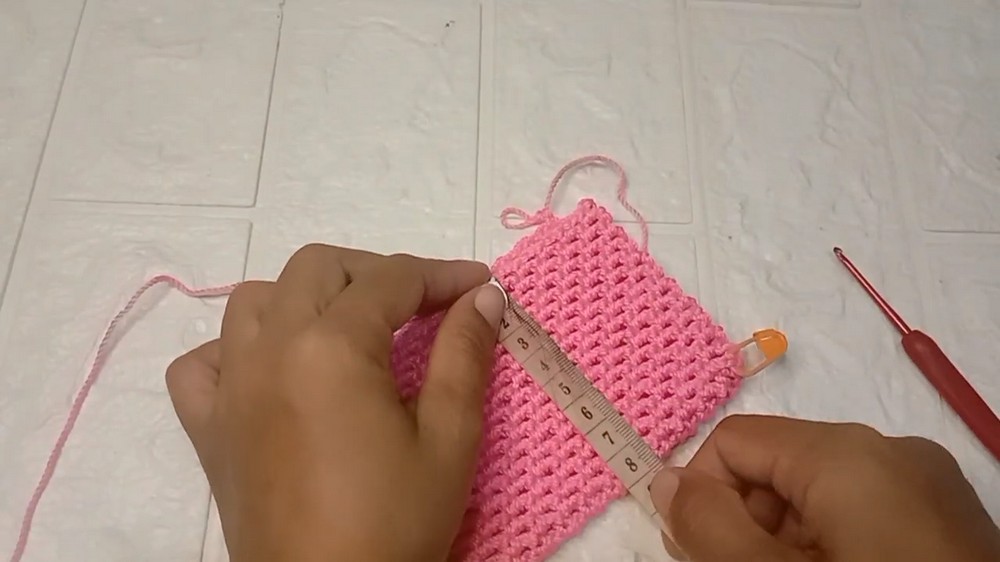
- Make rows until the height reaches 7.5 cm (to match card dimensions). This will be approximately 15 rows.
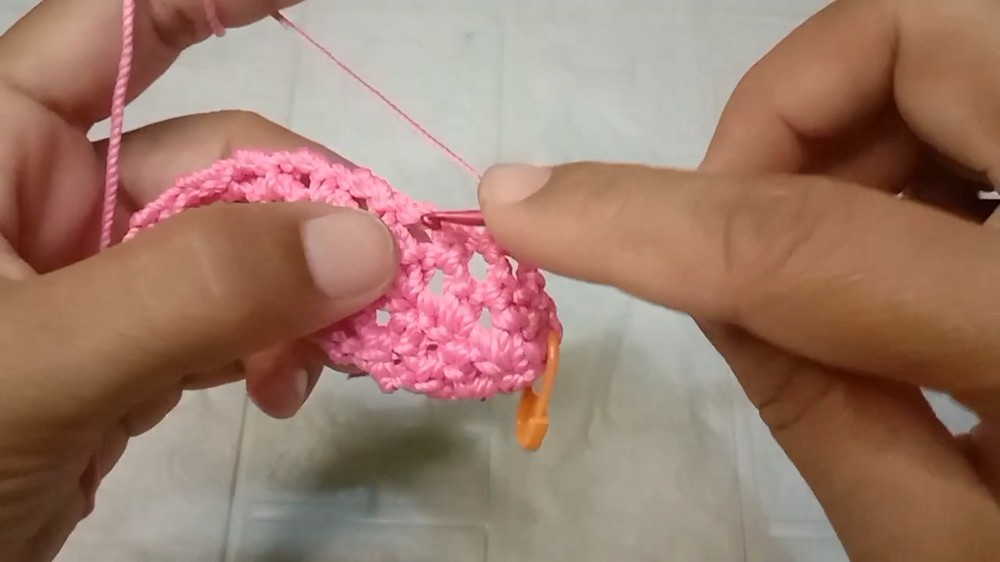
Step 3: Begin Shaping for Closure
Set Up Stitch Markers:
- Find the center of the row by marking the 12th ST out of 23 STS with a stitch marker.
Create Decreases:
- Begin with a CH 2.
- DEC at each end by working SC2TOG into the first two stitches and last two stitches before the marker.
- Work SC stitches in chain spaces between decreases.
Step 4: Create the Opposite Panel
Second Panel:
- Repeat Steps 1–3 to create an identical panel.
- Ensure both panels are the same width (11.5 cm) and height (7.5 cm).
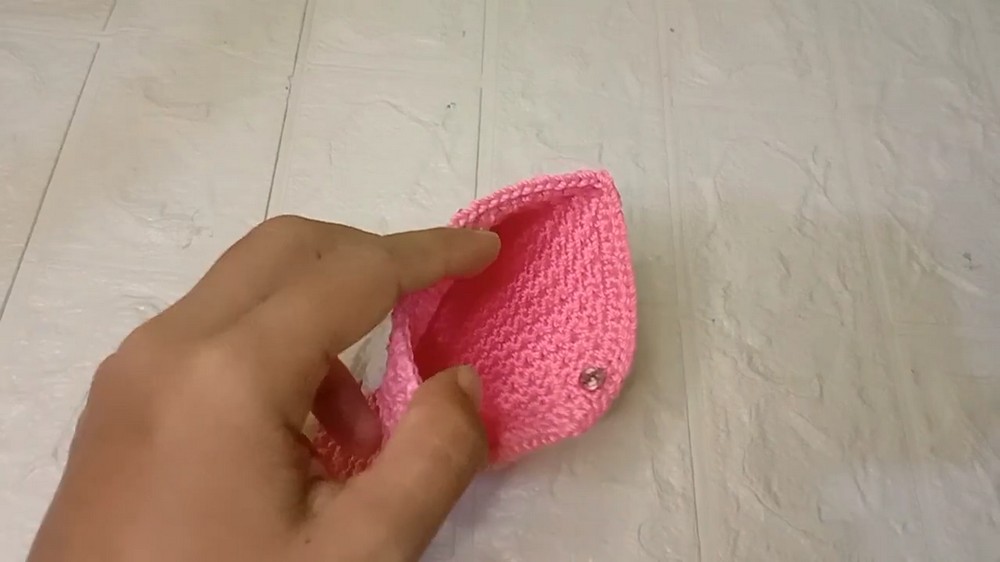
Step 5: Join Panels
Assembly:
- Align both panels with their textured sides facing outward.
- Use SC stitches to join the edges, working through both panels to stitch them securely. Leave the top edge open for card storage.
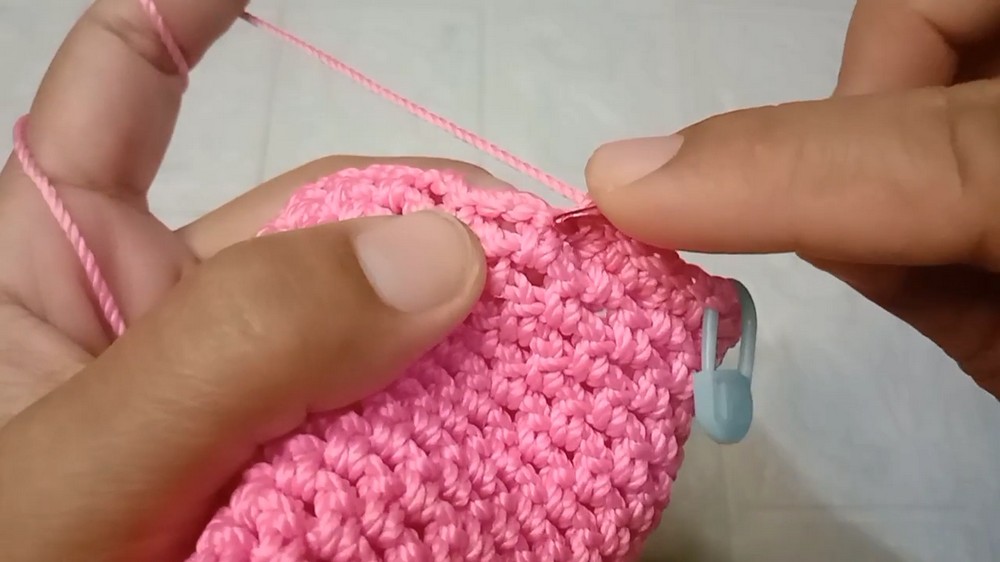
Edging Slip Stitch:
- Attach the yarn with a slip knot to the top opening.
- Slip stitch around the open edge for a neat and polished finish.

Step 6: Add Decorations and Closure
Flower Decoration:
- Prepare crocheted daisies or similar flowers (refer to previous tutorial, if applicable).
- Use glue or sew the flowers evenly across the surface of the wallet for decorative flair.
Button Closure:
- Select a button or magnet for closure.
- Sew the button onto the inside flap using a needle and thread.
- Ensure the thread matches the wallet color for seamless integration.
- Reinforce stitches for durability.
Step 7: Finishing Touches
Optional Strap:
- Create a strap with CH STS or use a pre-made strap to attach to the wallet sides.
- Use the 70cm yarn tail to sew or crochet strap attachments.

Conclusion
Congratulations! Your Crochet Card Holder Wallet is now complete. This versatile wallet doubles as a stylish and functional accessory. Personalize it by adding embellishments or varying yarn colors.
Pattern Corrections and Tips
- Alignment Issues: Use stitch markers and always align textures to ensure uniformity in both panels.
- Button Placement: For oversized wallets, experiment with button size and placement for a secure fit.
- Glue vs. Sewing: While glue works for quick decoration fixes, sewing ensures durability, especially for heavy-use items.
Pro Tip for Professional Finish
Line the inside with fabric for added durability and structure. Secure the lining with an adhesive or sew neatly to avoid bulk.

Leave a Reply