
Style your wardrobe with this Free crochet bandana shawl pattern that is simple to create comfortable to wear and perfect for every occasion.
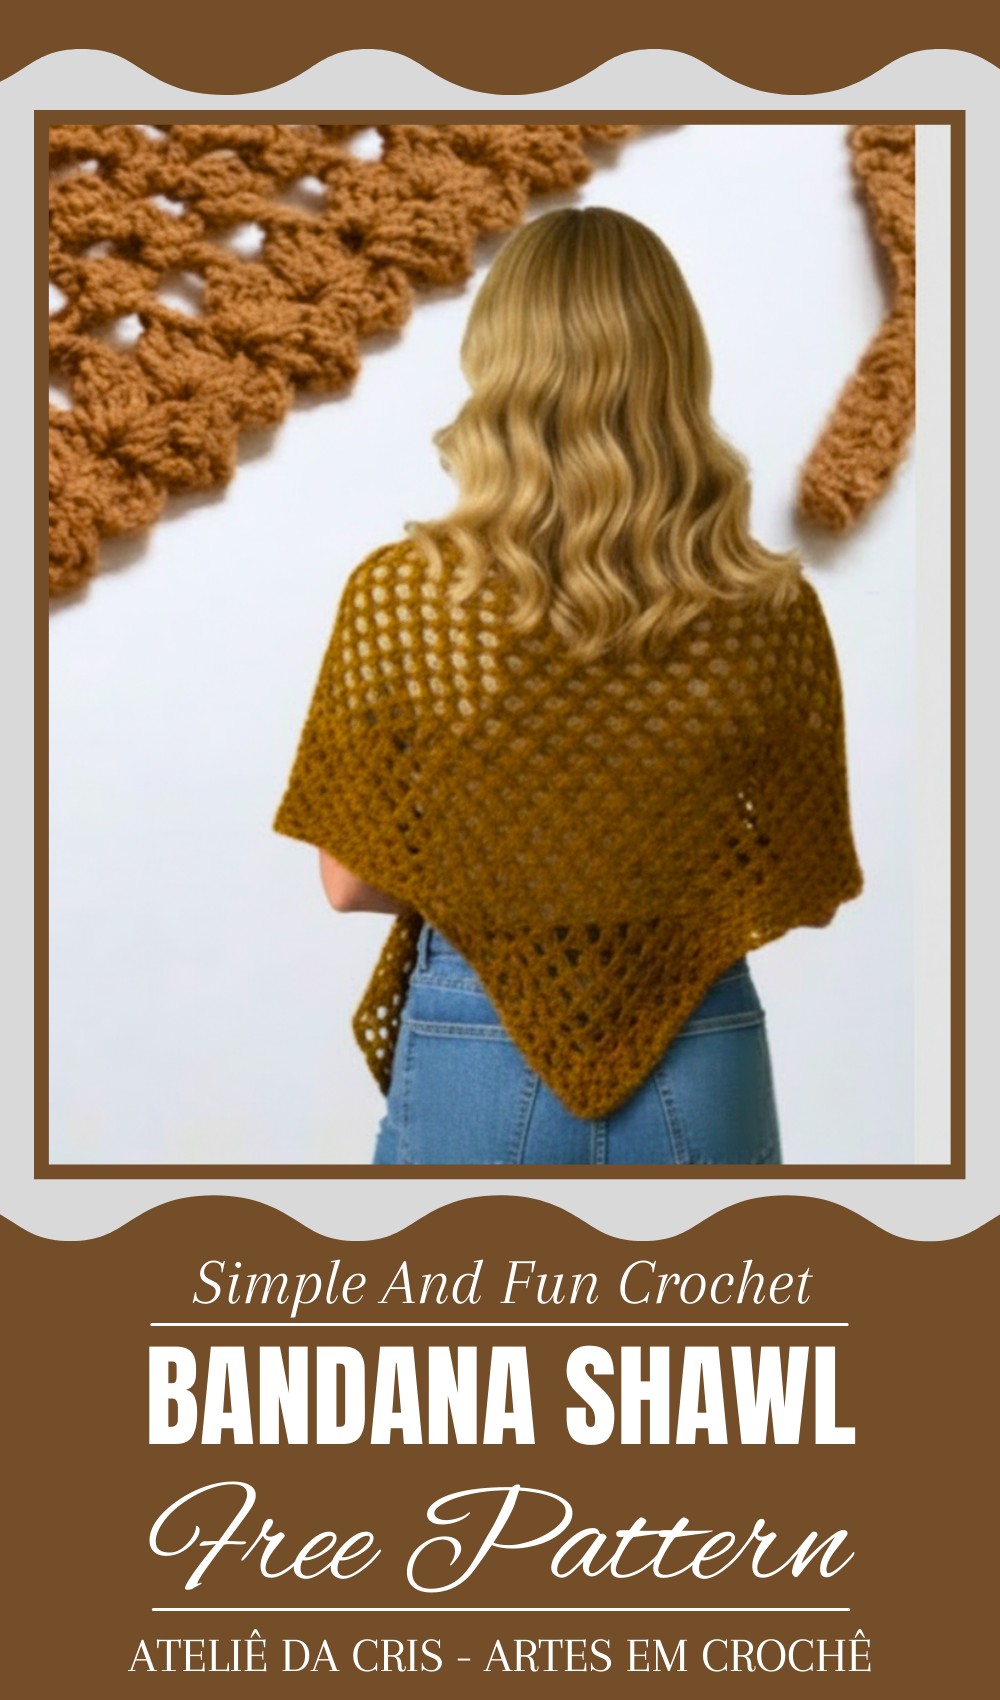
Lightweight and stylish to wear this beautiful accessory adds charm to any outfit and is perfect for all occasions. Whether you’re heading out for a walk, visiting friends, or dressing up your everyday look, a crochet bandana shawl pattern is a wonderful way to create something unique and practical. Its soft and intricate design makes it both eye-catching and comfortable.
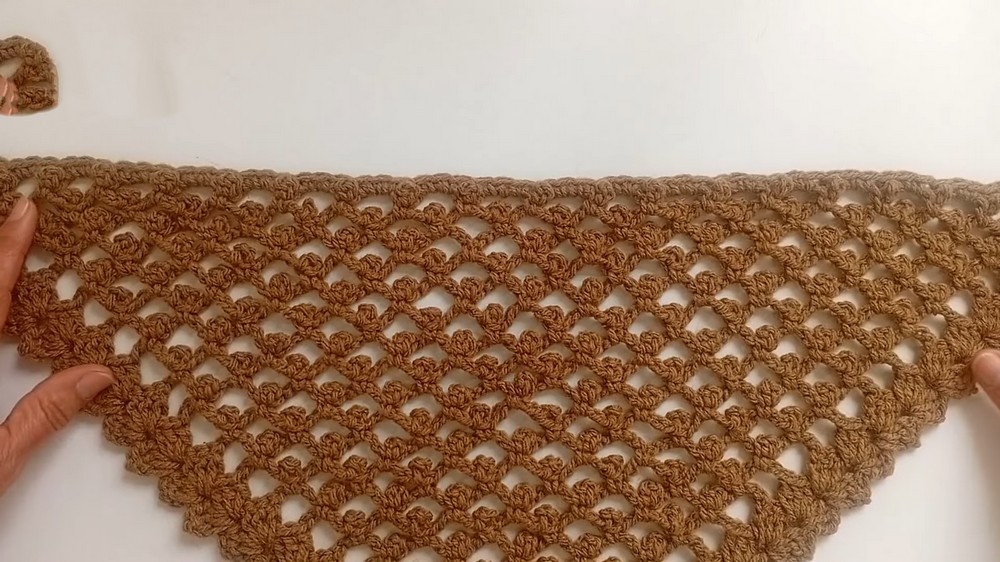
Stylish Crochet Bandana Shawl Pattern for Everyday Wear
You can wear it as a shawl to stay cozy during cooler nights or style it as a bandana for a fashionable twist. It’s not just a piece of clothing but a timeless accessory that suits everyone and every season. This handmade treasure is great for gifting or keeping as your go-to favorite. With its versatility and elegance, it’s an accessory that will elevate your wardrobe while being fun and enjoyable to create.
Materials List
- Yarn:
- Bandana: Lightweight yarn, ~46g (e.g., amigurumi yarn, Tex 492 or similar).
- Shawl: Approximately 150g of the same yarn type (1.5 balls).
- Crochet Hook: Size 2.5mm (US recommended).
- Additional Tools:
- Scissors
- Tapestry Needle for weaving in ends
Key Abbreviations
- Ch: Chain
- Sl st: Slip Stitch
- Sc: Single Crochet
- Dc: Double Crochet
- Picot: Picot stitch (Ch 3, Sl st into first Ch)
- St(s): Stitch(es)
- Rep: Repeat
Special Notes
- US crochet terminology is used for this pattern.
- The pattern supports easy customization for both bandanas and shawls — simply increase rows for shawls and adjust cords for bandanas as needed.
- Consistency in tension is crucial, especially for the picot stitches.
- For larger projects (e.g., shawls), keep track of row count to maintain size symmetry.
Step-by-Step Pattern
Step 1: Starting with the Magic Ring
- Create a magic ring.
- If you prefer, you can replace the magic ring with Ch 4, then join with a Sl st to form a ring.
- Inside the ring:
- Ch 3, this counts as the first Dc.
- Work 2 Dc into the ring.
- Ch 2 (separation) and work 3 Dc into the ring.
- Ch 2, then work another set of 3 Dc into the ring.
- Pull the yarn to close the ring tightly. You will have 3 groups of 3 Dc separated by 2 Ch spaces.
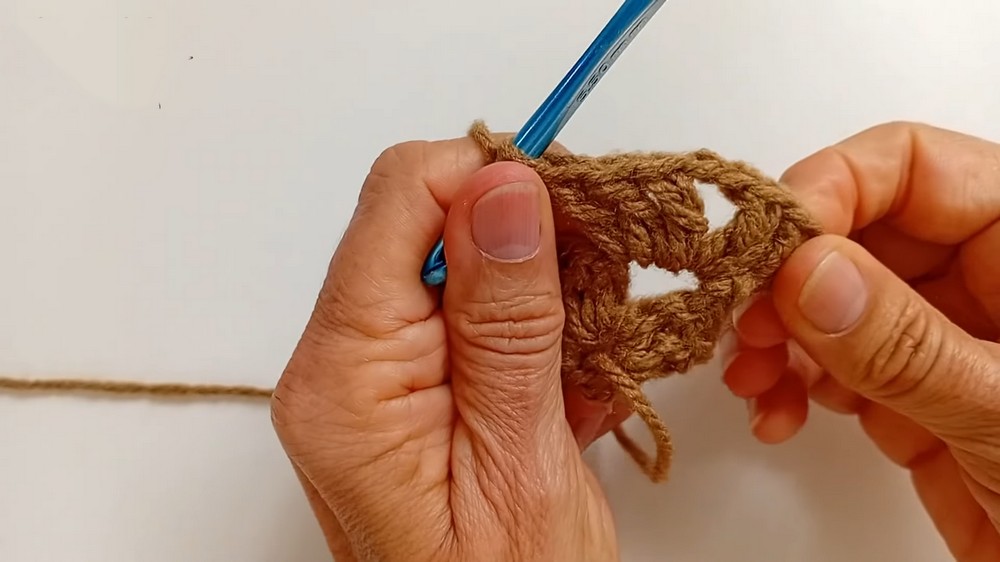
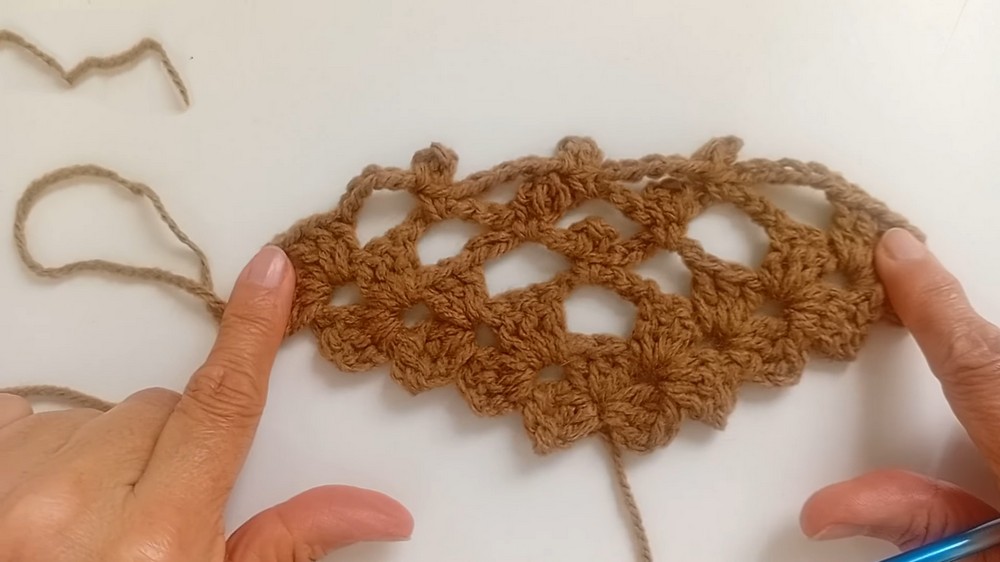
Step 2: Build the Base Fans
- Turn your work.
- To start the next row:
- Work Sl st into each Dc until you reach the center Ch space of the previous row.
- Begin the row with:
- Ch 3 (counts as 1 Dc).
- Work 2 Dc into the center Ch space.
- Ch 2, then work 3 Dc into the same space.
- This forms a fan (3 Dc, Ch 2, 3 Dc).
- Ch 5, skip to the next center Ch space, and repeat the fan pattern:
- 3 Dc, Ch 2, 3 Dc.
- Continue this for the entire row. Each fan is separated by Ch 5.
Step 3: Continuing the Fans
- Turn your work at the start of each new row.
- Walk up to the next center Ch space using Sl sts.
- Insert your hook into each Dc until you reach the Ch space, ensuring neat edges.
- Repeat the fan pattern in every center Ch space:
- Ch 3, work 2 Dc into the same Ch space.
- Ch 2, work 3 Dc into the same space.
- For separation between fans:
- Work Ch 5 between fans.
- Repeat row by row until the desired size is achieved (for either the bandana or shawl).
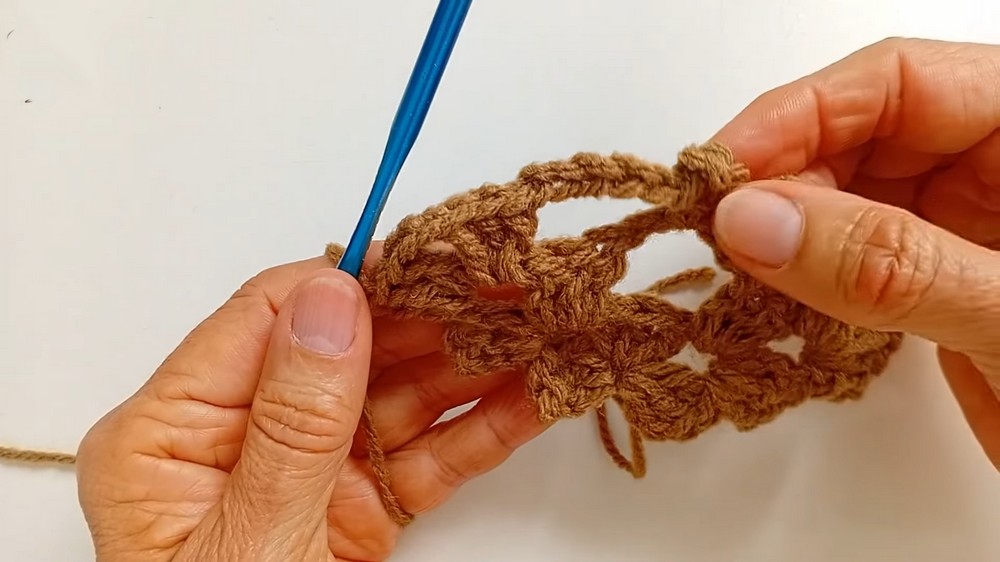
Step 4: Adding Picot Edging
- After completing the fans:
- Ch 5, fasten into the next Ch space with a Sc.
- Picot stitch:
- Ch 3, insert hook into the top of the last stitch (grab both loops), and close with a Sl st to form the picot.
- Ch 5, then fasten into the next Ch space with a Sc.
- Repeat this for the entire row, adding picot details between every Ch space.
- At the end of the row:
- Finish with a fan at the last Ch space to maintain symmetry.
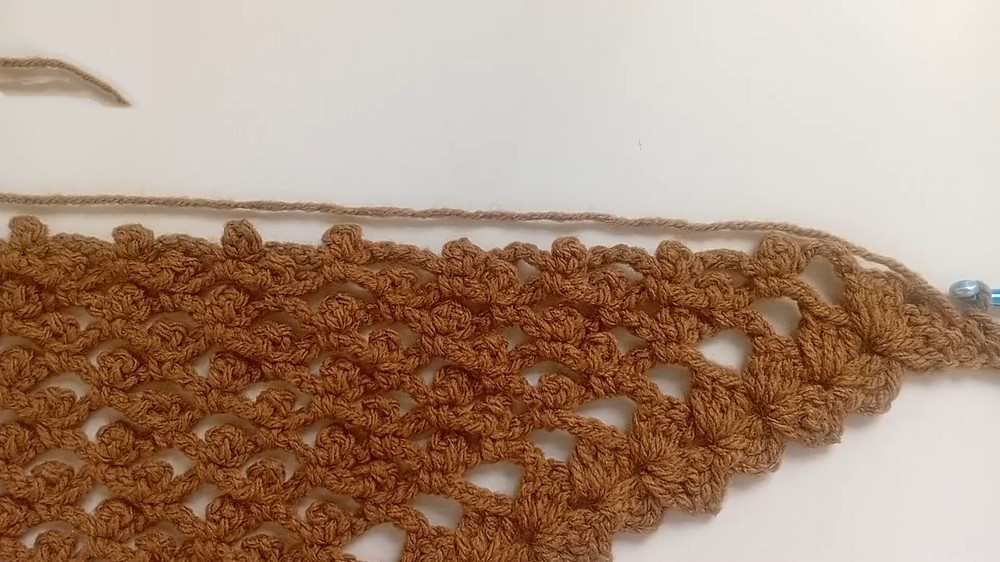
Step 5: Completing the Bandana
- For the bandana, create a drawstring cord:
- Ch 25 (or desired length).
- Test the fit for your head; adjust accordingly.
- Work Sc in each chain to create a sturdy cord.
- Attach the cord to the starting end of the bandana.
Step 6: Completing the Shawl
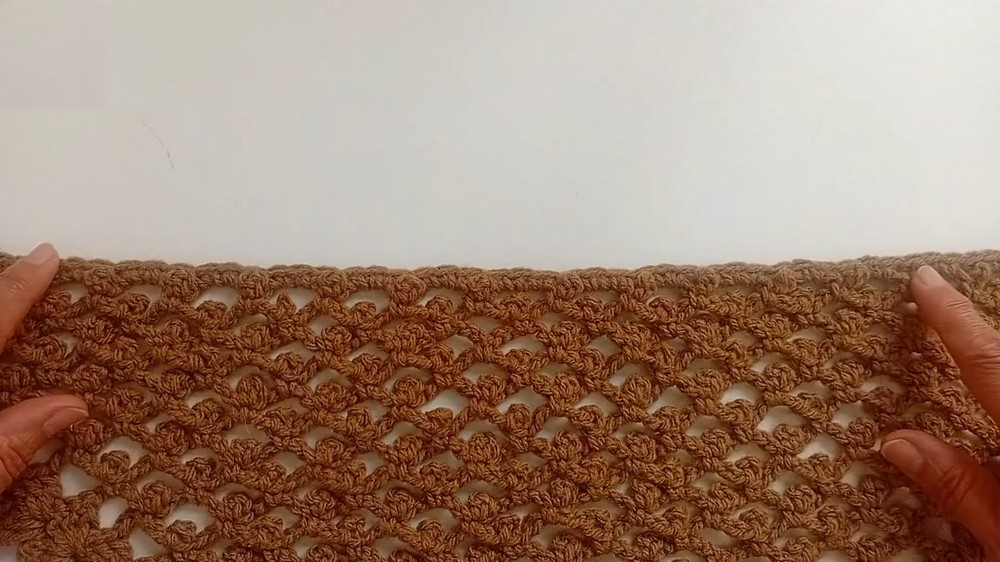
- After finishing all rows for the shawl, with desired height and width:
- Add a final row of Sc stitches to both edges (starting and ending rows).
- In spaces between the picots, work 3 Sc for neat edges.
- Weave in all loose ends using a tapestry needle, ensuring clean and secure finishing.
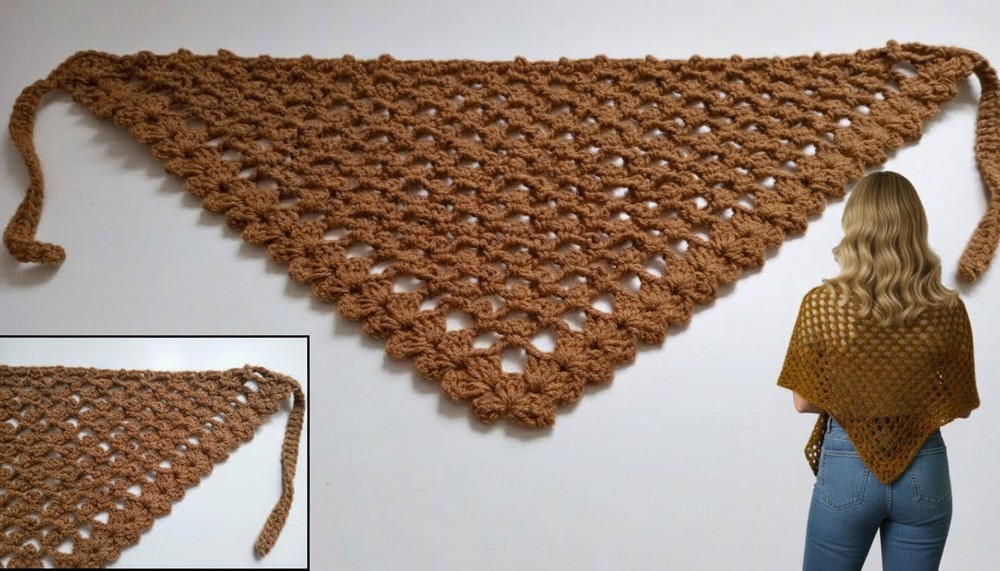
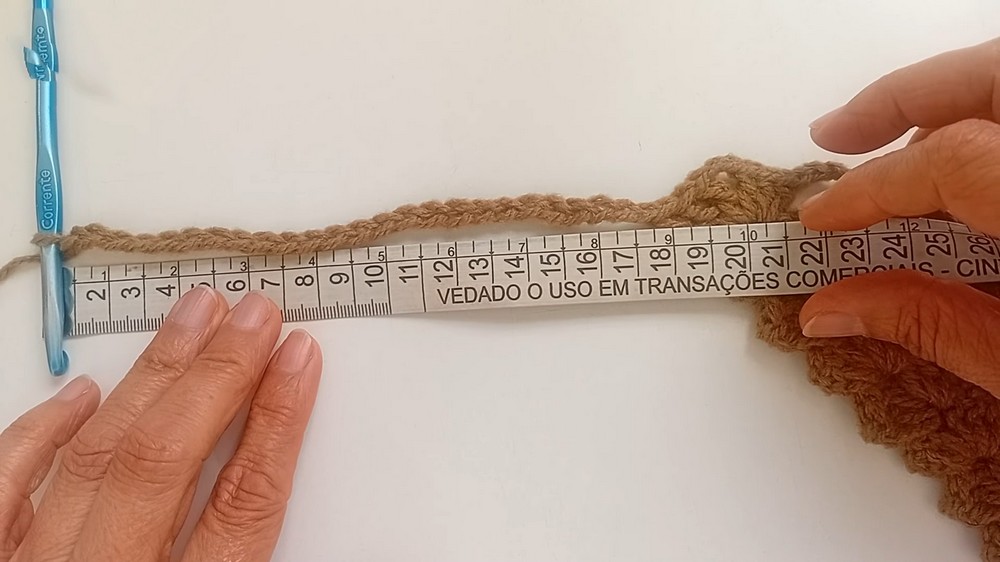
Measurements
- Bandana:
- Height: 28cm
- Width: 64cm
- Drawstring Cord: 18cm (adjustable length based on personal preference).
- Shawl:
- Height: 62cm
- Width: 120cm
Conclusion
This crochet bandana/shawl pattern offers elegant simplicity and versatility. Whether you need a smaller accessory like a bandana or a larger wrap like a shawl, this pattern can be customized easily. The picot edging adds delicate charm, while the fan stitch ensures a classic look.
Pattern Correction
- Ensure picot stitches are evenly spaced along Ch rows for uniform design.
- For larger shawls, adding a border row after completing fans enhances structure.
Tips
- Yarn Choice: Use lightweight yarn for airy effects or thicker yarn for a cozy, warm shawl.
- Blocking: Lightly block your finished project to set the stitches and enhance the shape.
- Color Play: Create gradient effects by using ombré or multicolored yarn.
- Reduce Curl: For Sc rows, avoid overly tight tension to prevent curling edges.

Leave a Reply