
Stay cozy and comfortable with this unique Crochet Granny Stitch Poncho pattern that’s add charm and warmth to your wardrobe effortlessly.

A crochet granny stitch poncho pattern is a wonderful blend of comfort and style. This project is perfect for anyone who loves a warm and handmade touch in their wardrobe. The classic granny stitch creates a design that is full of character, making it eye-catching and timeless. You can wear this poncho on cozy evenings at home, during casual outings, or even at special events to stand out in the crowd.
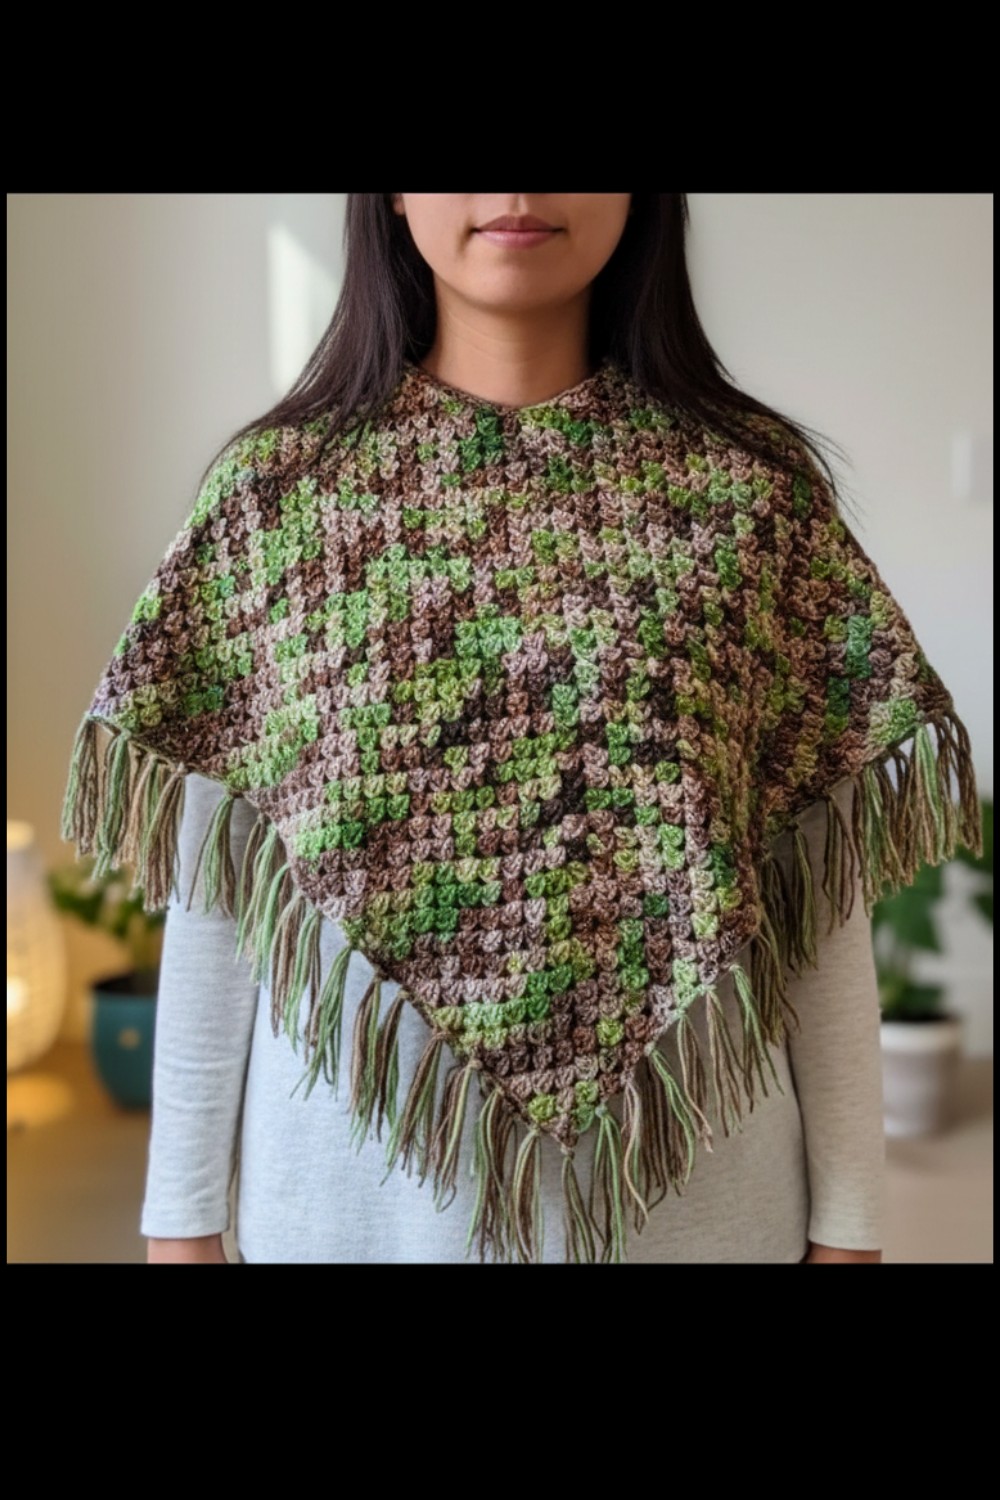
Sophisticated Crochet Granny Stitch Poncho Pattern for Any Outfit
This poncho isn’t just about staying warm—it’s about turning yarn into something truly special. Whether you’re crocheting it for yourself or giving it as a heartfelt gift, this pattern is simple enough for beginners yet satisfying for experienced crocheters. It’s a practical and stylish addition to any wardrobe, offering both comfort and elegance. With its timeless appeal and handmade charm, this piece will quickly become a favorite you’ll be proud to wear or share with others for years to come.

Materials List
Required Items:
- Yarn:
- 350 grams of 4-ply acrylic yarn (multi-colored recommended for a vibrant effect).
- For small size: ~300 grams.
- For medium/large size: ~350 grams.
- Crochet Hook:
- 5 mm hook: For medium and large sizes (or to achieve the desired gauge).
- 4 mm hook (optional): For a smaller size.
- Tapestry Needle: For sewing and weaving in ends.
- Measuring Tape: For checking the size during construction.
- Scissors: For finishing.
- Cardboard (optional): To create tassels if desired.
Key Abbreviations
- Ch – Chain
- Sl st – Slip Stitch
- Hdc – Half Double Crochet
- Dc – Double Crochet
- Inc – Increase
Special Notes
- Size Customization:
- This pattern is free-size and fits medium and large sizes by default. To make a smaller size, use a 4 mm hook or reduce the number of foundation chains. For larger sizes, add extra chains and rows.
- Adjusting the Neck Opening:
- The neck size is adjustable by dividing the starting chain evenly into two parts.
- Corner Construction: The cardigan has only two corners, which allow the neckline and body area to expand equally as you continue the rounds.
Pattern Instructions
Step 1: Foundation Chain
- Start with a Slip Knot.
- Ch 80 (for medium to large sizes).
- For smaller sizes: use a 4 mm hook, or reduce chains.
- For children’s sizes (e.g., 60 chains for kids aged 7-8 years, or 40 chains for newborns), divide them evenly into two parts.
- Mark the 40th chain with a stitch marker to divide the chains evenly into two parts for the front and back corners.
Step 2: Forming the Ring
- Straighten the chain carefully to ensure it’s not twisted.
- Slip Stitch (Sl st) into the first chain to form a circle. This represents your neck opening.

Step 3: First Round (Corner Setup)
- Ch 3 (counts as the first Dc).
- In the same stitch, work:
- 2 Dc. (This creates half a corner).
- Skip 2 chains, and in the 3rd chain, work:
- 3 Dc.
- Repeat:
- Skip 2 chains, work 3 Dc in the next chain. Continue this sequence to reach the 40th chain marker.

Creating the First Corner (at the 40th chain):
- In the marked chain, work:
- 3 Dc, Ch 2, 3 Dc (this forms the first corner).
Continuing to the Next Corner:
- Repeat the pattern:
- Skip 2 chains, work 3 Dc in the next chain until you reach the end of the round.
Creating the Second Corner:
- In the last chain before closing the round, work:
- 3 Dc, Ch 2, 3 Dc (to form the second corner).
Closing the Round:
- Sl st into the top of the 3rd chain.
Step 4: Second Round and Beyond (Body Construction)
- Ch 3 (counts as the first Dc).
- Work 2 Dc into the same corner space (this completes half of the corner from the previous round).
- In each space between groups of 3 Dc from the previous row, work:
- 3 Dc.
- At each corner (Ch 2 space), work:
- 3 Dc, Ch 2, 3 Dc to maintain the corner and increase the size.
- Repeat this pattern, continuing to add 3 Dc into each space and increasing at the corners, until the desired size is achieved.

Step 5: Finishing the Cardigan
- After completing 35 rounds (for medium-large size), stop increasing and sl st to close the final round.
- Fasten off by chaining one and cutting the yarn, leaving a small tail for weaving.
Optional: Adding Tassels
- Wrap wool around a piece of cardboard (or use your fingers) to create loops.
- Cut the ends and group 4-5 pieces together.
- Use a crochet hook to attach the tassels on the bottom edge of the cardigan. Space them evenly or add them where desired.


Conclusion
This pattern creates a simple, elegant, and free-size cardigan that can be customized to any size, making it perfect for gifting or personal use. The beauty of this design lies in its simplicity, with just two corners forming the entire garment’s structure. Multi-colored yarn enhances the design, giving it the appearance of a painted masterpiece.
Pattern Correction
- Ensure that the stitch count remains consistent within each row. Missing or adding stitches (especially at corners) is a common mistake.
- Always count your stitches and use stitch markers at the corners to avoid confusion.
Tips for Beginners
- Use stitch markers to mark the corners clearly; this helps prevent errors in placement and counting.
- If the chain twists while forming the ring, undo it and straighten it before joining.
- Practice the 3 Dc in one space and corner construction before starting the main project to ensure accuracy.
Final Note
This is the perfect project to transition from beginner to intermediate-level crocheting. Each round naturally increases, allowing flexibility in size and design. If desired, embellishments like tassels or buttons can be added to personalize the cardigan even further. Enjoy crocheting this beautiful piece!
Leave a Reply