
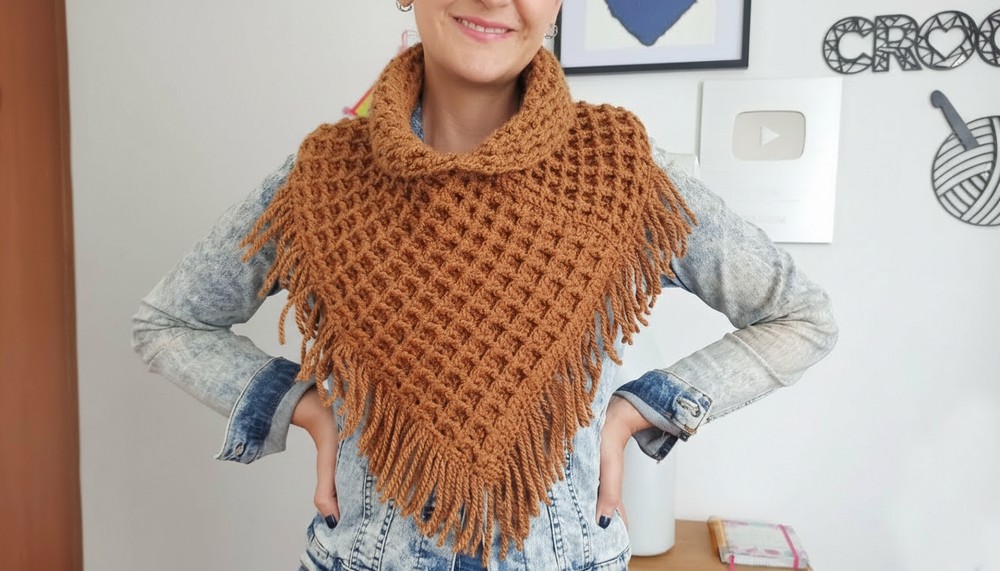
Style your outfit with this Crochet Mini Poncho Pattern to look fashionable and feel cozy while keeping your shoulders warm on cool days.
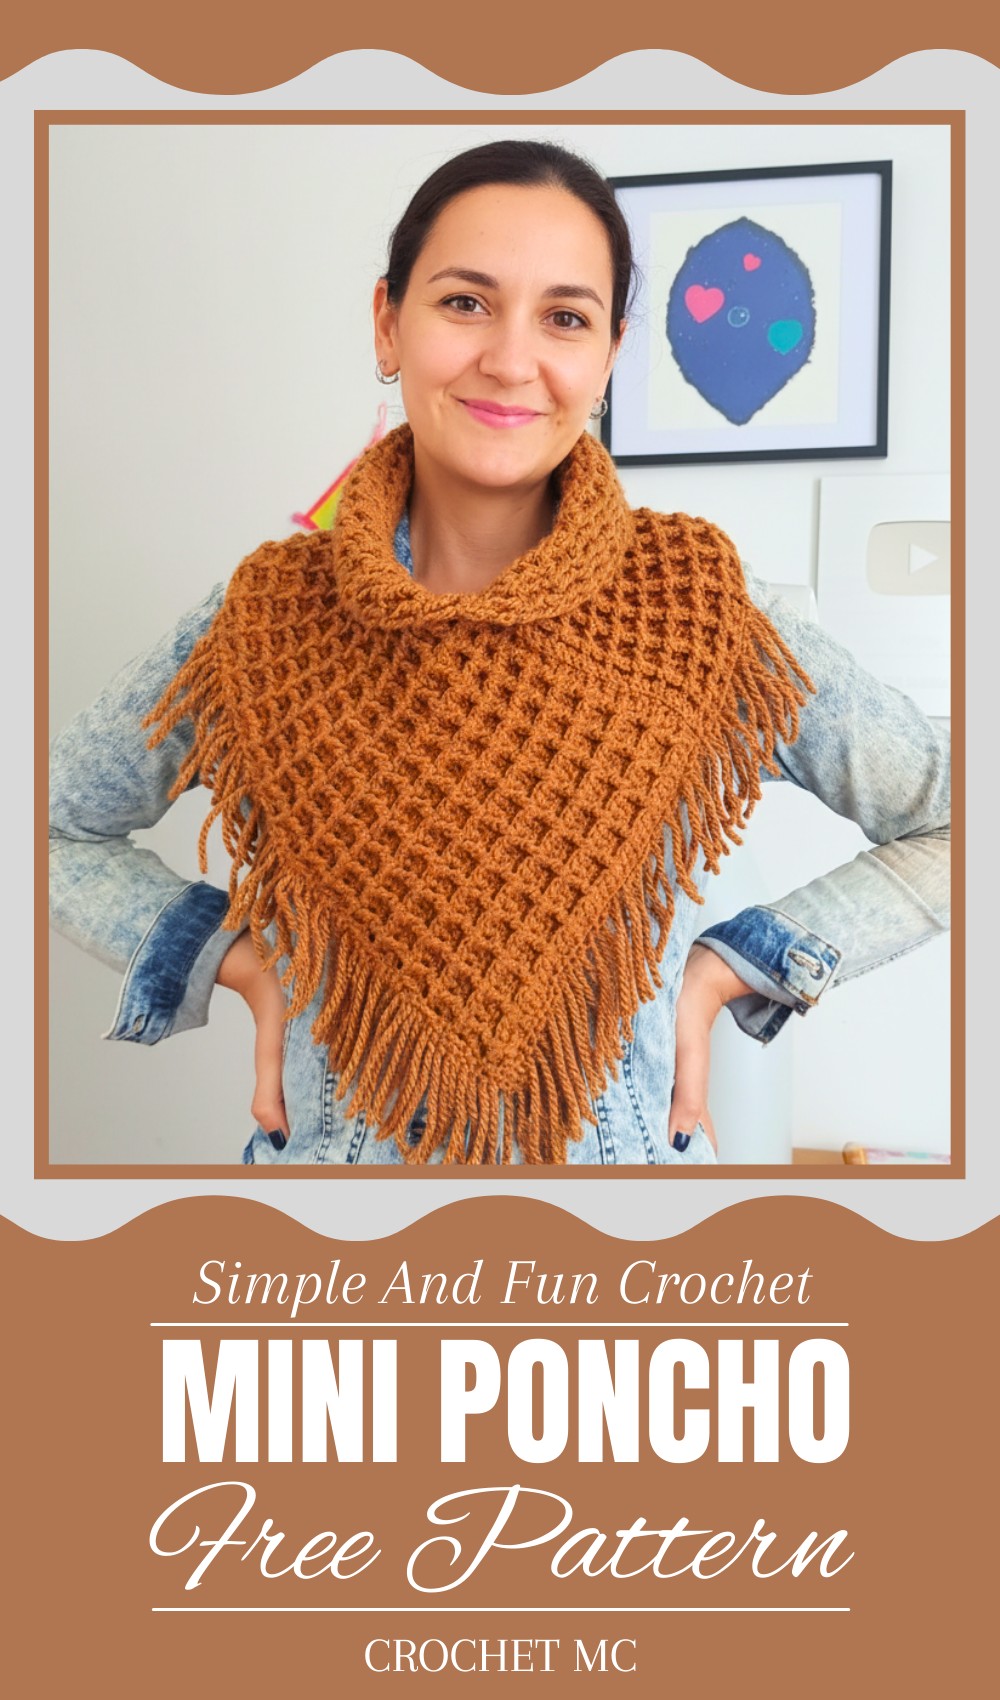
There’s something truly cozy and stylish about a poncho that fits every occasion. Whether you’re heading out for a casual day or dressing up for a special gathering, this garment brings warmth and beauty to your look. A Crochet Mini Poncho Pattern adds a touch of creativity with its simple design and charm. You can pair it with jeans, leggings, or even a sleek dress, making it a versatile choice for all seasons.
Perfect Crochet Mini Poncho Pattern Mini Poncho for Cozy Mornings
Its lightweight fabric makes it perfect for layering during cooler months or as an accessory for breezy evenings. The pattern allow you to explore colorful designs, creating a unique handmade piece that stands out. Simple yet elegant, these ponchos are practical and fashionable for anyone who wants comfort without sacrificing style. Perfect for gifting or personal wear, it’s a rewarding way to express your individuality and creativity through crochet.
Materials List
Required Items:
- Yarn:
- 100% acrylic yarn, such as Silvia Classic (210 meters per 100g ball recommended).
- Total Yarn Required: 175g (may vary slightly depending on tension and material).
- Crochet Hook:
- Manufacturer recommended hook: 3.75 mm.
- Actual hook used: 5 mm (to create a looser fabric).
- Other Tools:
- Scissors.
- Measuring Tape: To ensure accurate dimensions.
- Wool/Tapestry Needle: For finishing and sewing ends.
- Pins (optional): To hold pieces in place during sewing.
Key Abbreviations (US Terminology)
- Ch – Chain
- Sl st – Slip Stitch
- Sc – Single Crochet
- Hdc – Half Double Crochet
- Dc – Double Crochet
- FPdc – Front Post Double Crochet (worked around the front of the post of the stitch below).
- Rep – Repeat
Special Notes
Stitch Multiples:
- The waffle stitch requires starting with a base chain that is a multiple of 3 + 2.
- It is essential to keep the stitch multiple accurate to maintain the rectangular waffle pattern.
Adjustability:
- Length: Accurately measure the foundation chain to achieve your preferred length.
- Width: The height/depth can be adjusted by adding or subtracting rows. Finished width is 20–21 cm (8 inches), and length is 80 cm (31 inches).
Reversible Pattern:
- This project is reversible, allowing for versatile wear. The choice of “right side” is based on personal preference.
Step-by-Step Crochet Instructions
Step 1: Foundation Chain
- Create a slip knot and chain the desired number of stitches.
- For this project, work a multiple of 3 + 2 until reaching approximately 20 cm (8 inches) in width.
- Example: Ch 74.
- Add 2 additional chains for height.
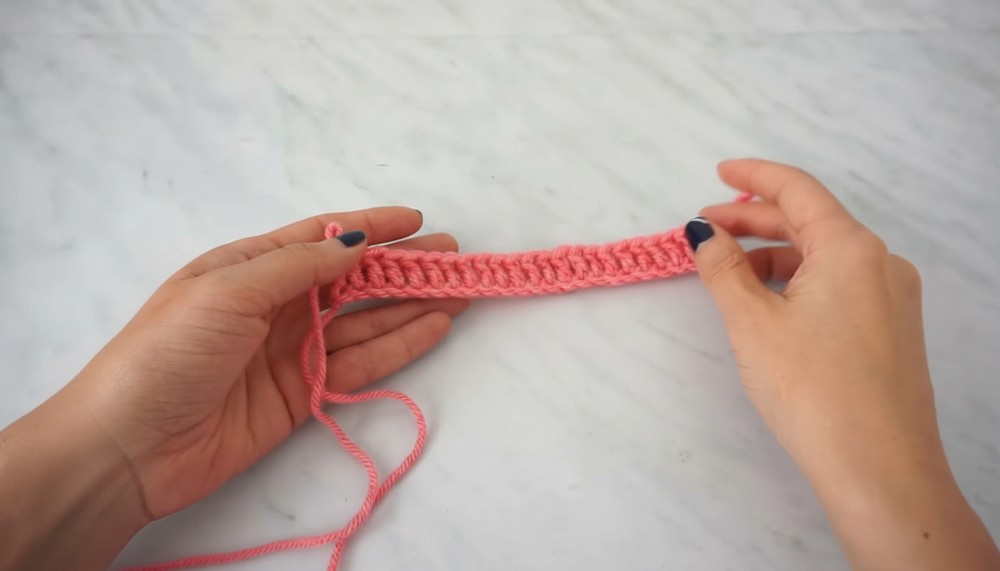
Step 2: Row 1 (Double Crochet)
- Turn your chain and work into the back loops (the ridged loops on the underside of the foundation chain).
- Skip the first 3 chains (counts as the first Dc).
- In the next chain:
- Yarn over, insert the hook, pull up a loop.
- Work 1 Dc (leave 3 loops on the hook, pull yarn through two loops at a time).
- Continue working Dc across the entire row into each chain.
- Ensure you maintain a stitch count that adheres to multiples of 3 + 2.
- At the end of the row: Ch 3, turn your fabric.
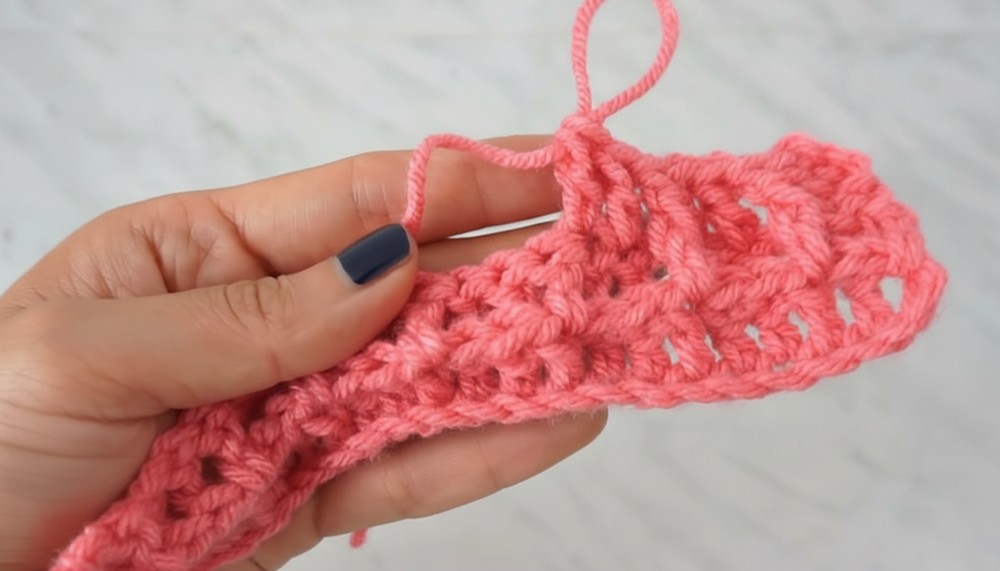
Step 3: Row 2 (Waffle Stitch – Embossed Pattern)
- Ch 3 (counts as the first Dc).
- Begin the waffle stitch pattern:
- Skip the first stitch (counts as the chain you made).
- FPdc in the next stitch:
- Yarn over, insert the hook around the front of the post of the stitch below, pull through, and complete as a regular Dc.
- Next stitch: Work a normal Dc into the top two loops of the next stitch.
- Next 2 stitches: FPdc (work both stitches as raised stitches around their posts).
- Repeat the sequence:
- 1 Dc (normal), 2 FPdc (front post double crochets) across the row.
- At the end of the row, ensure the final stitch is worked into the top of the turning chain from the previous row.
- Ch 3, turn your fabric.
Step 4: Row 3 (Alternate Waffle Stitch)
- Ch 3 (counts as the first Dc).
- Reverse the waffle stitch to create the textured pattern:
- 1 FPdc, followed by 2 normal Dc stitches.
- This reverses the raised stitches from Row 2 (where you previously had 2 FPdc, now place normal Dc, and vice versa).
- Repeat the 1 FPdc, 2 normal Dc sequence across the row.
- Ensure the last stitch is worked into the top of the chain from the previous row.
- Ch 3, turn your fabric.

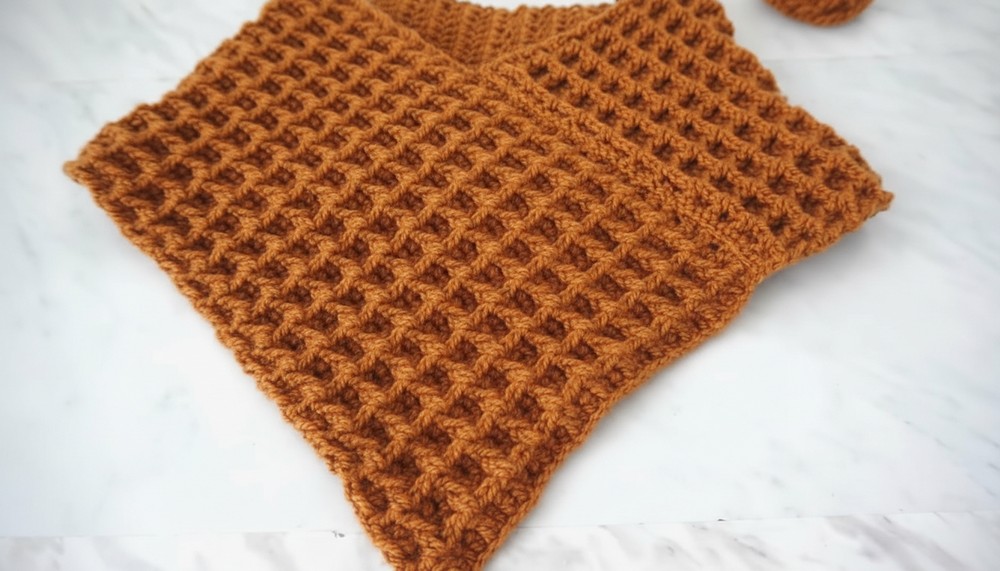
Step 5: Body of the Mini Poncho
- Repeat Row 2 and Row 3 alternately until the fabric reaches your desired total length.
- Finished Length: 80 cm (31 inches).
- Cut the yarn, leaving a tail approximately 6–8 inches long for sewing.
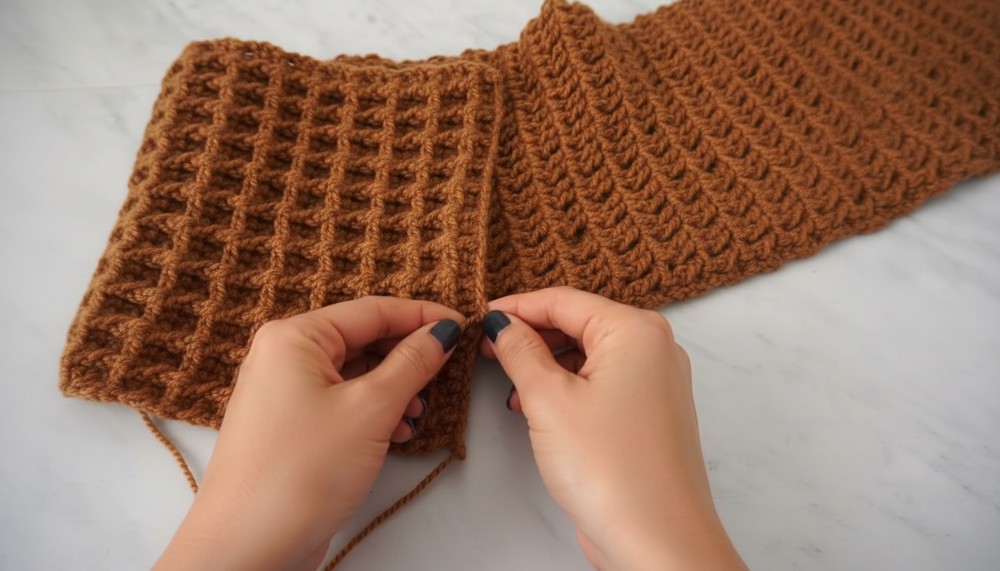
Step 6: Sewing the Rectangle into a Poncho
- Lay the rectangle flat.
- Bring the short ends together, folding diagonally to form a triangle.
- The first row should align with the side edge of the last row to form the neck opening.
- Secure the fold with pins or stitch markers to keep it in place.
- Using the tapestry needle, sew the short edge to the top edge:
- Insert the needle into the inner loops of both edges to create a seamless finish.
- Pull the yarn through and ensure the stitches are tight but not pulling at the fabric.
- Weave in any loose ends.
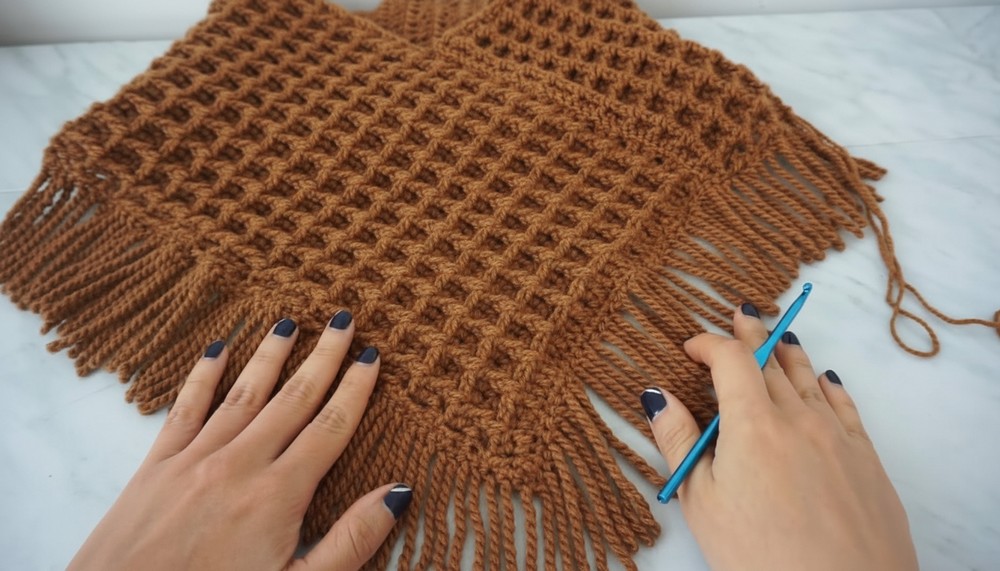
Step 7: Adding Fringe (Optional)
- Cut yarn into 20 cm (8 inches) strands.
- Group strands in sets of 2–3 for each fringe section.
- Attach fringes along the front edge or around the entire poncho:
- Fold the strand in half, insert the folded edge into a stitch, and pull through to create a loop.
- Pass the loose ends of the fringe through the loop, pull tight to secure.
- Trim the fringe evenly after attaching.
Conclusion
Congratulations! You’ve completed a stylish and practical neck warmer/mini poncho! This cozy accessory provides warmth and elevates any outfit. Its reversible design and textured waffle pattern ensure it stands out, and the optional fringe adds a playful finishing touch.
Pattern Correction
- Ensure you maintain the correct stitch multiple (3 + 2) throughout to keep the waffle texture aligned.
- Check your final stitch placement—always work the last stitch into the top of the turning chain to maintain straight edges.
Tips for Beginners
- Practice FPdc: If you’re new to FPdc, work a few practice rows on scrap yarn to master the post stitching.
- Keep it Relaxed: Use a looser gauge to create a softer and more flexible fabric.
- Blocking: To ensure a clean, professional finish, block your fabric before sewing.
- Experiment with Colors: Try alternating colors every few rows for a striped waffle pattern.

Leave a Reply