
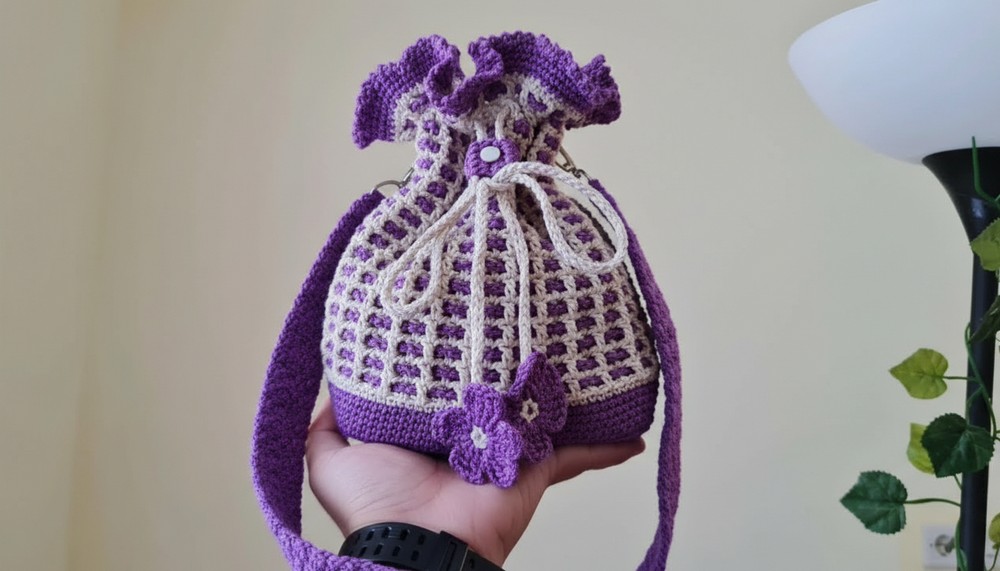
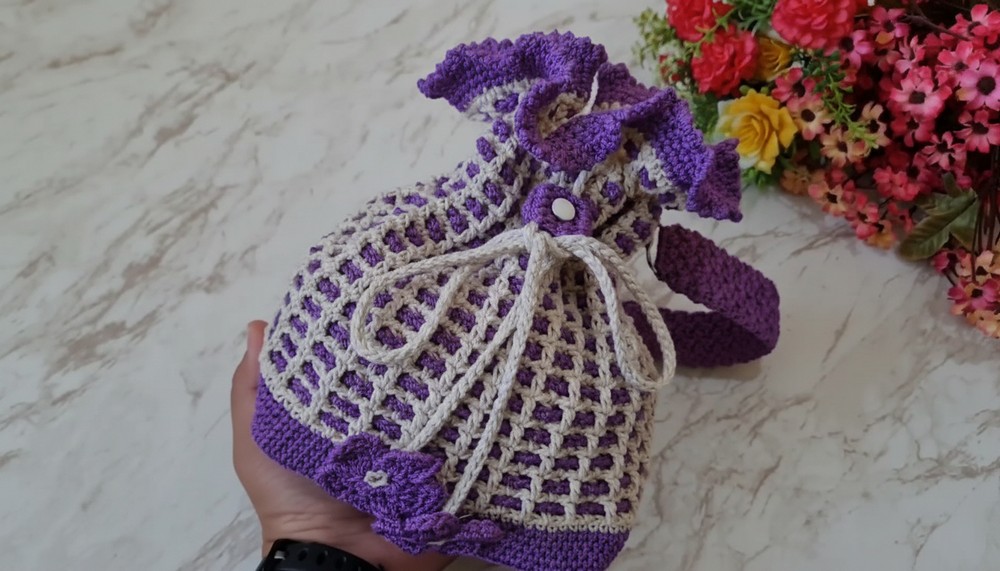
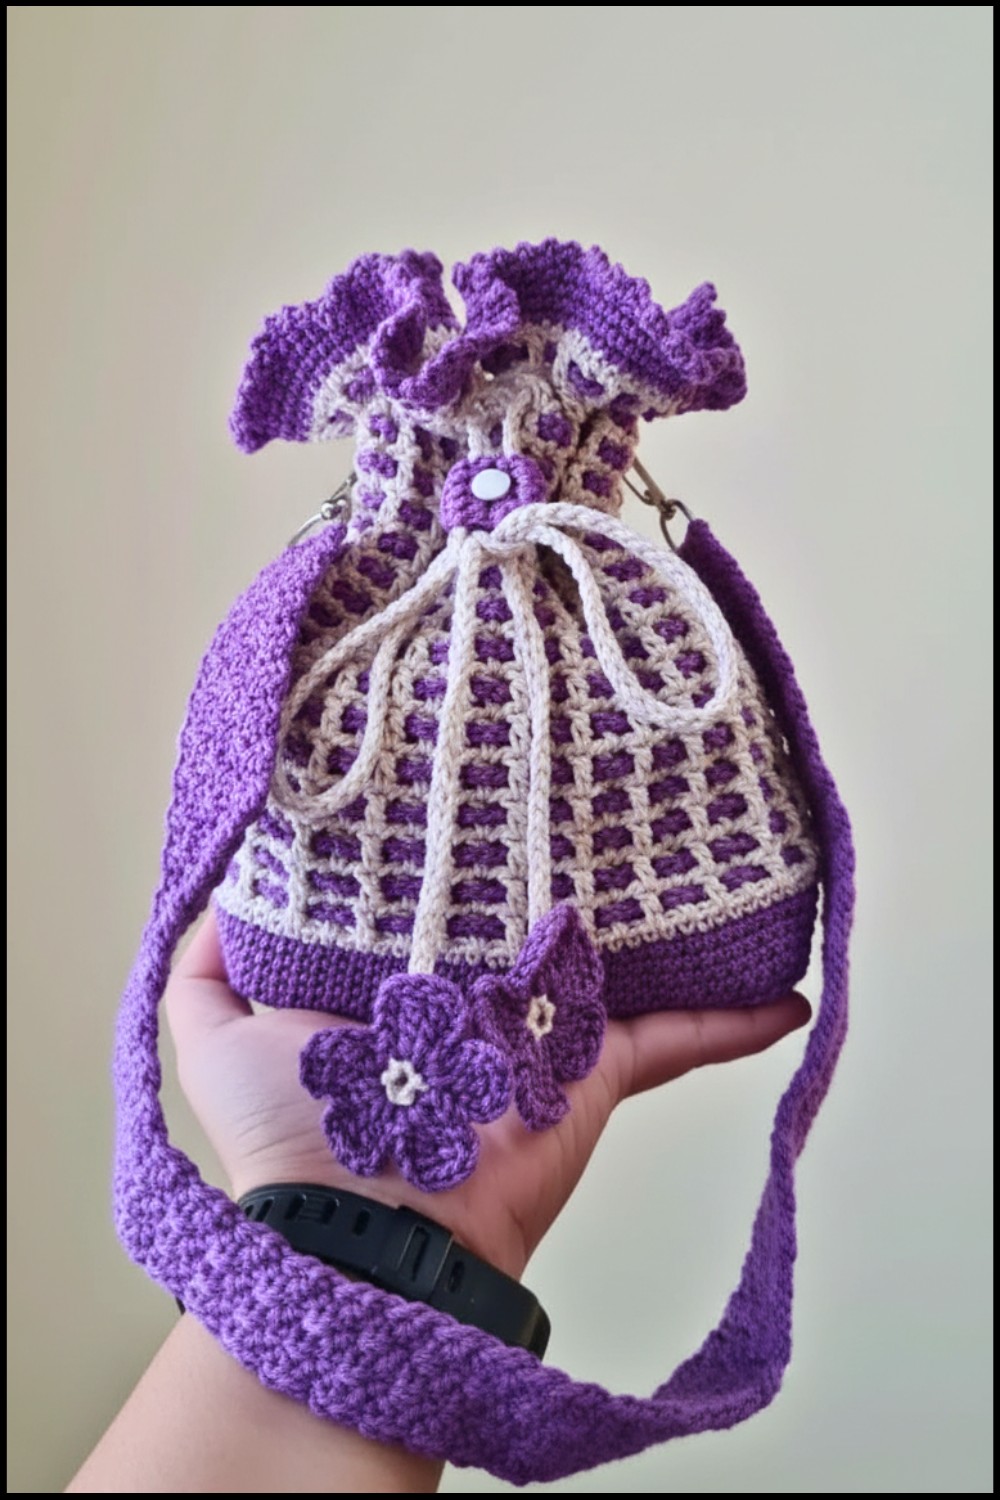
Personalize your everyday style with crochet drawstring bag pattern that’s perfect for holding your essentials and add charm to any outfit.
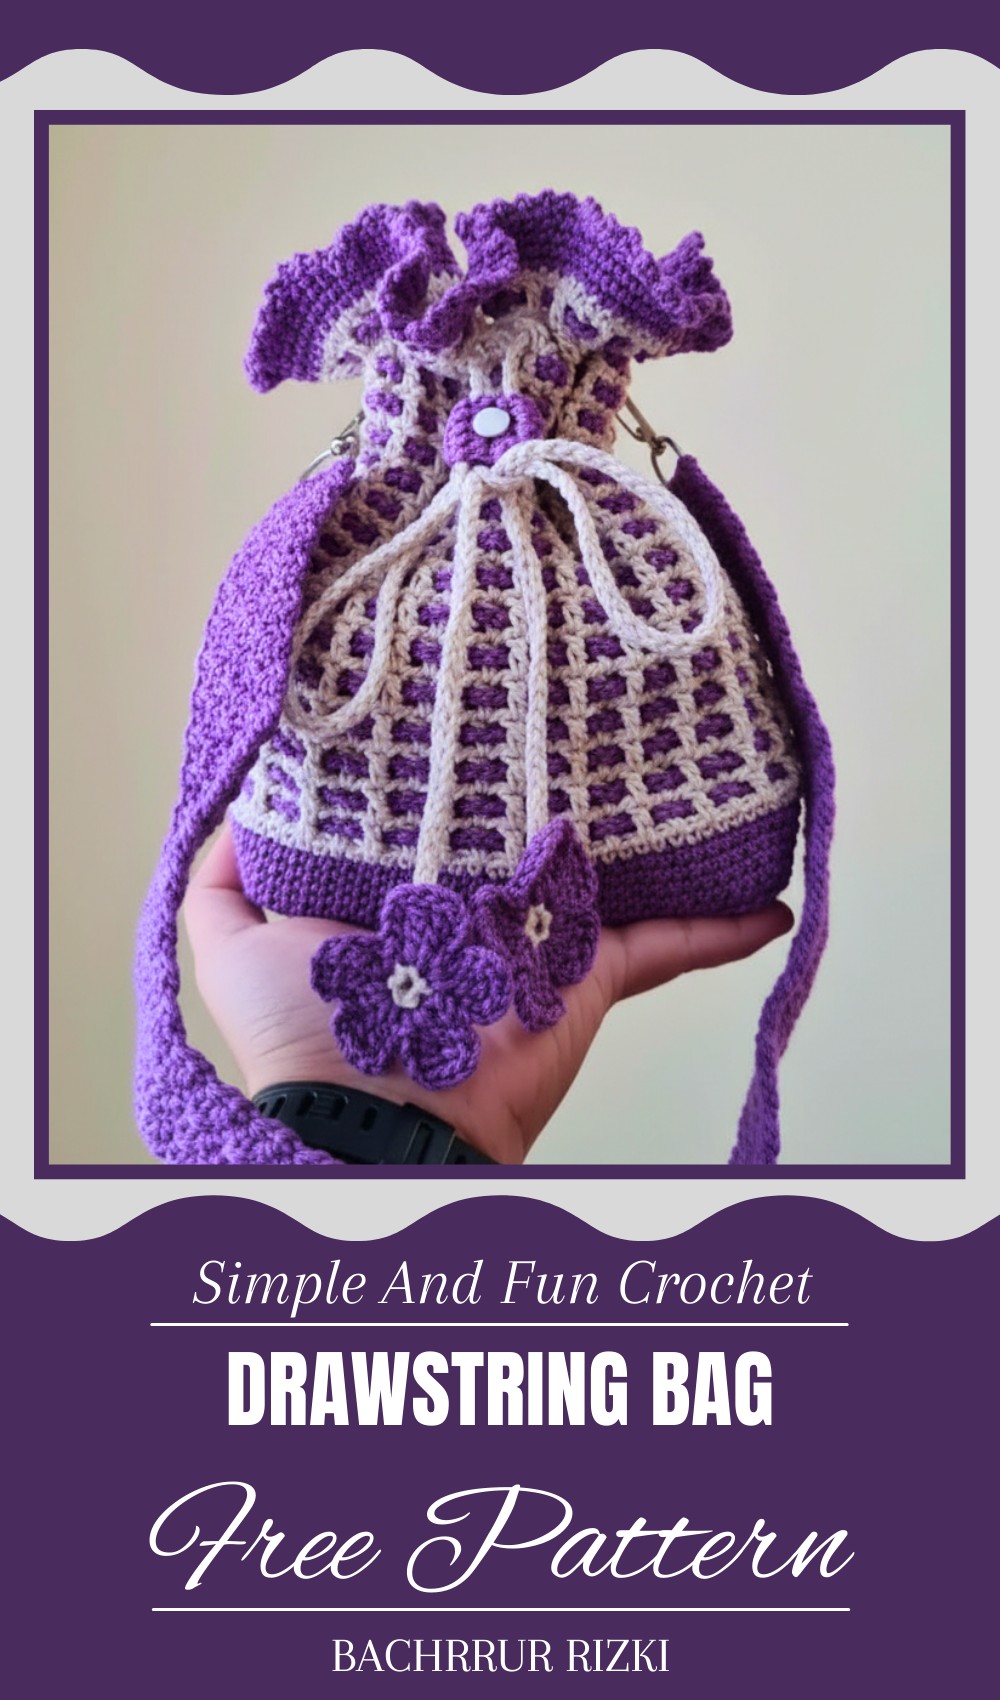
Not every bag is as beautiful and practical as this handmade bag that becomes a perfect companion for daily errands special occasions and casual outings while being a stylish accessory that adds charm to your look. Made using the crochet drawstring bag pattern this piece is easy to create even for beginners making it a delightful project that anyone can enjoy while ensuring it is functional with a unique style.
Cozy Crochet Drawstring Bag Pattern Carry Comfort with Style
The crochet drawstring bag pattern keeps your belongings secure and easy to access while the lightweight yet durable material makes it reliable for carrying essentials wherever you go. Adding personal touches like colors and textures lets you express your creativity making each piece unique and special. Whether you’re heading to a picnic the market or just running errands this bag effortlessly combines elegance and utility ensuring it is not only useful but also an eye-catching addition to your collection.
Materials List
Required Supplies:
- Yarn:
- Hemp Cotton Yarn: 2 rolls.
- Polyester Thread: 2 rolls.
- Total: 4 rolls (you may have leftovers).
- Crochet Hook:
- 3.0 mm (Clover or any other brand).
- Other Tools:
- Tapestry Needle: For sewing and weaving in threads.
- Knitting Markers: To mark rounds and important stitches.
- Drawstring Cord: Added to the handle loops to help tighten the bag.
- Decorative Buttons: For embellishing the bag or flowers.
- Scissors: To trim yarn tails.
- Lighter: Optional, for sealing thread ends.
Key Abbreviations (US Terminology)
- Ch – Chain
- Sc – Single Crochet
- Dc – Double Crochet
- Dec – Decrease (crochet two stitches together)
- Sl st – Slip Stitch
- Rep – Repeat
Special Notes
- Bag Dimensions:
- Height: ~13 cm, adjustable depending on desired size.
- Drawstring handle length: Adjustable based on personal preference.
- Base dimensions: Rectangular foundation, customizable by number of chains and rows.
- Color Transitions: The bag uses alternating thread colors. Ensure smooth transitions by securing yarn tails neatly to avoid visible overlaps.
- Seamless Look: The bag is worked in a continuous spiral without visible seams. Use a knitting marker to track the starting stitch of each round.
Step-by-Step Crochet Pattern
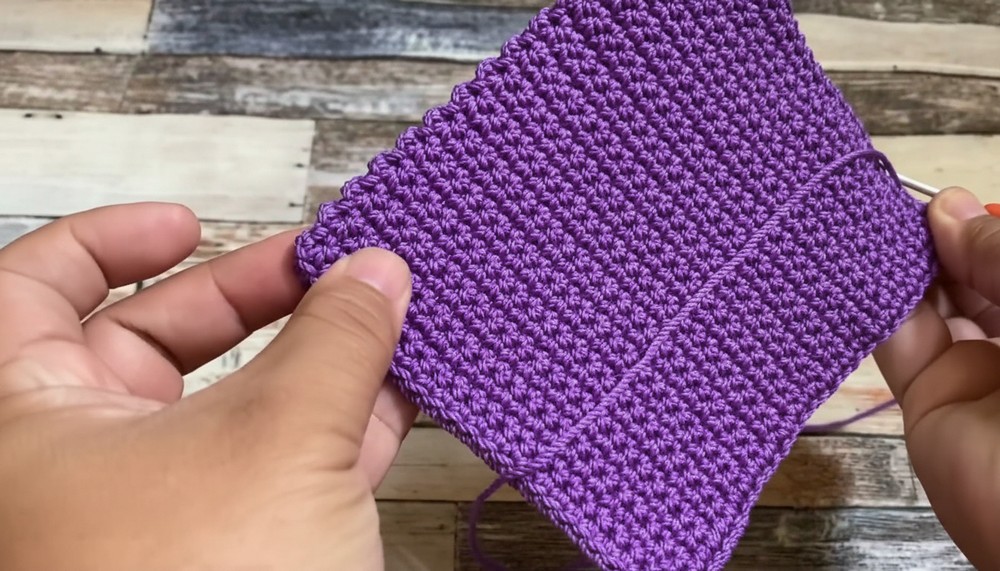
Step 1: Rectangular Base
- Foundation Chain:
- Begin with a Ch 25. (Adjust for a larger or smaller base depending on size preference.)
- Row 1 (Sc Row):
- Insert hook into the 2nd Ch from the hook, and Sc across. (Total: 24 Sc in the row.)
- Row 2–32 (Sc Rows):
- Ch 1, turn, and work 24 Sc in each row.
- Continue until you have 32 rows of single crochet.
- Finish:
- Fasten off and weave in ends.
- This forms the rectangular base of your bag.
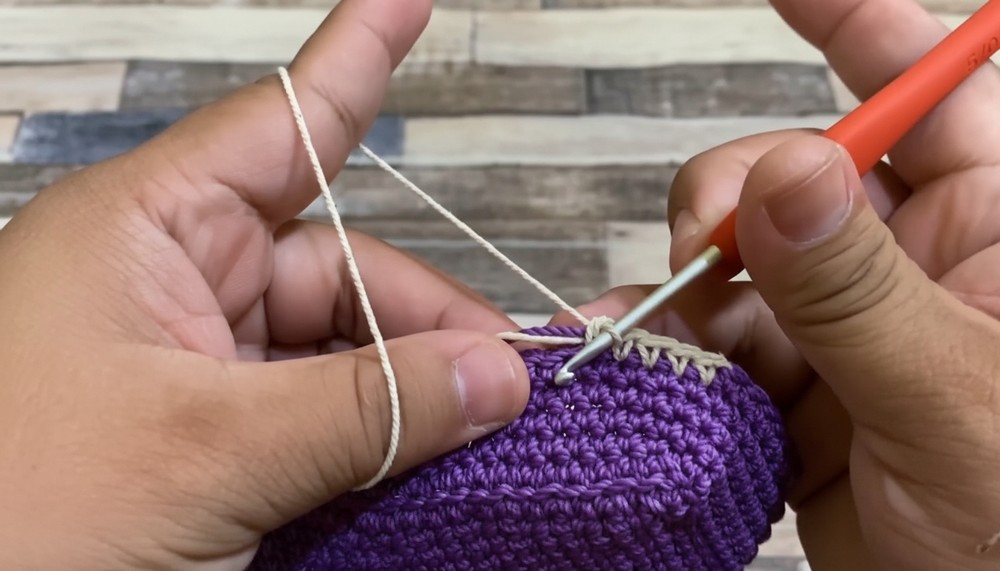
Step 2: Single Crochet Around the Base
- Attach Yarn: Rejoin the yarn at one corner of the base.
- Round 1 (Single Crochet in a Circle):
- Ch 1. Work 1 Sc into each stitch along each straight edge of the rectangle.
- When reaching corners, place 2 Sc into each corner stitch to keep the shape neat.
- After completing the entire perimeter of the base, join with a Sl st into the first Sc.
- Round 2 (Back Loop Sc):
- Ch 1. Work 1 Sc into the back loop of each stitch around. (No increases in this round.)
- Join with a Sl st to the first stitch.
- Rounds 3–5 (Continuous Single Crochet):
- Remove the Sl st from Round 2. Begin working continuously in spiral rows of Sc, ensuring no gaps appear. Mark the first stitch of each round with a knitting marker.
- Work 1 Sc in every stitch until completing a total of 5 rounds.
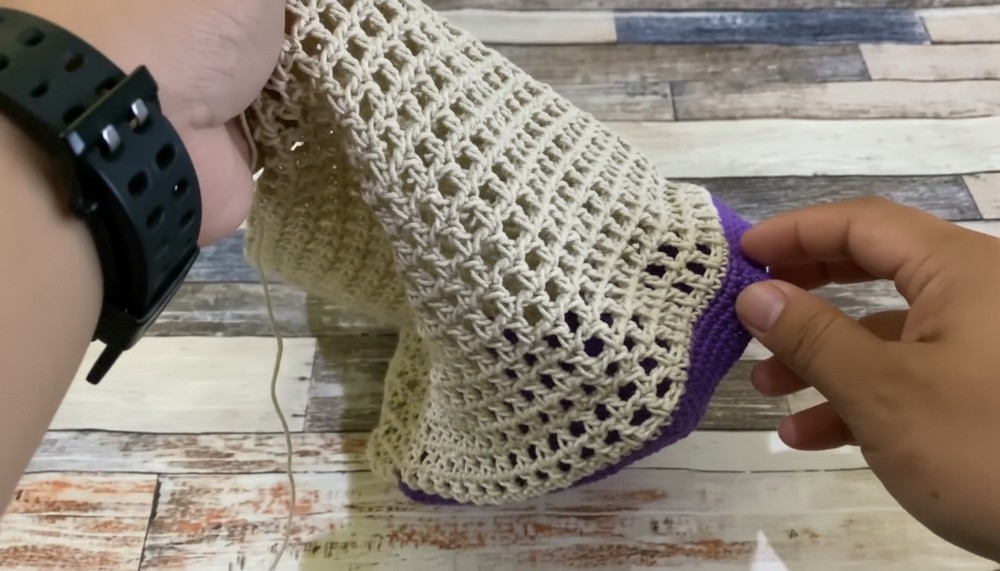
Step 3: Creating the Net Motif
- Round 6 (Transition to Net Motif):
- Switch to the second thread color (polyester thread) before starting this round. Create an unfinished Sc (work Sc up to the last pull-through) and finish it with the new color.
- Net Stitch Pattern:
- Sc in the first stitch, then Dc in the next stitch.
- Ch 1, skip 1 stitch, and work Dc into the following stitch.
- Continue the sequence: Ch 1, skip 1, Dc in next stitch, repeating this pattern around the round.
- Tie off any loose threads from the color change as you go.
- Rounds 7–17 (Building the Net Motif):
- Continue working Dc on top of previous Dc and Ch 1 over the skipped spaces from the previous row.
- This creates the signature lattice net motif of the bag.
- Adjust the number of rounds for the height of the bag. The tutorial uses 17 rounds.
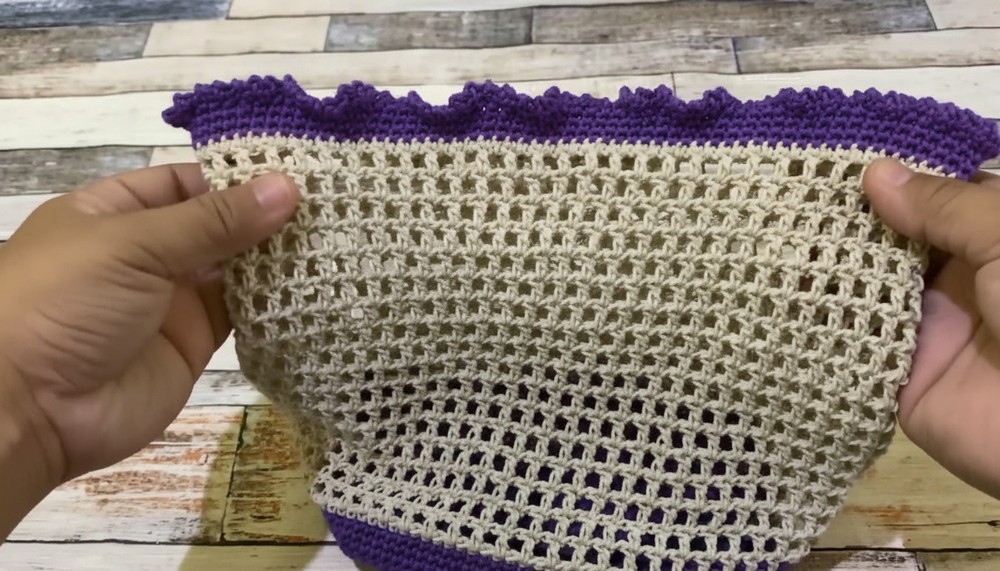
Step 4: Finishing the Body
- Round 18 (Single Crochet on the Edge):
- Once the desired height is achieved, work 1 round of Sc across the net motif, placing Sc on top of each Dc and Ch space.
- Round 19–21 (Adding Stability):
- Continue with your base yarn color and work 3 rounds of Sc for a smooth, sturdy finish at the bag’s rim.
- Round 22 (Picot Edging):
- Sc in the first stitch, then Ch 1 and insert the hook into the stitch below the Ch created. Work a Sc into this spot to form a picot bump.
- Continue alternating between regular Sc and picot stitches all the way around.
- After finishing the round, fasten off and weave in ends.
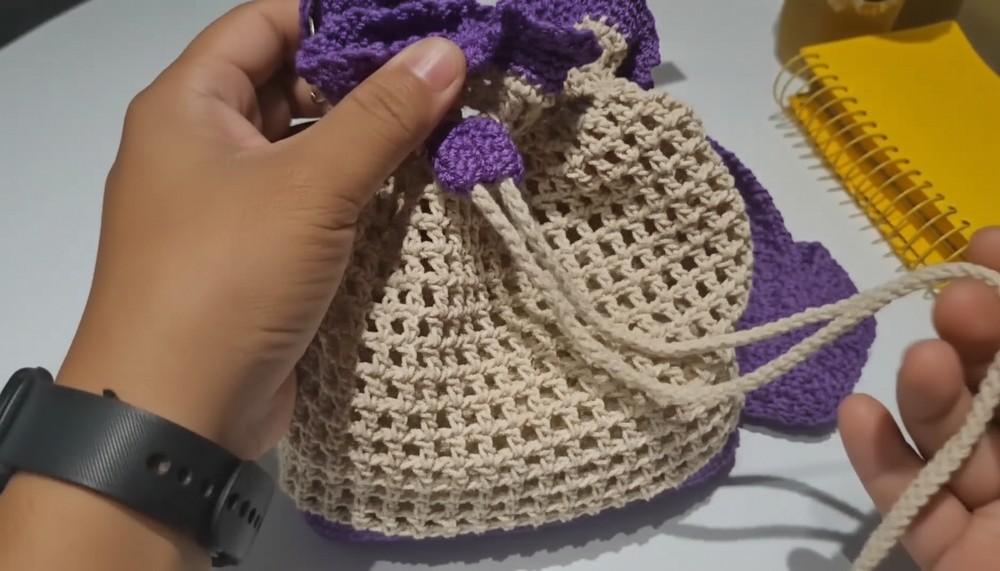
Step 5: Adding the Drawstring
- Create the Drawstring:
- Use the same yarn or a separate decorative cord. Create a long chain that fits comfortably through the bag’s top edge and allows for cinching.
- Weave in the Drawstring:
- Weave the chain cord through the top row of the bag, passing it alternately in and out between gaps in the net motif.
- Add a Decorative Stopper:
- Crochet or sew a small circular stopper to the ends of the drawstring. Sew it closed securely.
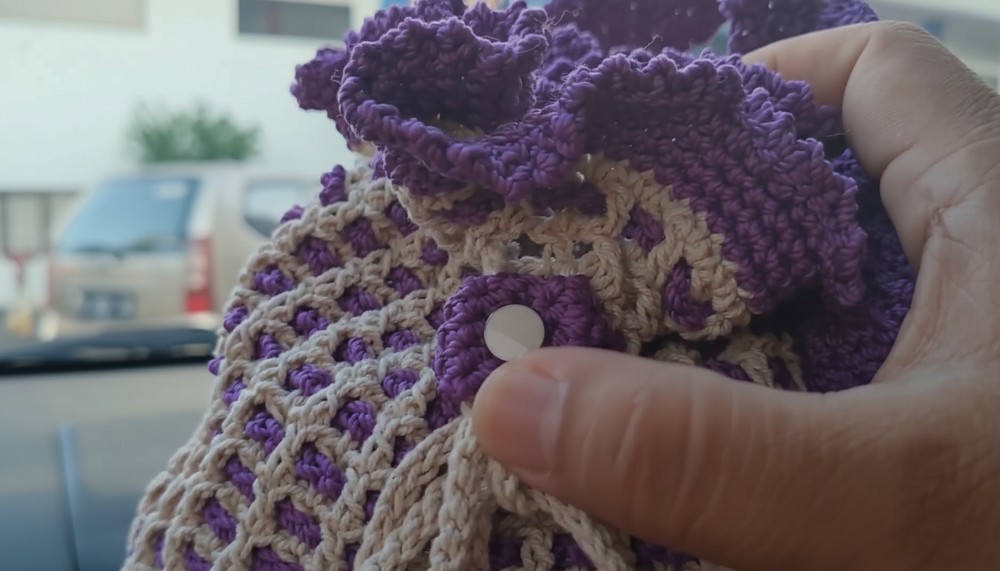
Step 6: Finishing Touches
- Decorative Flowers (Optional):
- Create crochet flowers separately and sew them onto the bag for embellishment.
- Attach buttons or other decorative elements as desired.
- Attach Bag Strap:
- Crochet a long strap or use a ready-made strap of your choice. Securely attach it to both sides of the bag using an invisible stitch or heavy-duty sewing thread.
Conclusion
Congratulations! Your adorable crochet drawstring bag pattern is now complete. The net motif gives it a sophisticated and airy texture, while the additional decorative elements elevate the design.
Pattern Corrections
- Ensure corner stitches are accurately placed to avoid distortion at the base.
- When transitioning colors, secure and weave in yarn tails to ensure a seamless appearance.
- Keep tension consistent when creating the net motif to maintain the lattice pattern.
Tips
- Use Markers: Mark the beginning of each row when working in continuous rounds.
- Customize Size: Adjust the bag’s height, width, and drawstring length to suit your needs.
- Block Your Bag: Soak the finished bag lightly, shape it to your preference, and allow it to dry to define its structure.
Leave a Reply