
Organize your stationery in style with crochet pencil case pattern that combines functionality and charm while being simple and fun to make.

Don’t settle for a plain pencil case when you can have something unique and beautiful that stands out. A crochet pencil case pattern is a lovely and practical way to keep your stationery organized and stylish. This colorful design lets you add a personal touch to your everyday essentials while keeping everything neat in one place. Whether you use it for school, work, or home, it is an accessory that adds charm and personality to your belongings.
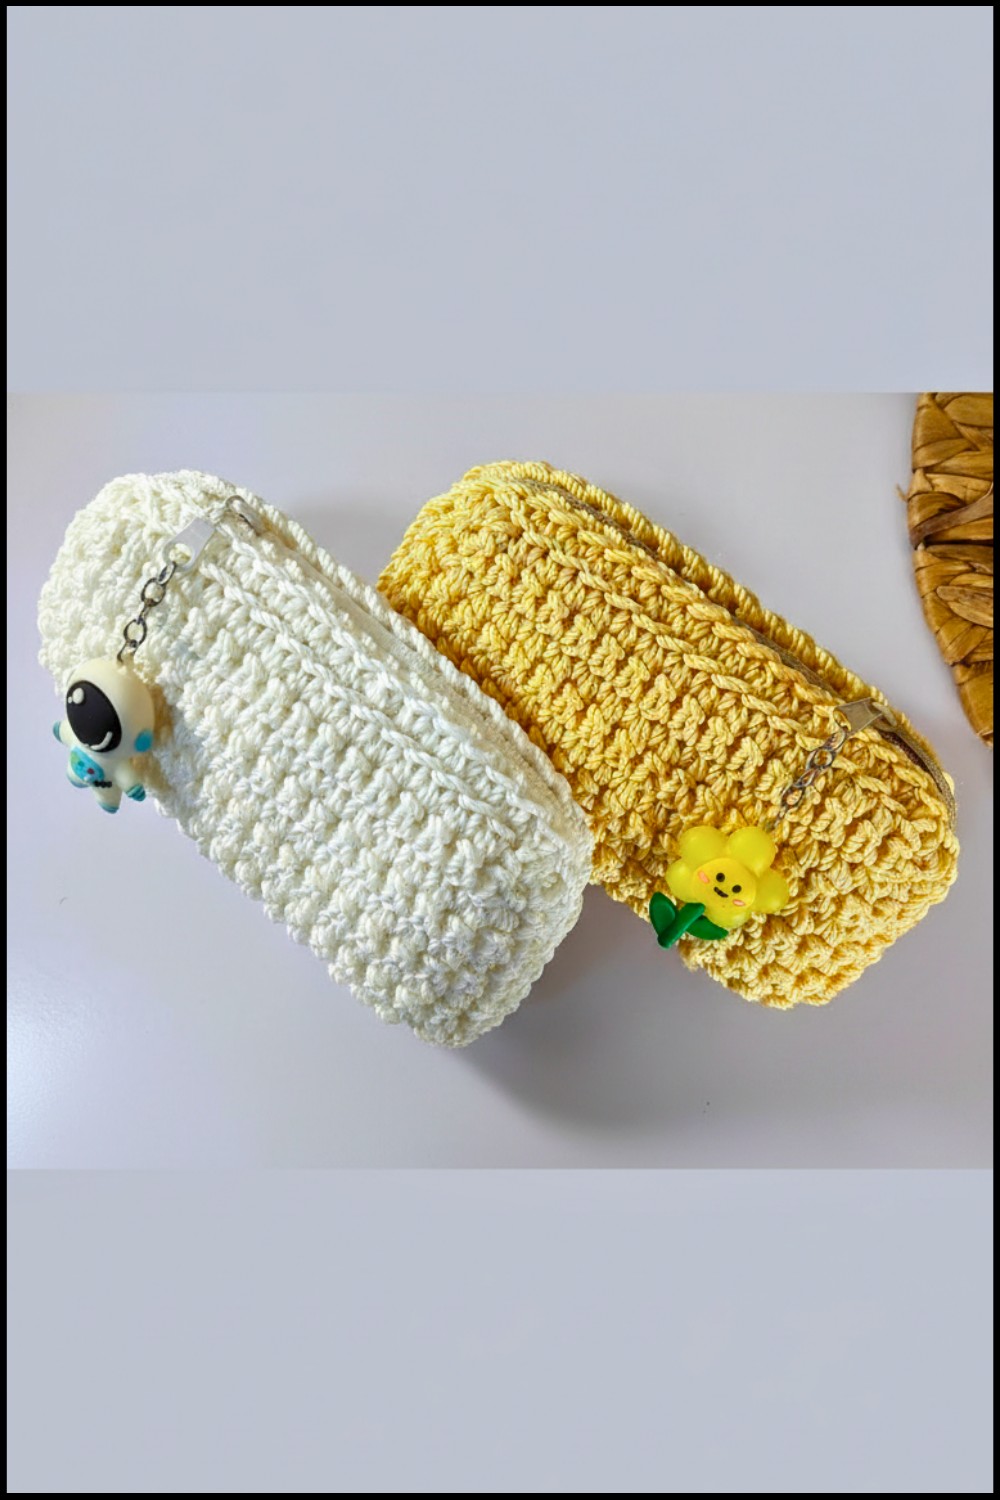
Handy Crochet Pencil Case Pattern for Daily Organization
Soft and sturdy, it can hold a pen, a pencil, a marker, or even smaller items with ease. It is also a thoughtful and meaningful gift that can make someone feel special. With countless options for patterns, colors, and textures, a crochet pencil case is not only functional but also delightful to look at. Keep your items safe and stylish while showcasing something truly unique that makes your organization stand out.

Materials List
- Yarn: Egyptian macramé thread or similar sturdy yarn.
- You can also use leftover threads from other projects.
- Hook Size: 5.5mm crochet hook.
- Zipper Length: Ideally matches the width of your pencil case (adjustable as per the final size).
- Other Tools:
- Sewing needle (large for yarn).
- Stitch markers (optional, helpful for accuracy).
- Scissors.
Skill Level
Intermediate.
Key Abbreviations
- ch: Chain.
- sc: Single Crochet.
- sc-blo: Single Crochet in Back Loop Only.
- st(s): Stitch(es).
- sl st: Slip Stitch.
Special Notes
- This pattern is worked in single crochet throughout.
- The case’s size is customizable by altering the number of foundation chains and rows.
- Maintain accurate stitch counts for symmetry.
- The design consists of two identical rectangular pieces sewn together with a zipper added for closure.
Pencil Case Instructions
First Piece
- Foundation Chain:
- Begin with 20 chains.
- Row 1:
- Starting from the second ch from the hook, work sc in the third loop of the foundation chain.
- Continue working 1 sc in each chain across (total: 19 sc).
- Rows 2–8:
- Ch 1, turn. Work 1 sc in each st across (total: 19 sc per row).
- At the end of Row 8, check your stitch count (ensure it’s 19 per row).
- Row 9 (Decreasing Row):
- Ch 1, turn. Skip the first st.
- Work 1 sc in each st until the last 2 sts remain. Skip the second-to-last st and work a sc in the last st (total: 17 sc).
- Row 10 (Decreasing Row):
- Repeat Row 9 decrease (total: 15 sc).
- Single Crochet Around the Piece:
- Begin working sc stitches around the entire rectangle.
- On the short edges, work 10 sc (1 sc per row).
- On the long edges, work 19 sc across each side.
- Mark the first sc to keep track.


Second Piece
- Repeat Steps 1–6 to make a second identical rectangle.

Assembling the Case
- Mark the Center:
- On one short side of each piece, mark the center stitch of the 15 sc row.
- Count 10 stitches to the right and place a marker.
- Similarly, count 10 stitches to the left and place a marker (these marks will serve as alignment points).
- Join the Pieces:
- Align the two pieces with the marked stitches matching exactly.
- Securely attach yarn to the starting spot.
- Insert the hook through the front loops only of the stitches from both pieces and work sl sts to join. Repeat for the entire circumference.
- Finishing the Thread:
- After sewing, secure and weave in the excess thread inside the pencil case.

Adding the Zipper
- Using the sewing needle, sew the zipper on the inside edge of the case, securing it on both sides.

Conclusion
Your crochet pencil case is now complete! This sleek, sturdy, and functional design is customizable and perfect for reusing leftover yarn. The addition of a zipper provides a practical and professional finish.

Pattern Corrections
- Ensure equal stitch counts on both short and long sides before assembling to avoid uneven edges.
- If you notice misalignment during the final joining process, recheck your markings and adjust stitches accordingly.
Tips
- Yarn Selection: Use sturdy yarn like macramé or any thread with good structure for the best results.
- Custom Sizing: To customize size, increase or decrease the foundation chain and the number of rows proportionally.
- Zipper Attachment: Use a coordinating sewing thread and small stitches for neat attachment.
Leave a Reply