
Feel the joy of wearing a cozy crochet heart top that adds a charming touch to your style with an easy-to-follow guide anyone can enjoy.
Cozy Crochet Heart Top Pattern to Rock Stylish Looks
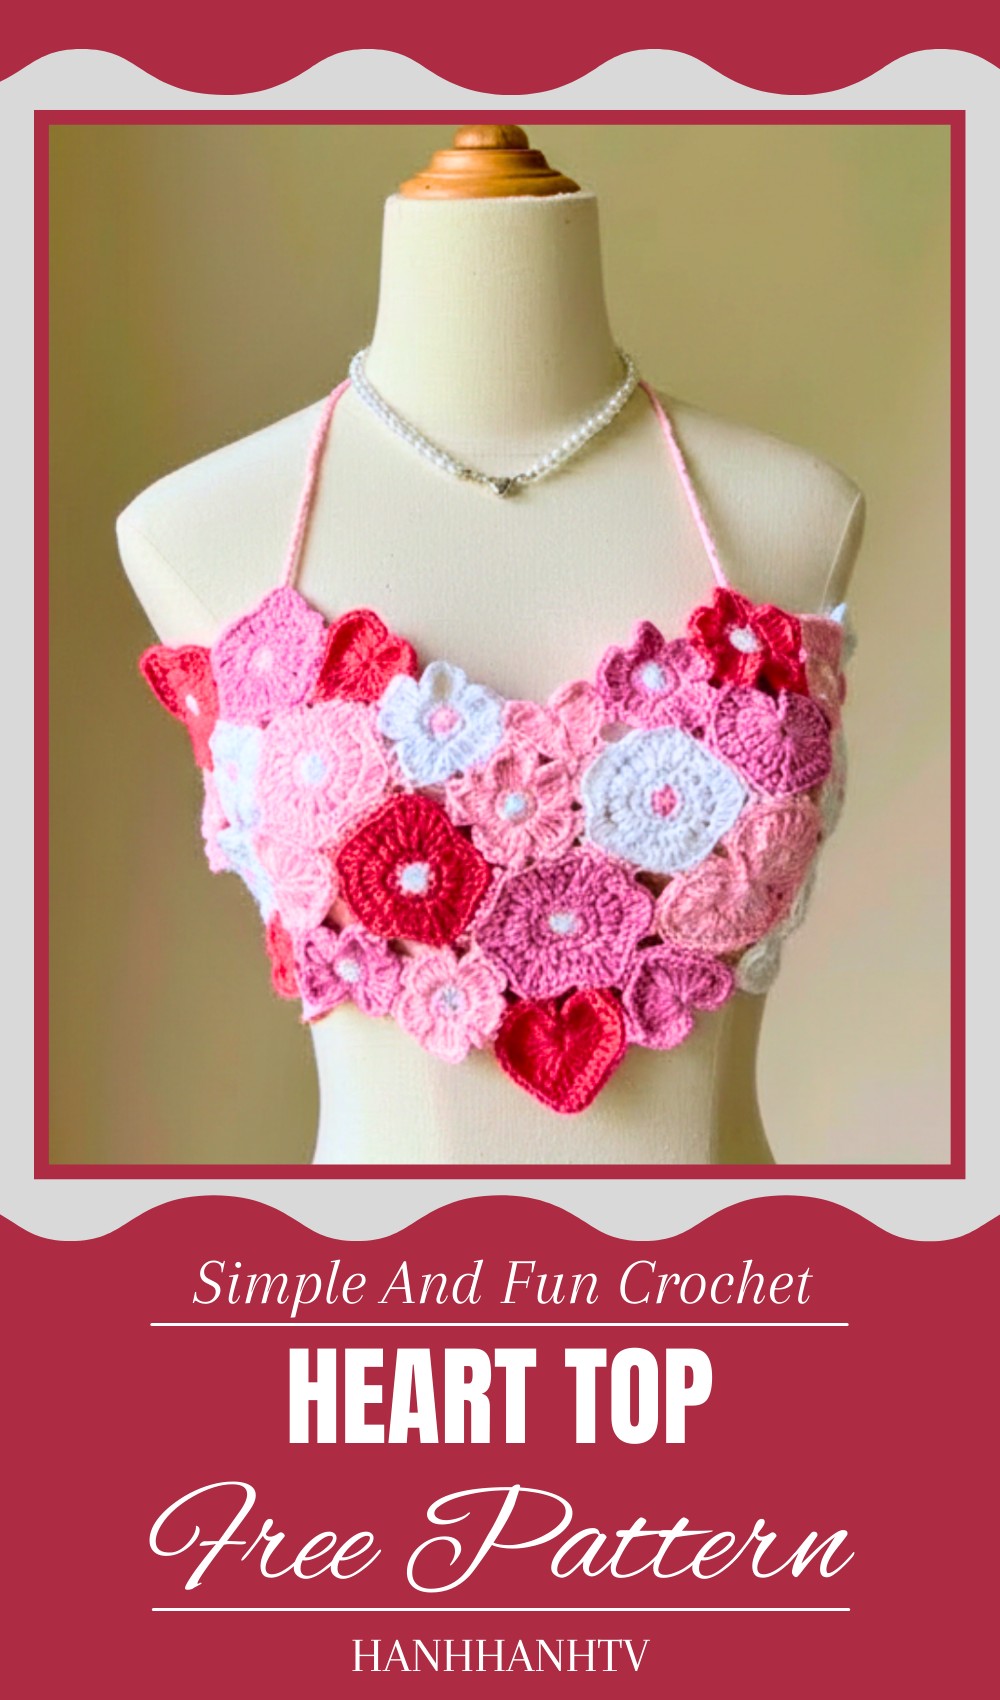
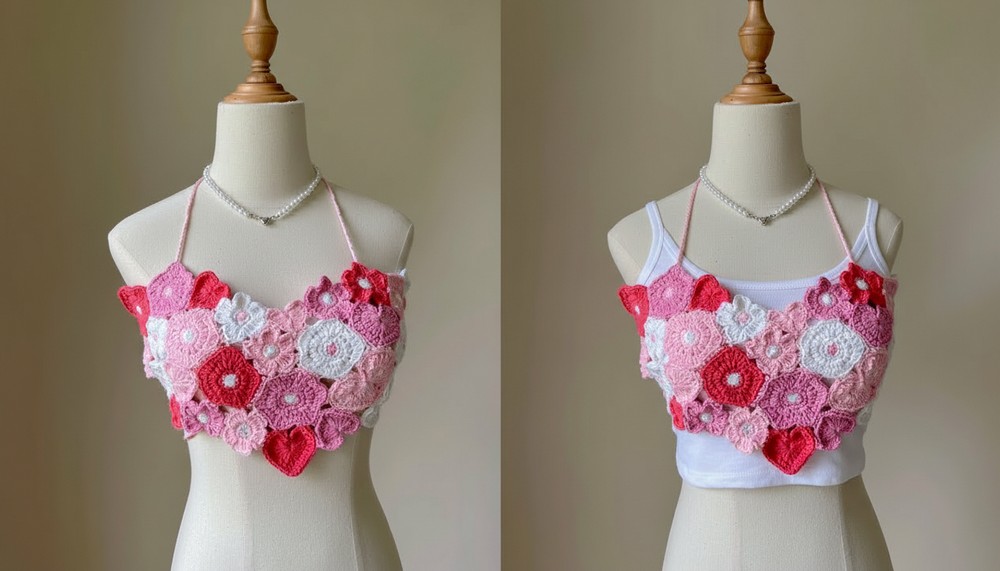
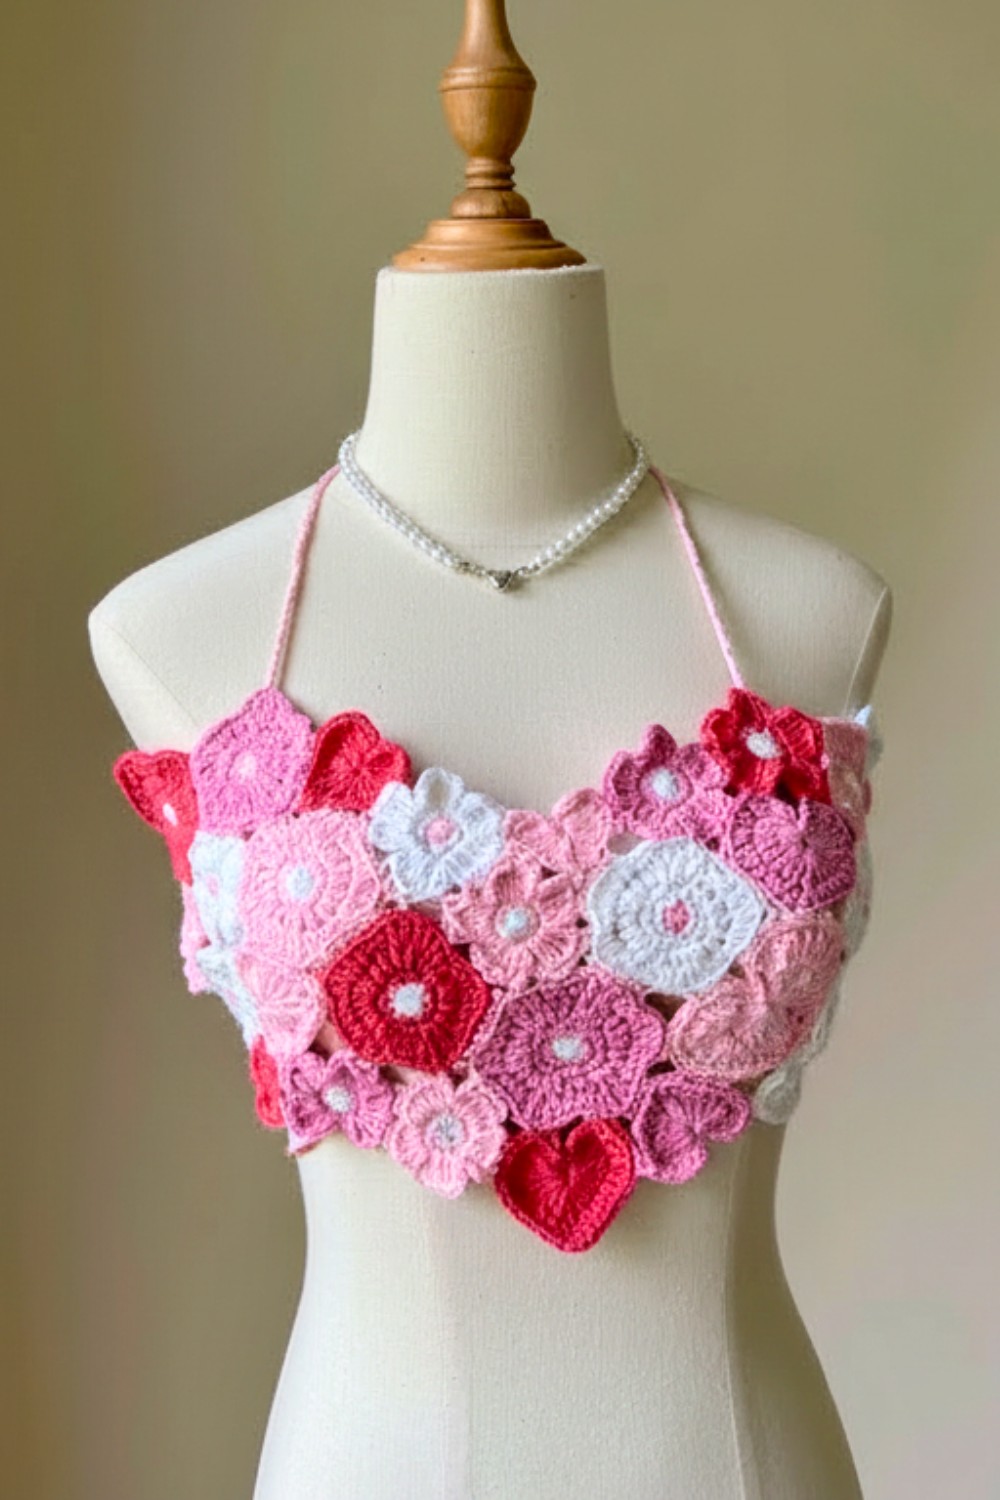
Wearing a lovely piece that adds a touch of sweetness and charm to your outfit, making you feel special and cared for. This is exactly what the crochet heart top pattern offers—a beautiful and simple way to create a stylish garment with delicate heart shapes woven into the design. The pattern gives life to a soft, comfortable top that looks perfect for warm days or casual outings.
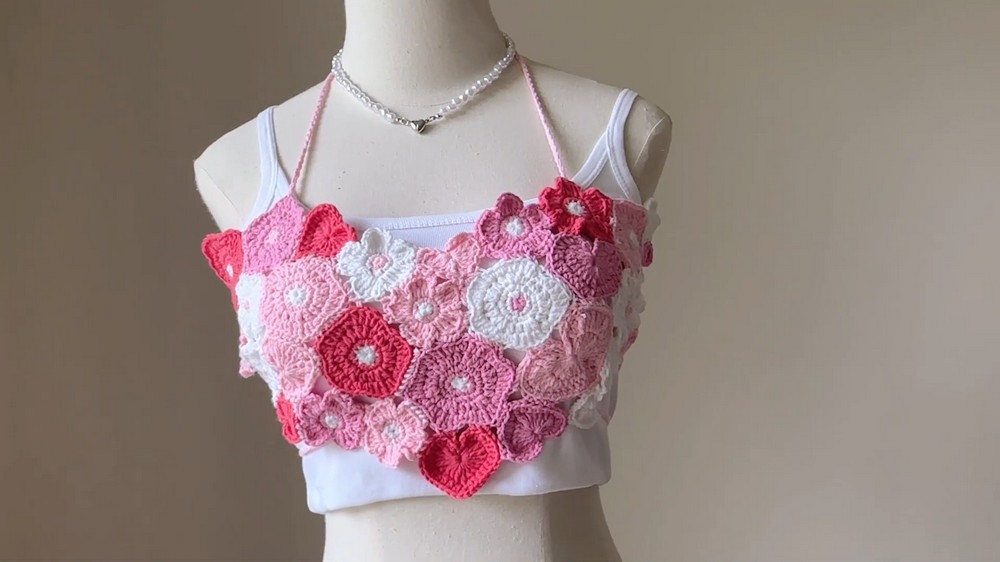
Its pretty heart details catch the eye and bring warmth to your look without being too flashy. This top is not only comfortable to wear but also versatile—great for pairing with jeans, skirts, or shorts. Whether you want to stand out at a summer party or enjoy a relaxed day in the sun, this crochet heart top pattern is a wonderful choice. Its gentle and charming appearance can make anyone feel confident and happy every time they put it on.
Crochet Floral Shirt with Heart Patches Pattern
Materials:
- Cotton yarn in several colors (e.g., MK MT white Milk Combit lenses, colors 01, 07, 06, 05)
- Crochet hook size 2.5 mm
- Sewing needle for assembly
- Scissors
- Cardboard for template (optional, to aid shaping)
- Stitch markers (optional)
Difficulty Level:
- Intermediate: Requires skills in magic circle, single crochet (SC), half double crochet (HDC), double crochet (DC), increases, motif assembly, and sewing.
Tutor’s Suggestions:
- Use stitch markers for counting stitches when working repetitive increases.
- Prepare a cardboard template if precise shaping is desired.
- Customize flower and heart sizes with practice before attaching.
- Color mix-match according to personal taste; freestyle assembly works well.
- Sew decorations carefully, matching yarn colors to minimize visible stitching.
Step-by-Step Pattern:
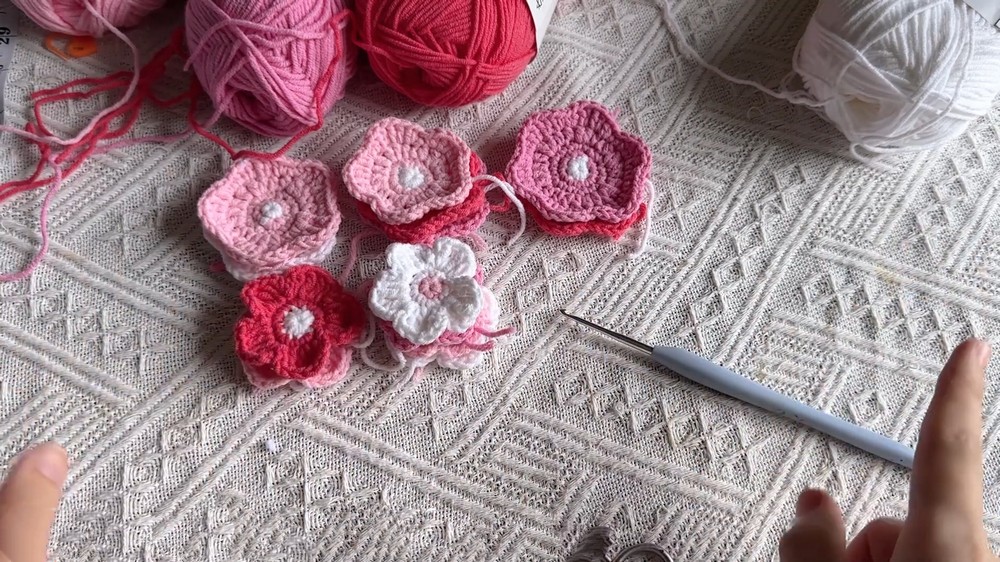
Part 1: Flowers – General Steps for Types A, B, C, D, E
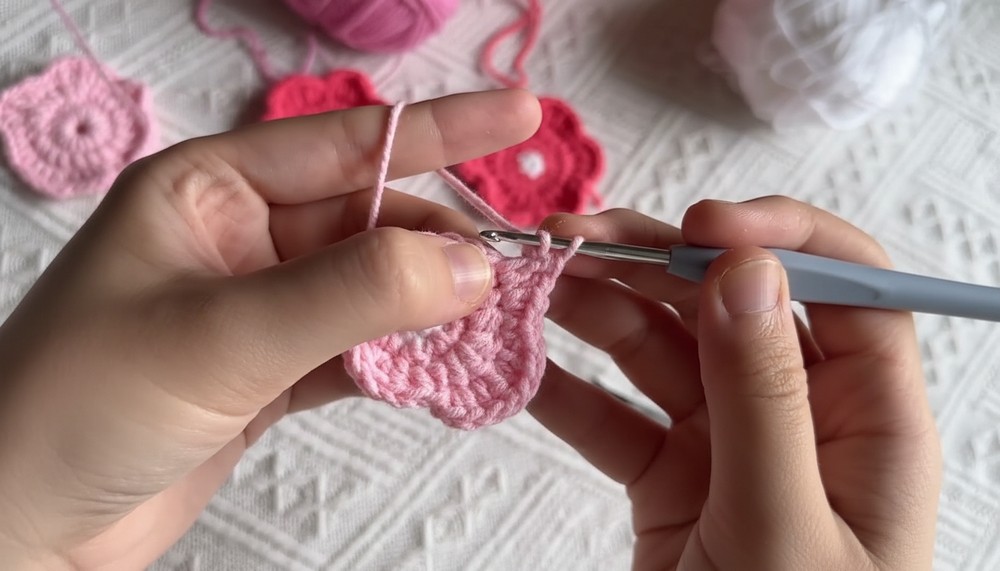
Flower Type A (5 Petals, Smaller Pistil):
- Create Magic Circle and crochet 10 SC stitches inside.
- Round 2 (Petal Formation):
- Use contrast color yarn.
- Increase stitches by crocheting 2 SCs in some stitches.
- Follow instructions to increase and form points (single crochet, increases alternating).
- Round 3 & 4 (Petal Texturing):
- Work half-double crochets (HDC), double crochets (DC) in sequence to shape petals, with increases at necessary points forming wings.
- Complete Petals:
- Each petal is formed by a set of HDC, SC, and increases. Repeat petals 5 times.
- Fasten off and pull yarn tight to close.
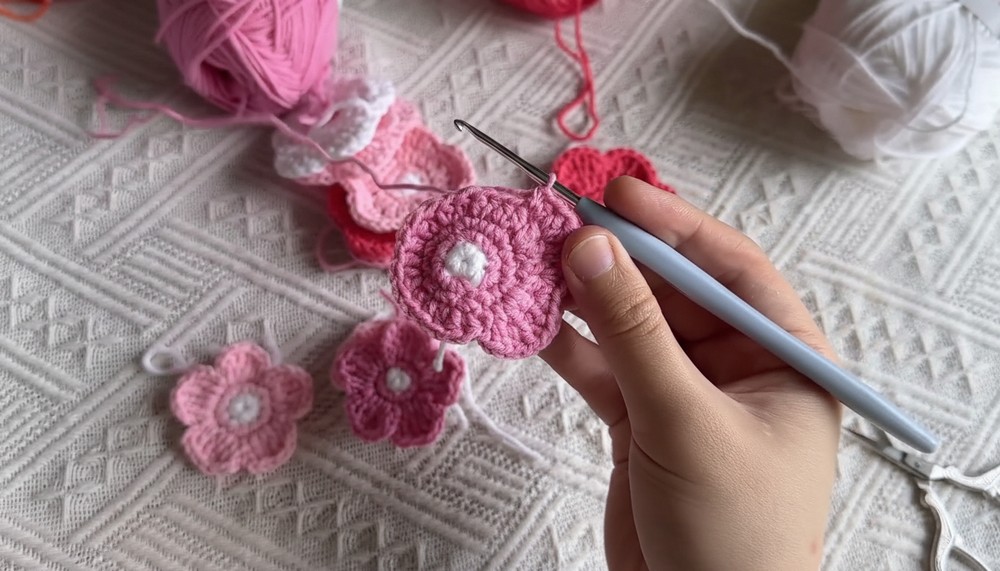
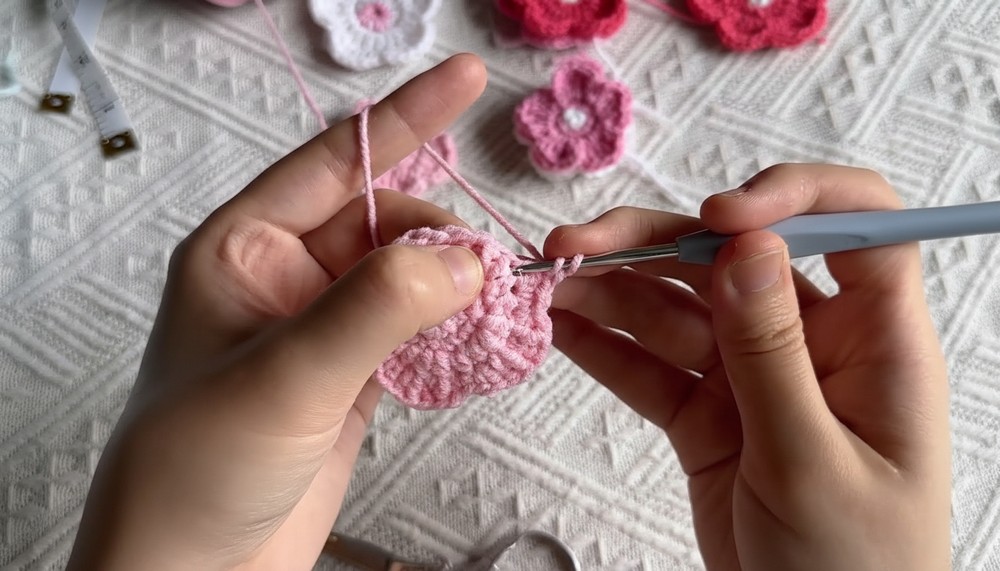
Flower Type B (Larger Pistil):
- Same as Type A, but start with a larger pistil (center) by extending the number of base stitches from 10 to 12, and increase petals similarly.
Flower Type C (6 Petals):
- Magic circle with 6 SC stitches.
- Optionally increase pistil size with 2 rows of white SC stitches (12 SCs).
- Form 6 petals with HDC and DC, increased accordingly.
- Finish same as above.
Flower Types D and E (Smaller Flowers):
- Use similar formulas but with fewer stitches and petals; adapt sizes by reducing base stitches.
Part 2: Heart Patches – General Instructions
Heart Type A (Smallest Heart):
- Make a magic circle.
- Crochet 3 chains and work double crochet pairs forming a symmetrical shape resembling a heart.
- Crochet three double stitches rows, followed by symmetrical decreases to shape.
- Finish by cutting yarn and pulling ends tight.
Heart Types B, C, and D:
- Follow similar steps, increasing stitch counts and rows for larger sizes.
- Use increases and chains to create a fuller heart shape.
- Pay attention to symmetrical double and single crochet pairs for balanced shaping.
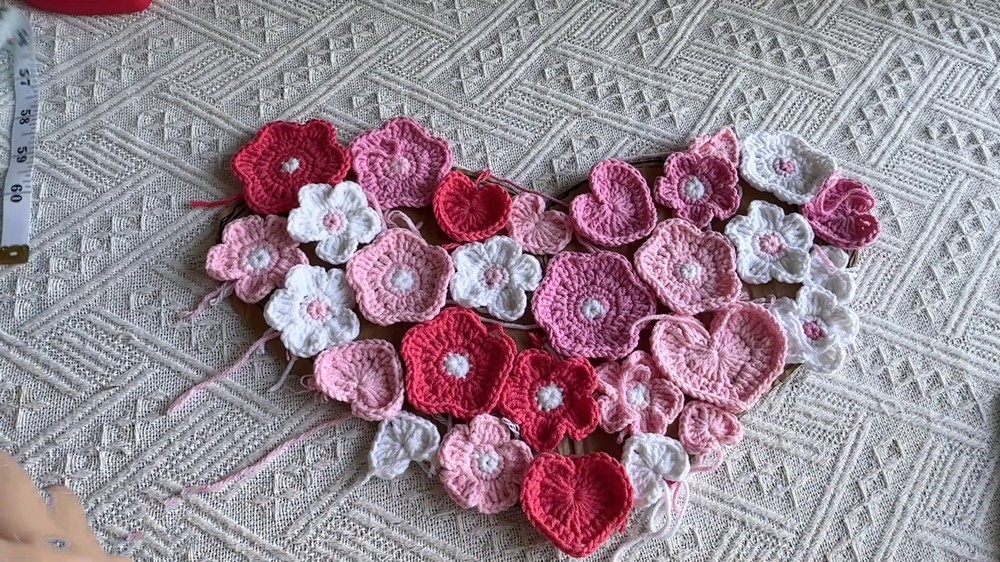
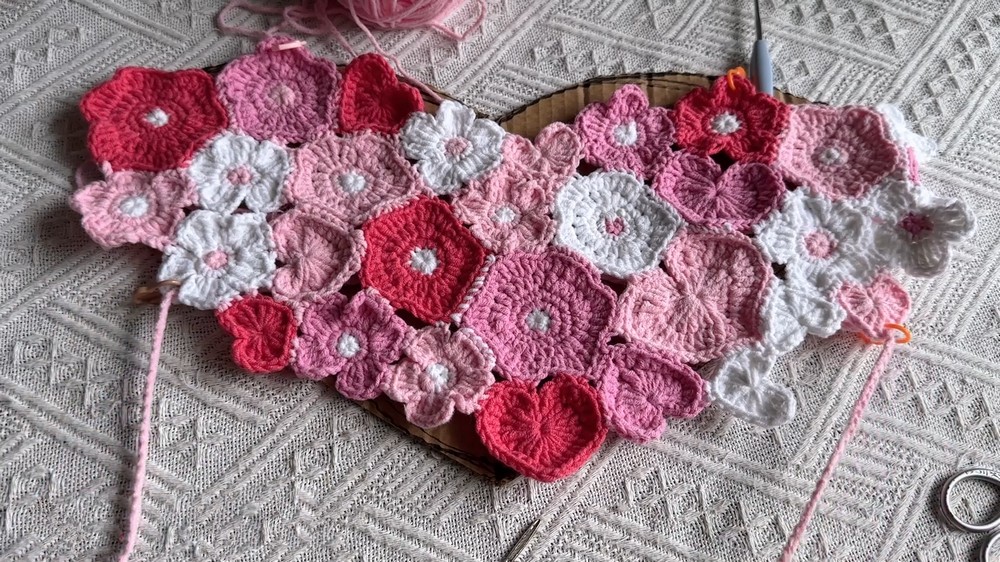
Part 3: Assembly Preparation
- Template (Optional):
- Cut a cardboard piece sized approx. 17 cm tall and 34 cm wide (or adjust to your size).
- Use as guide for arranging flowers and hearts symmetrically or freestyle.
- Arrange Motifs:
- Plan placement of flowers and hearts on the shirt base or fabric.
- Place larger hearts in focal positions; smaller hearts on edges.
- Intermingle flowers and hearts for organic look.
Part 4: Sewing and Finishing
- Thread Attachment:
- Use yarn color matching motifs for sewing to avoid visible stitching.
- Sew motifs starting at central points, reinforcing corners and edges with extra stitches.
- Hide Yarn Ends:
- Weave leftover yarn tails back into motifs securely.
- Adjust Tension:
- After sewing motifs, adjust positions slightly to prevent bunching or flattening.
- Add Supporting Chains/Straps:
- Crochet chains to create supporting straps:
- Longest strap ~200 chain stitches crossing top points.
- Additional diagonal and horizontal straps ~50-80 chain stitches depending on size and support needed.
- Crochet chains to create supporting straps:
- Crisscross Straps:
- Weave straps in a crisscross pattern on back for stability and aesthetic interest.
- Final Adjustments:
- Measure fitted shirt, making sure motifs are distributed evenly and securely sewn.
Special Features:
- Customizable motif sizes and colors.
- Freestyle assembly for unique, personalized design.
- Crisscrossing straps for structural support and visual texture.
- Mix of flower and heart shapes for a balanced artistic shirt.
Uses:
- Fashionable crochet shirt or overlay piece.
- Decorative wear for casual or summer events.
- Personalized artistic expression through crochet fashion.
Tips:
- Use a soft yarn that holds shape but offers comfort.
- Measure yourself or intended wearer as you assemble motifs.
- Block motifs prior to assembly for even shaping.
- Take photos of motif layout before sewing for reference.
- When sewing motifs closely, leave small gaps to allow for fabric stretch.
Conclusion:
This floral shirt with heart patches embodies a blend of creativity and crochet skill, resulting in a charming piece perfect for summer wear or unique gifting. By combining multiple crochet motifs with flexible assembly and supportive strap designs, you can create a comfortable, stylish garment that captures individual flair.
Leave a Reply