
Twirl into style with a playful crochet bubble skirt pattern that’s perfect for adding a fun, cozy, and unique touch to your everyday wardrobe.
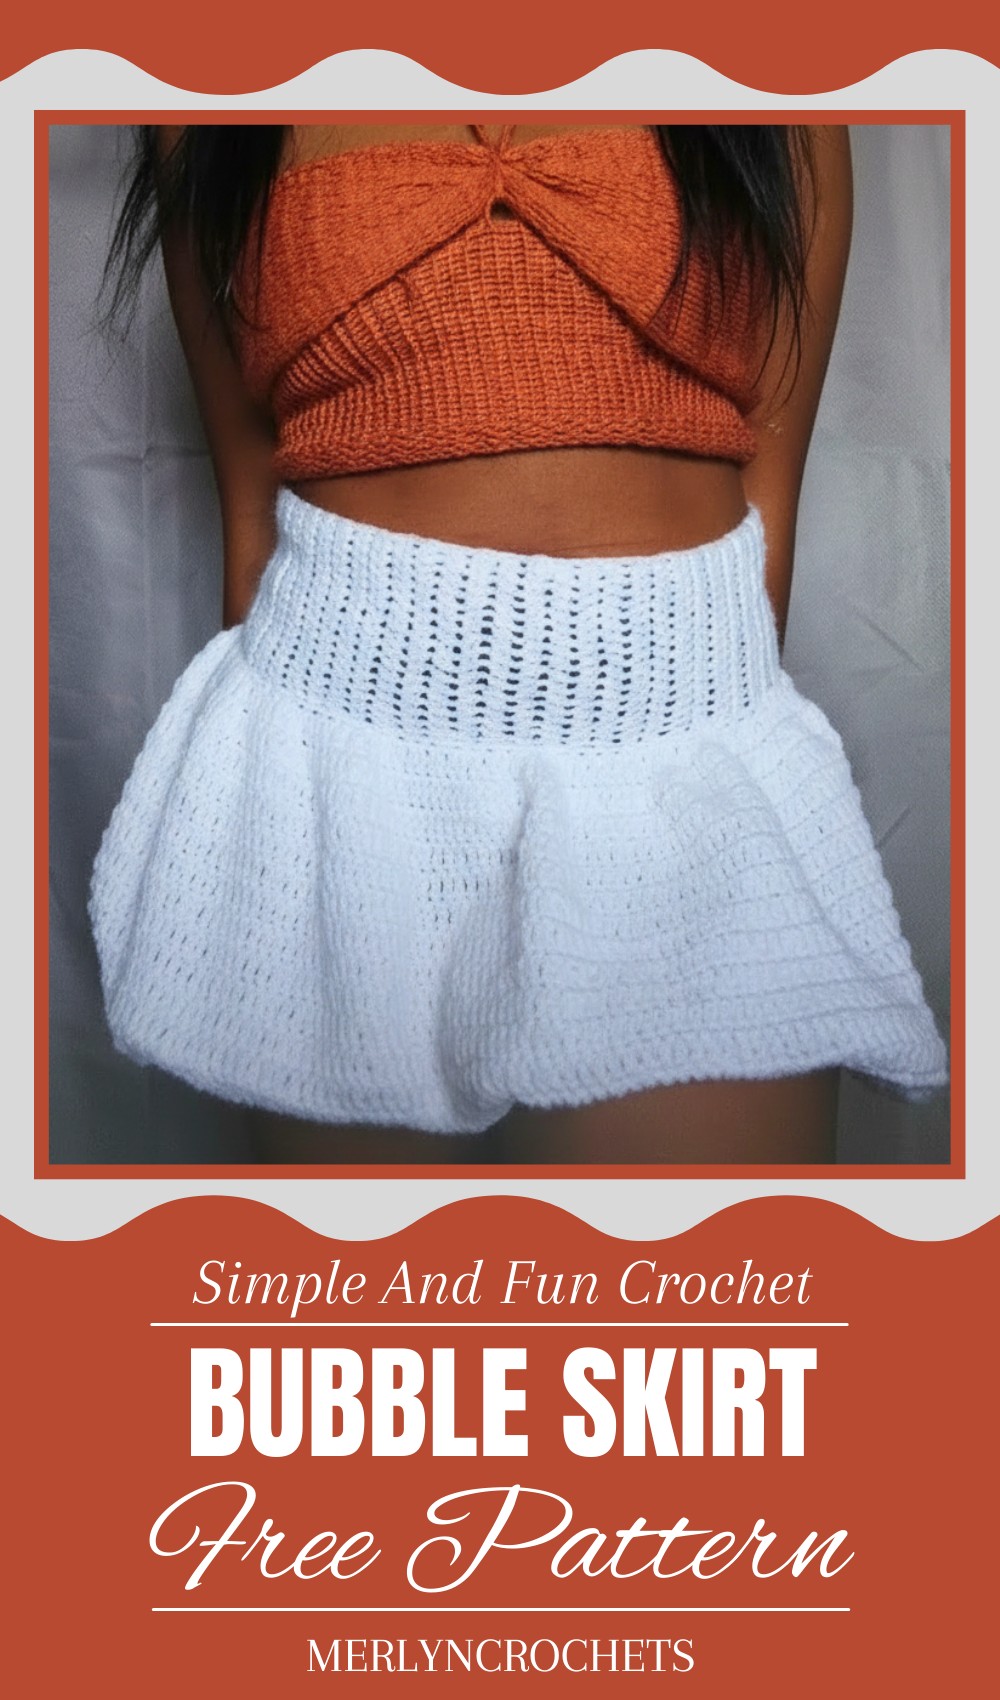
Crochet Bubble Skirt Pattern for a Fun Flare in Fashion
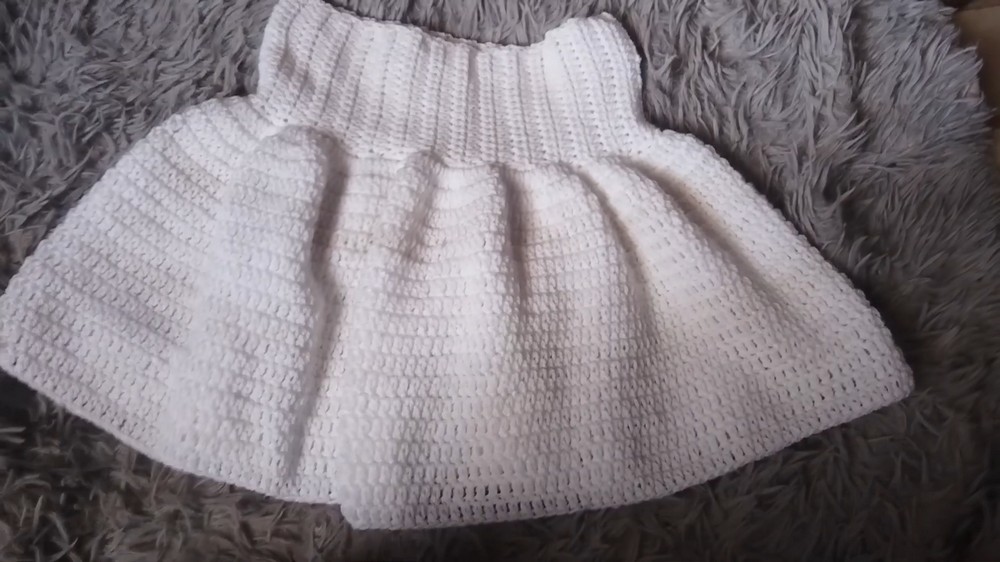
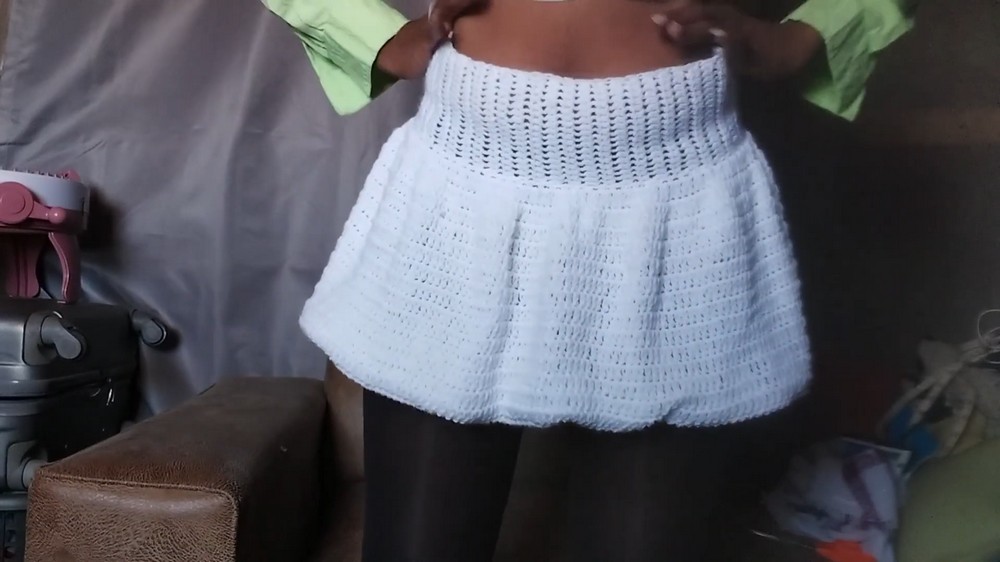
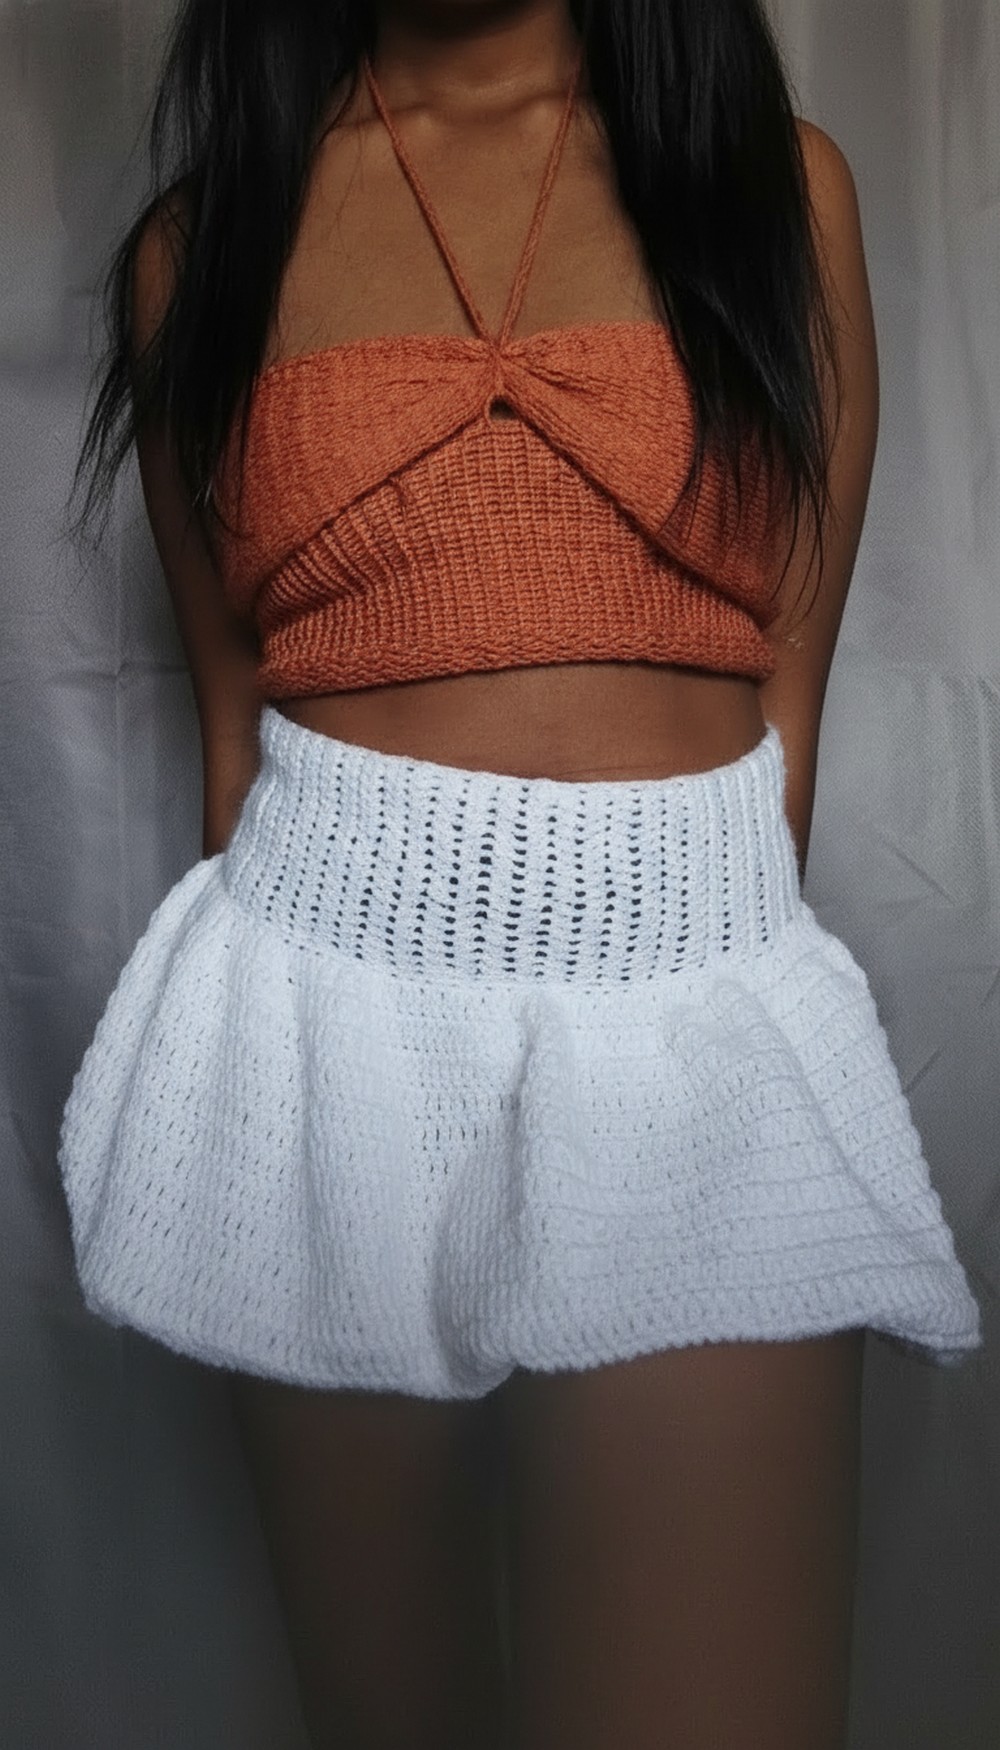
This skirt brings a playful and charming look that instantly adds a fun touch to any outfit. Its unique bubble shape creates soft, rounded layers that gently puff out, giving a lovely fullness without feeling heavy or bulky. The texture is soft and cozy, making it comfortable to wear all day long, whether you’re out for a walk, at a casual gathering, or just relaxing at home.
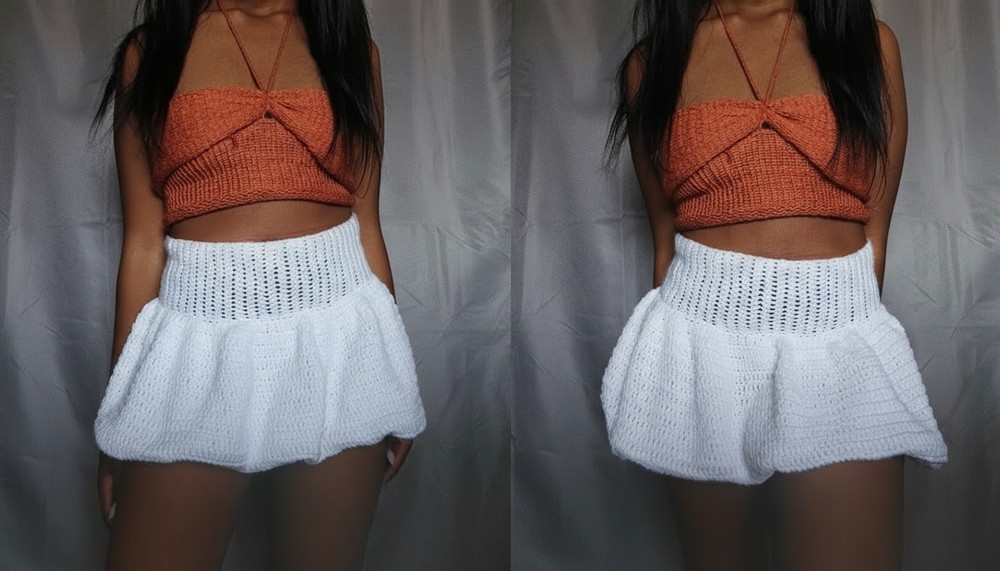
Its airy feel allows easy movement, giving you freedom and confidence in every step. Perfect for all seasons, this skirt can be paired with simple tops or sweaters to create different styles, from casual to a bit dressy. Its friendly shape flatters many body types, making it an ideal choice if you want something both stylish and comfy. With its eye-catching puffed design, this skirt is sure to bring smiles and compliments wherever you go, turning everyday moments into something special.
Crochet Bubble Skirt – Step-by-Step Pattern
Materials
- Yarn: Starcraft Special Double Knit yarn (acrylic) or any DK weight yarn
- Crochet hook: 4 mm
- Scissors
- Measuring tape
- Yarn needle (for finishing)
Special Features
- Thick, stretchy waistband for comfort and shape
- Bubble effect created by drawstring scrunching at the hem
- Lightweight, comfortable fabric using half double crochet and double crochet stitches
- Beginner-friendly repetitive stitches
- Adjustable length and waistband circumference
Level of Difficulty
Beginner – This pattern uses basic stitches (half double crochet, double crochet, single crochet) and simple shaping with easy-to-follow instructions.
Step-by-Step Pattern
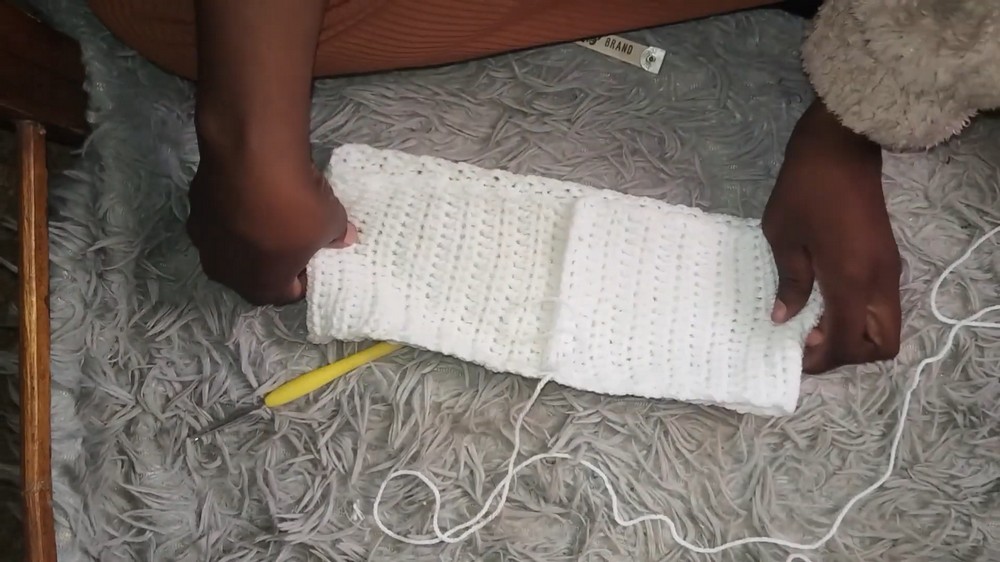
Step 1: Crochet the Waistband – Foundation Chain
- Chain desired number for waistband length (example: 19 chains).
- This will depend on your waist measurement.
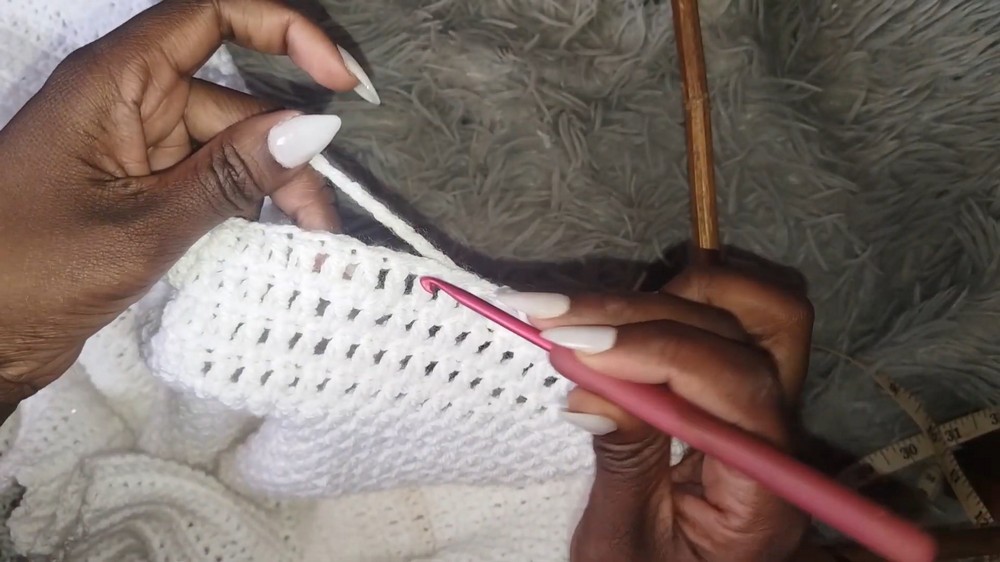
Step 2: First Row – Half Double Crochet the Waistband
- Yarn over, insert hook into the second chain from the hook.
- Yarn over again, pull through (3 loops on hook).
- Yarn over, pull through all 3 loops (half double crochet (hdc)).
- Repeat hdc stitches in each chain across.
- At end, you will have approximately 18 hdc stitches (for the example).
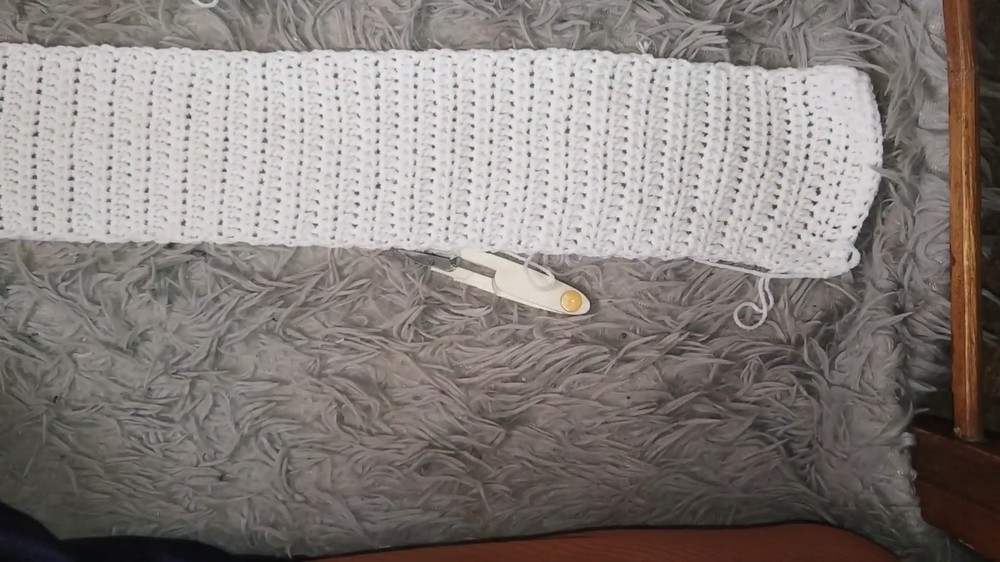
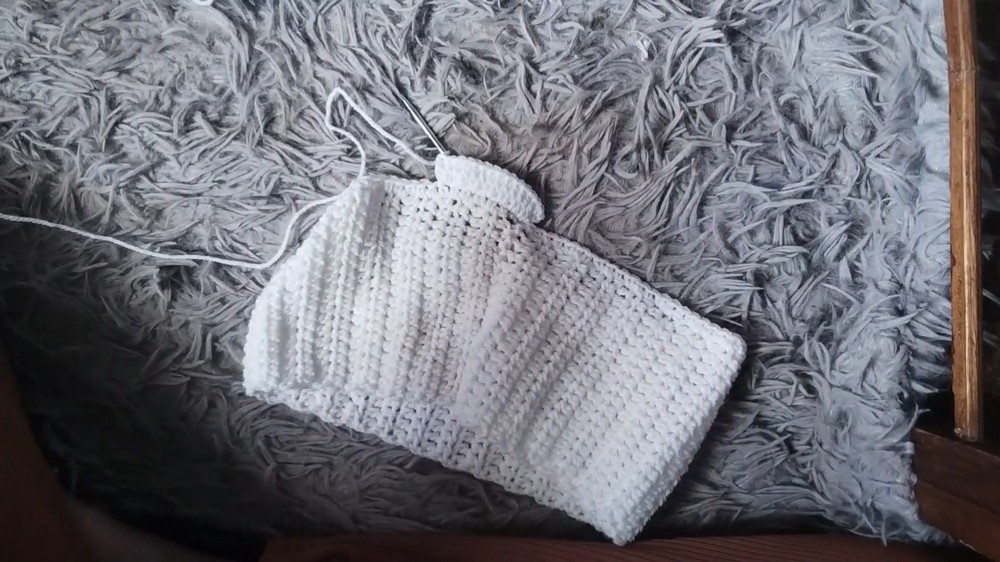
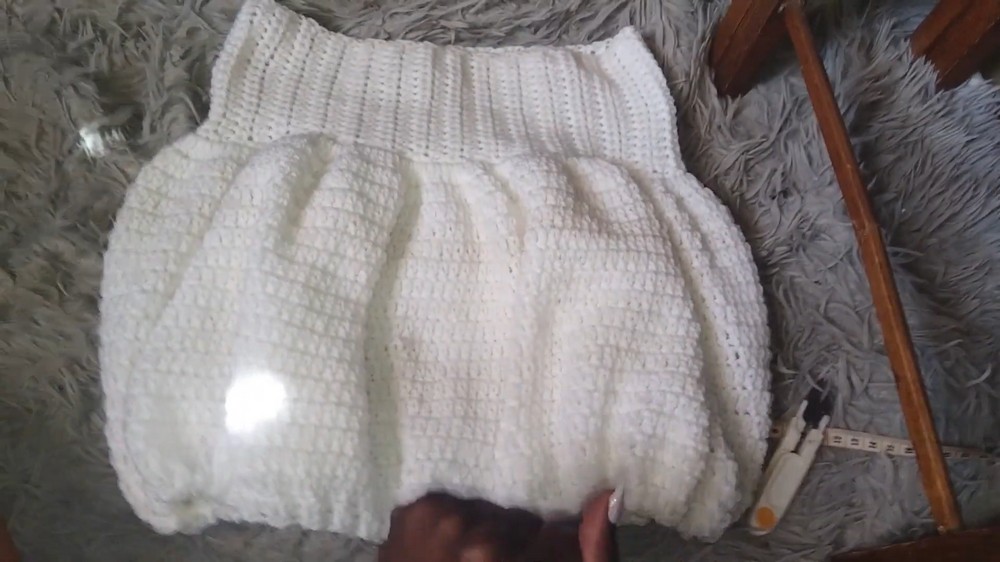
Step 3: Build Thickness of Waistband
- Chain 1, turn.
- Work hdc in each stitch across, inserting hook under both loops of each stitch.
- Repeat until waistband reaches desired thickness (the example reaches about 4 inches after several rows).
- Keep count of rows to fit your comfort (example uses 56 rows to reach waist measurement).
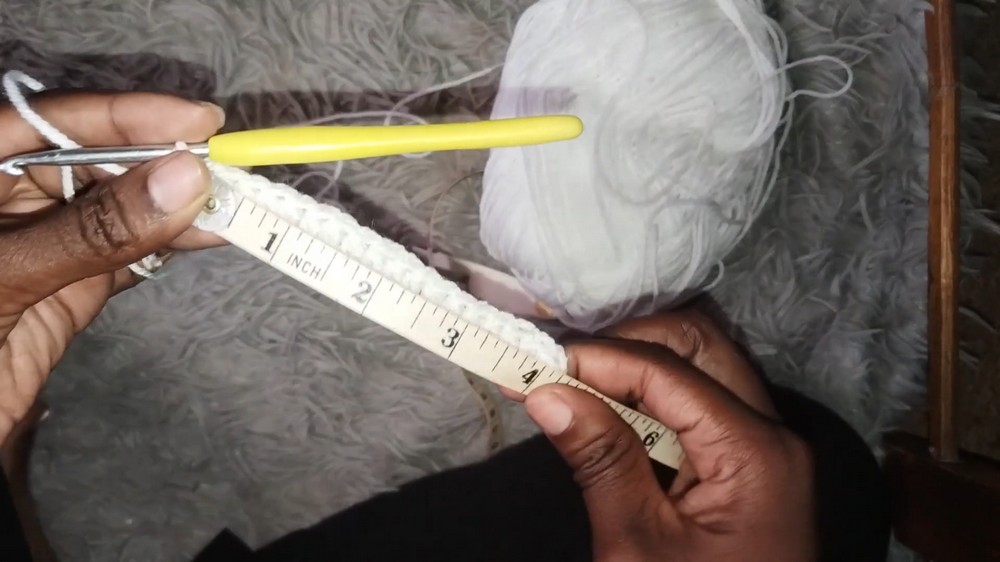
Step 4: Measure Waistband and Adjust
- Stretch waistband gently to check fit.
- The example measures roughly 23.5 inches relaxed, 28 inches stretched.
- Continue adding rows accordingly to reach comfortable size.
Step 5: Join Waistband Edges
- Fold waistband in a circle, align edges.
- Join edges using single crochet (sc) stitches along the side seam to form a waistband loop.
Step 6: Single Crochet Around Waistband Top Edge
- Chain 1, work sc stitches evenly around the waistband edge for a neat finish.
- Join with slip stitch.
Step 7: Skirt Body – Working Double Crochet Rows
- Chain 3 (counts as first double crochet (dc)), turn.
- Work 2 double crochets (dc) in each stitch around (2 dc in each stitch for increase and fullness).
- Join with slip stitch to top of chain 3.
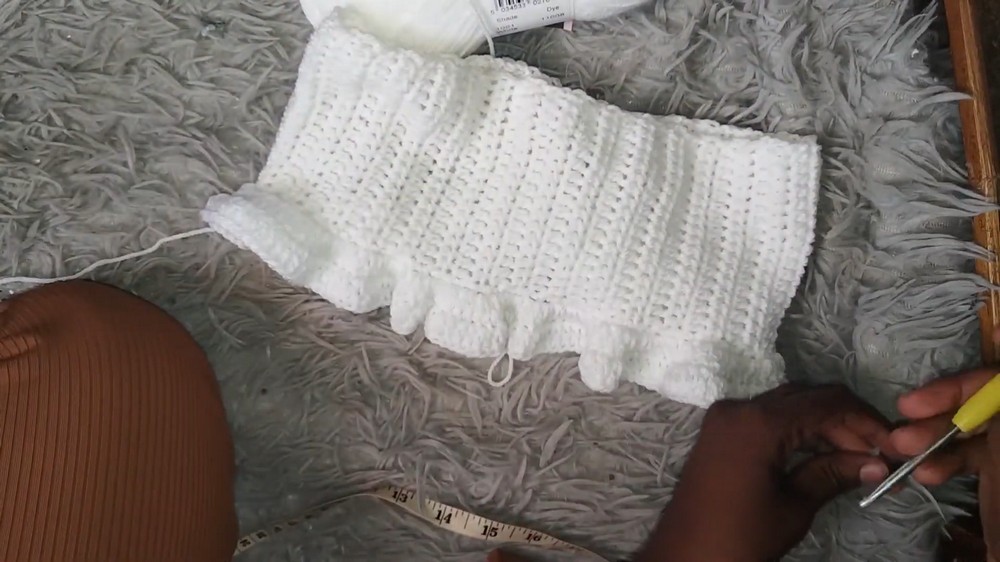
Step 8: Second Row and Increase Pattern
- Chain 3 (counts as first dc).
- Work 3 dc in next 3 stitches, then increase by working 2 dc in one stitch.
- Repeat pattern (3 dc, increase) around row.
- Join with slip stitch.
Step 9: Continue Double Crochet Rows
- Chain 3, work one dc in each stitch around without increases.
- Maintain stitch count and work for desired skirt length (example works about 14 inches total length with 17 rows).
Step 10: Edge Finishing – Single Crochet Round
- Chain 1, turn.
- Work single crochet evenly around the bottom edge to create a clean hemline.
Step 11: Create Drawstring for Bubble Effect
- Chain a long cord (length based on waistband circumference plus extra for threading through hem).
- Thread this long chain through the bottom row stitches of the skirt using fingers or crochet hook.
- Scrunch and gather fabric evenly to create the “bubble” look.
Step 12: Tie and Secure Drawstring
- Once desired scrunchiness is achieved, tie a secure knot on the drawstring.
- Tuck in ends or cut excess yarn as preferred.
Tutor’s Suggestions
- When working the waistband, ensure the fabric is not too tight to allow comfortable wear.
- Measure your waist system multiple times as you go, since the yarn will stretch.
- Keep tension consistent, especially when increasing the skirt body.
- For threading the drawstring, a crochet hook makes the task easier but fingers work too.
- Adjust the drawstring scrunch to your preferred volume of bubbling effect.
Uses
- Stylish, comfortable skirt perfect for casual wear.
- Suitable for warm to mild weather because of light stitch fabric.
- Can be paired with crop tops or casual tees for a trendy look.
- Customizable in length and fit.
Tip
To make your bubble skirt more durable, consider weaving in ends securely and blocking the skirt lightly after finishing to smooth out stitches.
Conclusion
This quick and fun crochet bubble skirt pattern is perfect for beginners wanting to create a fashionable garment with basic stitches and simple shaping. With a stretchy waistband and a beautiful bubble hem created with a drawstring, it’s a versatile addition to any wardrobe.
Leave a Reply