
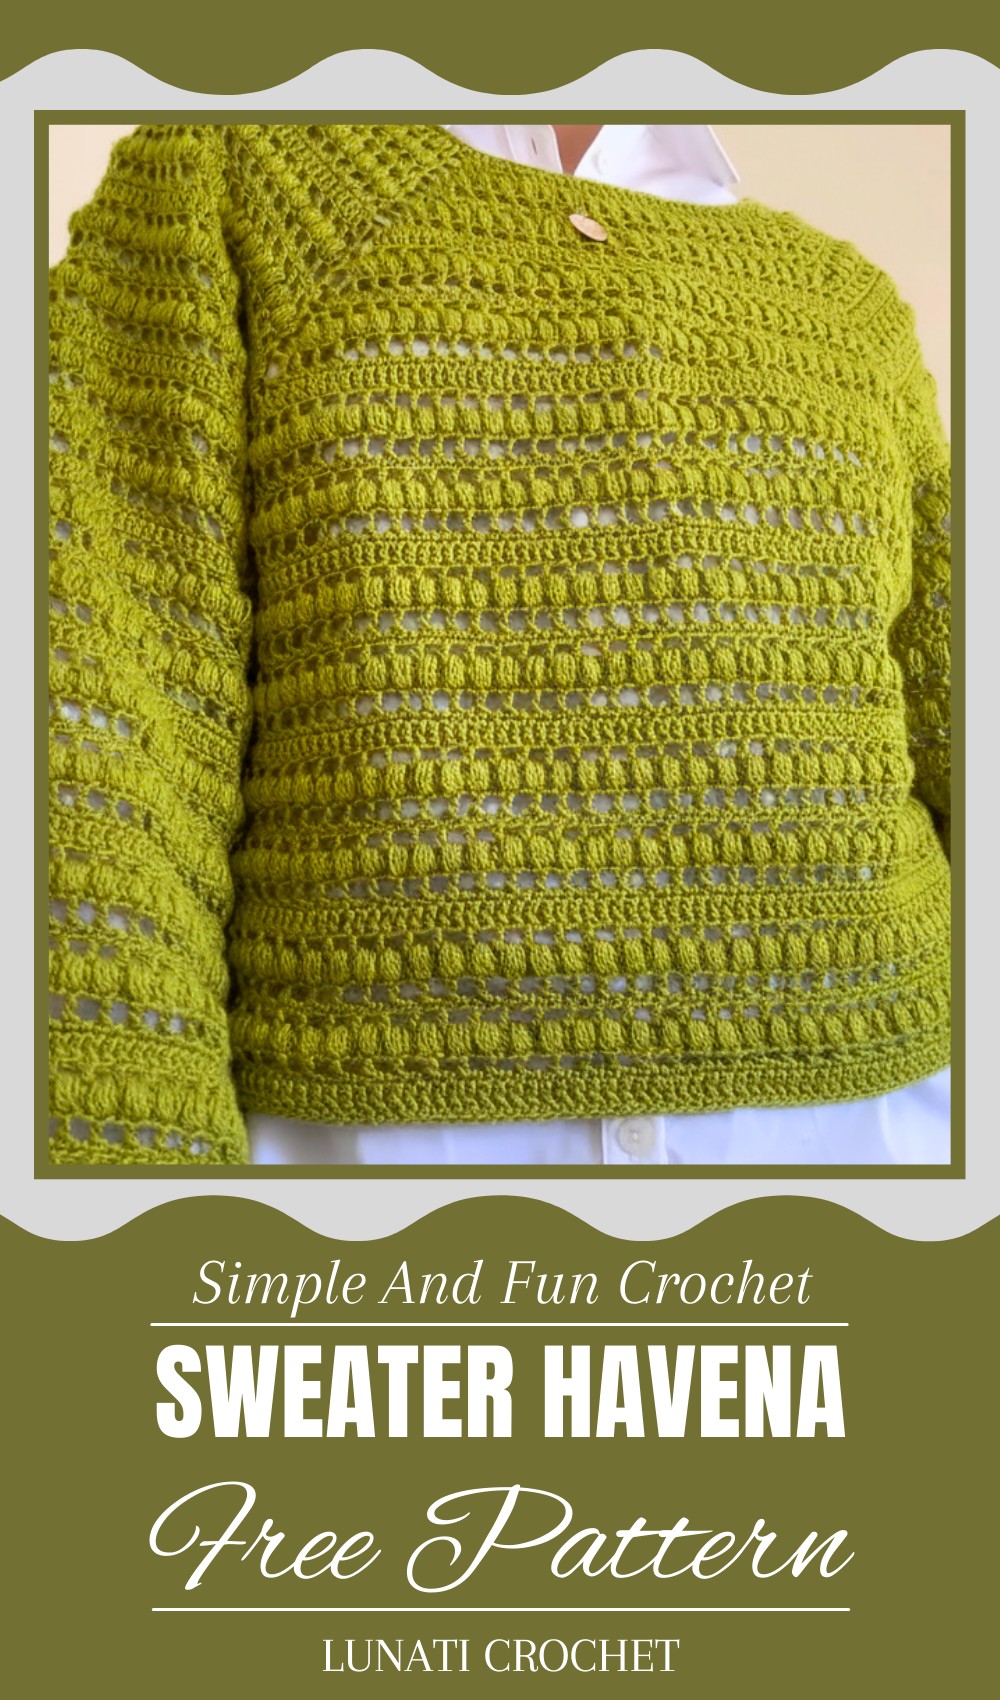
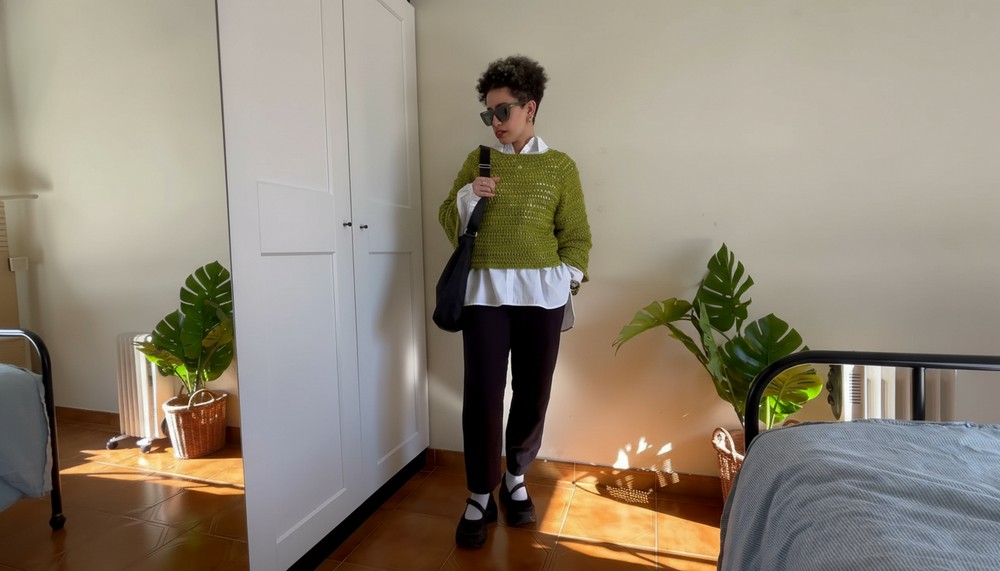
Cozy up instantly with the Crochet Sweater Havena Pattern that’s a warm, comfy, and stylish knit that’s perfect for any chill day or casual outing.
Ultimate Crochet Sweater Havena for Cozy Comfort
Make fun of chilly days with this cozy sweater that wraps you in warmth and style! Soft yarn and gentle stitches give it a friendly, inviting look you’ll love to wear anywhere. Its roomy fit lets you move freely, whether you’re lounging at home or out with friends. Long sleeves and a comfy neck keep the cold away without feeling tight or heavy.
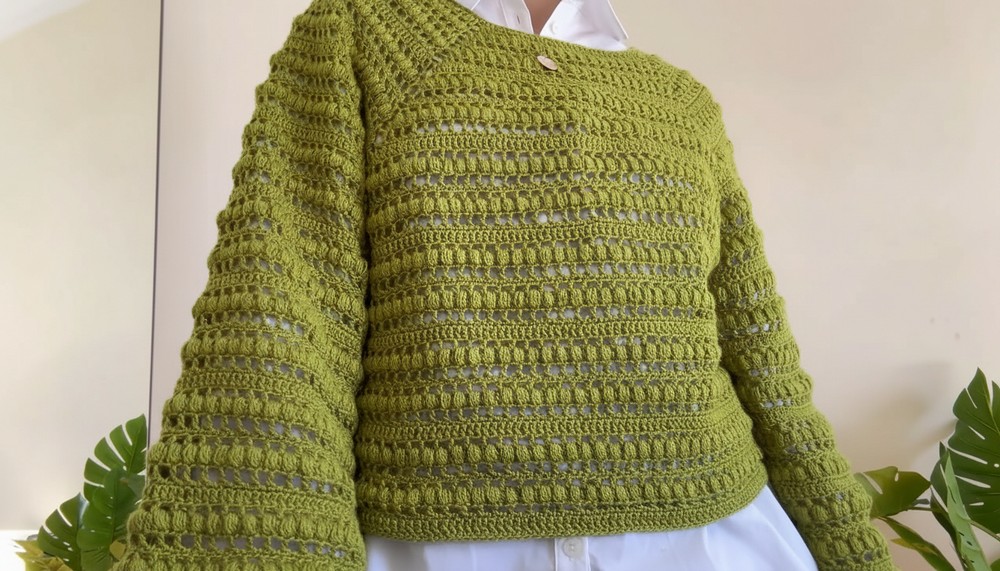
With its natural colors and simple charm, this sweater easily matches jeans, skirts, or casual pants for a relaxed, handmade vibe. Perfect for chilly walks, cozy fireside chats, or casual outings, it’s a go-to piece that blends comfort and style effortlessly. Everyone will admire its classic, cozy feel that’s just right for any age. Forget the cold and have fun staying warm in this lovely sweater made to brighten your everyday.
Crochet Sweater Havena Pattern
Materials Needed
- Yarn (recommended yarn matching gauge and drape)
- Crochet needles: 2 mm for the collar (adjustable based on your yarn and drape preference)
- Measuring tape
- Calculator and notebook (for size computation)
- Tapestry needle for finishing
- Scissors
Difficulty Level
Intermediate – Suitable for crocheters comfortable with working in rounds, making increases, and pattern repeats.
Step-by-Step Pattern
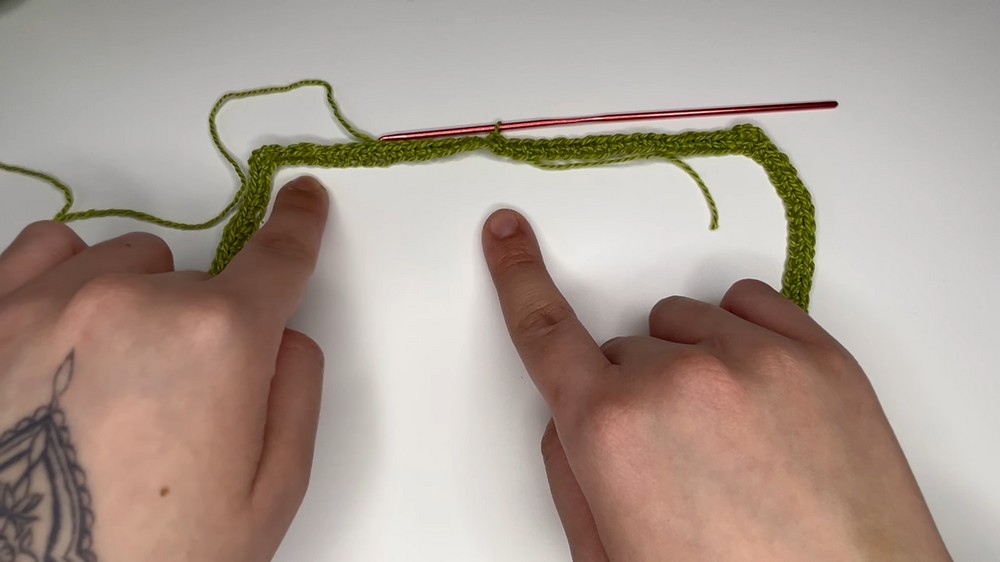
Step 1: Measure Head Circumference and Make Foundation Chain Circle
- Use measuring tape to measure the head circumference (e.g., 55 cm).
- Chain stitches to match this measurement. Example: 120 chains = 55 cm.
- Join chain ends carefully by placing the last chain facing the first to form a circle.
- Work a slip stitch to close the circle neatly without twisting the chain.
Step 2: Calculate Chain Division for Square Shape Collar
- Divide total chains by 4 (since collar is square).
- Example: 120 chains ÷ 4 = 30 chains per side.
- If number isn’t integer, round up (e.g., 28.75 rounds up to 29).
- Adjust chain count accordingly and redo circle if needed to keep square shape.
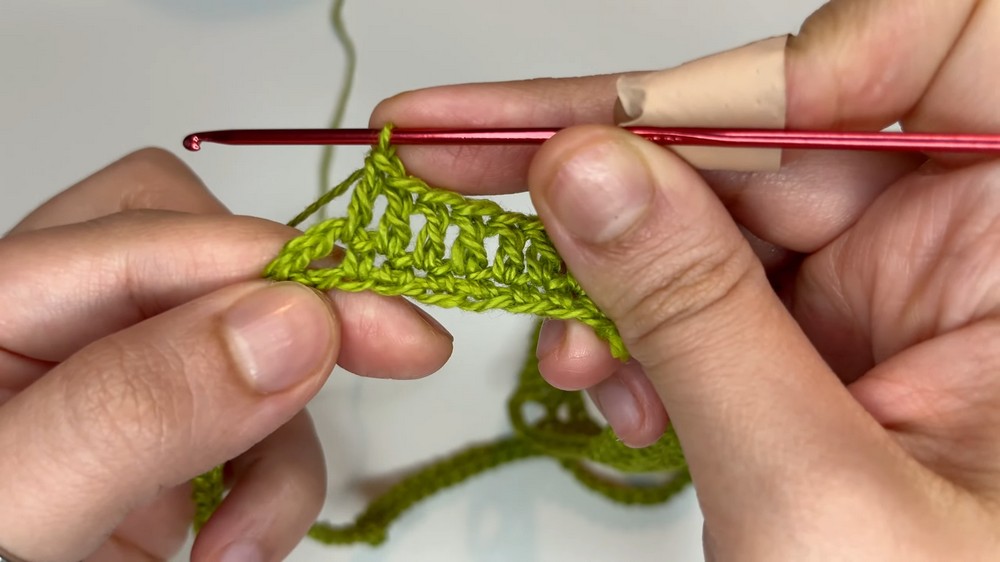
Step 3: Start First Round (Row 1) with Single Crochet
- Chain 2 (counts as first stitch).
- Work single crochet (sc) stitches along first half of first side (e.g., 15 sc).
- At side turn, make chain 3 for increases (corner shaping).
- Continue working sc stitches on other sides, adding chain 3 corner increases at each side boundary.
- Close round carefully with slip stitch into initial stitch.
Step 4: Second Round (Row 2) with Double Crochet Increases
- Chain 3 (counts as first double crochet (dc)).
- Work dc stitches around as per pattern to increase corners and sides.
- At each corner, work 3 dc, chain 3, 3 dc for smooth square growth.
- Work dc stitches evenly on sides.
- Finish round with slip stitch to close.
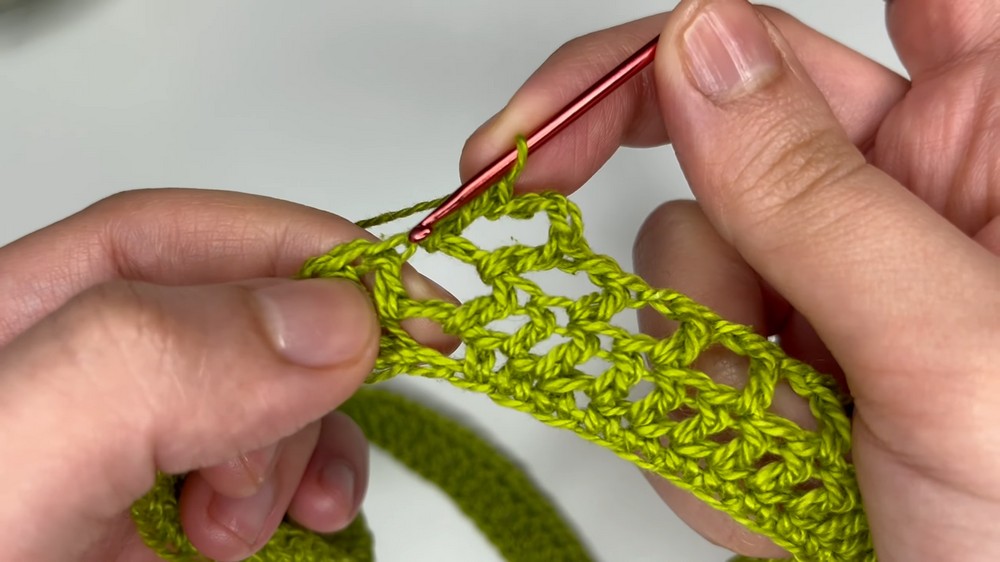
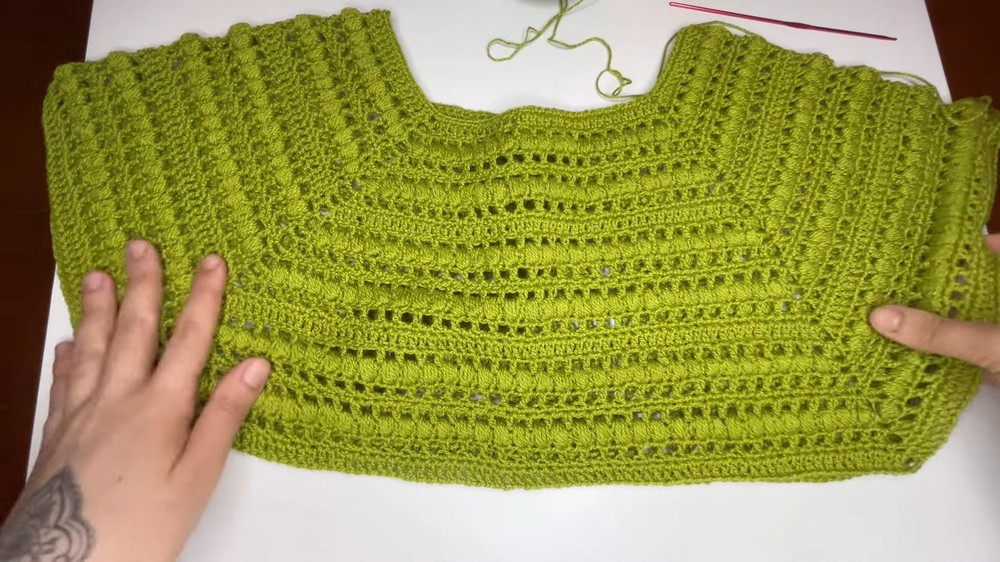
Step 5: Third Round Onwards – Square Pattern and Increases
- Chain 3, turn work.
- Work double crochet (dc) stitches with chain spaces to form “little square” motifs:
- Chain 1, skip 1 stitch, dc into next to create open space.
- At corner increases, maintain 3 dc, chain 3, 3 dc.
- Monitor increases carefully to keep square shape; adjust chain stitches as needed for motif size.
- Continue rounds of alternating dc and open chain spaces (little squares) per pattern instructions.
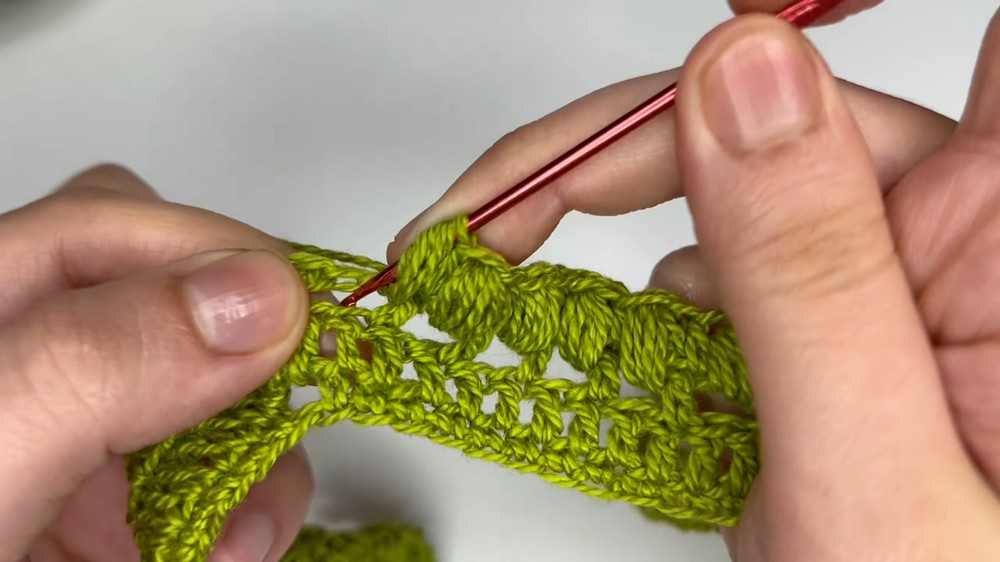
Step 6: Fourth and Further Rounds with Special Textures
- Add texture stitches such as half double crochet (hdc) popcorn stitches by looping the needle multiple times inside same stitch and working off loops at once.
- Maintain pattern and repeats on all four sides.
- Ensure increases at corners maintain square shape growth.
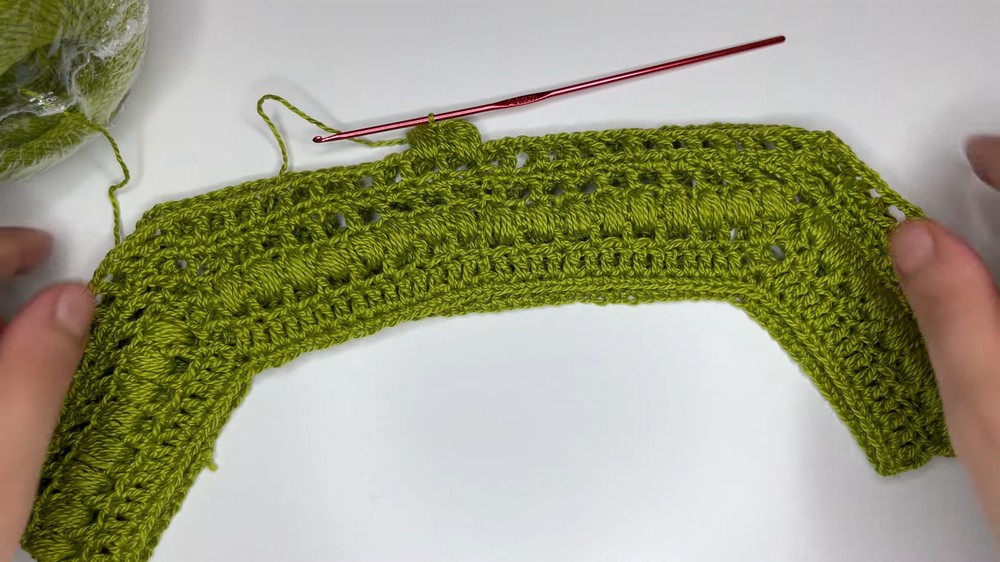
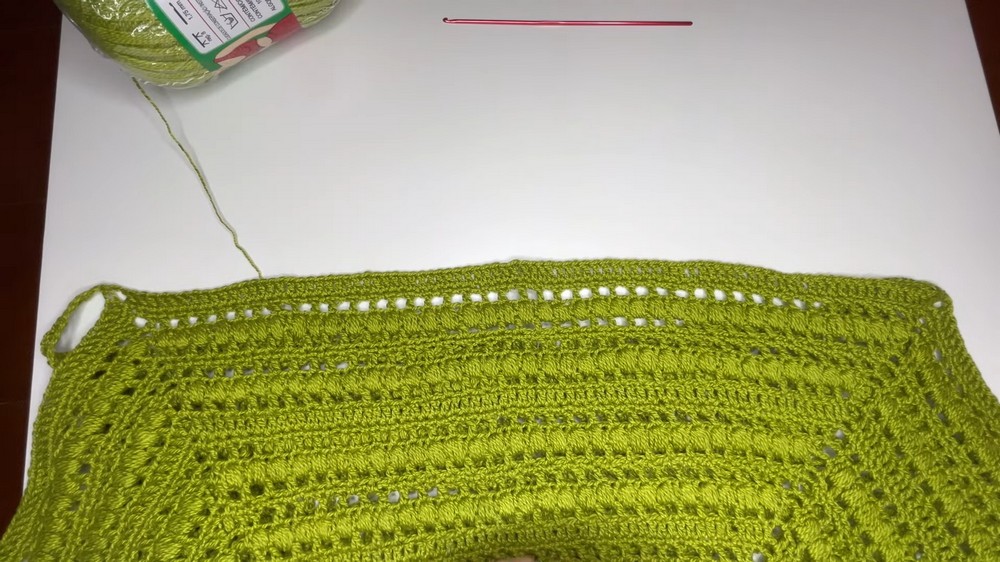
Step 7: Completing Collar and Reinforcement
- Finish collar with a row of single crochet (sc) stitches for firmness and neat edge.
- Work in back loops for folded edge effect if desired.
- Secure all yarn ends and hide them within stitches for clean finish.
Step 8: Joining Front and Back with Chain Stitches
- Chain 10 stitches (or 5 cm) to connect squares on front and back at side seams and shoulders.
- Use slip stitch to secure chain loops to opposite side.
- Repeat for opposite side seam for symmetry.
- These chains form flexible armholes and side joining.
Step 9: Working Body and Sleeves from Collar Down
- Continue body and sleeves following square pattern established in collar: alternate double crochet (dc) and chain spaces for openness.
- Work sleeve rows on chain loops created earlier for seamless integration.
- Maintain your own length measurements, e.g., sleeve length 35 cm.
- Finish body and sleeves with single crochet (sc) rows for neat edges.
Step 10: Final Finishing
- Weave and hide all loose yarn ends securely using a tapestry needle.
- Block garment lightly to even out stitches and shape.
- Try on garment and adjust as needed by adding or removing rows.
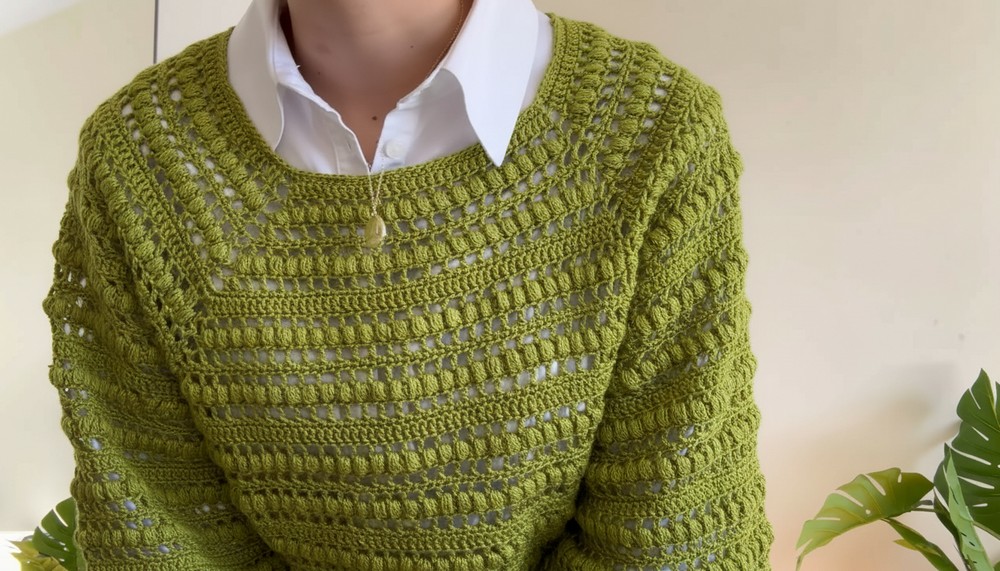
Special Features
- Custom-fit square-shaped top-down collar.
- Use of corner increases and chain spaces for square shaping and openwork look.
- Seamless joining with chains for armholes and side seams.
- Textured stitches add visual interest and garment structure.
Tutor’s Suggestions
- Always measure wearer carefully for best fit.
- Use stitch markers for corner and join placement.
- Keep track of chain stitch counts precisely to maintain shape.
- Adjust needle size for desired drape and fabric density.
Uses
- Stylish summer or layering top with open crochet texture.
- Custom fitted for comfortable wear or gifting.
- Adaptable pattern for various sizes with ease.
Tip
If the number of chains for the circle doesn’t divide evenly by four, round up and adjust your stitch count in corners to maintain symmetry—better a slightly larger collar than a distorted shape!
Conclusion
This crochet collar and top pattern delivers a personalized fitting experience with modular square designs and openwork textures. Through careful measurement, counting, and consistent patterning, you will create a comfortable, elegant crochet garment.
Leave a Reply