
Celebrate warmth and color with a cozy crochet rug pattern that brings comfort underfoot and brightens any room with its cheerful, handmade charm.
Creative Crochet Rug Pattern for Vibrant Living Spaces
Bring joy and fun into your home with a crochet rug that’s as playful as it is cozy! This lively piece adds a splash of color and a soft spot to jump, sit, or dance on. Its bouncy loops and cheerful patterns make every step feel like a happy dance, turning any room into a bright, welcoming space.
Perfect for kids’ rooms, play areas, or wherever you want to add a burst of personality, this rug invites smiles and good vibes. Easy to clean and comfortable to touch, it’s a cozy friend for your feet and a fun splash of art for your floor. Whether you’re curling up with a book or hosting a lively gathering, this colorful crochet rug makes every moment feel special, lively, and full of cheer.
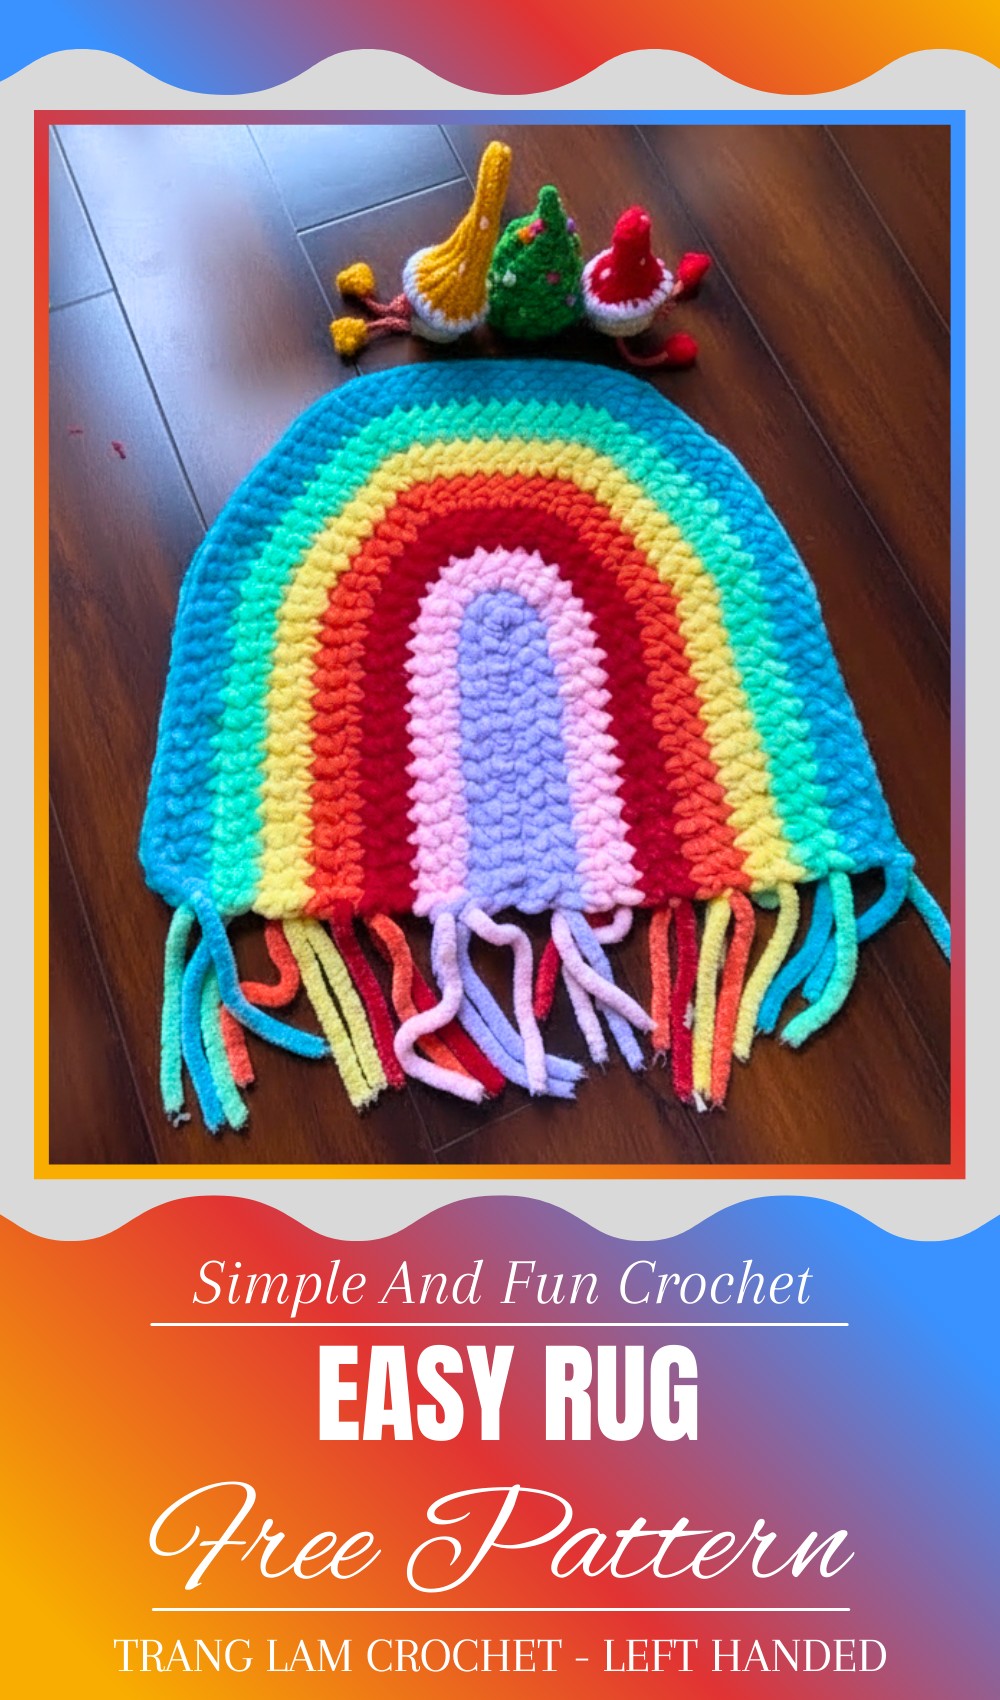
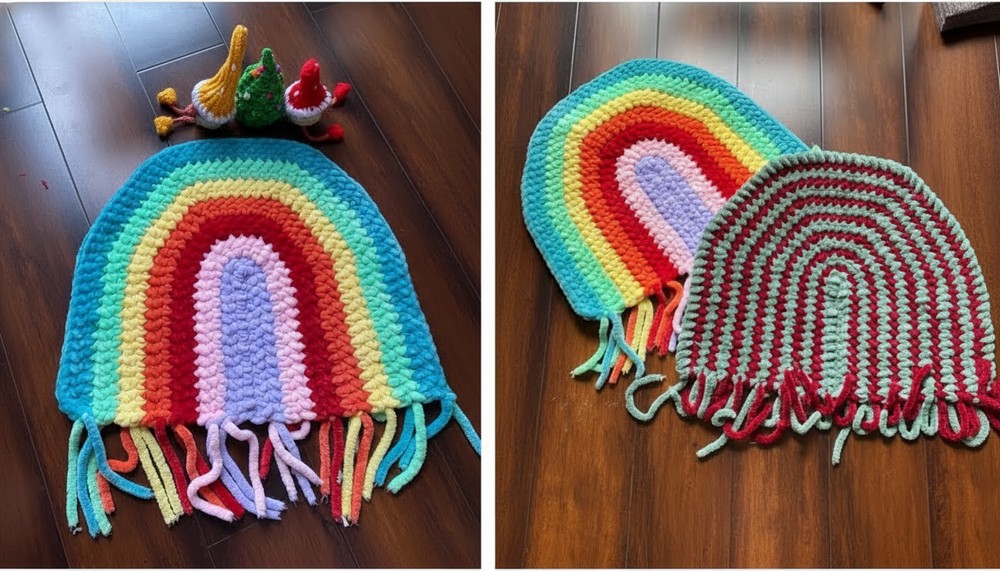
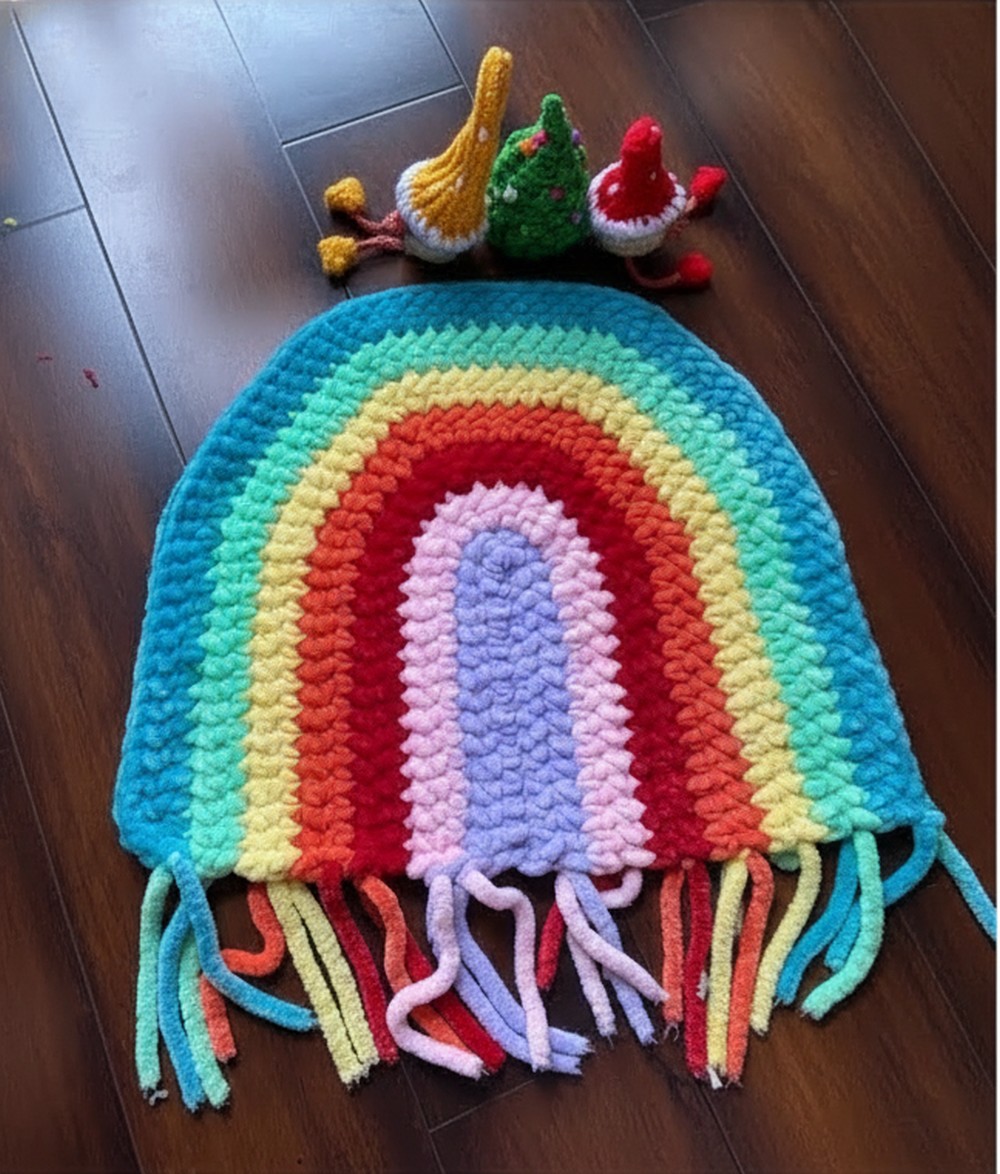
Crochet Rainbow Color Doormat Pattern
Special Features
- Colorful rainbow-inspired design with choice of colors
- Constructed from two rectangular panels for ease
- Uses bulky velvet yarn for softness and durability
- Mainly uses single crochet stitches with increases for shaping
- Finished off with a reverse single crochet edge for stiffness
Difficulty Level
Beginner to Easy Intermediate: The pattern mostly uses basic stitches (chain, single crochet, increases). Color changes add some interest but are easy to manage. No complex shaping or motifs.
Materials Needed
- Bulky velvet or similar yarn in multiple colors of your choice
- Crochet hook size 8 mm
- Scissors
- Yarn needle for weaving ends
- Stitch markers (optional)
Step-by-Step Crochet Pattern
Step 1: Foundation Chain
- Chain 15 stitches (ch 15) to start your first panel.
Step 2: Row 1 – Single Crochet Base
- Starting in the second chain from hook, work 13 single crochet (sc) stitches across.
- At the last chain, crochet 3 single crochet stitches in this stitch to increase the width at the corner.
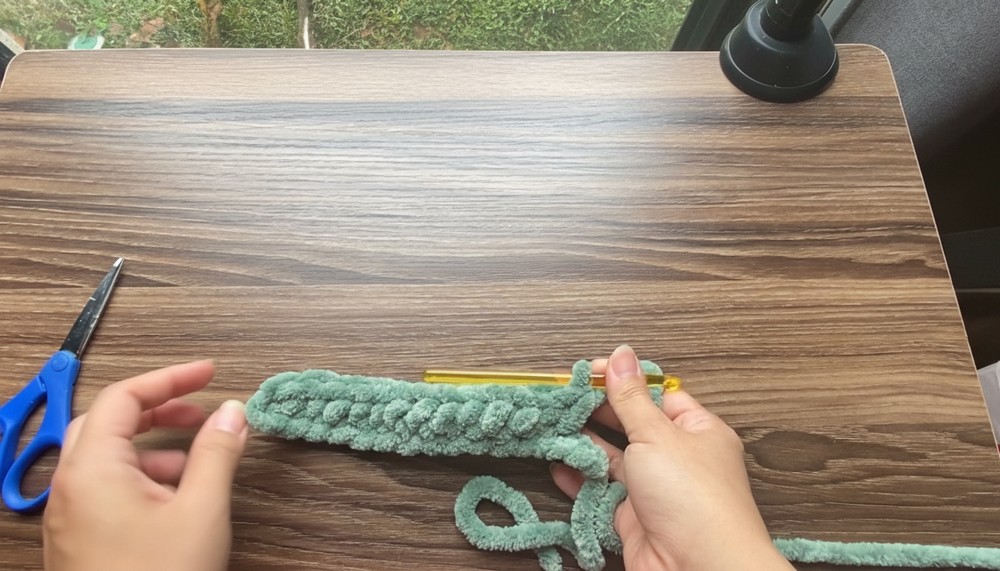
Step 3: Row 2 Onward – Continue Single Crochet
- Chain 1, turn your work.
- Crochet 13 single crochet stitches evenly across the row.
- At the end of the row, increase by crocheting 3 single crochet stitches in the last stitch again.
- Repeat this process establishing an increase at corners to gradually widen the rectangle.
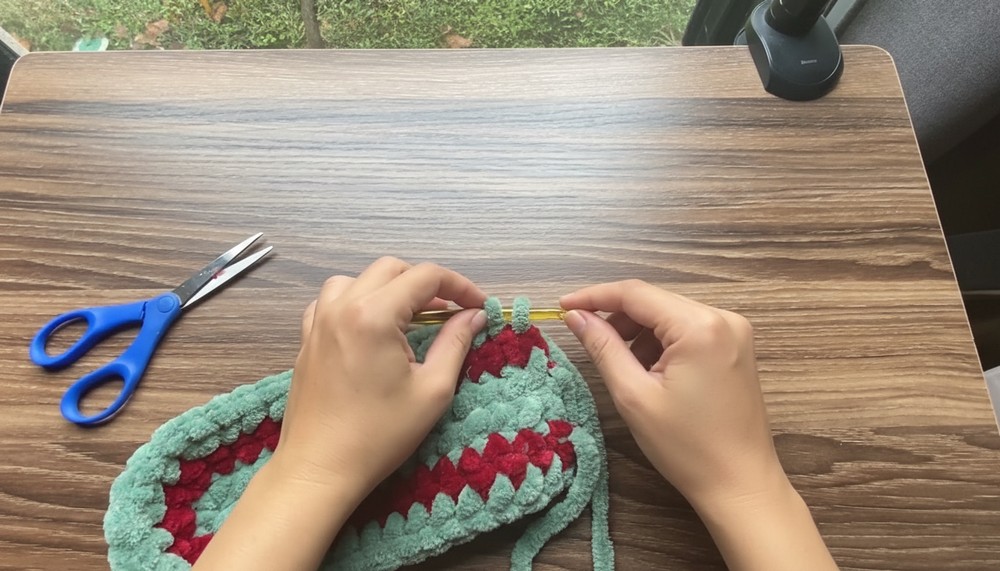
Step 4: Color Change
- At a preferred row, switch to a different color yarn (e.g., red for Christmas colors).
- To change color, cut the yarn leaving a tail, and join the new color with a slip stitch.
- Continue crocheting the same stitch pattern with the new color.
Step 5: Repeat Rows and Color Changes
- Continue alternating colors every 1-2 rows according to desired rainbow or themed color scheme.
- Keep working with 13 single crochet stitches per row, increasing by 3 singles at the row end each time.
- Maintain neat tension for consistent shape.
Step 6: Increasing Stitches
- To increase width proportionally, after the main straight rows, crochet 2 single crochets in one stitch for increases spaced evenly 3 times per row.
- This increase step is repeated on preferred rows to control size.
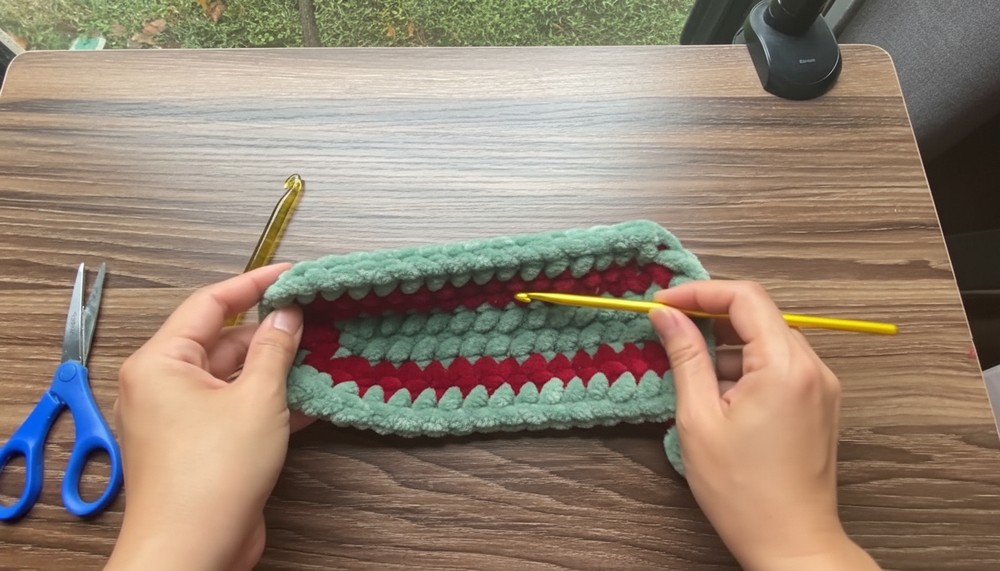
Step 7: Complete Two Rectangular Panels
- Crochet two identical panels following above steps.
- Make sure both panels have the same row count and color sequence for symmetrical look.
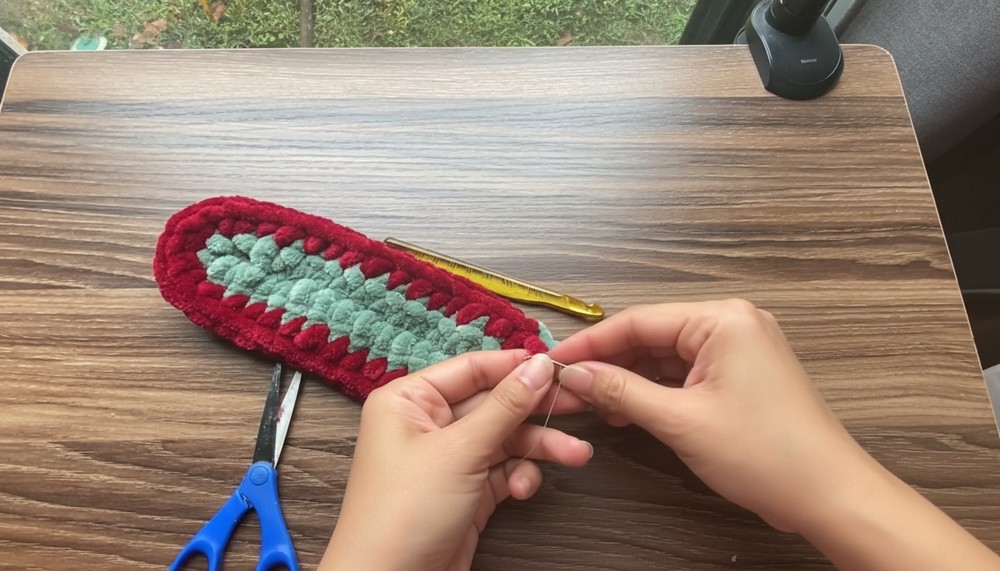
Step 8: Join Panels
- Sew or crochet the two panels together along one long side.
- Weave in all loose ends for a clean finish.
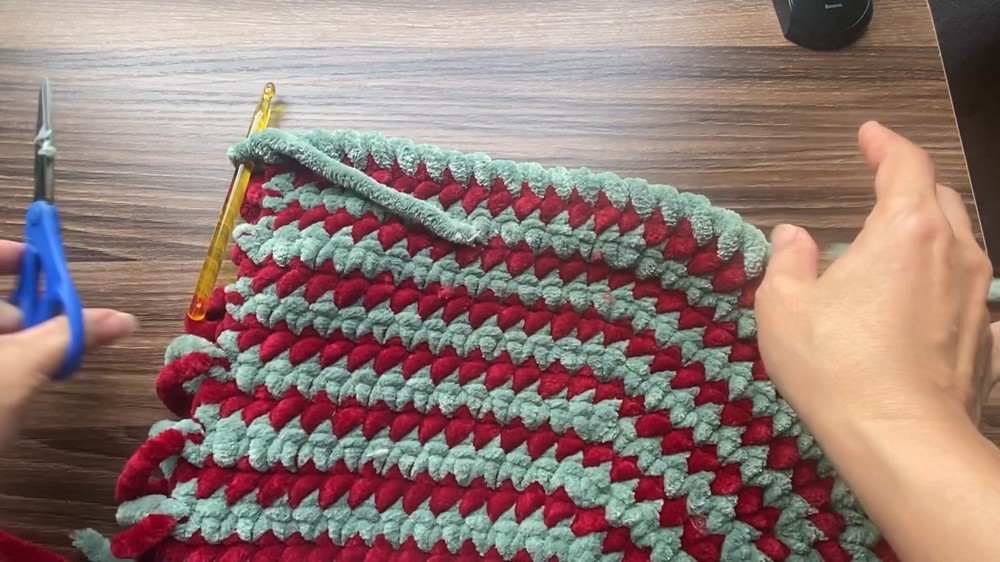
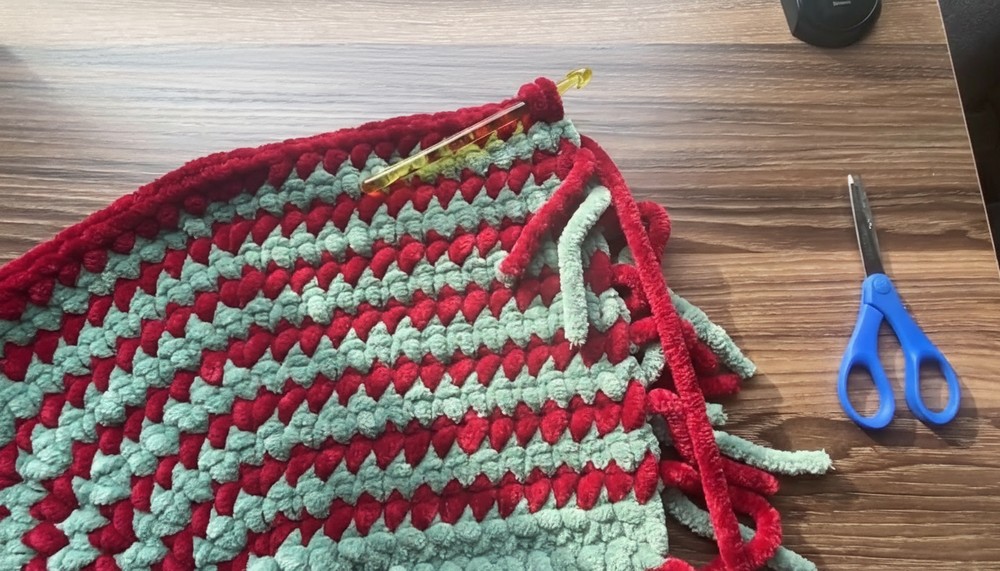
Step 9: Final Edge – Reverse Single Crochet
- Using your chosen yarn (usually main or neutral color), edge the entire perimeter with reverse single crochet (crab stitch).
- This creates a neat, stiffened edge that helps the mat lay flat and holds the shape well.
Tutor’s Suggestions
- Choose velvet or thick yarn to give the rug softness and durability.
- Change colors frequently for a playful look, or keep it uniform for a simpler style.
- Blocking your finished doormat will help flatten and shape the rug nicely.
- Use a larger hook than usual in case your yarn is very thick.
Uses
- Perfect colorful doormat for indoor entryways or kitchens
- Soft rug for kids’ playroom or bathroom
- Gift idea with customizable colors for any season or holiday
- Practical and beautiful handmade home decor
Helpful Tip
To minimize cutting and weaving ends, try carrying the yarn up the sides during color changes if using yarns of similar thickness. This helps keep joins tidy and stable.
Conclusion
This rainbow-color crochet doormat is a quick and rewarding way to add color and comfort to your home. With simple stitches and customizable colors, you can adjust size and style to suit any space. Whether for personal use or gifting, this vibrant rug combines function with fun crocheting.
Leave a Reply