
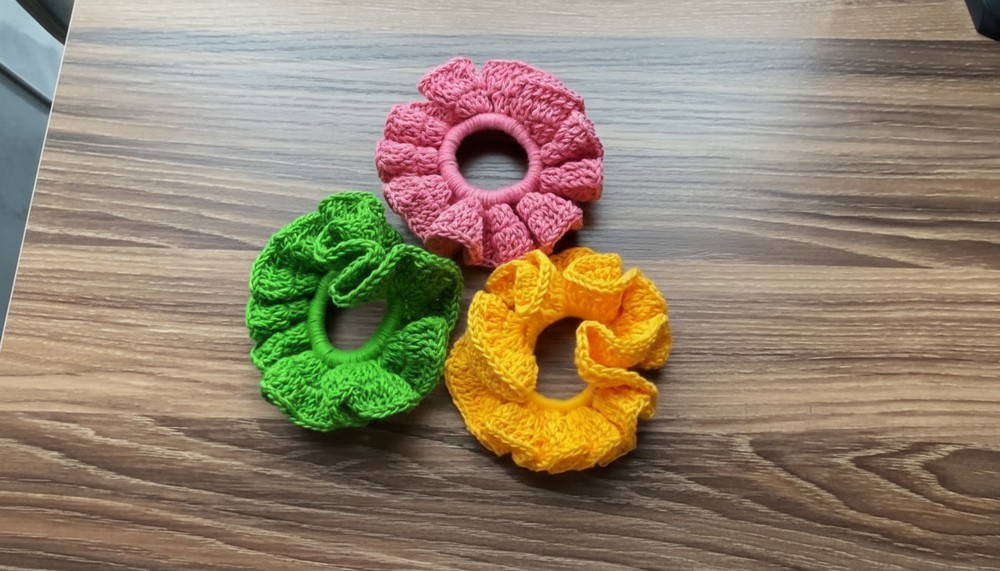
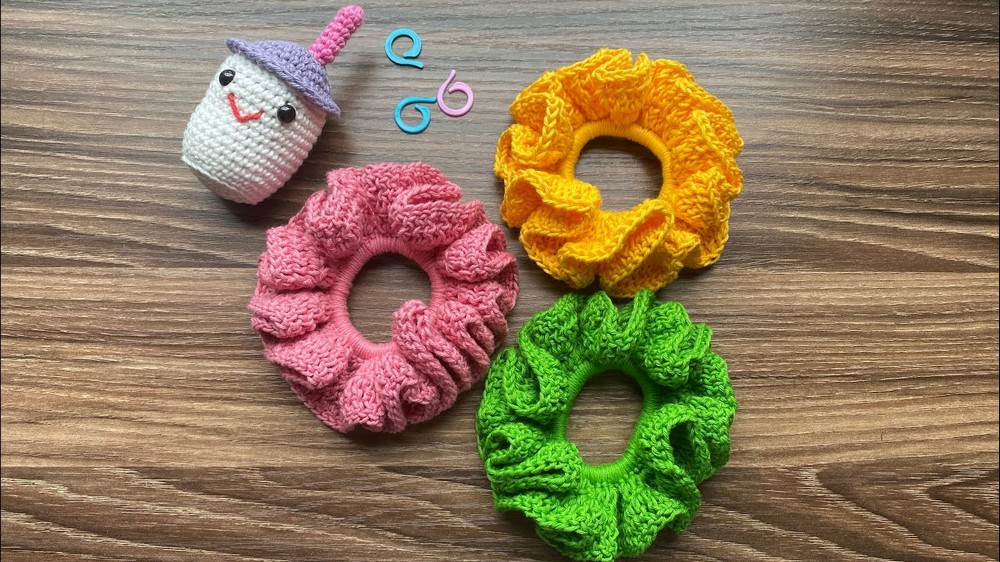
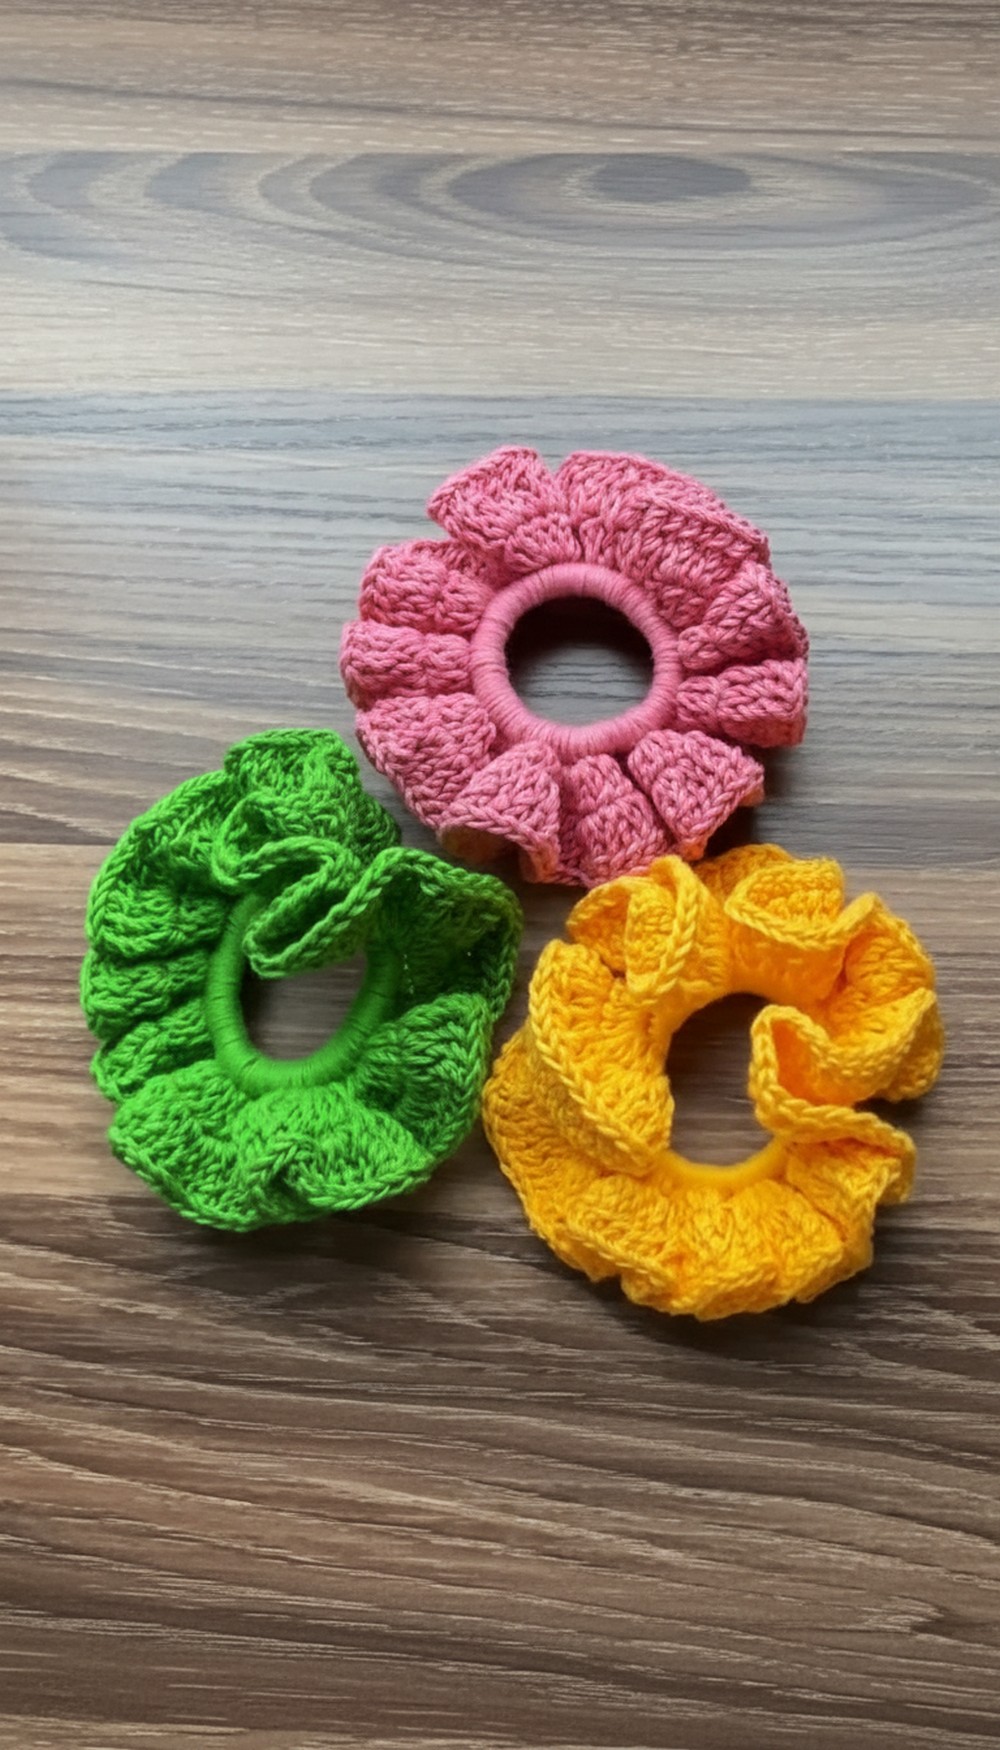
Brighten your look with vibrant, stretchy scrunchies that hold hair gently and add a fun pop of color to any hairstyle effortlessly.
Tired of hair ties that pull, snap, or leave painful dents? These soft, colorful hair accessories provide a gentle hold that keeps your hair secure without causing damage. Their stretchy, comfortable yarn feels light and breathable, making them perfect for all-day wear. With their round, ruffled shape, they add a playful and stylish touch to any hairstyle, whether it’s a messy bun, ponytail, or half-up look.
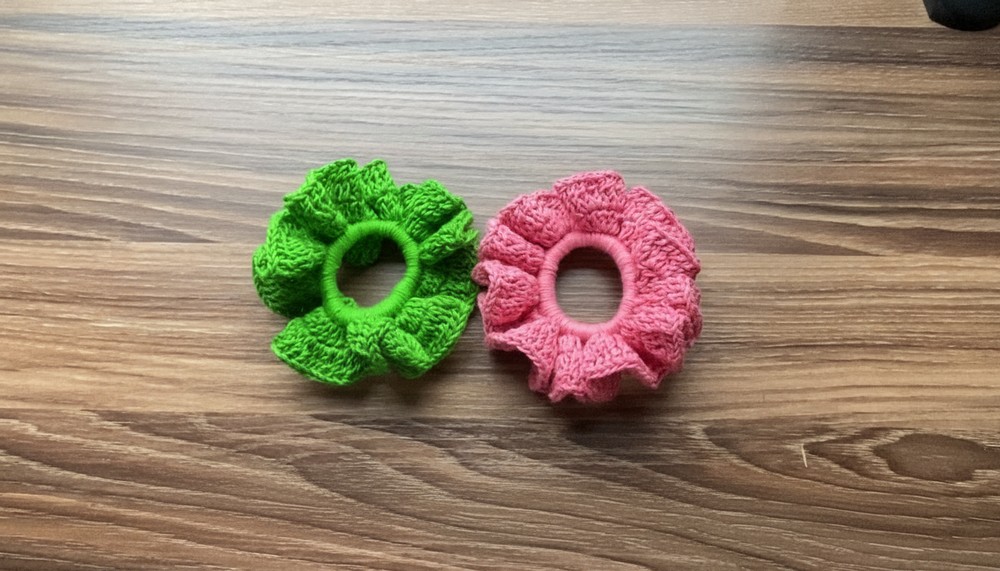
Soft & Stretchy Crochet Scrunchies Pattern for All Hair Type

Easy to put on and take off, these scrunchies brighten your day with a splash of charm and texture. They suit all hair types and sizes, making them a versatile addition to your collection. Beyond being functional, they also make thoughtful, handmade gifts that show care and creativity. Combining beauty and practicality, these scrunchies are a wonderful way to add comfort and style to your everyday routine.
Crochet Hair Tie Pattern
Materials
- Amigo cotton yarn (available in the US, or other desired yarn) – use thinner thread for best results
- Crochet hook: 3mm
- Elastic hair tie (any standard elastic band)
- Sewing needle to weave in ends
Difficulty Level
Beginner to Intermediate – The pattern uses primarily single crochet and double crochet stitches, with basic increases. Great for those who know how to crochet and want to try something quick and satisfying.
Special Features
- Works well with cotton yarn for firmness and neat texture
- Elastic band is covered completely for durability
- Uses simple yet effective stitch increases to shape the hair tie
- Fast project that can also be sold or gifted
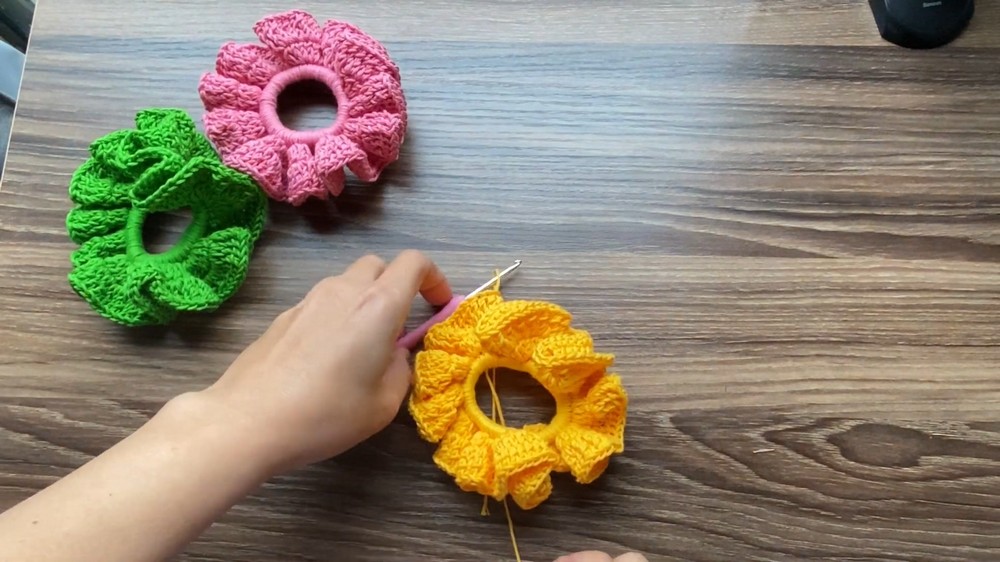
Step-by-Step Pattern
Round 0 – Preparation
- Tie your elastic hair band securely with a crochet thread to prevent it from slipping. Wrap the thread around twice for extra security.
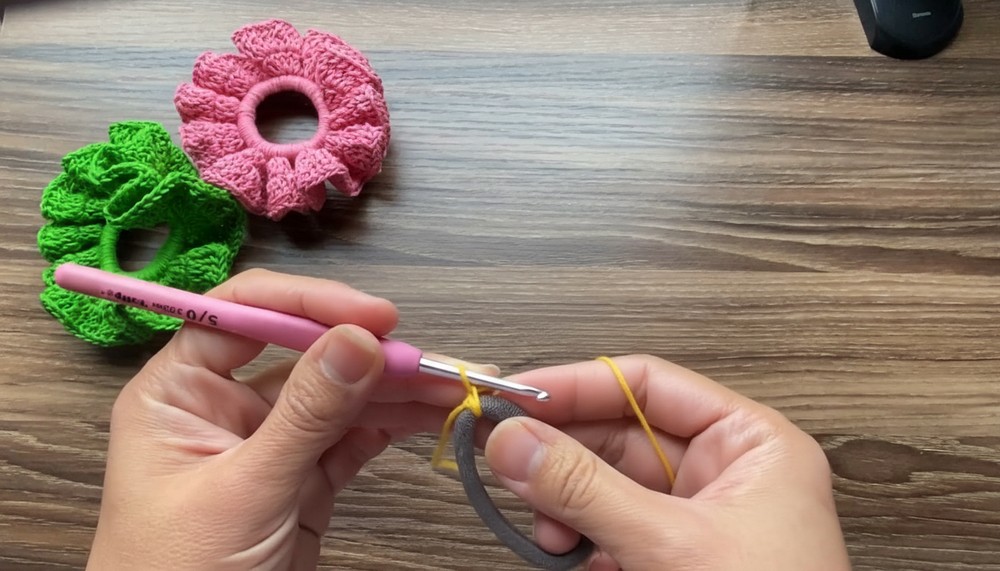
Round 1 – Foundation Single Crochet
2. Using your 3mm hook and chosen yarn, crochet single crochet (sc) stitches around the elastic band. Continue until the entire elastic is covered.
- Ensure the stitches are tight enough to hold the elastic firmly but not too tight to restrict elasticity.
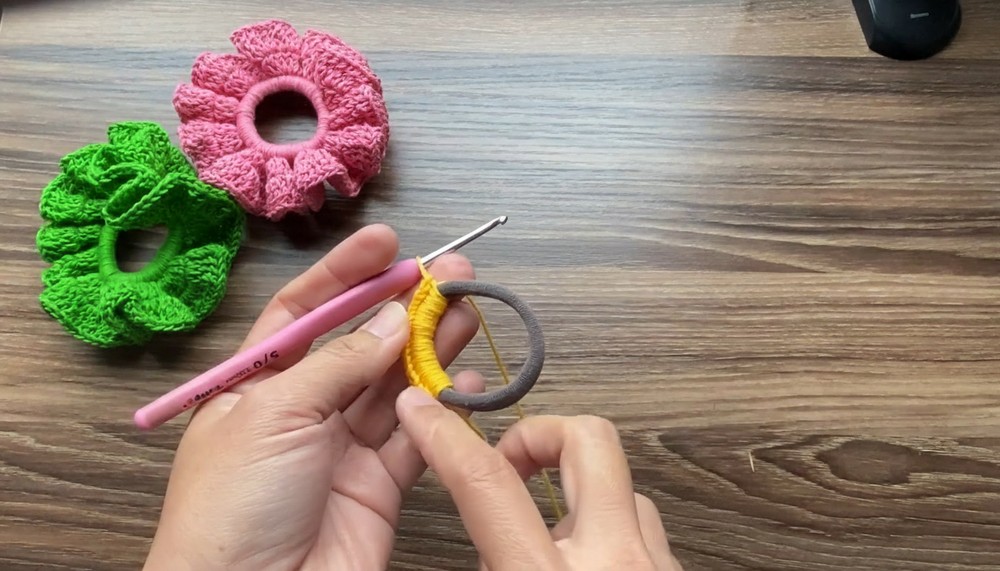
Round 2 – First Increase Round (Double Crochet)
4. For each stitch of the previous round, crochet 2 double crochet (dc) stitches into the same stitch. This means 2 dc in every single crochet around.
- This expands the piece and starts forming the shape of the hair tie cover.

Round 3 – Second Increase Round (Double Crochet)
6. Crochet 2 double crochet stitches in each stitch again, doubling the stitch count from Round 2.
- Wrap yarn twice over hook to make your double crochet stitches consistent and even.
- Keep the tension even and your increases spaced regularly.
Round 4 – Shaping the Final Round
9. Continue crocheting double crochet stitches around until you reach the desired width, keeping the shape circular and even.
- The video indicates finishing this round by picking the first double crochet stitch and folding the edge inward, creating a neat finish.
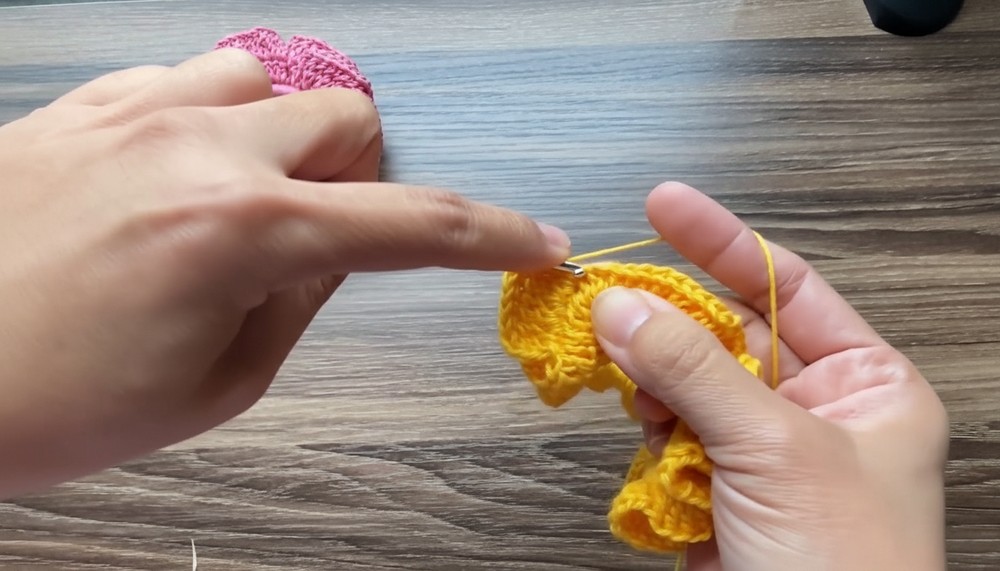
Finishing Up
11. Use a sewing needle to weave in and hide all loose threads and ends securely, especially around the elastic band area.
- Check your work to make sure the hair tie is neat, secure, and functional.
Additional Tips from Tutor
- Try different yarns to find the one with the best texture; cotton gives a firm, neat look that holds up well.
- Be sure not to miss any stitches during rounds to maintain consistent size and shape.
- Attach the elastic band tightly, wrapping with thread twice for durability.
- If desired, this hair tie can become a small business product due to its easy make and pretty results.
Uses
- Practical hair tie for everyday wear
- Handmade gift item
- Small craft business product
Helpful Tip
To maintain elasticity and durability, always crochet snugly over the elastic band and secure the band tightly before starting your stitches. This prevents the elastic from slipping out during use.
Conclusion
This crochet hair tie is a wonderful, easy project that combines simple stitches with a functional result. With minimal materials and a bit of practice, you’ll be able to create beautiful hair accessories quickly — perfect for yourself or as lovely gifts.
Leave a Reply