
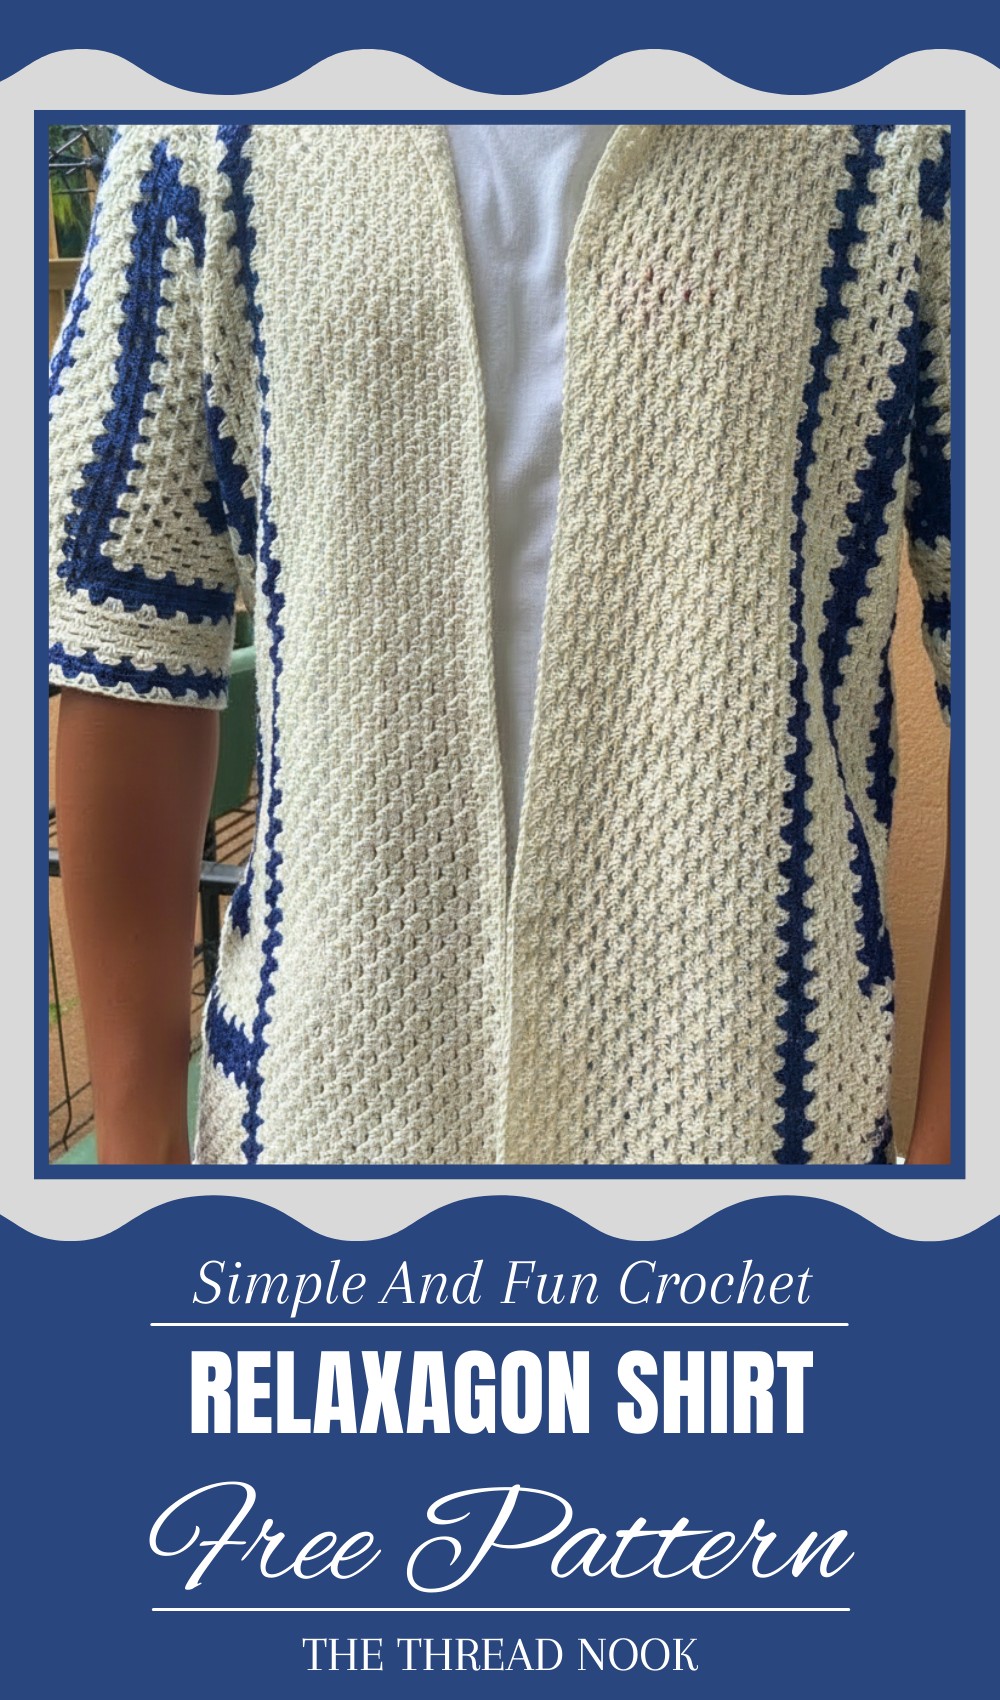
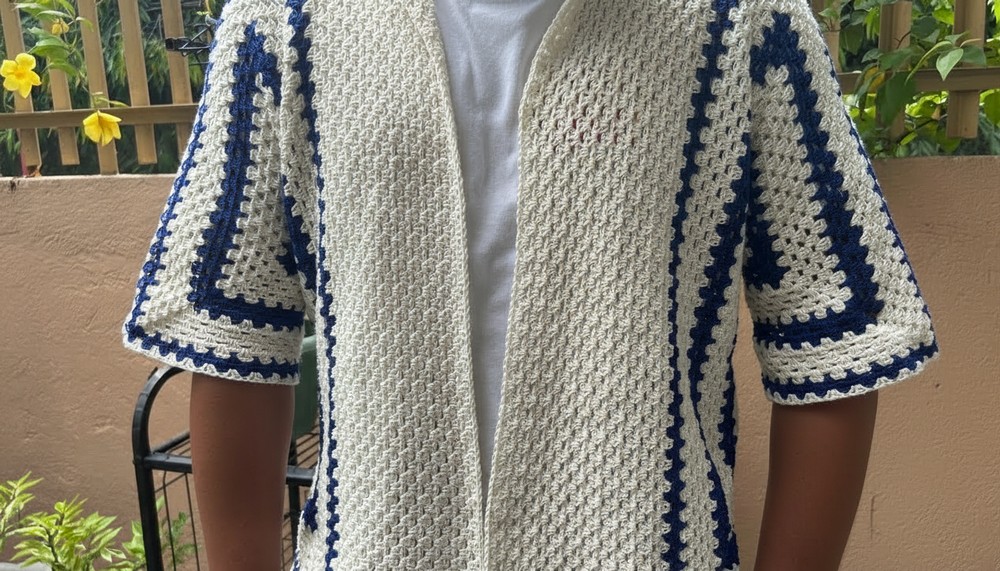
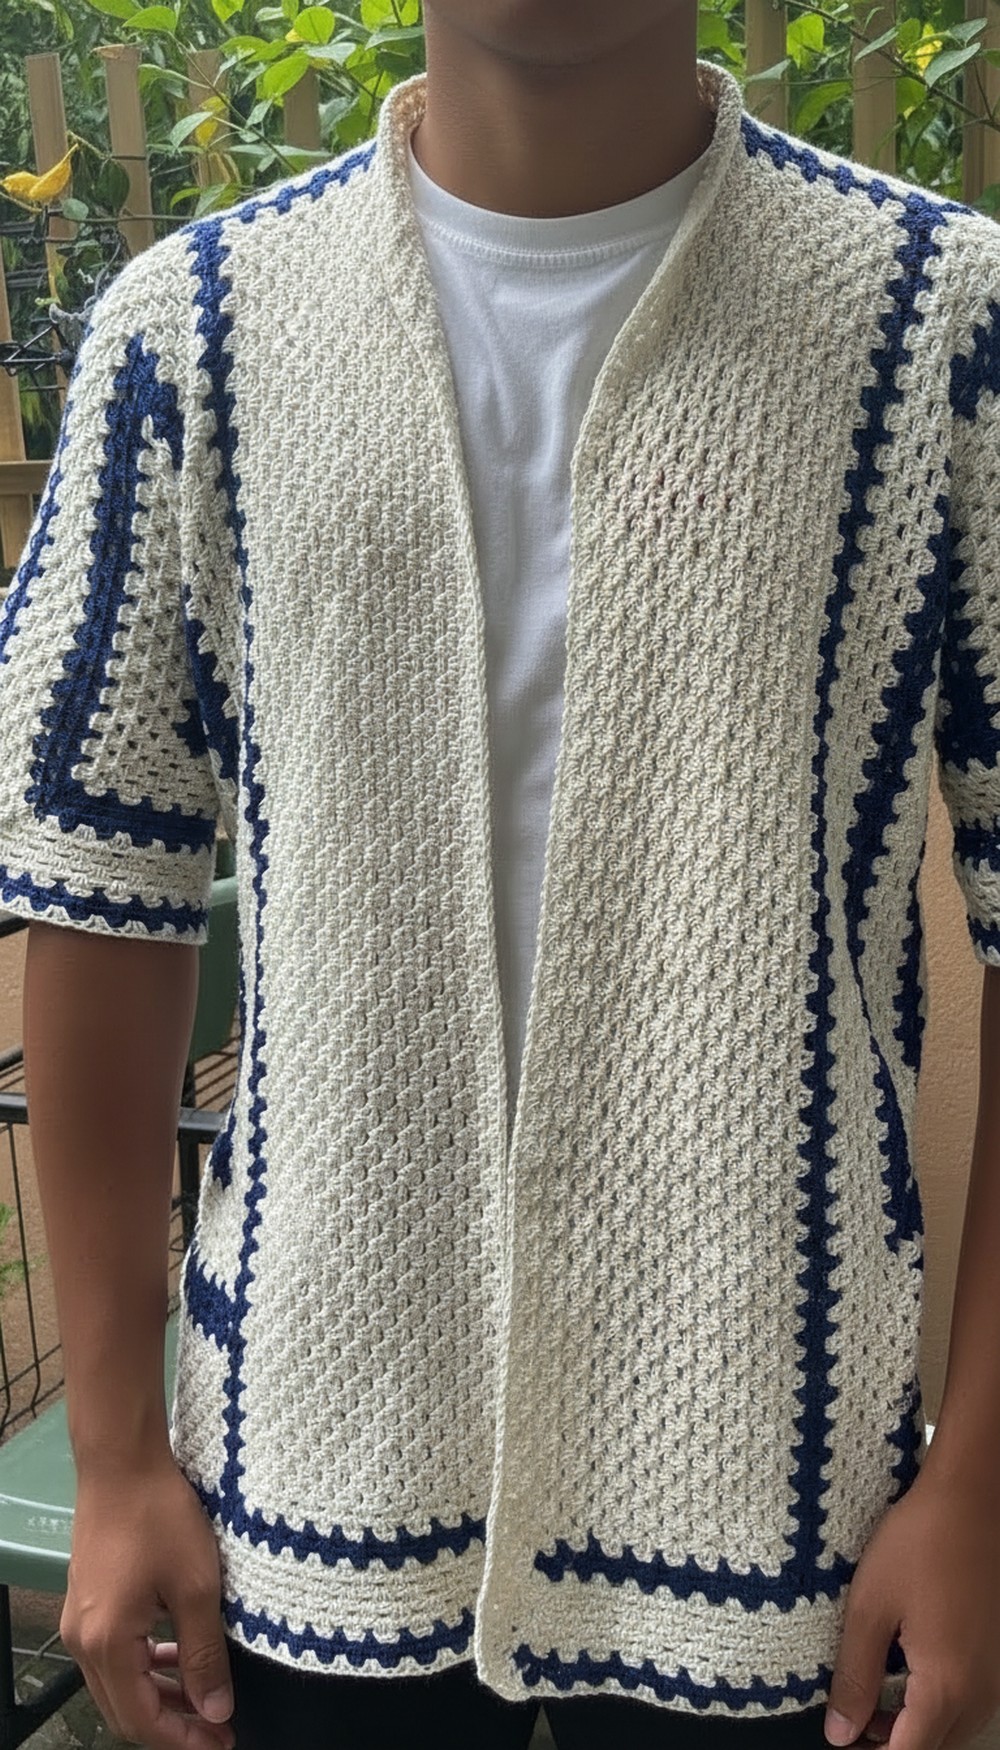
Create cozy vibes with the Crochet Relaxagon Shirt Pattern that blends comfort and style effortlessly, perfect for relaxing or stepping out in unique flair.
Sometimes, finding a shirt that is both comfortable and stylish feels impossible. But this crochet Relaxagon shirt changes that by offering a soft, cozy garment that feels like a gentle hug. Its unique pattern, made of connected shapes, flows gracefully and creates a beautiful, airy design. This shirt lets the breeze in on warm days while being easy to layer when it’s cooler.
Stylish Crochet Relaxagon Shirt Pattern for Cool Weather
Whether you’re relaxing at home, going out with friends, or enjoying fresh air, it combines comfort and style effortlessly. The colors can be bright or soft, matching any mood or outfit. Handmade with care, each stitch adds a personal touch, making it feel special and warm. Wearing this crochet Relaxagon shirt is like wrapping yourself in a piece of art that brings calm, comfort, and style all day long—a perfect choice for anyone who wants beauty and ease in their wardrobe.
Relaxed Crochet Shirt Pattern Step-by-Step
Materials:
- 400 to 600 grams of medium weight yarn (cotton or cotton blend recommended)
- Crochet hook 3.0 mm
- Stitch markers
- Yarn needle
- Scissors
- Tape measure
Special Features:
- Classic granny stitch texture
- Worked in panels from a magic ring center for perfect fit and shaping
- Color block stripes with easy yarn change technique
- Open sides and armholes for relaxed fit and breathability
- Simple sewing method for assembling panels
Uses:
- Casual summer or spring shirt
- Layering piece over camisoles or tanks
- Stylish handmade gift
Step-by-Step Pattern
Step 1: Take Important Measurements
Take your measurements in inches or centimeters:
- Measurement A: Chest circumference divided by 4 (e.g., 40 in ÷ 4 = 10 in)
- Measurement B: Armhole (shoulder to armpit) divided by 2
- Measurement C: Desired shirt length (armpit to waist/hip)
- Measurement D: Sleeve length (armpit to wrist or desired sleeve end)
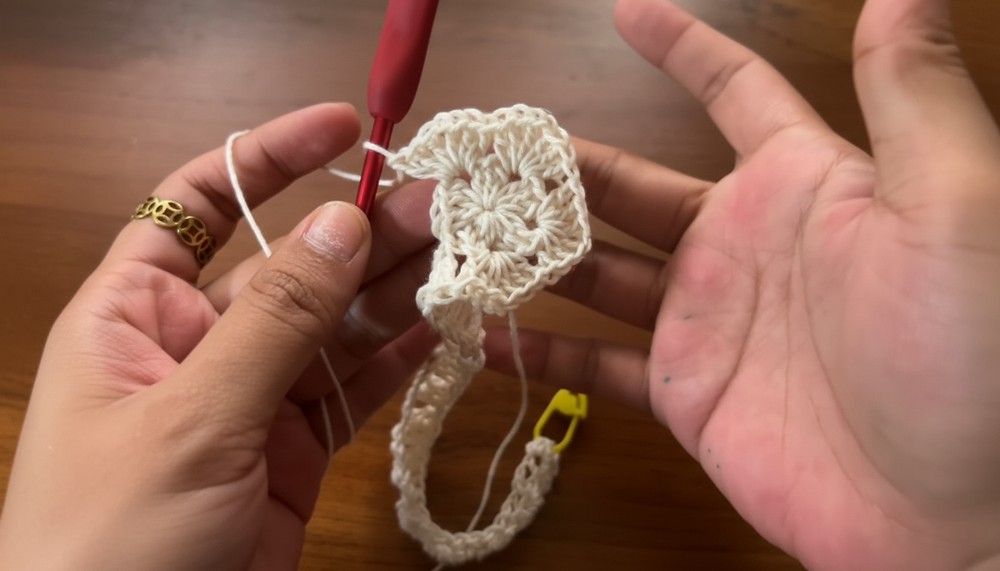
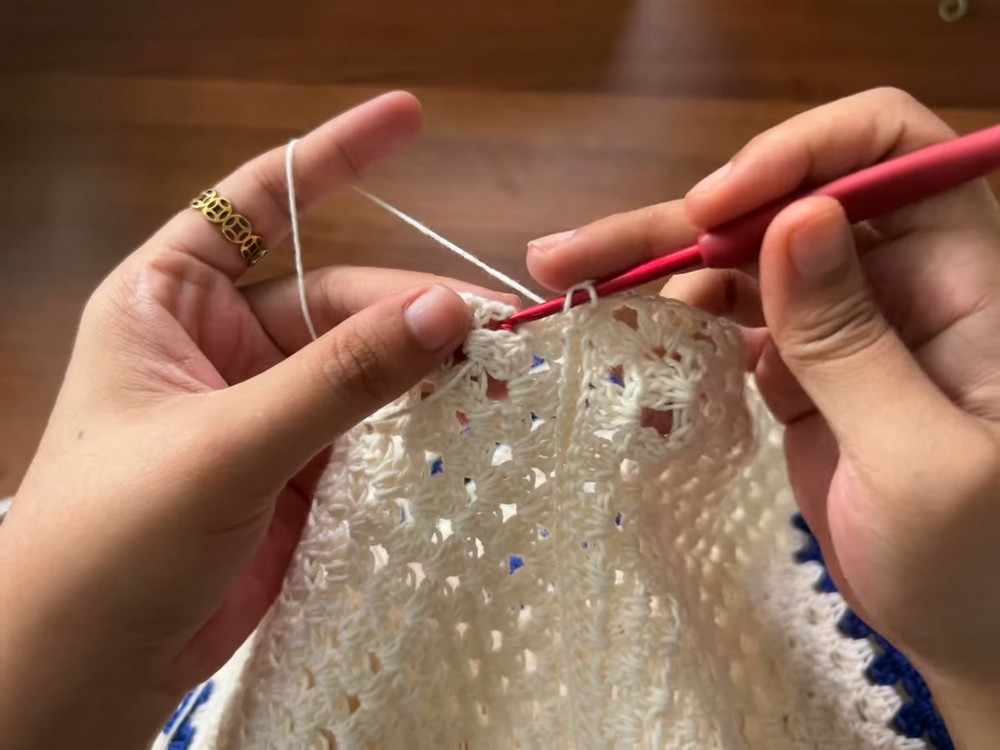
Step 2: Start with Magic Ring and First ROUND (Pentagon Base)
- Make a magic ring.
- Chain 3 (counts as first double crochet (dc)).
- Make 2 more dc in ring (you now have 3 dc including the chain).
- Chain 1.
- Repeat cluster: 3 dc, chain 1 five times to form 5 clusters (pentagon).
- Pull yarn to close ring tightly.
- Chain 1, slip stitch in top of chain 3 to close round.
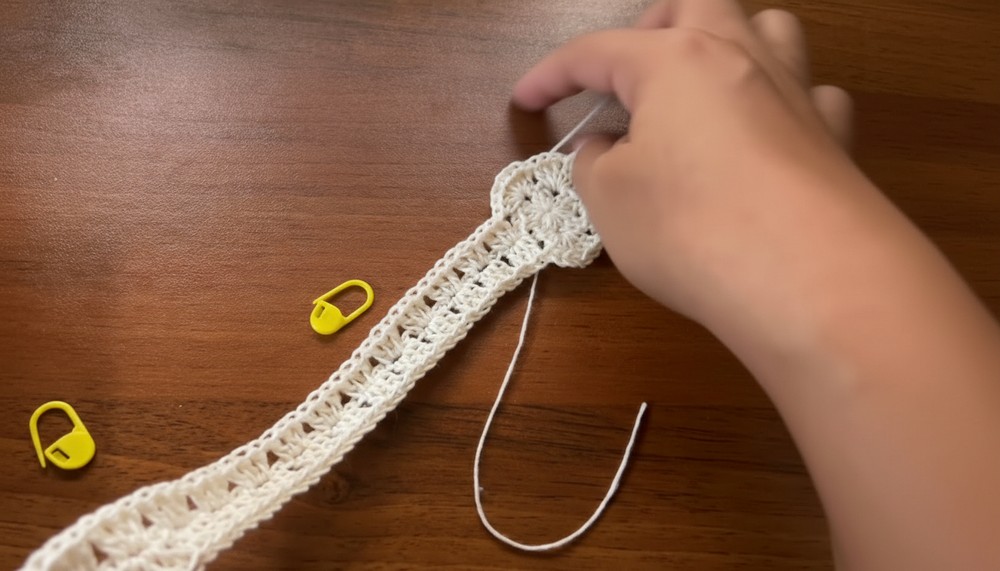
Step 3: Chain Foundation for Panel Width
- Chain 39 plus 1 (total 40 chains) — must be multiple of 3 plus 1 for granny stitch foundation.
Step 4: Row 1 of Panel (Granny Stitch Foundation Row)
- Skip first 3 chains (counts as first granny stitch).
- Skip 2 chains, 3 dc in next chain – repeat across chain foundation.
- End with 3 dc in last chain.
Step 5: Row 2 and Onward – Build Granny Clusters Up Panel
- Chain 3, turn.
- Work granny clusters (3 dc, chain 1, 3 dc) in the chain-space of the previous row.
- Work 3 dc cluster in chain space between granny stitch clusters (skip stitches).
- Continue pattern back and forth in rows until panel reaches desired height.
Step 6: Continue Panel Length and Width
- Keep checking measurements for armhole height (Measurement B) and body length (Measurement C).
- Use stitch markers to track the edges and important points like sleeves or panel lengths.
- Continue granny stitch rows until armhole and length measurements are met.
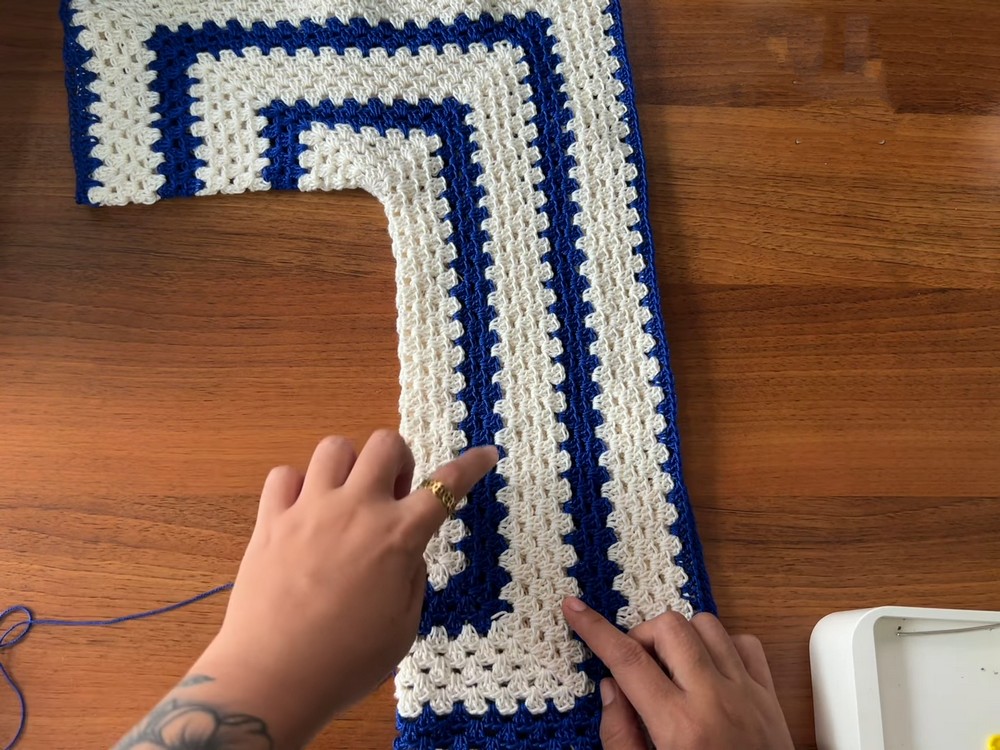
Step 7: Work Sleeve Sections Independently
- Mark armhole edges with stitch markers.
- When sleeve length (Measurement D) is reached, stop working further rows on sleeve panel side but continue on body panel side.
- Work each sleeve side independently until desired sleeve length is reached.
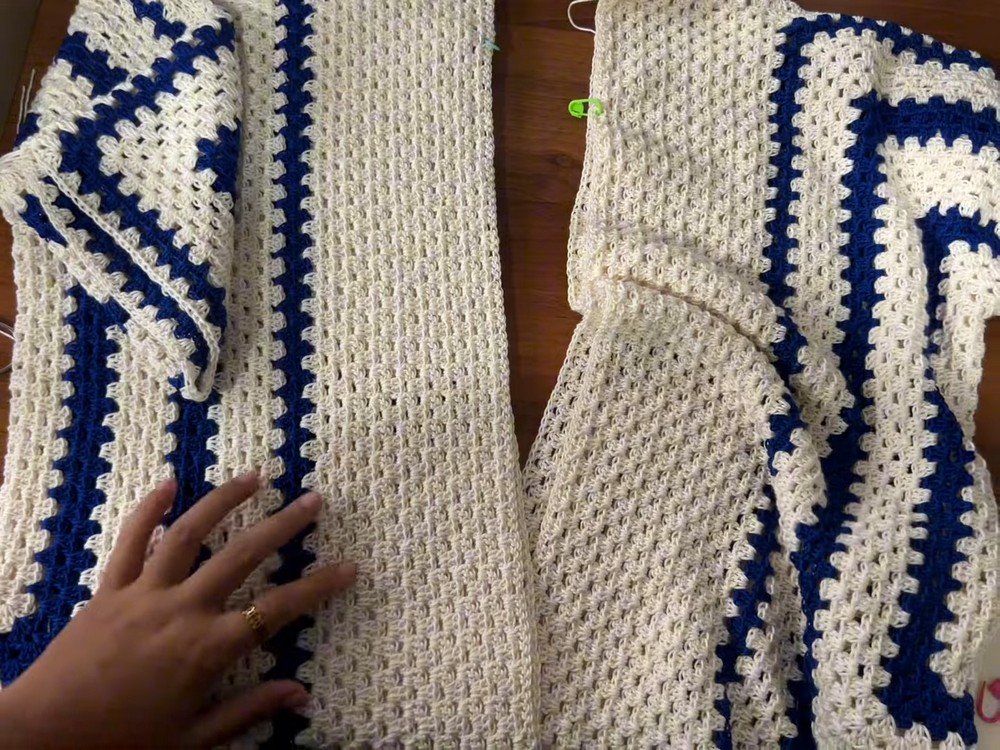
Step 8: Create Two Identical Panels
- Repeat previous steps to create two identical front panels.
- Use stitch markers to identify shoulder tops and work the same rows on both sides.
Step 9: Add Shoulder Seams
- Fold panels right sides together.
- Using yarn and crochet hook or yarn needle, seam shoulders using slip stitch join or mattress stitch.
- Don’t pull too tight to maintain flexibility.
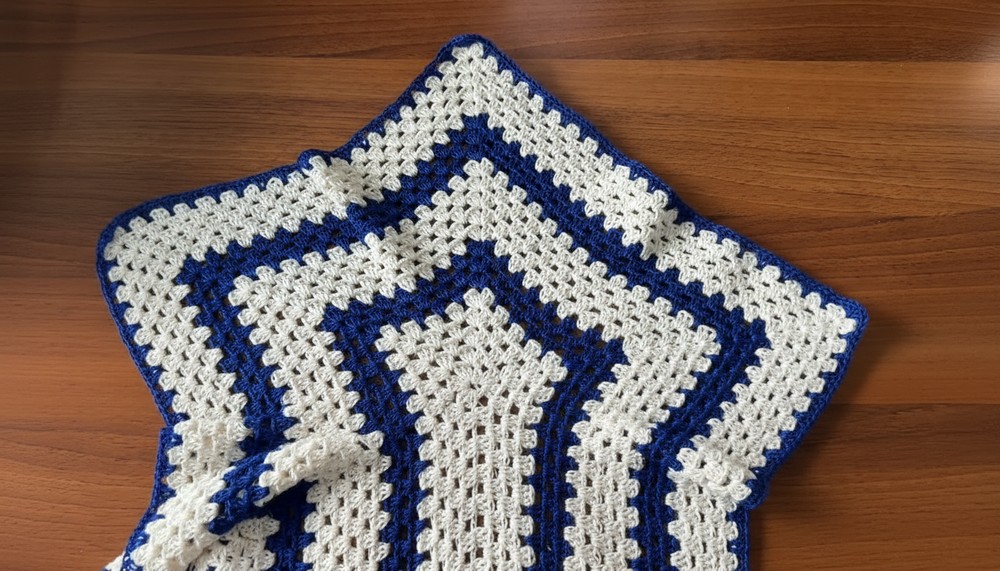
Step 10: Join Panel Centers and Shape Armholes/Body
- Attach yarn at one side of panel body.
- Continue granny stitch rows across full width for body shaping.
- Use stitch markers to measure total circumference as you work.
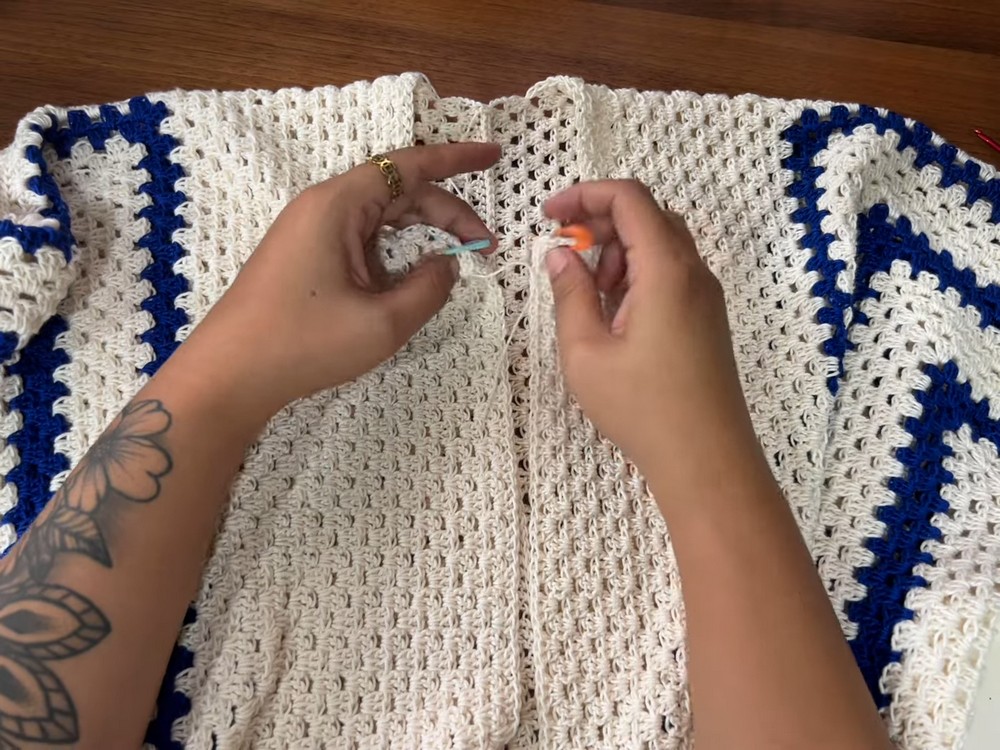
Step 11 (Optional): Color Changes and Stripes
- Change yarn colors after completing groups of rows as desired.
- To change color, finish last dc of row with new yarn pulled through loops.
- Weave in yarn tails as you go for a neat finish.
Step 12: Final Finish and Length Adjustment
- Add additional rows at bottom of shirt body to reach desired length if needed.
- Work granny clusters evenly around bottom edge.
- Ensure corners are neat by working double granny clusters with chain 1 in corners.
Step 13: Add Buttons and Buttonholes (Optional)
- Use spaces (chain 1 gaps) along front edges as buttonholes.
- Sew buttons opposite these spaces for closure or decoration.

Tutor’s Suggestions:
- Use stitch markers to monitor measurements for sleeves, length, and armholes carefully.
- Keeping tension consistent aids in accurate sizing.
- Seam panels gently to avoid puckering or bunching fabric.
- Experiment with yarn colors and stripes for a personalized look.
Tip:
Before sewing panels, block your pieces lightly to smooth edges and ensure accurate measurements for a well-fitted shirt.
Conclusion
This relaxed crochet shirt combines classic granny stitch texture with a modern, breathable design and customizable fit. The detailed panel construction and finishing allow crafters to create a stylish piece perfect for casual wear. With patience and careful measuring, this intermediate-level project will result in a beautiful handmade shirt tailored to your size and color preferences.
Leave a Reply