
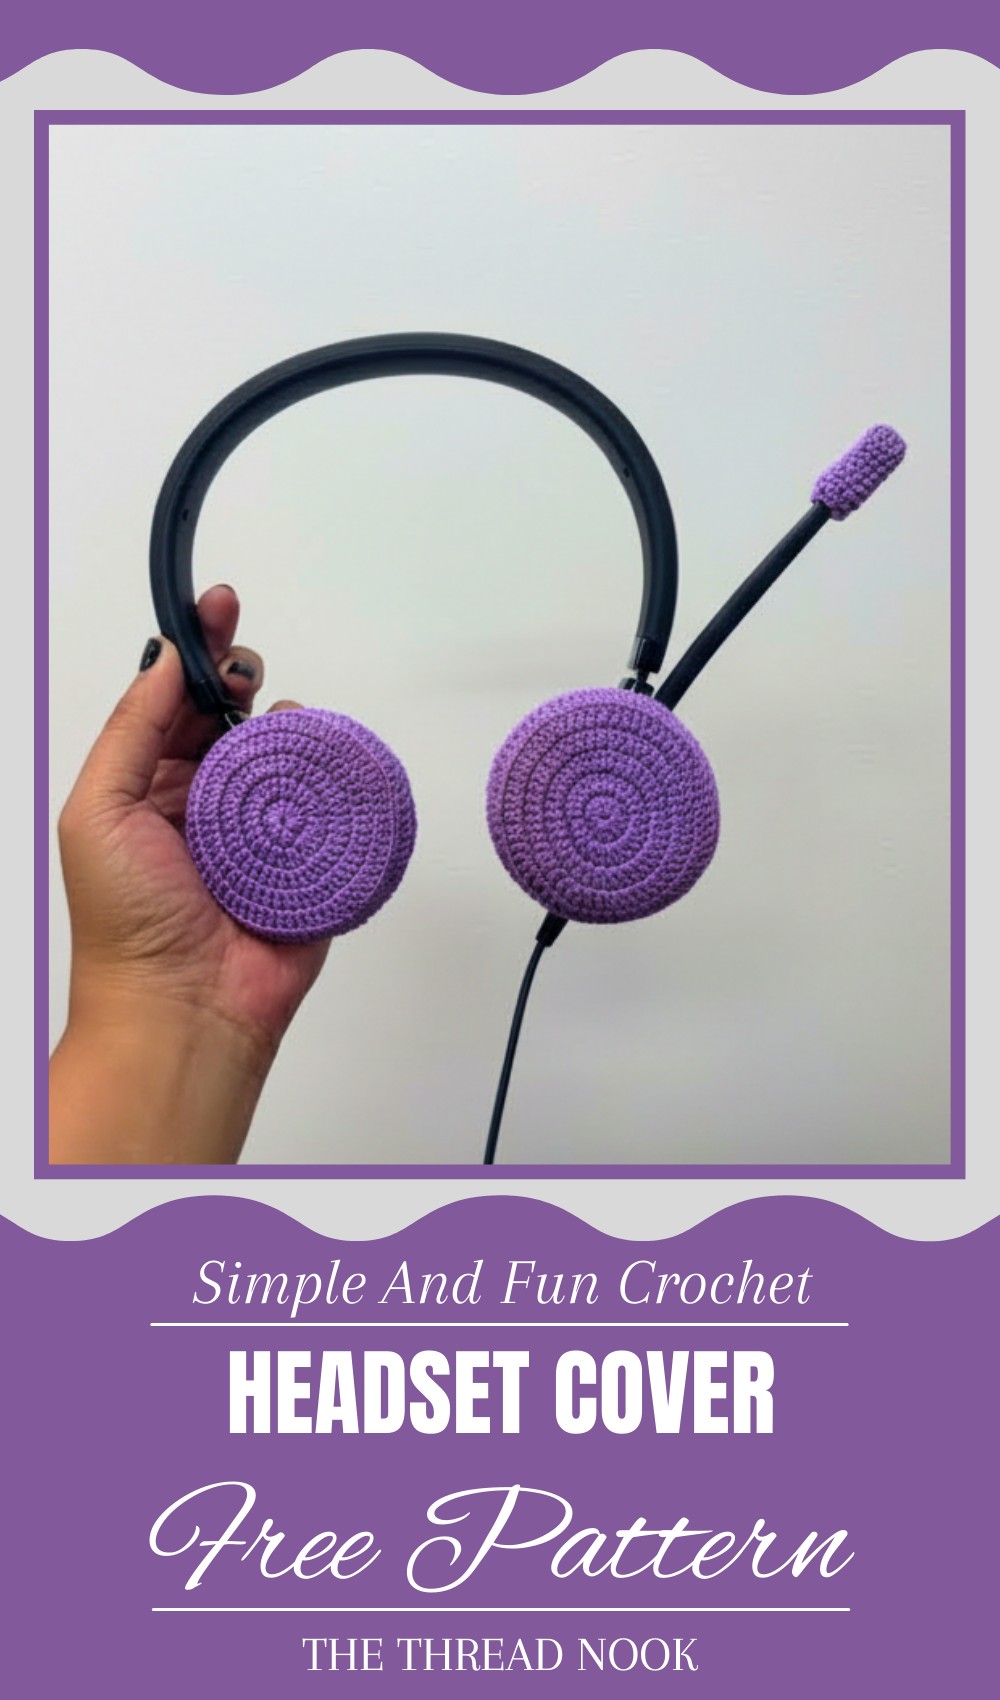
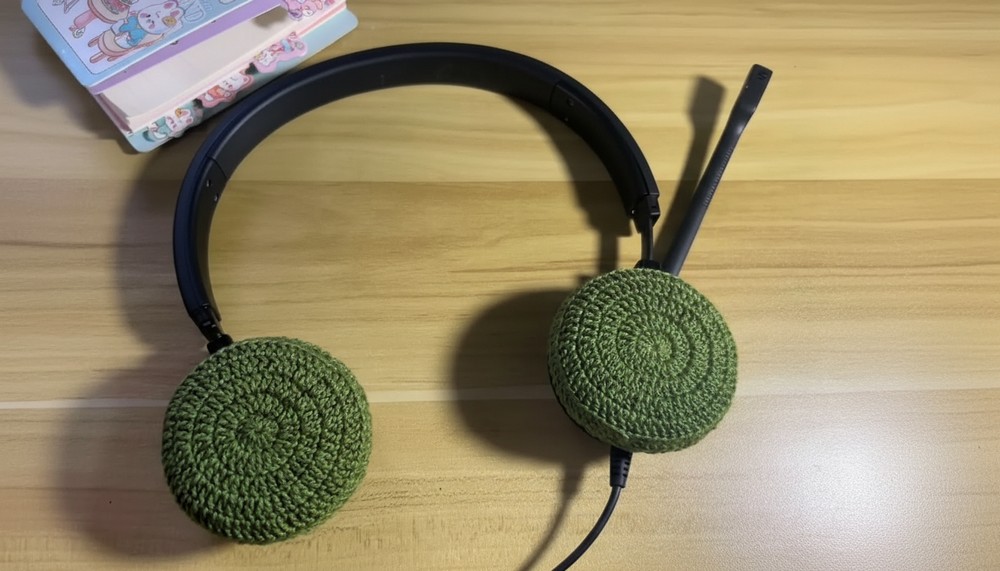
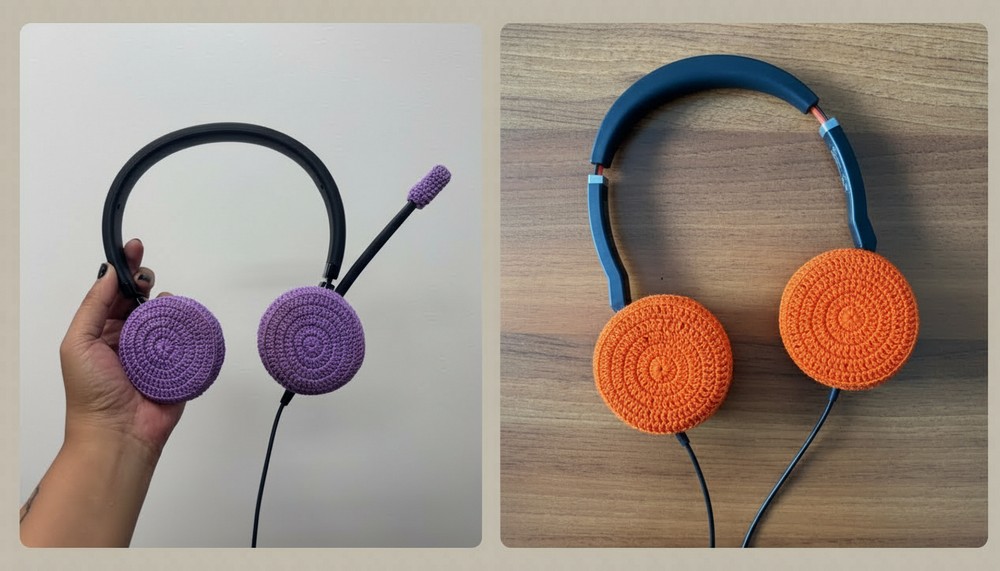
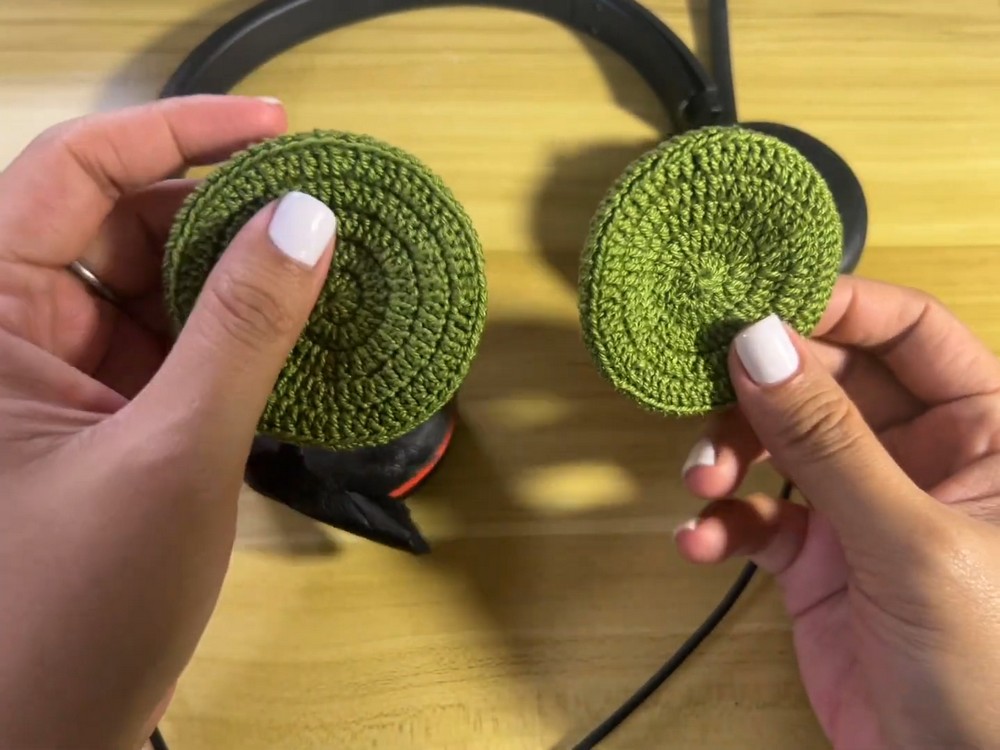
Protect your headphones with a cozy handmade crochet cover that’s easy, colorful, and adds a fun, unique touch to your daily tech gear.
Turning something ordinary into a charming little gift that brightens your day every time you use it, that’s exactly what a crochet headset cover does! It wraps your headphones in a cozy, colorful hug, making them not only protected but also stylish and unique. With soft yarn and thoughtful stitches, these covers add a touch of beauty to your everyday tech. They stop your headset from getting scratched or dirty and make them easy to spot among others.
Quick Crochet Pattern to Give Your Headphones a Cozy Makeover
The look is playful and warm—like giving your gadgets their own little sweater. Easy to hold and pleasant to the touch, these covers bring joy and personality to something you use all the time. Plus, they make perfect gifts for friends or loved ones, showing care in a small but meaningful way. Turning simple yarn into a handy, beautiful item feels special, even if you’ve never picked up a hook before.
Crochet Headset Cover Pattern
Materials Needed:
- Mercerized three-ply lace yarn (shade “beut 4” or your color choice)
- Crochet hook: 1.8 mm
- Yarn needle
- Scissors
Special Features:
- Starts with a magic circle to achieve a tight, neat center
- Utilizes increasing rounds to fit the headset snugly
- Finishes with textured back loop double crochets
- Can be customized with different colors and appliqué designs (e.g., Mickey Mouse ears, sunflower petals)
Uses:
- Protects your headset from dirt and damage
- Adds a decorative, personalized touch
- Makes a fun and practical handmade gift
Step-by-Step Pattern:
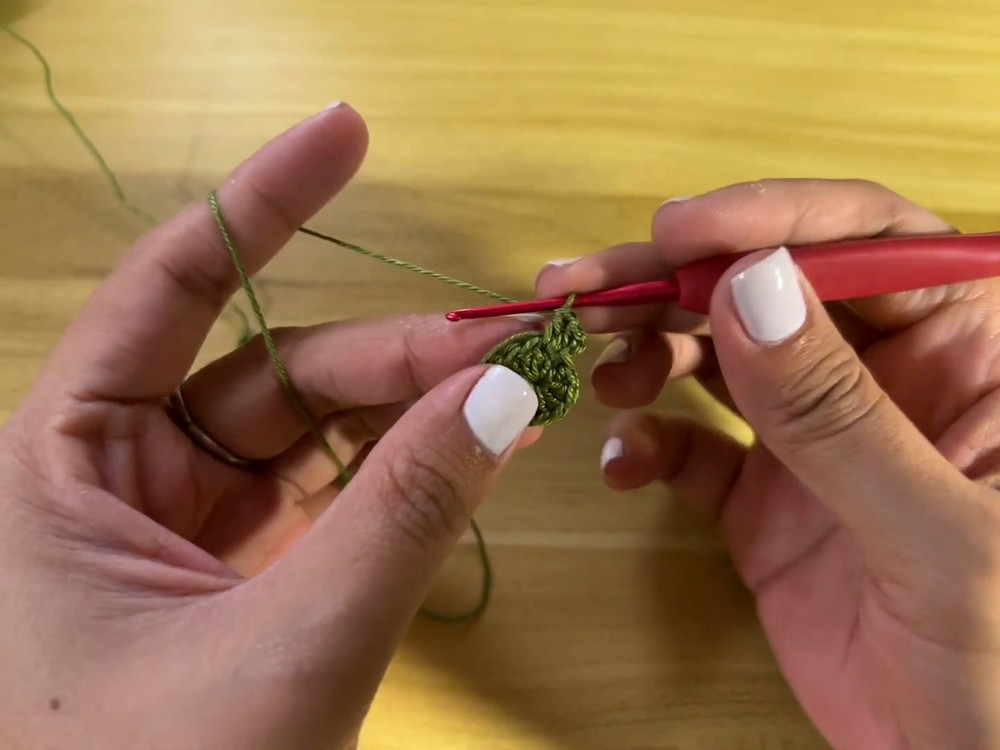
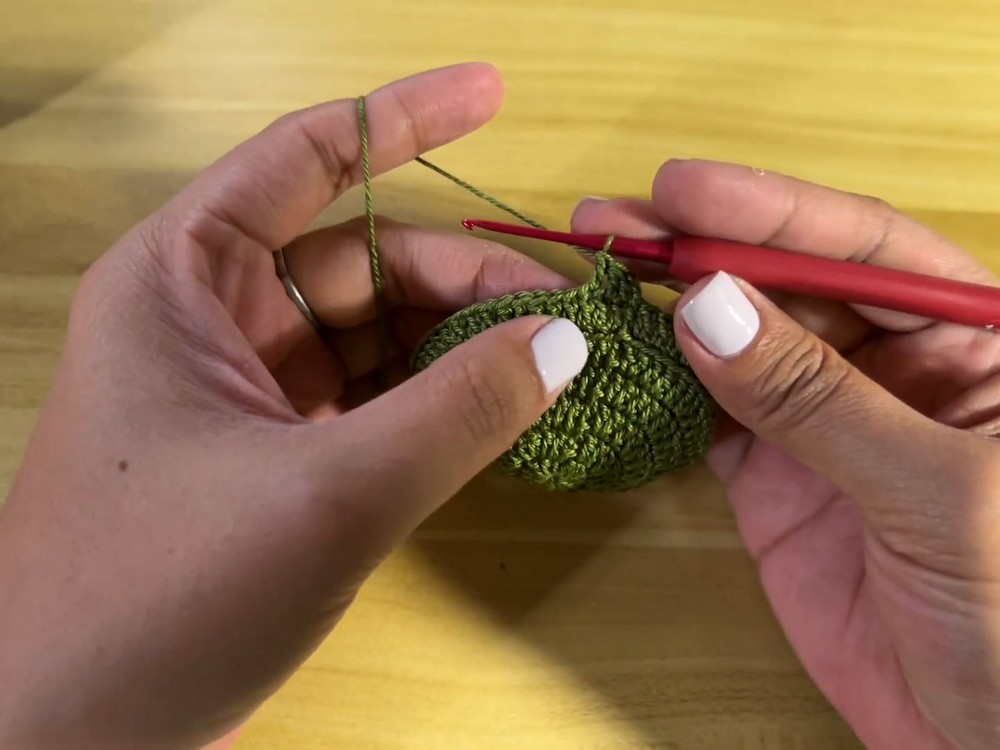
Round 1: Magic Circle Base
- Make a slip knot and form a magic circle.
- Chain 2 (does not count as a stitch).
- Work 12 double crochets (dc) inside the magic circle.
- Pull the tail tightly to close the circle.
- Join with a slip stitch (sl st) to the first double crochet.
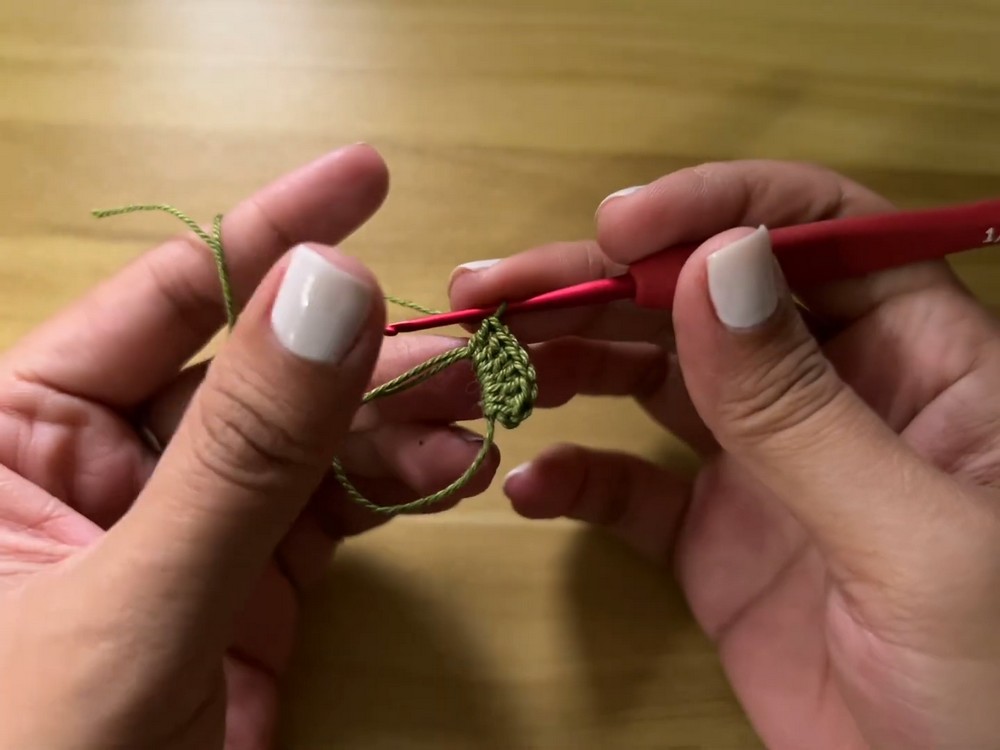
Special Tip: Work over the yarn tail to avoid weaving it in later.
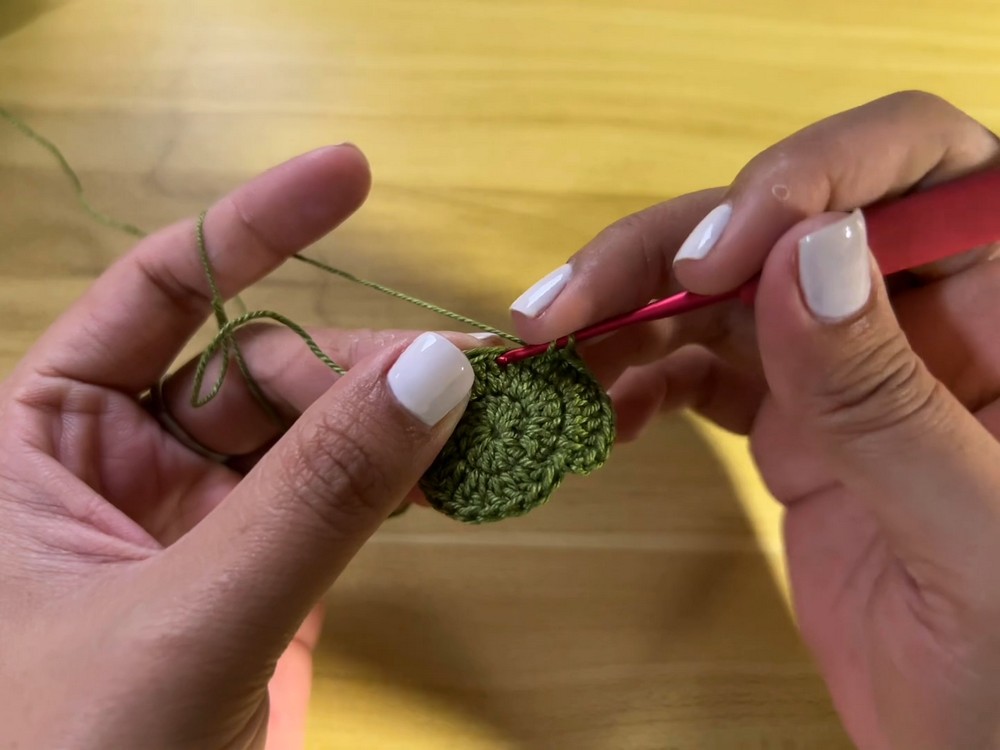
Round 2: First Increase Round
- Chain 2 (does not count as a stitch).
- Work 2 double crochets in each stitch around, doubling the stitch count to 24.
- Join with a slip stitch to the first double crochet.
Round 3: Increase Pattern (Single Increase)
- Chain 2 (does not count as a stitch).
- Alternate 1 double crochet in next stitch, then 2 double crochets in the following stitch, repeat this 12 times.
- You will have 36 stitches total.
- Join with a slip stitch at the top of the first double crochet.
Round 4: Increase Pattern (Double Increase)
- Chain 2 (does not count as a stitch).
- Work 1 double crochet in the next two stitches, then 2 double crochets in the next stitch. Repeat around.
- The stitch count increases to 48.
- Join with a slip stitch.
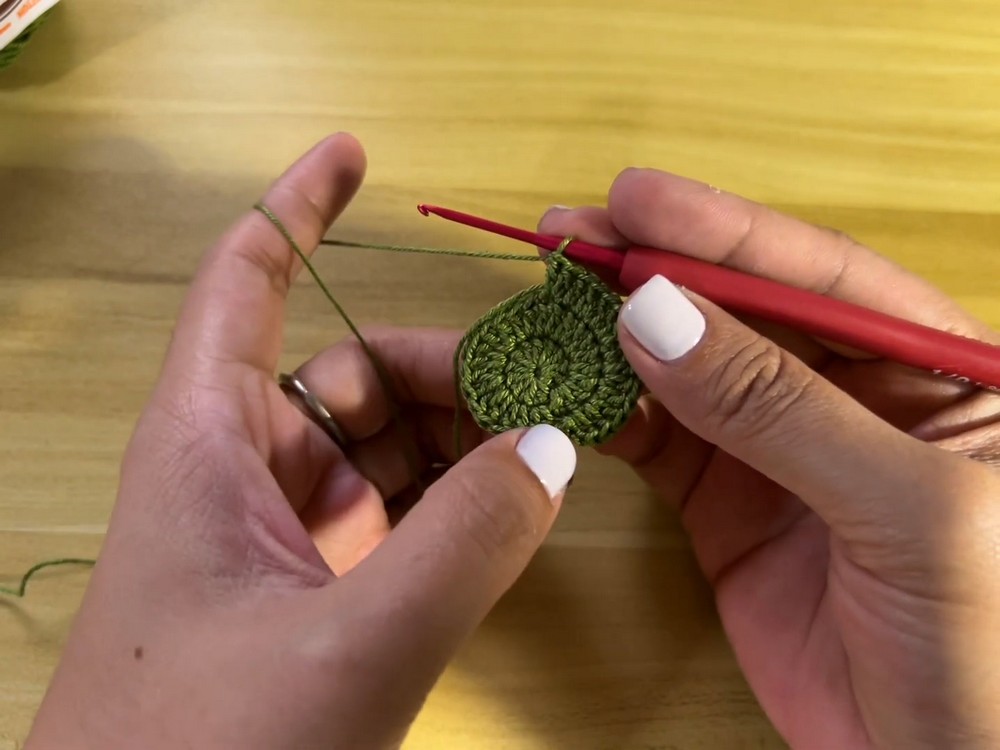
Round 5: Further Increase for Larger Size
- Chain 2 (does not count as a stitch).
- Crochet 1 double crochet in the next 3 stitches, then 2 double crochets in the next stitch.
- Repeat this pattern until the round ends with 60 stitches total.
- Join with a slip stitch.
Stop increasing if your headset fits at this stage; otherwise, add more rounds as needed.
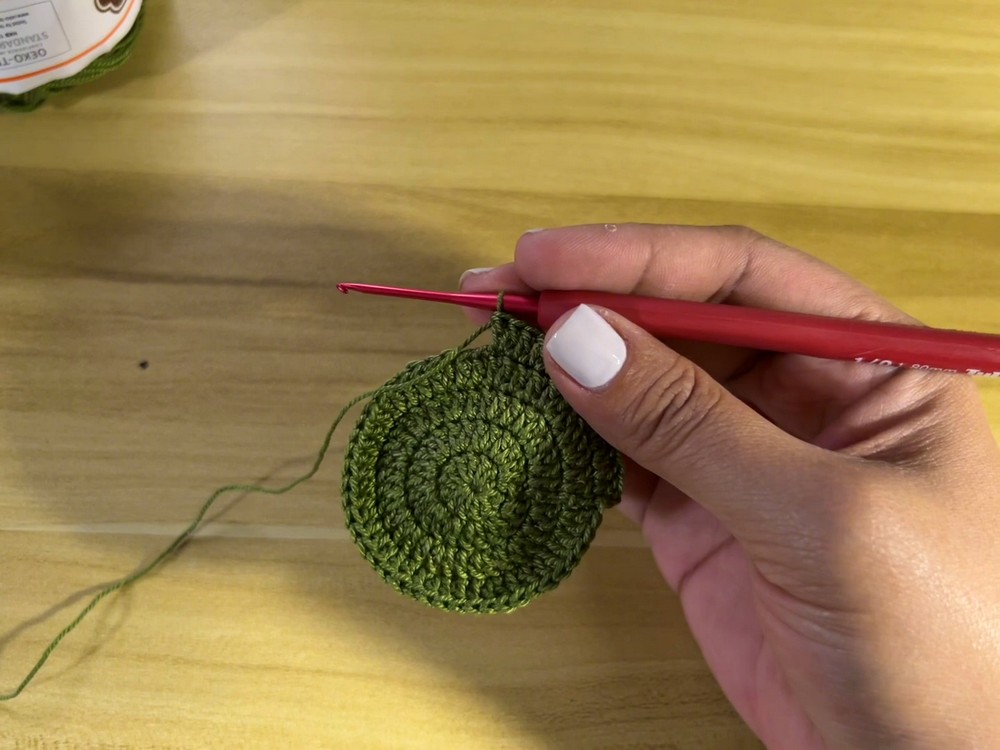
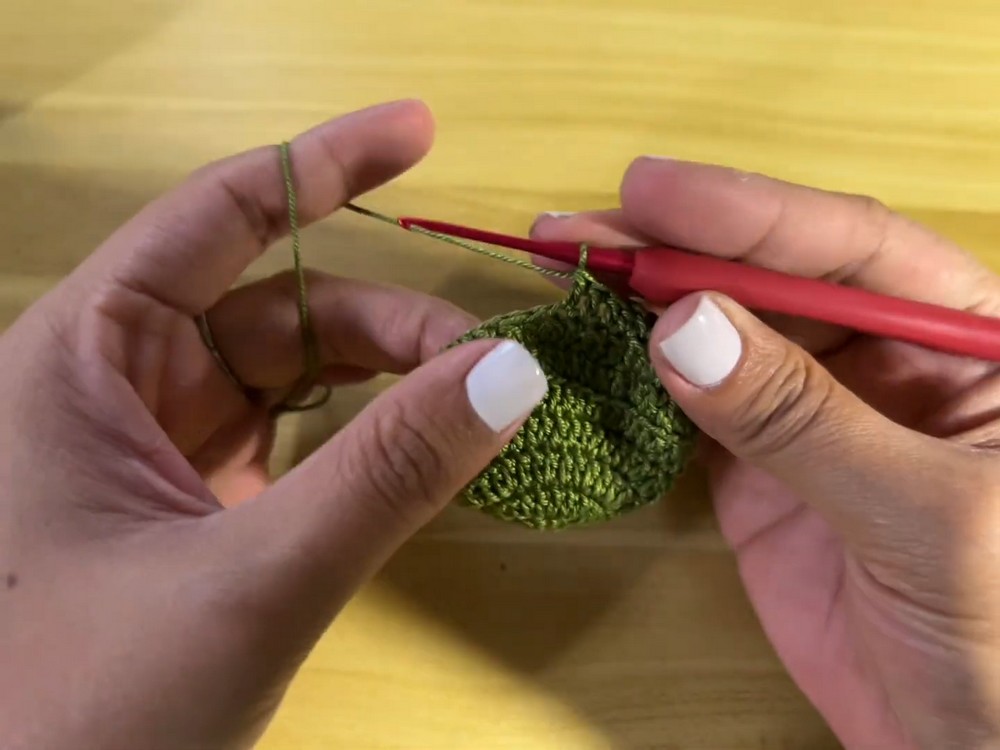
Round 6: Back Loop Double Crochets
- Chain 2 (does not count as a stitch).
- Work 1 double crochet in the back loop only of each stitch around (60 stitches).
- Join with a slip stitch.
Round 7 (Optional): Regular Single Crochet Round for Thickness
If your headset is chunky, add this round:
- Chain 1.
- Work 1 single crochet in each stitch around, using both loops.
- Join with a slip stitch.
Round 8-9: Decreasing Rounds for Fit
Repeat the following pattern for 2 decrease rounds:
- Chain 2 (does not count as a stitch).
- Decrease round: Work 1 double crochet, then perform a double crochet decrease over the next two stitches. Decrease = yarn over, insert hook into first stitch, yarn over and pull through, yarn over, insert hook into next stitch, yarn over and pull through, yarn over and pull through 3 loops on hook.
- Continue alternating 1 dc and 1 dc decrease to end.
- Join with a slip stitch.
The decreases shape the cover for a snug fit.
Final Finishing
- Cut yarn leaving a tail.
- Pull yarn through last loop (fasten off).
- Weave in ends using yarn needle.
- Optionally, decorate with appliqués like Mickey Mouse ears or sunflower petals by crocheting motifs separately and sewing them on.
Tutor’s Suggestions:
- Measure your headset often while crocheting to ensure the cover fits perfectly.
- Adjust additional rounds based on your headset’s thickness and size.
- Use fine yarn and a small hook for a tight weave to protect your headset better.
- Experiment with colors and decorations to personalize!
Tip:
If your headset is thicker or chunkier, add an extra single crochet row without back loop only for extra thickness and stretch.
Conclusion:
This crochet headset cover combines function and flair by protecting your device while adding your personal creative touch. Easy enough for beginners comfortable with double crochet and increases, the project’s flexibility lets you customize fit and style.
Leave a Reply