
Bring summer vibes to life with this easy crochet mesh top with stylish combo perfect for sunny beach days and casual outings.
Simple Crochet Mesh Top Pattern for Summer Comfort
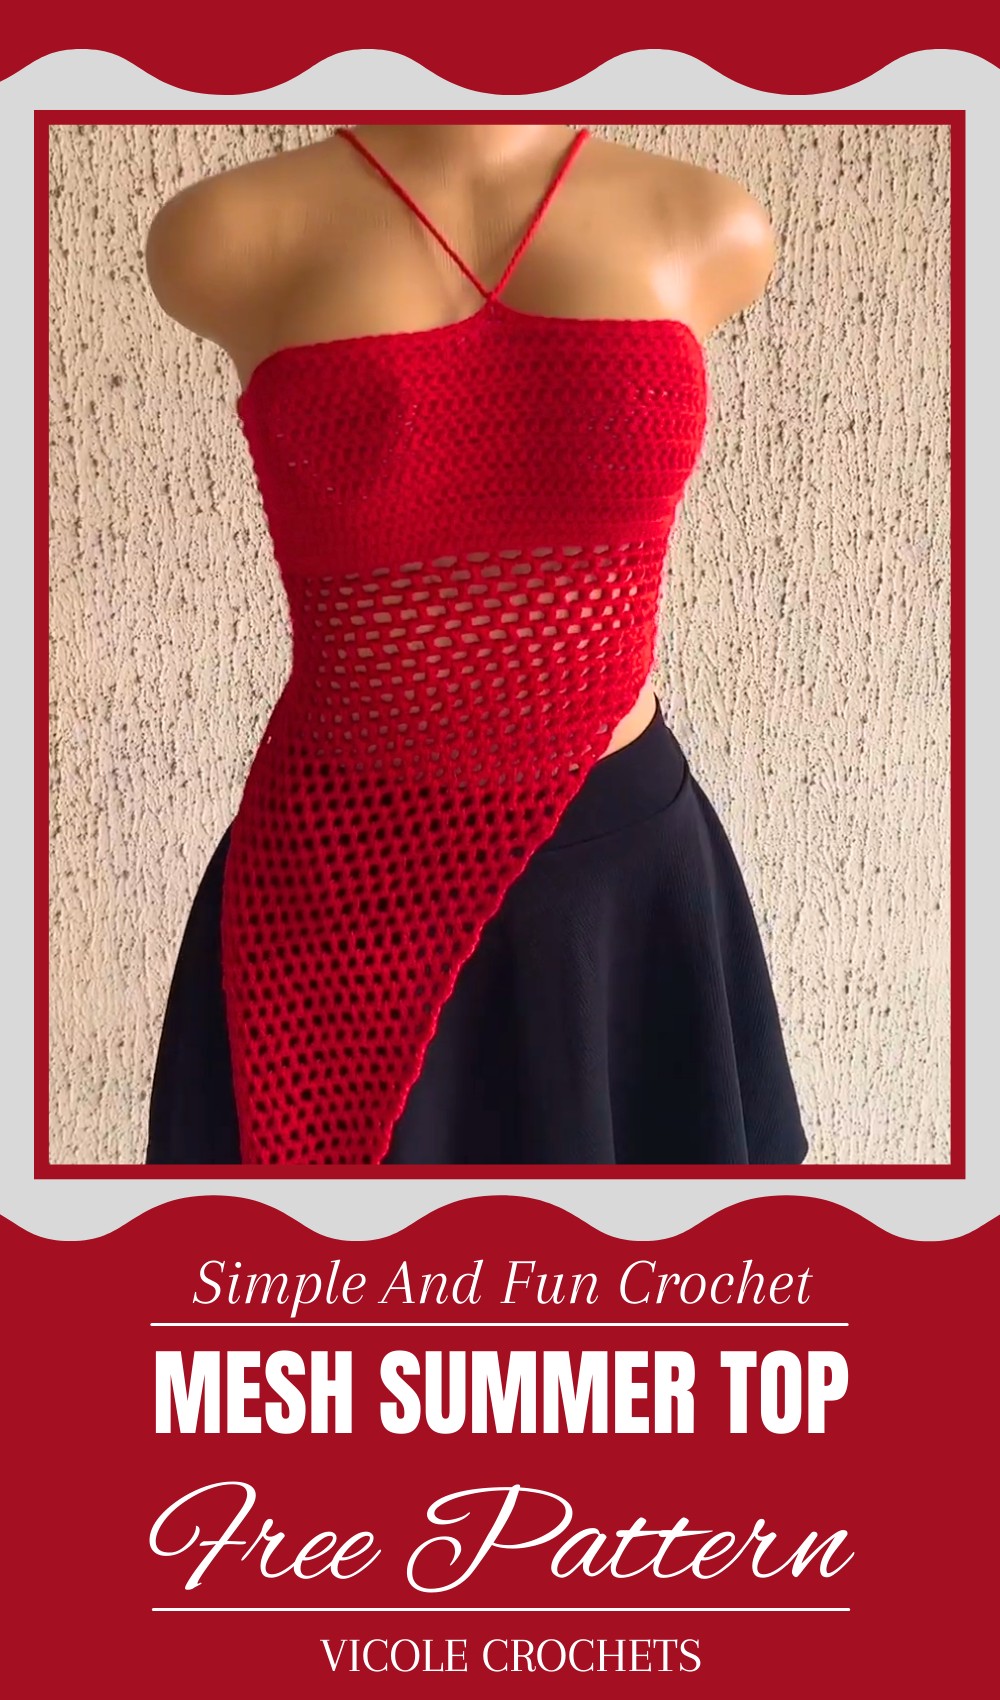
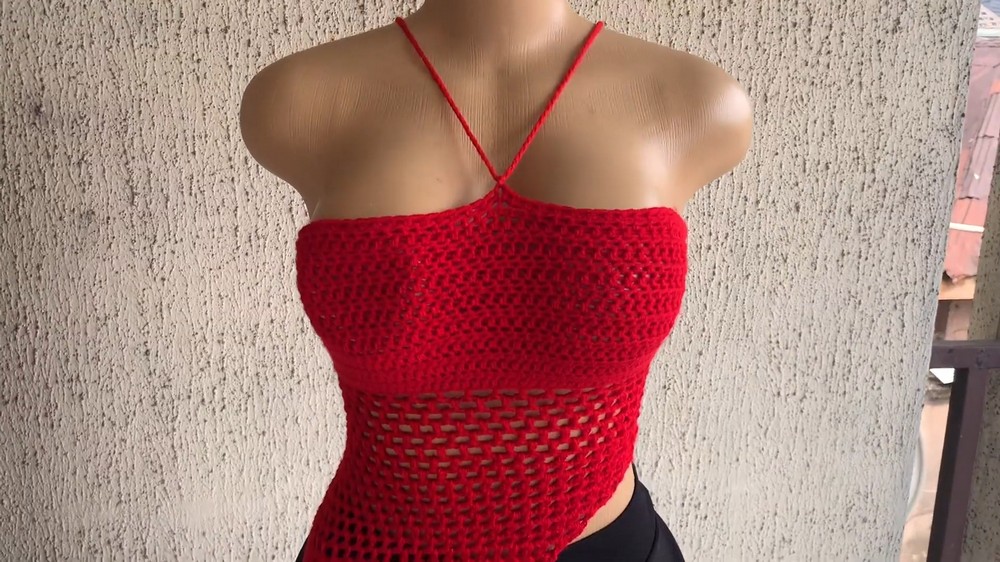
This breathable summer top keeps you cool and comfortable when the temperature rises. Its open mesh design allows air to flow freely, making it ideal for hot, sunny days. With a charming and delicate appearance, it adds a fresh, casual touch to any outfit. Whether you’re spending time outdoors, heading to the beach, or enjoying a calm evening walk, this top fits perfectly and feels gentle on the skin.
The soft, stretchy fabric adapts to different body shapes, ensuring a comfortable fit for everyone. Its playful holes create a light and breezy look that captures the easygoing feeling of summer. Easy to pair with shorts, skirts, or jeans, this top brings style and practicality together in one simple piece. Wearing it helps you stay cool, relaxed, and ready to enjoy every sunny moment with effortless charm.
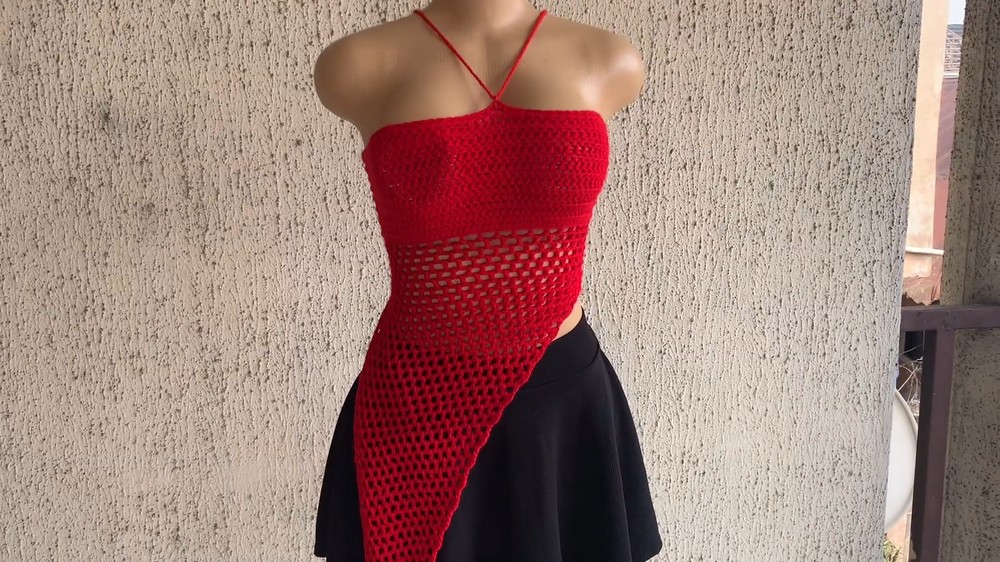
Crochet Mesh Diagonal Top Pattern
Special Features
- Lightweight, breathable mesh stitch ideal for warm weather
- Diagonal shaping with decreases on one side for a flattering fit
- Custom sizing techniques with easy adjustment options
- Includes back lace-up detail with a crisscross rope for style and fit
- Works up quickly with repetitive stitch patterns
Level of Difficulty
Intermediate
Materials Needed
- Acrylic 3-ply yarn doubled into 6-ply
- 4 mm or 4.5 mm crochet hook
- Scissors
- Measuring tape (to measure bust and customize size)
- Yarn needle for weaving ends
- Optional: extra yarn for back lace rope
Step-by-Step Pattern
Step 1: Measure & Chain Foundation
- Measure your bust circumference, leaving extra inches for the back lace.
- Chain a length matching your bust measurement in a multiple of 3 stitches (example: 84 chains).
- The multiple of 3 is important for the mesh stitch pattern to align properly.
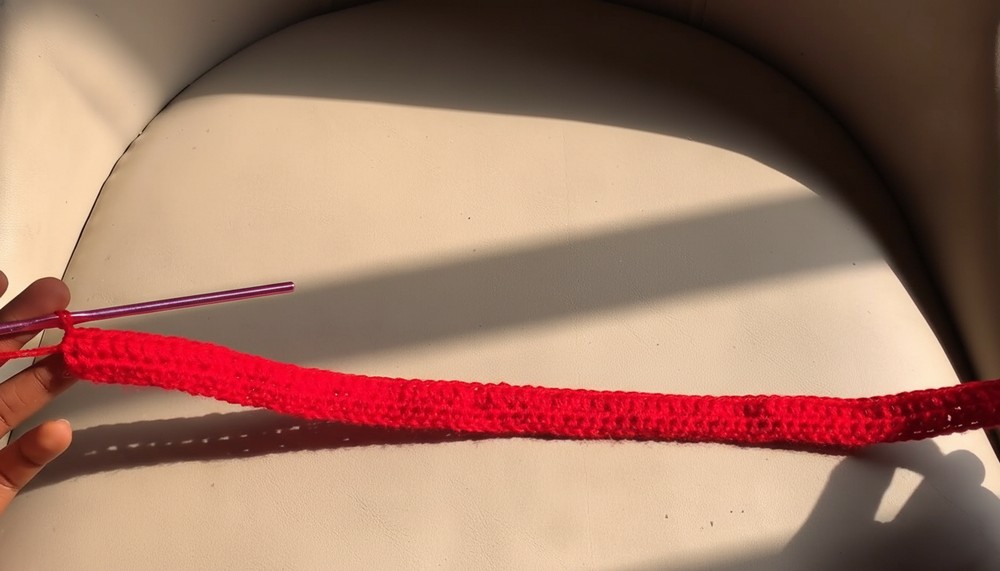
Step 2: Add Turning Chain & Row 1
- Add 1 extra chain for turning (total chains = multiple of 3 + 1, e.g., 85).
- Yarn over, skip first chain, insert your hook into second chain and make a half double crochet (hdc).
- Make 1 hdc in each stitch across the chain.
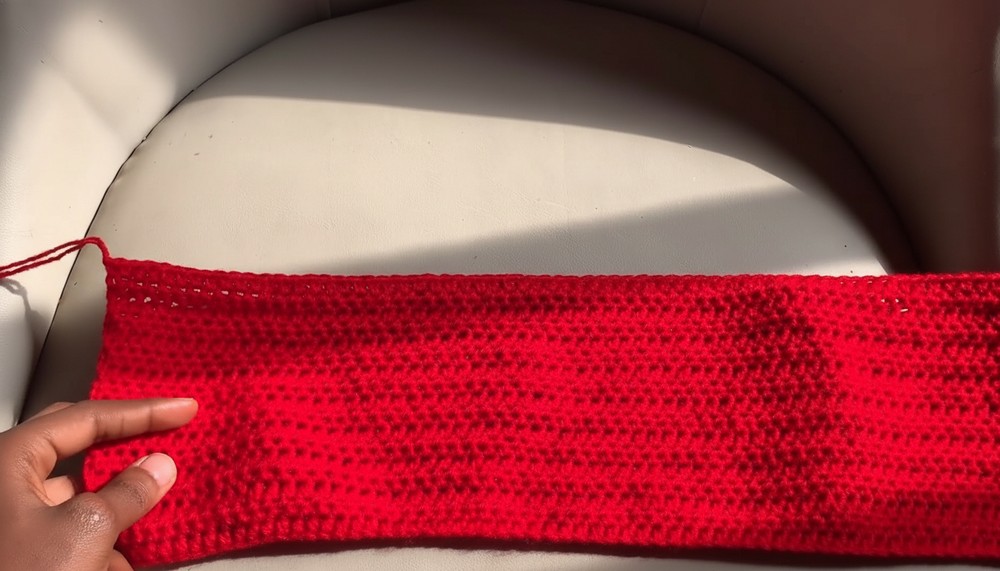
- This row sets the base for the mesh and measures the bust width.
Step 3: Repeat Row 2
- Chain 1, turn work.
- Make 1 hdc in each stitch across, do not skip the last stitch.
- Repeat this row until the piece is long enough to cover your bust height.
- Example: Make total 17 rows (including Row 1 & 2).
- The fabric here will be solid to support the mesh section later.
Step 4: Prepare for Mesh Section
- Turn your work to the side opposite the starting chain (to avoid tightness).
- Insert hook into the first chain of the original foundation chain.
- Pull yarn through and make a chain 4. This starts the mesh pattern.
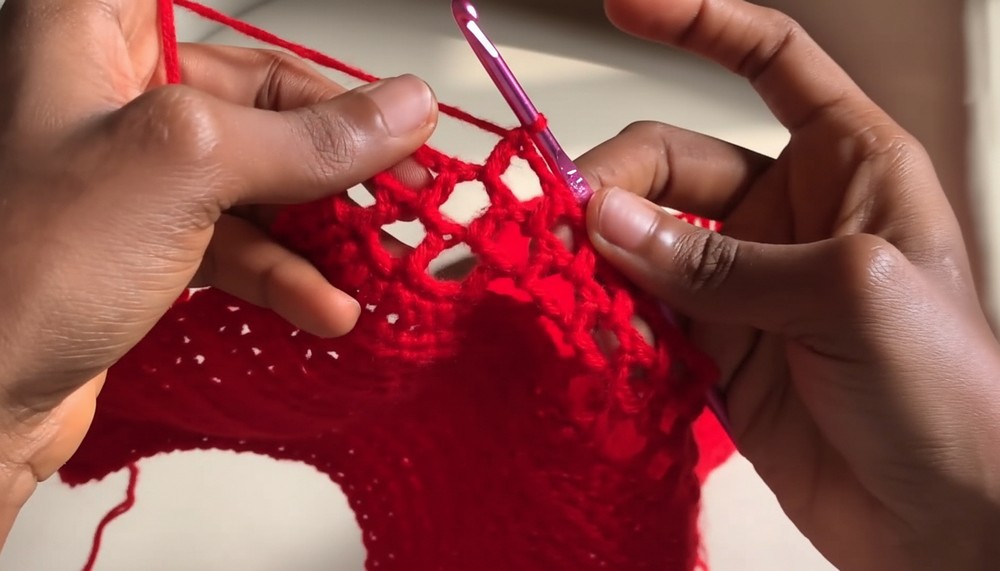
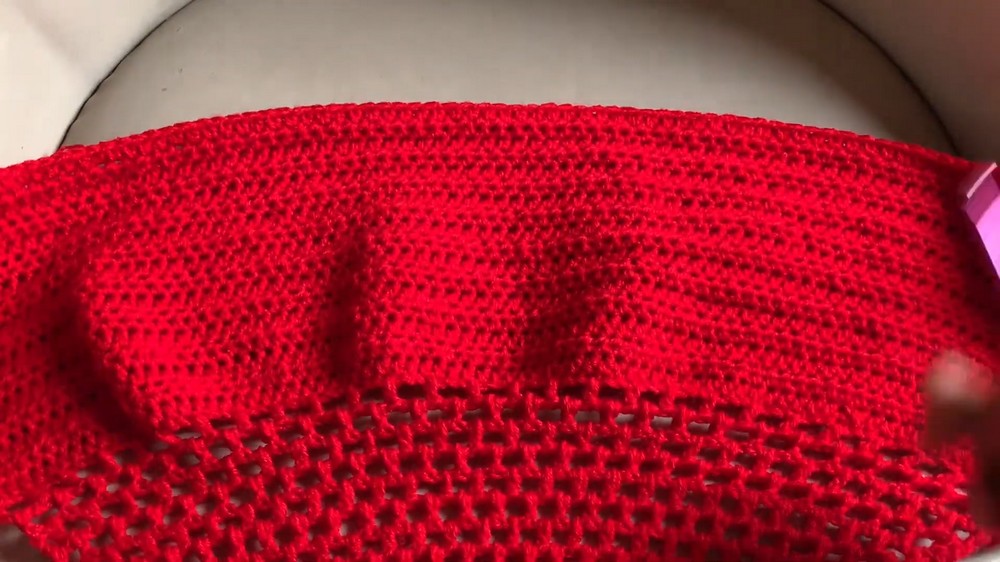
Step 5: Mesh Stitch Pattern (Row 1 of Mesh)
- Chain 4 (counts as first double crochet + chain 1).
- Skip 2 stitches, yarn over, insert hook into 3rd stitch, pull yarn and make a double crochet (dc).
- Repeat the mesh repeat: chain 2, skip 2 stitches, dc in next stitch until end of row.
- End with a dc in last stitch for neatness.
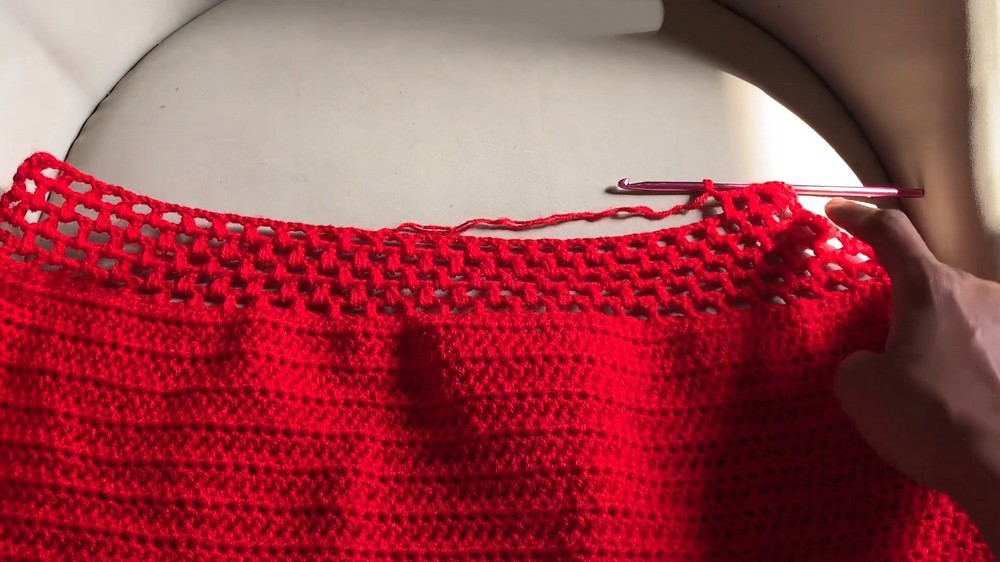
Step 6: Continue Mesh Pattern (Rows 2 onwards)
- Chain 3, turn.
- Work the same mesh pattern: chain 2, dc in next chain space across row.
- Repeat mesh rows following: chain 2, dc in next chain space.
- This creates the open, airy mesh fabric.
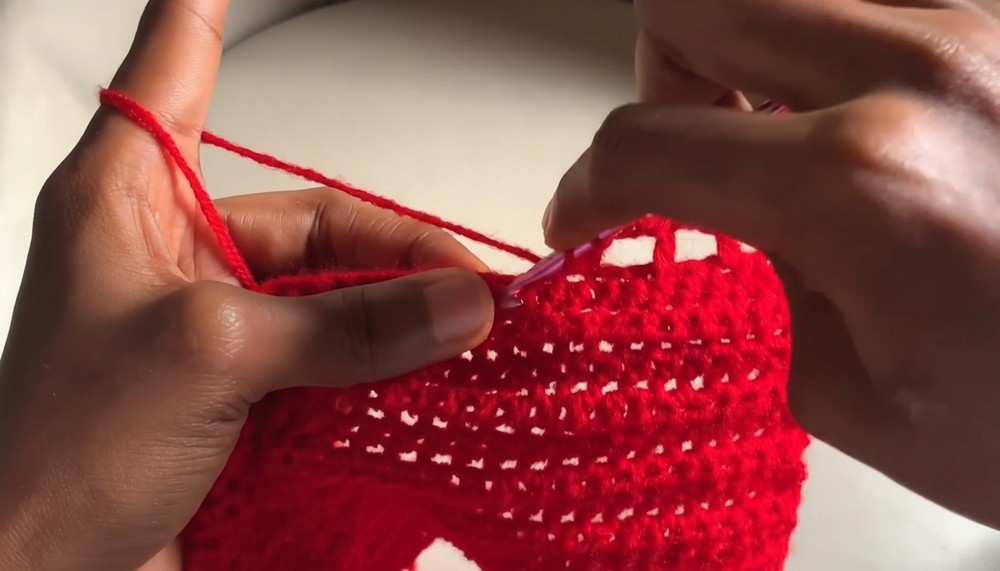
Step 7: Diagonal Decrease Setup
- To create diagonal shaping on one side, begin decreasing on first mesh stitch row after the solid rows.
- Start the decreasing row with chain 3, turn.
- For the decrease:
- Yarn over, insert hook in first stitch, pull up loop.
- Insert hook in next chain space/stitch, pull up loop.
- Yarn over, pull through first 3 loops.
- Yarn over, pull through the last 2 loops. (This is a decrease dc combining two stitches.)
- Continue with mesh pattern on remaining stitches.
Step 8: Continue Decreasing Rows
- Chain 2, dc in each chain space across row as usual.
- At the beginning of every alternate row, repeat decrease as explained in Step 7.
- This will cause the mesh fabric to angle diagonally on one side, flattering the shape.
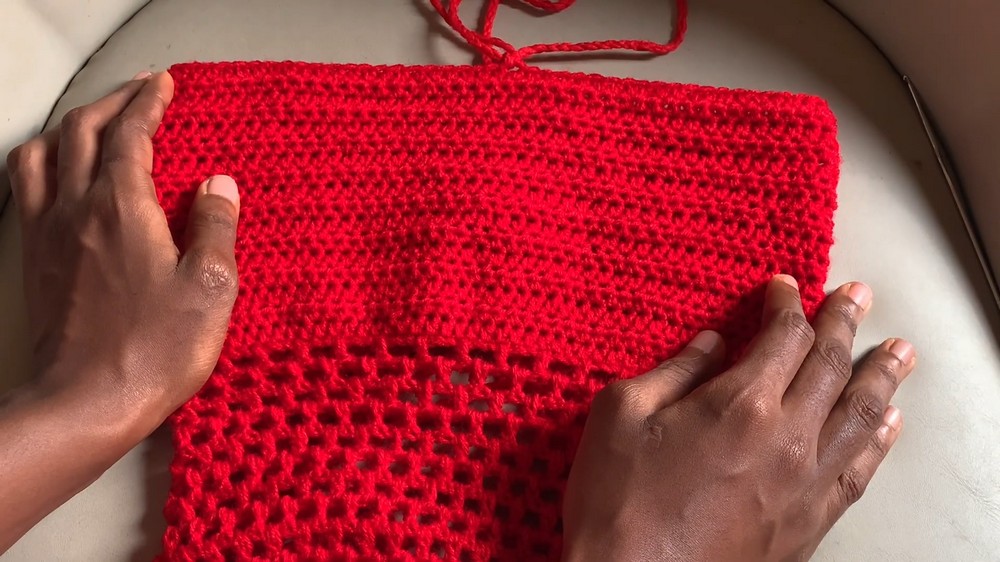
Step 9: Finish Rows
- Continue the mesh pattern and diagonal decreases until you have only 1 or 2 mesh stitches remaining at the decreasing edge.
- End with a clean final row.
- Fasten off, cut yarn, and weave in ends.
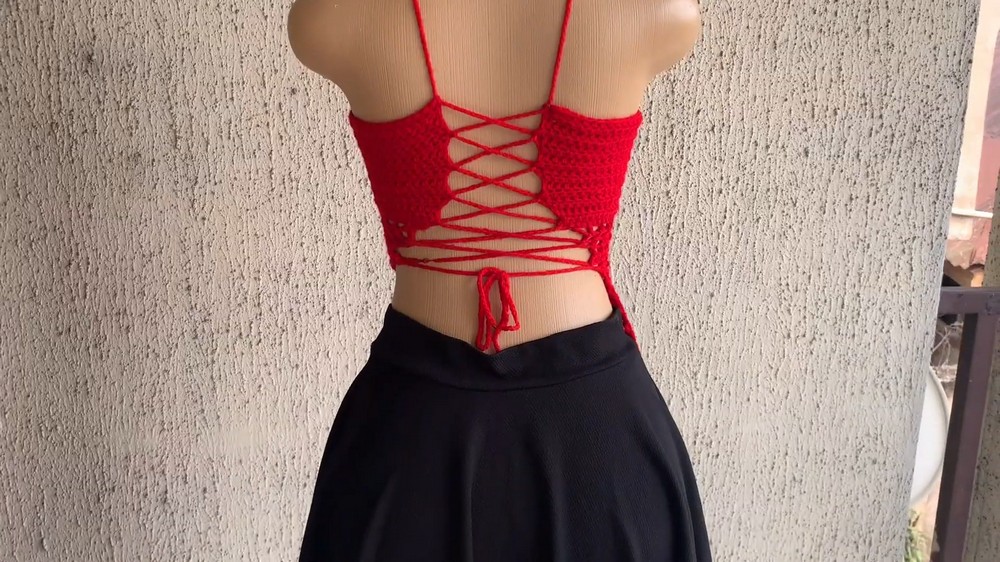
Step 10: Make & Attach Back Lace Rope
- Make a slip knot and chain a length that will comfortably crisscross the back and pass through the middle mesh stitches.
- Fold the completed top in half, find the middle stitch (around center back).
- Pass the lace rope through this stitch, securing it evenly.
- Crisscross the rope through mesh spaces on the back, spacing approximately 3 stitches apart for a comfortable fit and style.
- Tie the ends or weave through edges as desired.
Uses
- Perfect summer crop top or beachwear
- Customizable for all sizes through chain count and bust measurement
- Stylish layering piece for casual and vacation outfits
Tutor’s Suggestions
- Always measure yourself or client and add inches for fitting and back lace ease.
- Begin mesh stitches on the looser side (opposite start chain) to avoid tightness on bust.
- For neat shaping, decrease stitches only on one side as shown, or both sides if you want symmetrical shaping.
- Adjust back lace length for secure but comfortable fit.
Tip
Slowing down and carefully counting stitches during the mesh section helps keep the pattern consistent and reduces errors.
Conclusion
This crochet mesh diagonal top combines style and comfort with its breezy fabric and flattering diagonal shape. With simple stitches and easy size adjustments, it’s a versatile project ideal for intermediate crocheters.
Leave a Reply