
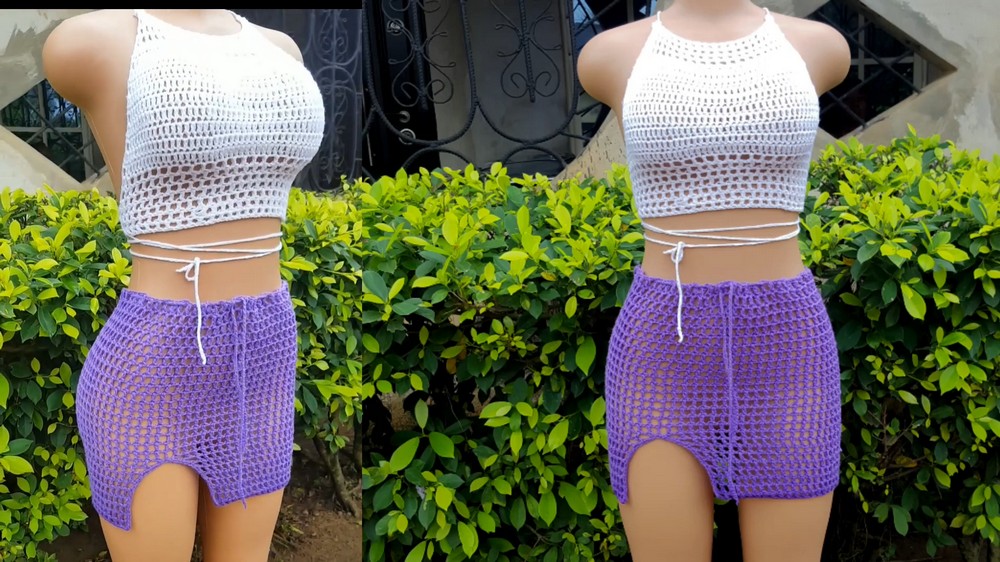
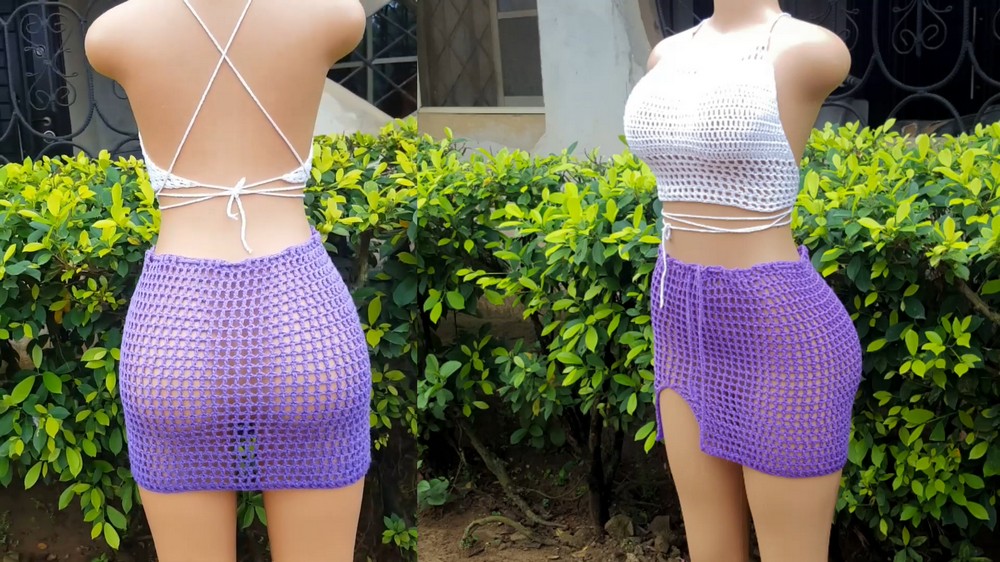
Show off your beach vibes with this Crochet Mesh Skirt Cover Up Pattern featuring airy design playful texture and a breezy look perfect for sunny days.
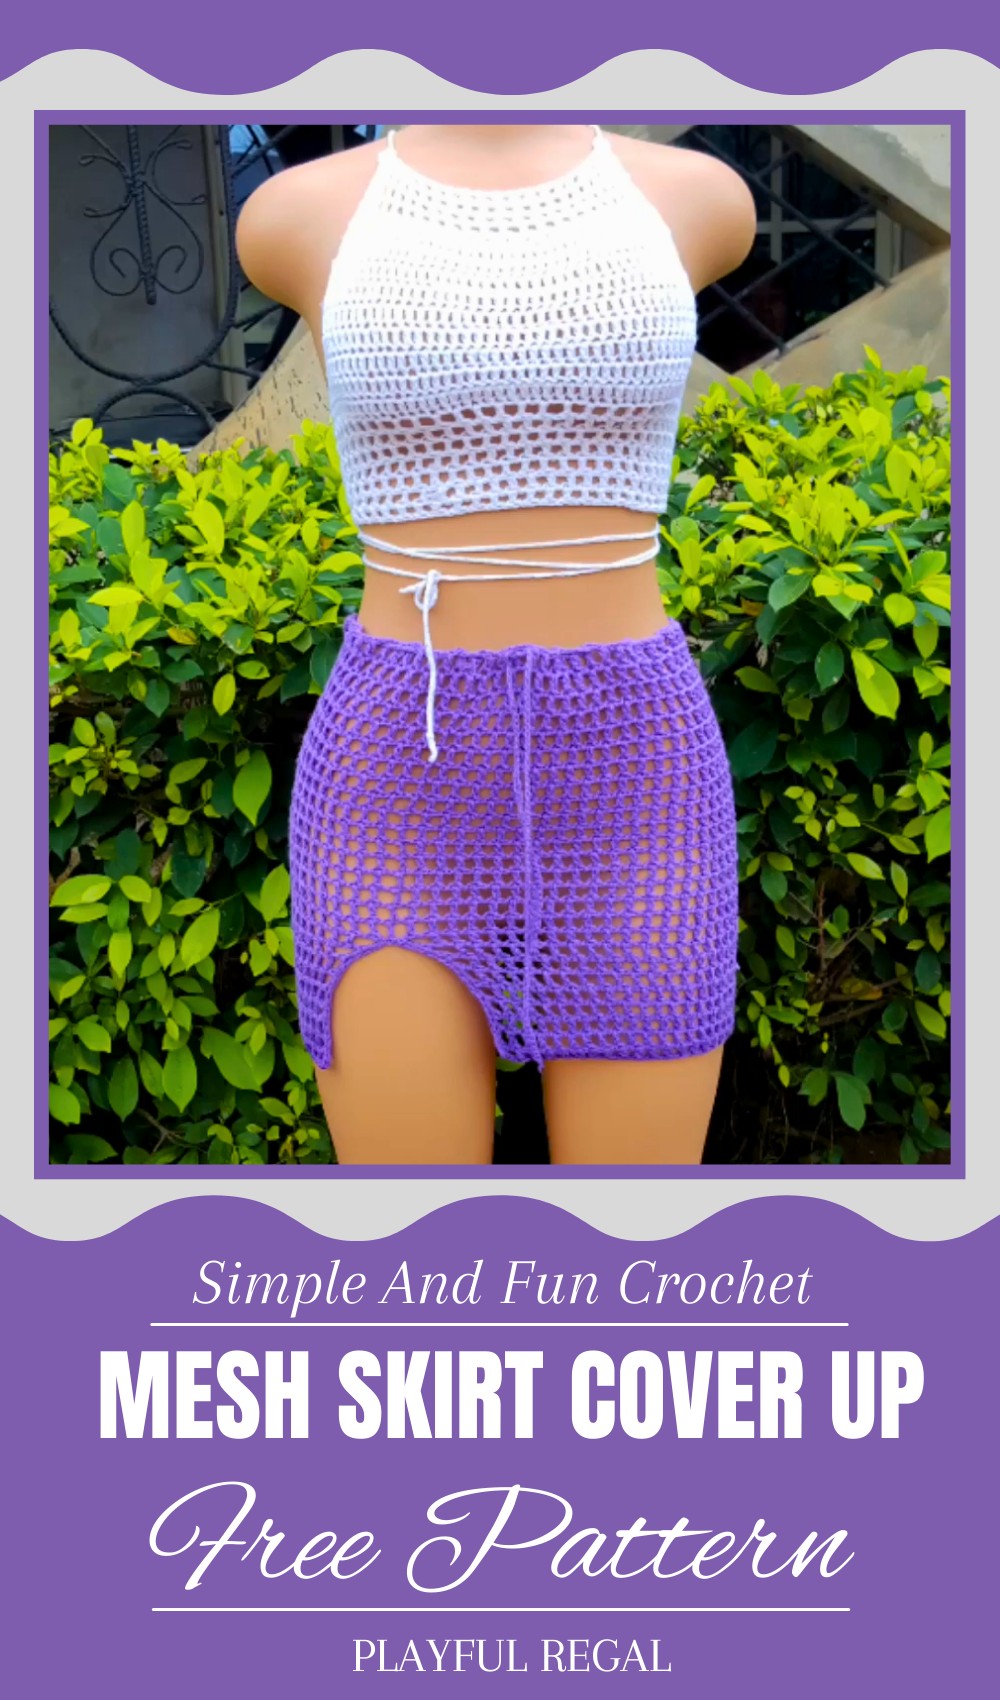
Fresh Crochet Mesh Skirt Cover Up Pattern for Beach Outfits
Looking for a stylish and comfortable way to stay cool on hot days? This skirt cover-up is just what you need! Made with a light and open mesh design, it allows air to flow freely, keeping you fresh and comfortable. The airy pattern shows a bit of what’s underneath, making it perfect to wear over your swimsuit at the beach or pool. Soft and stretchy yarn helps you move easily, whether you’re walking, dancing, or relaxing in the sun.
Its simple yet elegant look fits many occasions, wear it over shorts or a dress for a casual and trendy outfit. The skirt’s flowy shape adds a touch of beauty without feeling heavy or hot. This cover-up is easy to put on, fun to wear, and perfect for anyone who wants to look good and feel great during warm weather. It’s a smart choice for fun and comfort in the sun.
Crochet Skirt Pattern: Step-by-Step Detailed Guide
Materials Needed
- Thin acrylic yarn (approximately double strands for thickness)
- 4 mm crochet hook
- Scissors
- Measuring tape for sizing
Special Features
- Stretchy and comfortable double crochet stitch pattern
- Stylish slit for a fashionable look
- Waist tie looped through stitches for adjustable fit
- Easy to adjust length and waist size
Level of Difficulty
Beginner to Intermediate — Basic stitches with simple shaping and attention to stitch counts.
Step-by-Step Instructions
1. Making the Foundation Chain
- Make a slip knot.
- Create a chain that stretches easily around your hip size.
- The total number of chains must be even.
2. Joining the Chain to Work in the Round
- Slip stitch into the very first chain to form a circle.
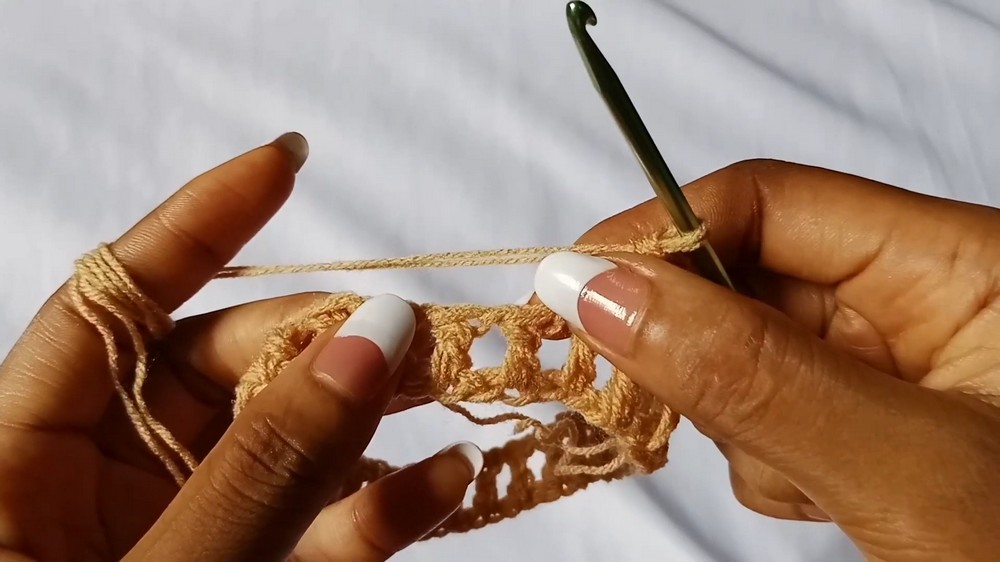
3. Round 1
- Chain 4 (counts as 1 double crochet + 1 chain).
- Skip 1 chain, double crochet in the next chain, chain 1.
- Repeat skip 1 chain, double crochet, chain 1 all the way around until one chain is left.
- To finish the round, chain 1, skip the last chain, and slip stitch into the 3rd chain of the beginning chain 4.
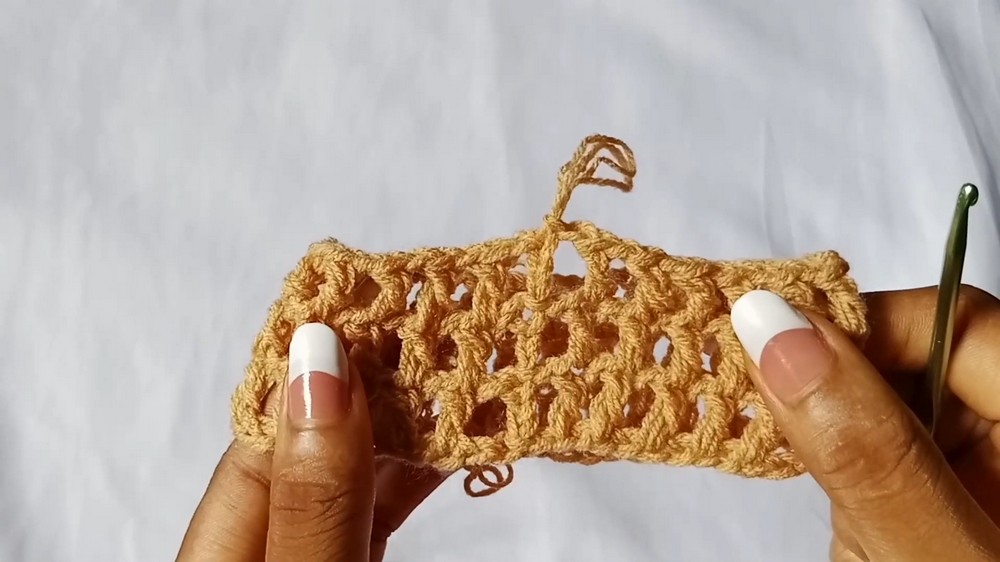
4. Round 2
- Chain 4 (counts as one double crochet + chain 1).
- Double crochet in the next stitch, chain 1.
- Repeat double crochet, chain 1 around.
- Finish with chain 1 and slip stitch into 3rd chain of beginning chain 4.
5. Round 3
- Repeat Round 2.
- Continue repeating Round 2 continuously until the skirt reaches your desired length before the slit starts (from waist down to desired slit height).
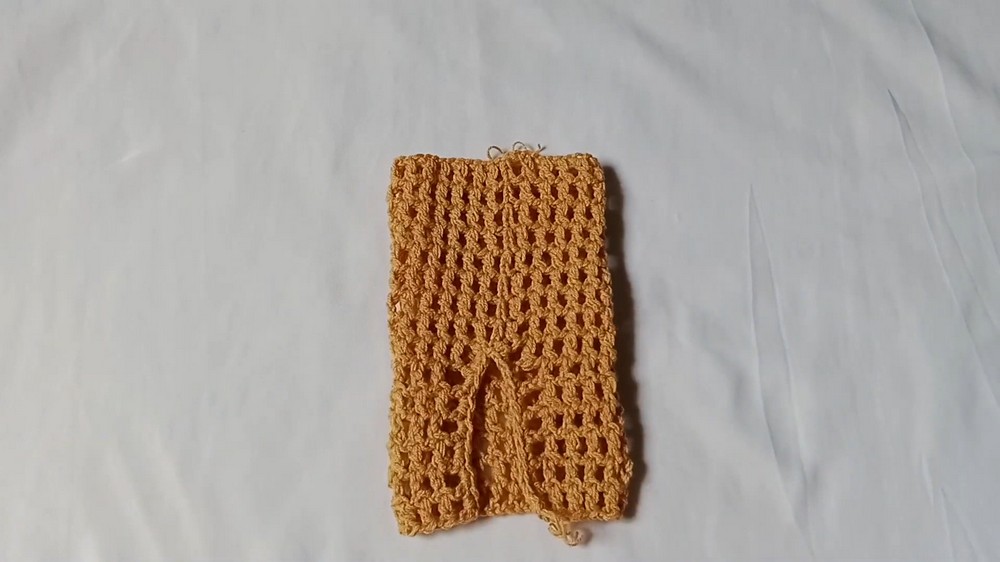
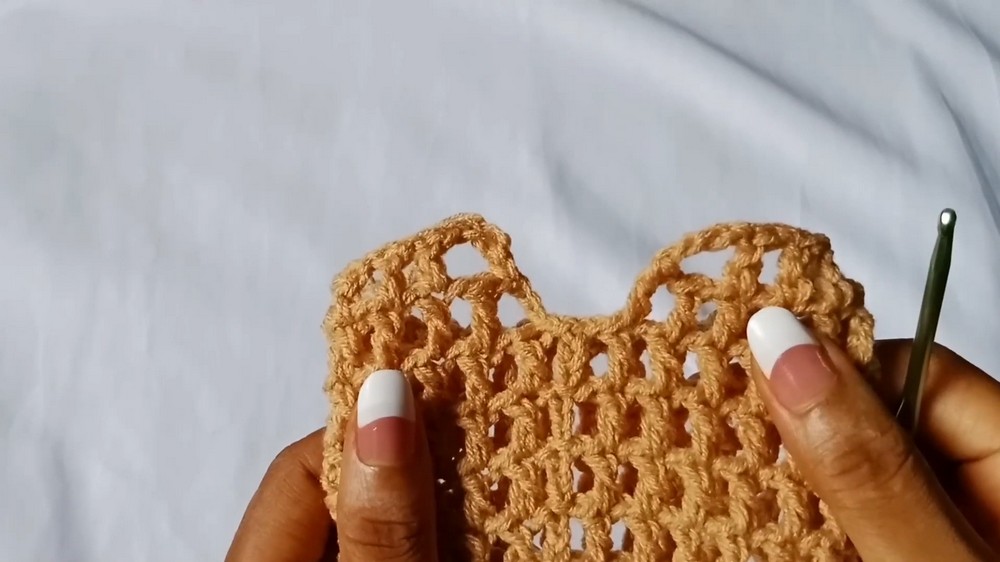
6. Forming the Slit
First Row of Slit:
- Slip stitch into the next chain-1 space.
- Slip stitch into the next stitch.
- Chain 4.
- Double crochet in the next stitch, chain 1.
- Double crochet in the next stitch, chain 1.
- Continue double crochet, chain 1 across until one stitch before the beginning chain 4 of the previous row.
- This creates the slit opening.
7. Working the Slit Rows
- Chain 4, turn.
- Skip one stitch.
- Double crochet in the next stitch, chain 1.
- Repeat double crochet, chain 1 until two stitches remain.
- Chain 1, skip next stitch, double crochet in the last stitch.
- This reduces one stitch at the beginning and the end to accentuate the slit.
- For all following rows, chain 4, turn, double crochet in next stitch, chain 1 across the row to the last stitch, chain 1, double crochet in last stitch.
- Repeat this row until the slit reaches your desired length.
8. Neatening the Slit Edge
- Make sure the number of rows in the slit section is an odd number for neat edges.
- Turn your work up the slit.
- Chain 1.
- Place 2 double crochets in each double crochet space up the slit.
- Place a slip stitch into the middle stitch (the original chain 4 stitch forming the slit).
- Turn the work to the other side of the slit.
- Place 2 double crochets in each double crochet space down the other side of the slit.
- Chain 1 and fasten off.

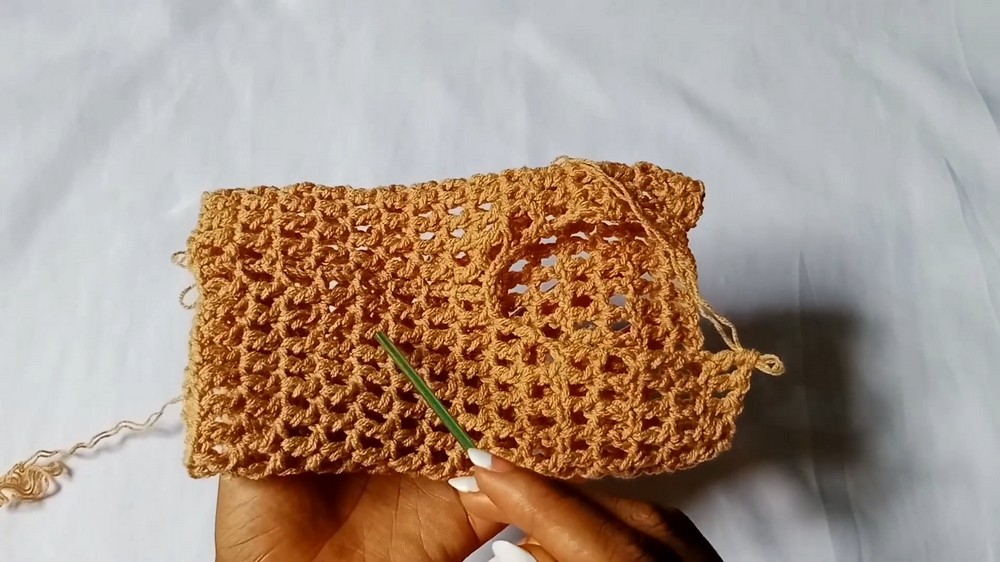
9. Waist Tie
- Chain about 250 stitches for the waist tie or adjust based on your waist size.
- To attach ties, find the middle stitch on your skirt.
- Loop the tie around every 3 stitches, skipping the middle stitch of the tie loop.
- Pull the end of the tie through each loop and continue all around the skirt to create the waist tie.
Tutor’s Tips
- Always keep your stitch count consistent, especially in the slit rows.
- Ensure your chains and stitches stretch comfortably for easy fitting.
- Using a multiple of even chains helps the pattern remain symmetrical.
- The slit should be an odd number of rows for a neat finish.
- Experiment with yarn colors for a vibrant look.
Uses
- Ideal for summer and spring wear.
- Great for casual days, parties, or beach cover-ups.
- Can be paired with sandals or flats, perfect for comfortable style.
Conclusion
This crochet skirt is a wonderful project for beginners and intermediate crocheters who want a stylish, easy-to-wear garment. The simple stitch pattern combined with a fashionable slit and waist tie makes it a versatile piece to add to your wardrobe.
Leave a Reply