
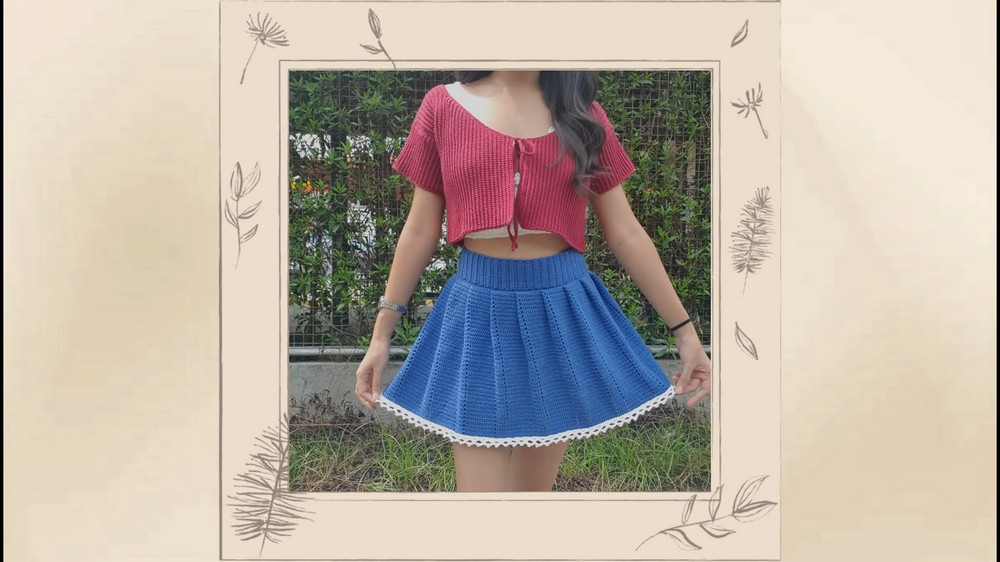
Twirl into style with this Crochet Pleated Skirt Pattern featuring flowing layers a flattering fit and a playful handmade charm perfect for any sunny day.
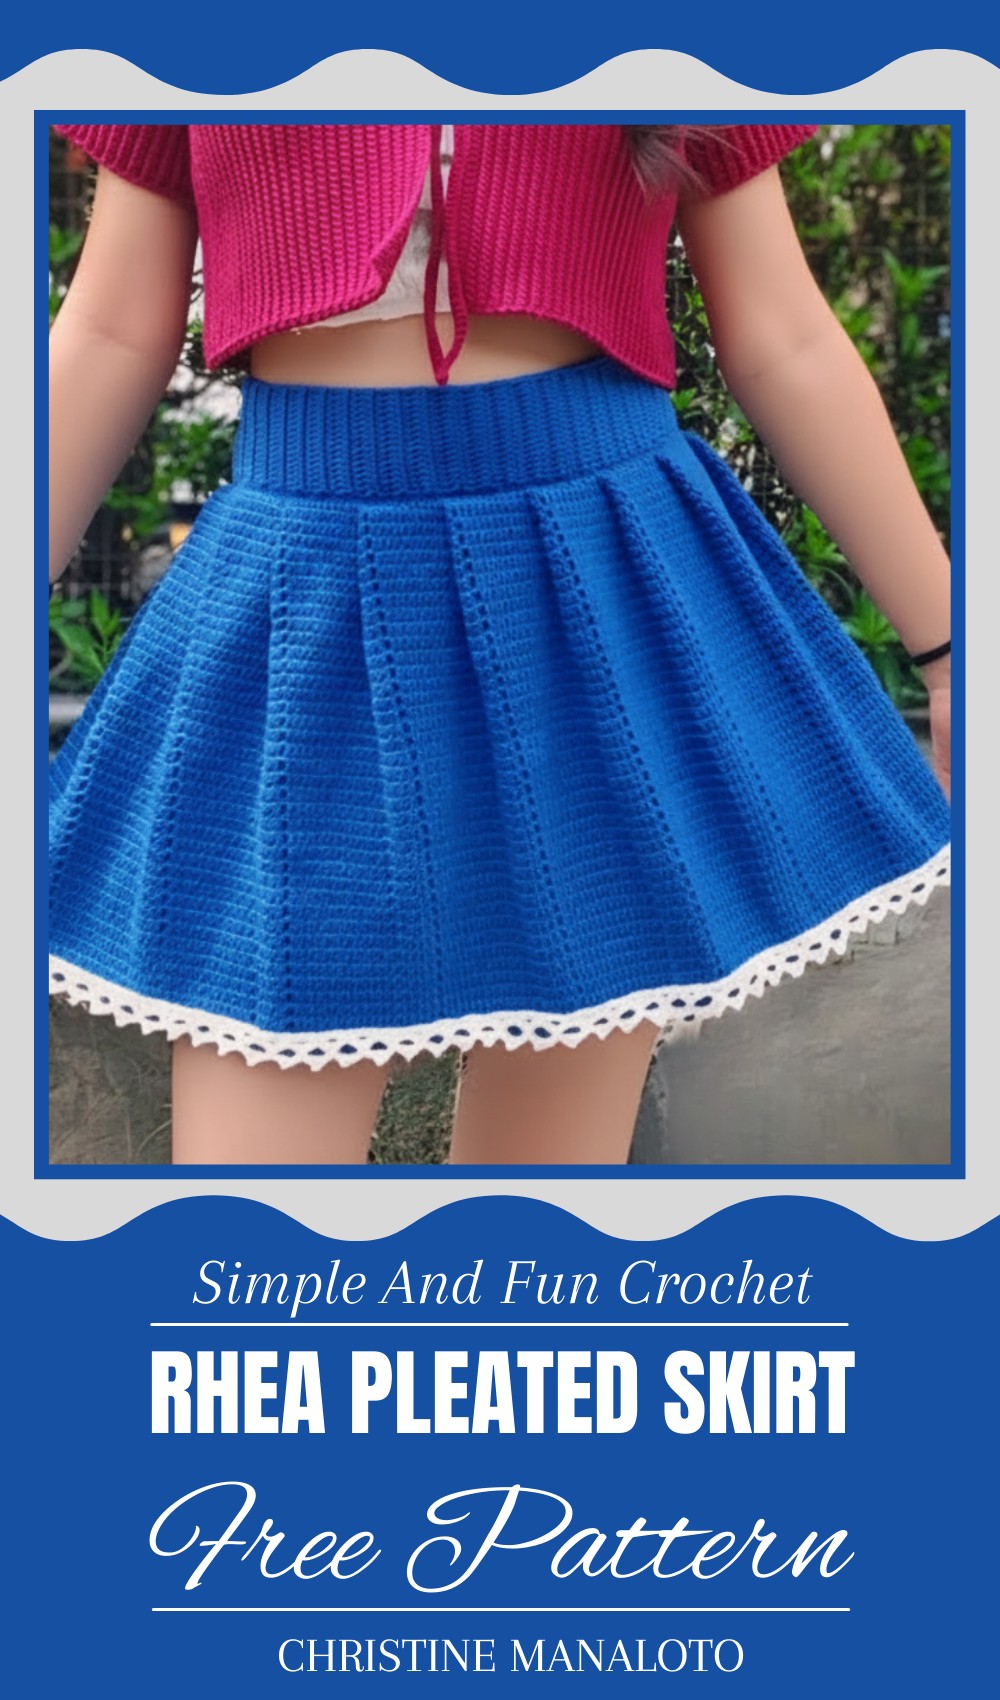
Detailed Crochet Pleated Skirt Pattern for Polished Handmade Looks
Add a fresh and fun twist to your wardrobe with this pleated skirt that moves beautifully with every step you take. The skirt’s soft folds give it a lovely look, making it feel both stylish and comfortable. Made from gentle yarn, it is light and cool, perfect for warm days or breezy evenings. Its pleated design adds a smart and neat touch that looks great whether you’re going out with friends or enjoying a quiet day at home.
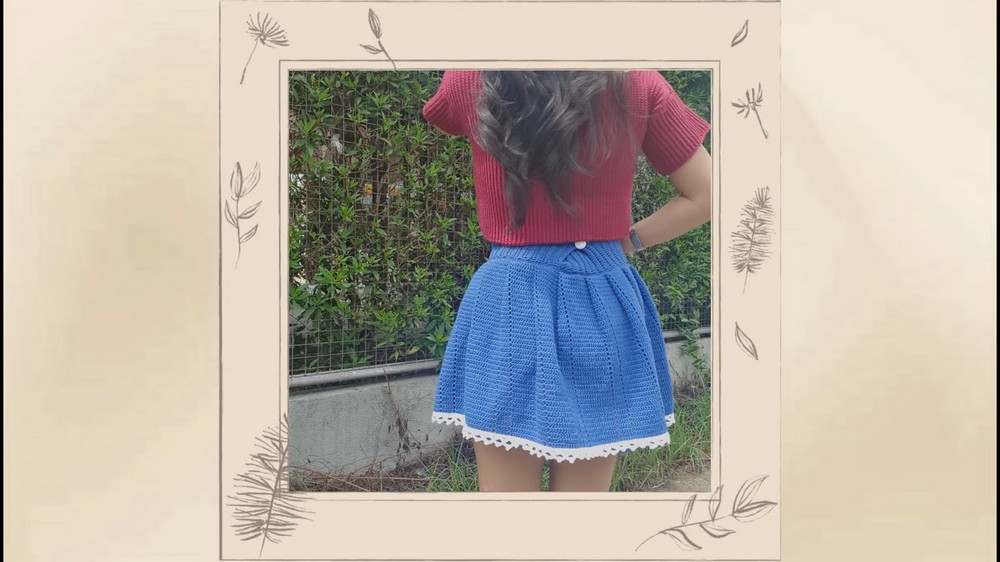
The skirt fits nicely around the waist, making it easy to wear all day without fuss. You can pair it with simple tops for a casual look or dress it up for special moments. This pleated skirt is a happy mix of comfort and charm, perfect for anyone who wants to add a little grace and fun to their outfit. Enjoy wearing something soft, pretty, and easy to love.
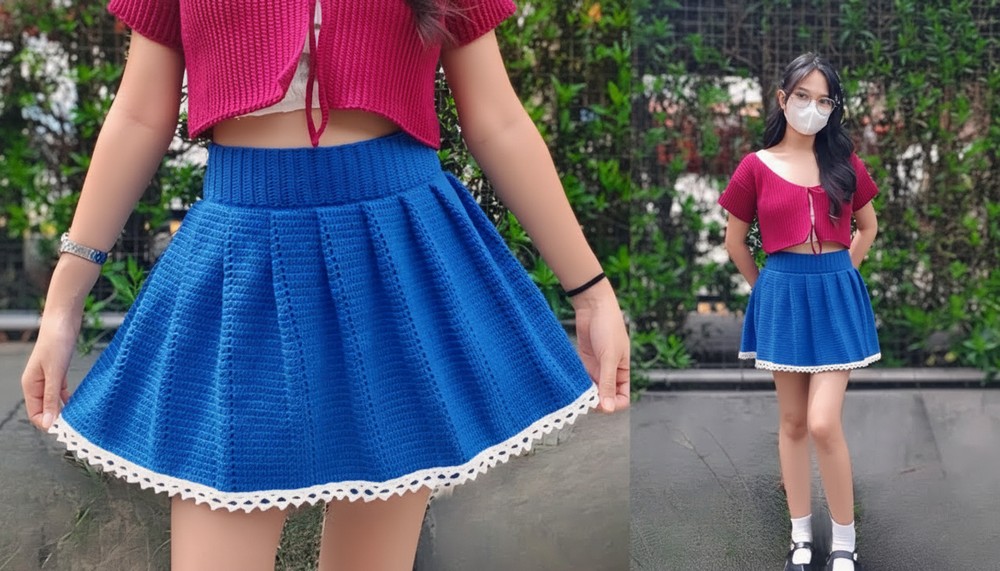
Rya Plaited Skirt Crochet Pattern
Special Features
- Adjustable waistband tailored to your waist measurement
- Textured plaited (braided) design created with front and back loop work
- Intricate lace edging for a delicate finish
- Interplay of half double crochet (hdc) and double crochet (dc) stitches
- Beautifully structured flowing skirt suitable for various occasions
Difficulty Level
Intermediate – Requires familiarity with half double crochet, double crochet, working in front/back loops, increases, decreases, slip stitches, and lace patterning.
Materials Needed
- Yarn of your choice (recommended any yarn suitable for a 2-5 mm hook)
- Crochet hook matching yarn thickness
- Stitch markers
- Buttons for back closure
- Scissors
- Yarn needle
Step-by-Step Crochet Pattern
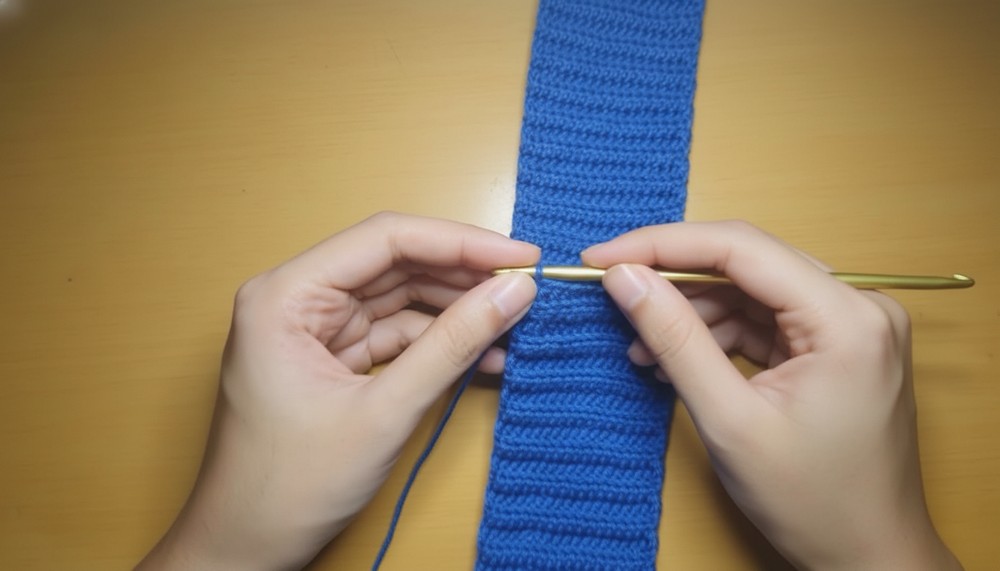
Step 1: Waistband Foundation
- Make a slip knot, chain 18 or adjust chains for desired waist circumference.
- Starting in 2nd chain from the hook, work 1 half double crochet (hdc) in each chain across. (Total 17 hdc)
- Turn your work.
Step 2: Waistband Rows – Ribbing
- Chain 1 and turn.
- Work hdc in back loops only across the row, except on the last stitch—work hdc in both front and back loops of last stitch to finish the row.
- Chain 1, turn, and repeat the pattern on back loops only for each subsequent row to create ribbing texture, always finishing with a hdc in both loops on the last stitch.
- Repeat until you have completed 99 rows or until the waistband wraps comfortably around your waist without stretching.
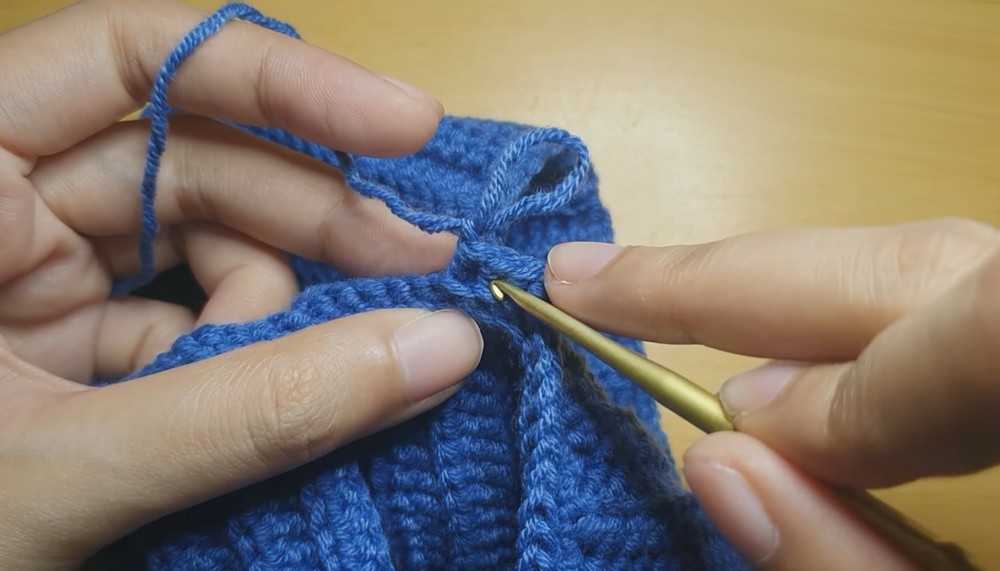
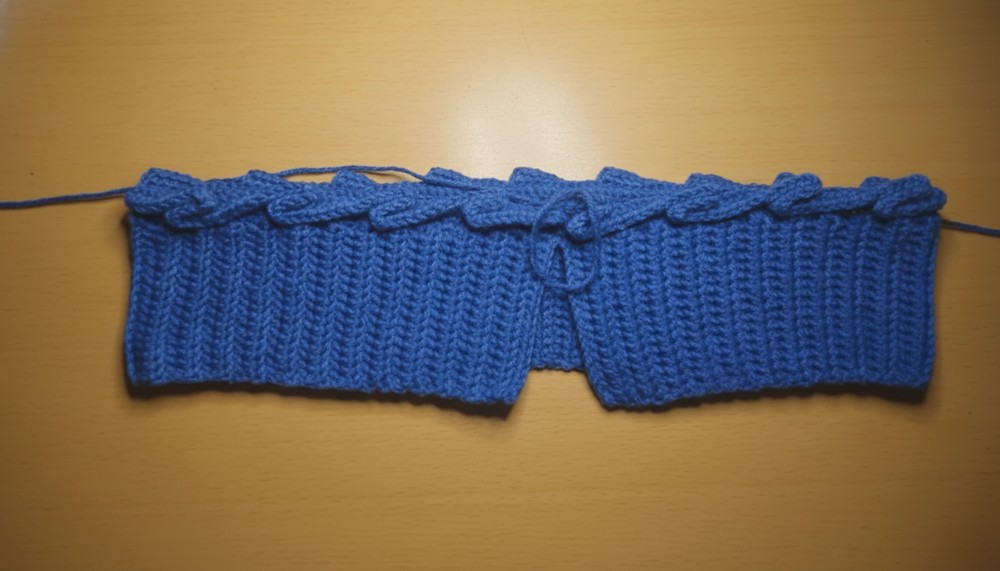
Step 3: Joining Waistband Ends
- Attach yarn to last hdc of the final row, chain 1.
- Join ends by working single crochet (sc) around the edge, connecting the two ends, working increases for shape:
- Round 1: 2 sc in first stitch, then 1 sc in the next; repeat all around.
- Round 2: 1 sc in each of 5 stitches, then 2 sc in the next stitch; repeat all around.
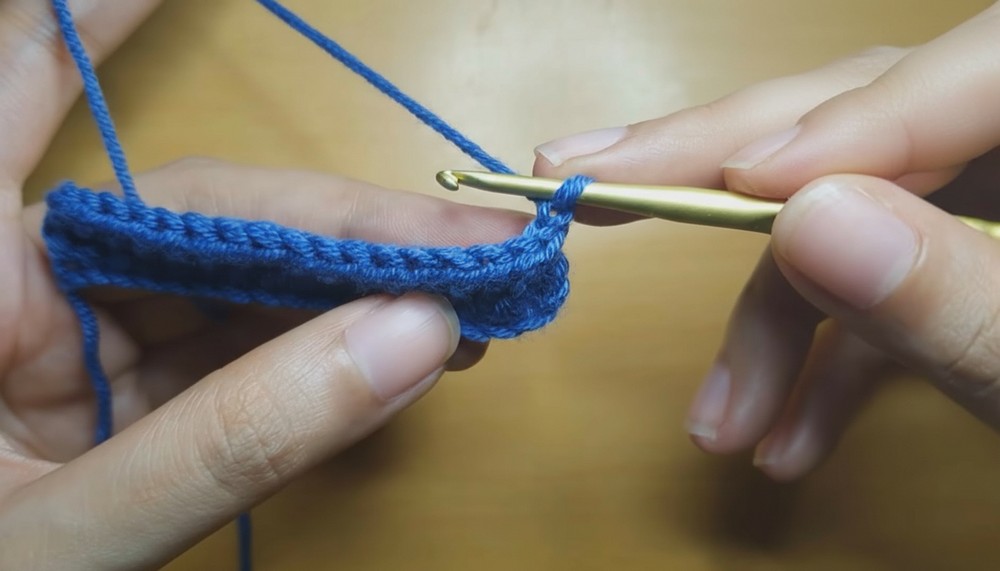
Step 4: Round 3 – Single Crochet in Front Loops
- Chain 1, work sc in front loops only around the entire waistband; join with slip stitch.
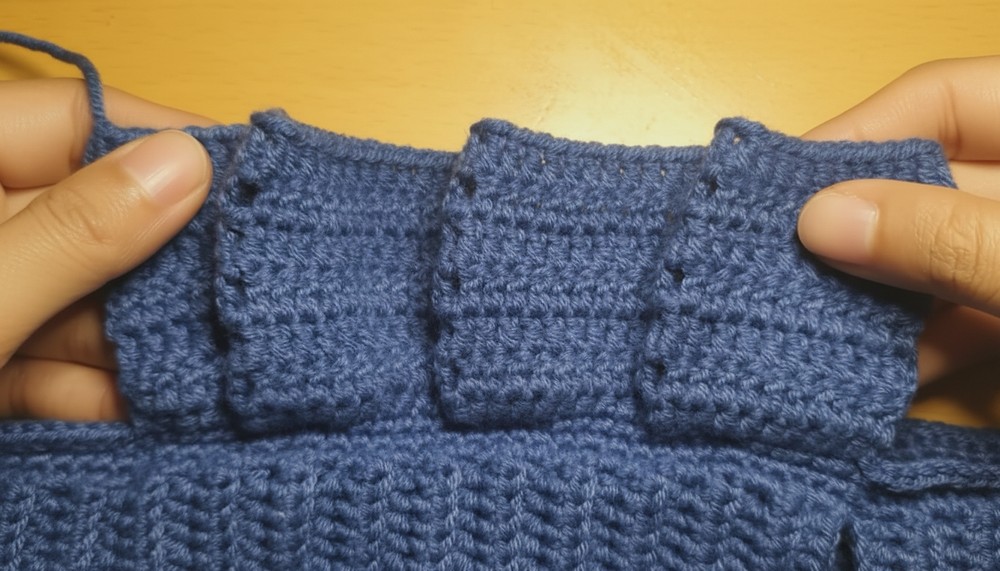
Step 5: Round 4 – Plaited Pattern Formation
- Chain 1, work hdc in front loops only on next 10 stitches, chain 1, turn.
- Work hdc behind previous stitches, starting on the 10th stitch of previous round, making 5 hdc behind stitches.
- Chain 1, turn.
- Work 4 hdc in back loops aligned with previous hdc.
- Repeat this front and back loop pattern forming repeated plait units (creating a “Z” shape visually).
- Slip stitch to join the end of round.
Step 6: Round 5 – Refinement of Pattern with Double Crochet
- Chain 2, work 1 double crochet (dc) in each of the next 10 stitches starting at first stitch.
- Chain 1, turn.
- Work 5 dc over the previous half double crochets, then 4 dc over the next aligned stitches, forming the plait finish.
- Slip stitch and continue repeating this pattern for subsequent rounds.
Step 7: Repeat Pattern & Length
- Repeat Round 5 until skirt reaches your desired length (e.g., 38 rounds or longer).
- Do not cut yarn after final round as extra finishing rounds will be added.
Step 8: Additional Rows for Finish
- Chain 2, work dc in back loops only for all stitches.
- Slip stitch to end row.
- Chain 2, work dc normally in all stitches.
- Slip stitch to finish.
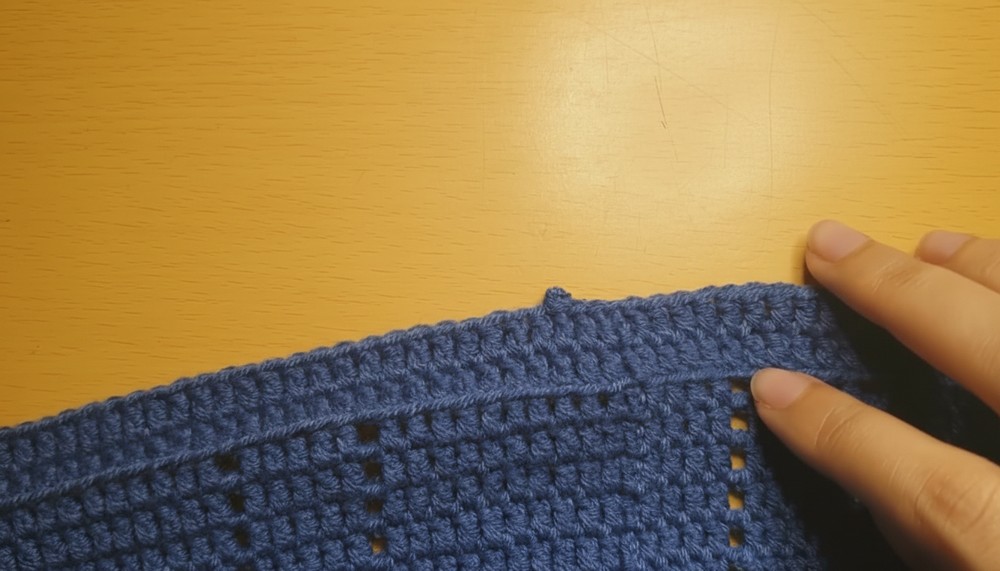
Step 9: Lace Detail Edging (Using Contrasting Yarn)
- Attach contrast (white) yarn on front loops that were skipped earlier.
- Sc in the same stitch to secure.
- Work sc all around front loops for uniform edging.
- Chain 4, skip 2 stitches, sc in next 2 stitches, repeat around creating lace pattern.
- Chain 4, slip stitch in first stitch, repeat to end.
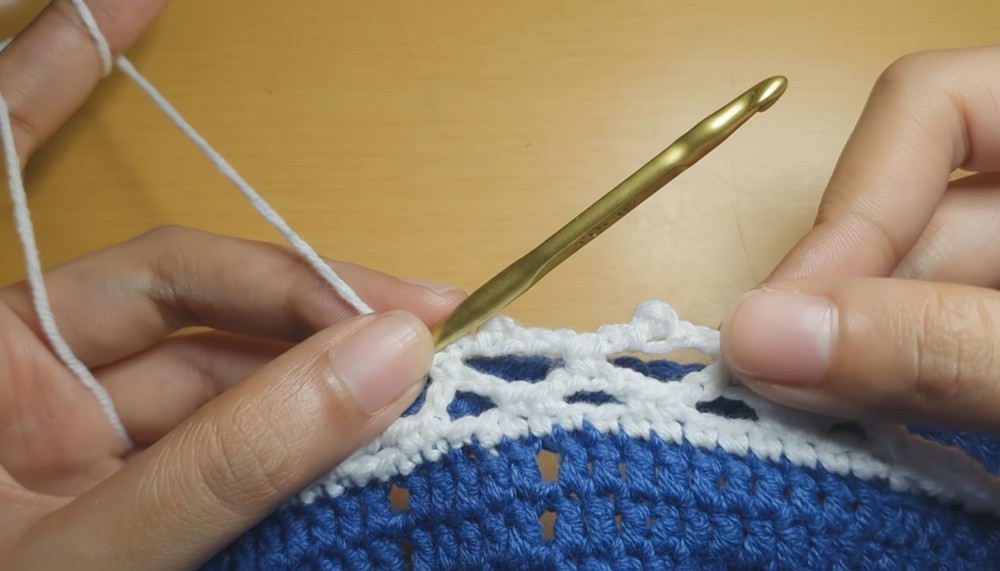
Step 10: Final Round (Lace Scallops)
- Chain 5, slip stitch in 3rd chain from hook, chain 2, sc in middle of chain space.
- Repeat chain 5, slip stitch, chain 2, sc in middle of next chain space around.
- End with chain 1 and fasten off.
Step 11: Closure
- Attach a button at the back waistband for closure.
- Weave in all ends.
Tutor’s Suggestions
- Take care to maintain consistent tension, especially when switching between front loop and back loop stitches to keep pattern uniform.
- Add or subtract chains in waistband foundation based on waist circumference for best fit.
- When working the lace edging, ensure your stitch count matches the skipping pattern for an even edge.
Uses
- Elegant handmade skirt fit for casual or semi-formal occasions
- Lightweight and breathable for warm weather
- Adjustable sizing with customizable waistband circumference
- A stylish addition to any summer wardrobe or festival outfit
Helpful Tip
While working the plaited pattern, pay close attention to stitch placement in front and back loops to keep the braided effect crisp and clean. Practice on a swatch to get comfortable with “working behind stitches.”
Conclusion
The Rya Plaited Skirt is a gorgeous crochet project that masterfully combines texture, structure, and style with an adaptable fit. It enhances your crochet skills by using front/back loops and creative stitch placement, resulting in a sophisticated skirt perfect for many occasions.
Leave a Reply