
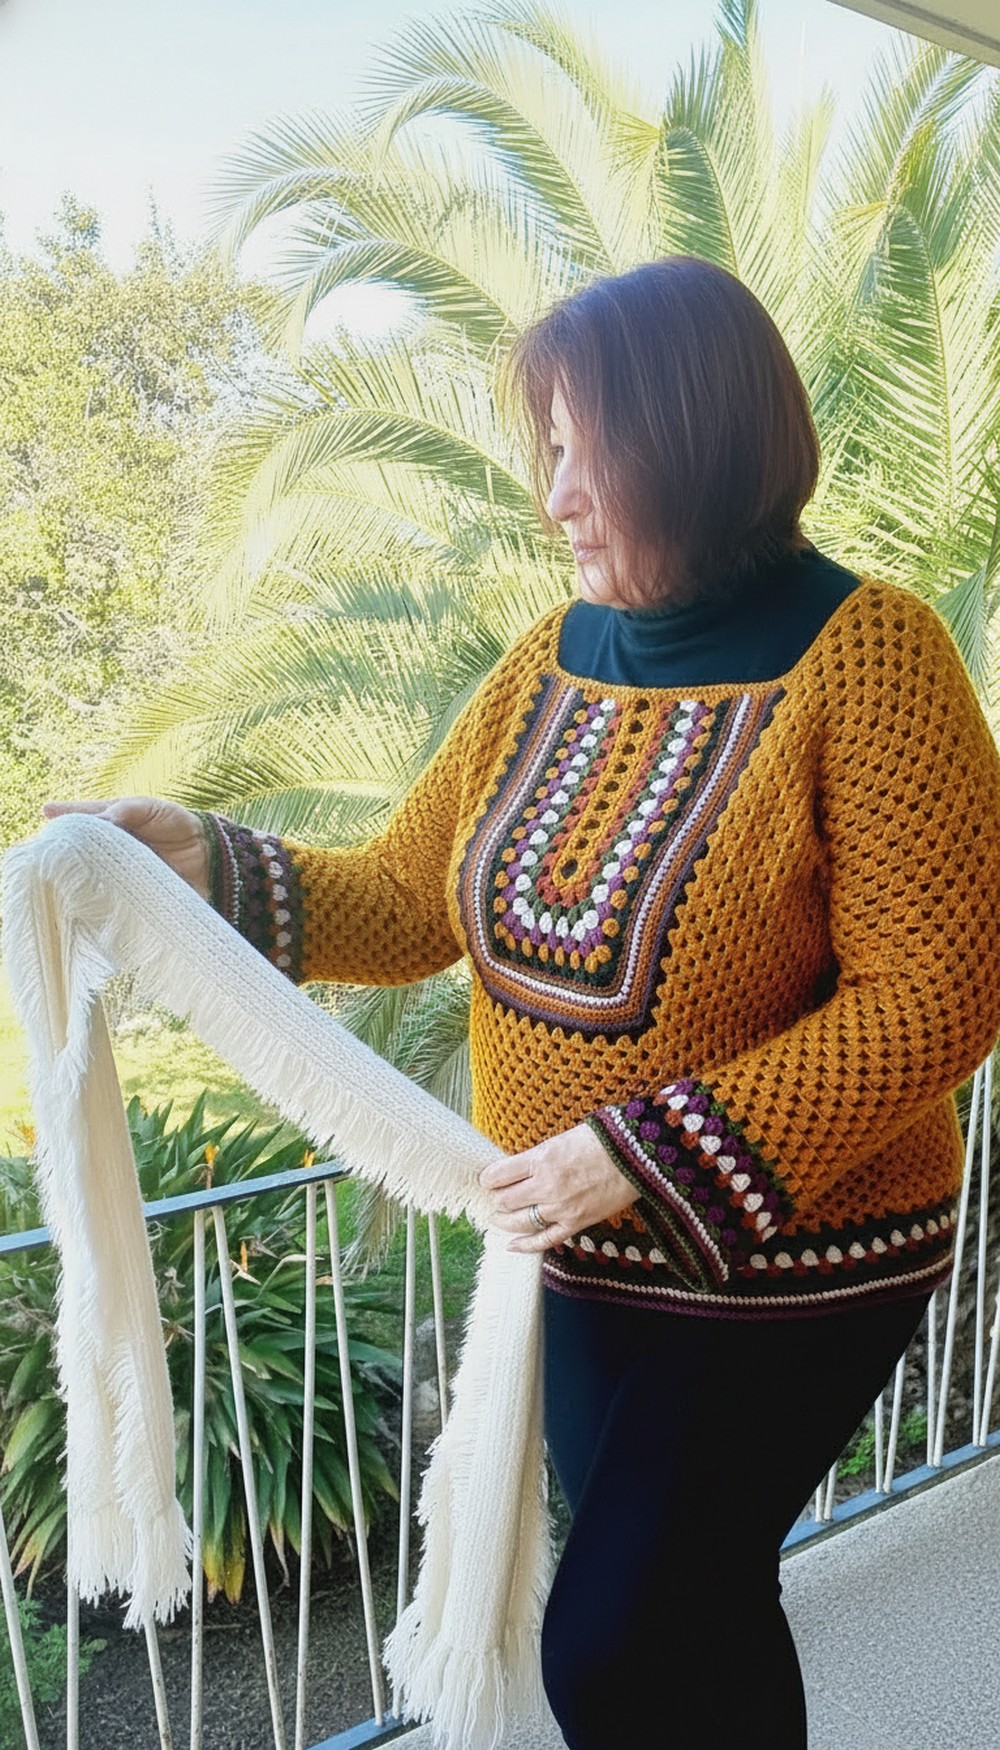
Nostalgic flair returns with this Crochet Retro Granny Square Sweater Pattern packed with bold colors, cozy comfort, and a statement look for cool days.
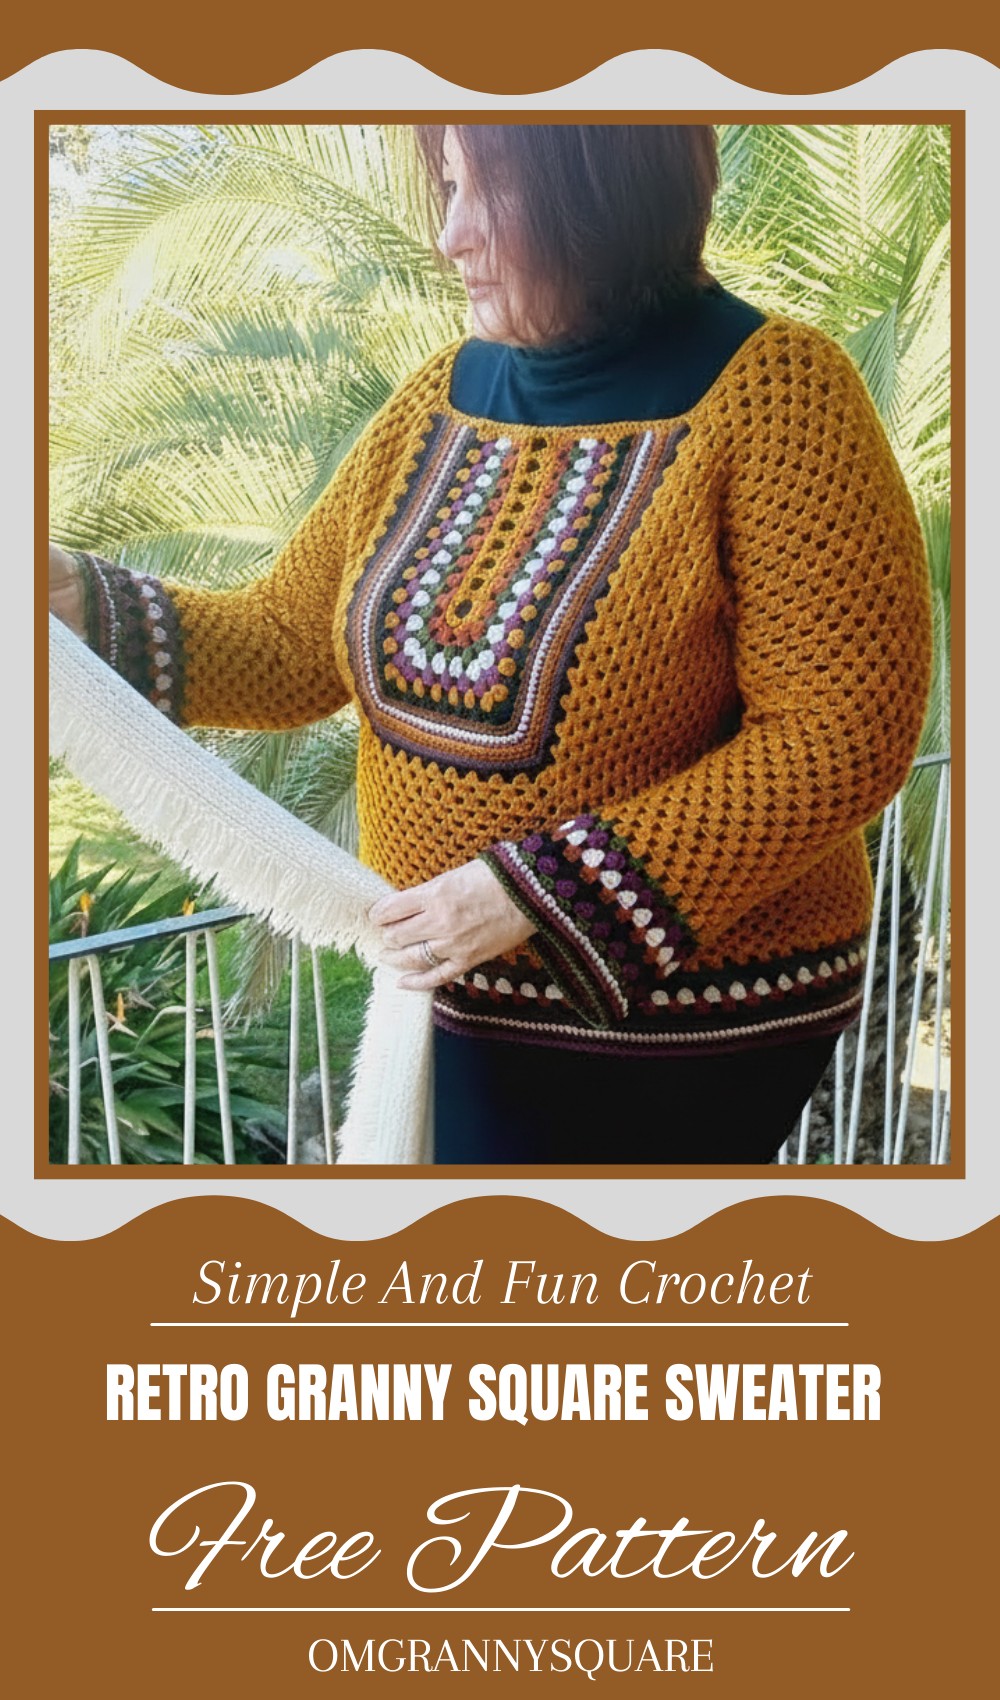
Cozy Crochet Retro Granny Square Sweater Pattern for Handmade Gifts
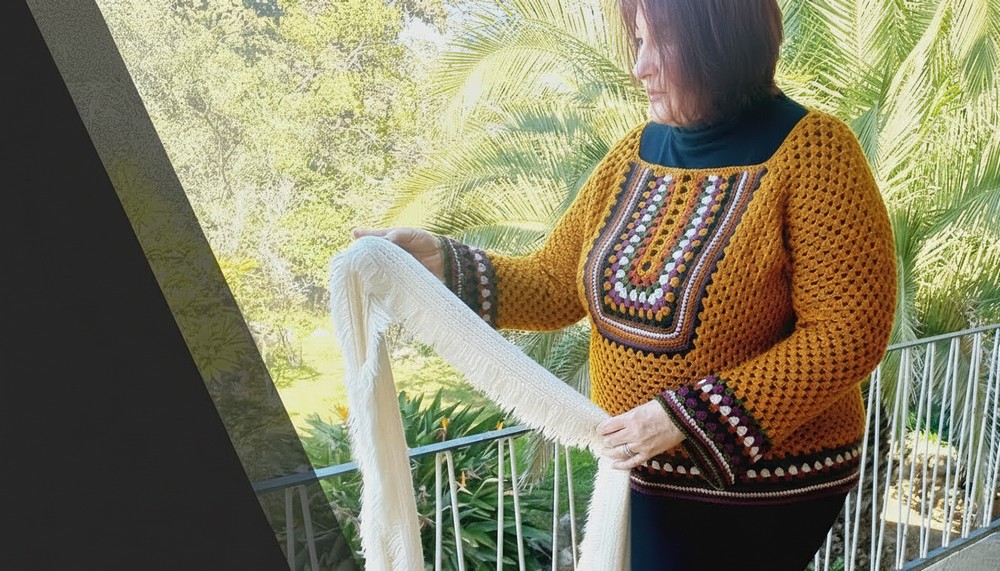
Bright colors and bold patterns bring a fun, nostalgic vibe to this retro granny square sweater. Each square is like a little piece of art, combining to create a cozy and eye-catching garment that stands out in any crowd. Its relaxed fit makes it comfortable to wear all day, whether you’re lounging at home or heading out for a casual outing.
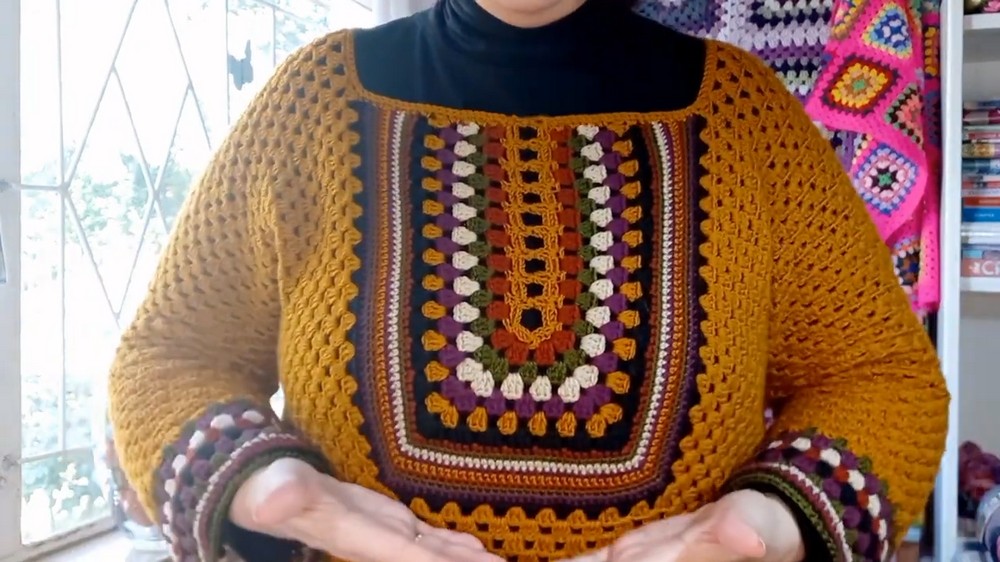
Beginners will appreciate the straightforward granny square technique, which offers a perfect balance of challenge and simplicity, helping you build confidence stitch by stitch. This sweater is perfect for adding a playful touch to cooler days without sacrificing warmth. The classic granny square design mixed with modern color choices gives it a timeless yet fresh look, making it a versatile addition to any wardrobe. Fun to make and even more fun to wear, this retro-inspired sweater turns crochet skills into a stylish statement piece.
Retro Granny Square Sweater Crochet Pattern
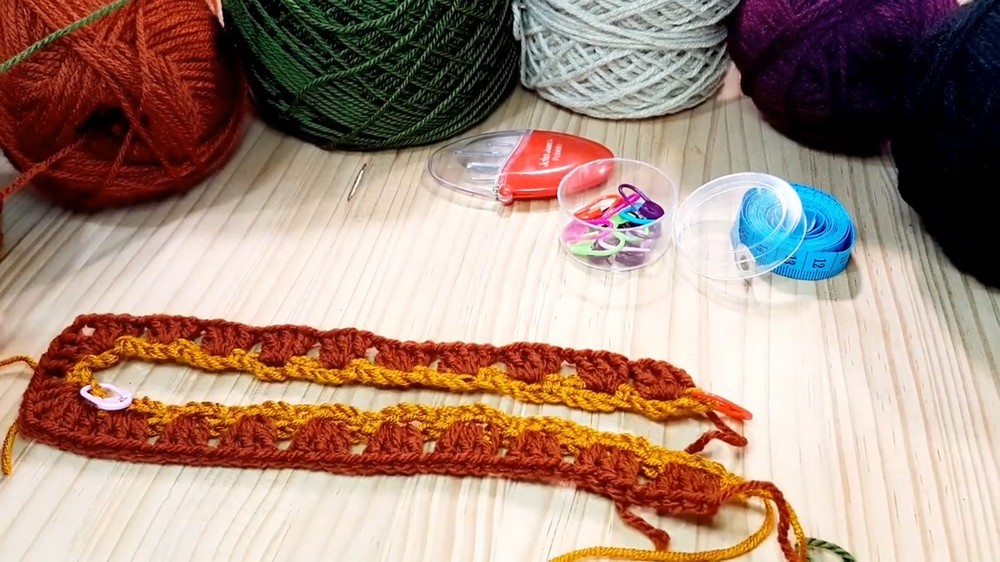
Materials Needed
- 3 weight double knit (DK) yarn in 6 balls for main color + one ball each for 5 contrast colors (approx. 300m per ball for main color)
- 4 mm crochet hook
- Scissors
- About 20 stitch markers
- Yarn needle
- Measuring tape (inches/cm)
Special Features
- Freestyle granny stitch construction; minimal counting except initial foundation
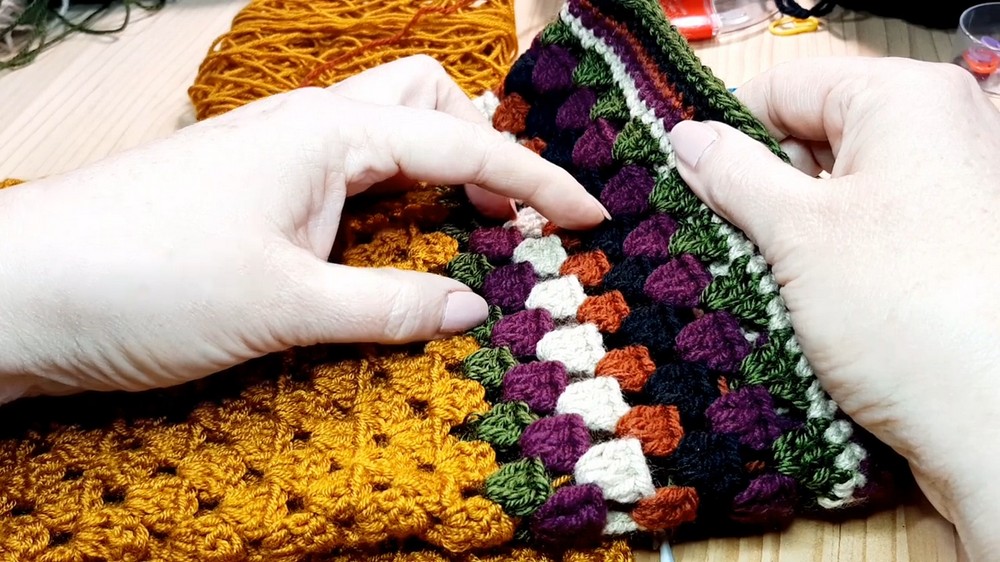
- Classic granny stitch clusters with chain spaces create stretchy fabric
- Boho-style sleeves with optional decreases
- Seamless join with crocheted edges, no sewing needed
- Adjustable length and width by adding/removing rows
Level of Difficulty
Beginner to Intermediate: Basic knowledge of chaining, single crochet (sc), double crochet (dc), granny stitch clusters, and slip stitch required. Minimal stitch counting with emphasis on measuring fit during progress.
Step-by-Step Pattern Instructions
1. Foundation Chain
- Make a slip knot, chain 40, place a stitch marker.
- Chain another 40 + 1, total chains = 81.
- This foundation forms the width of the front panel.
2. First Row: Single Crochet with Chain Spaces
- Work a single crochet (sc) in the 2nd chain from the hook.
- Chain 3, skip 3 chains, sc in fourth chain, chain 3, skip 3 chains, repeat across foundation.
- End with a sc in the last chain.
- Cut, fasten off. This forms the base with chain-3 spaces for next rounds.
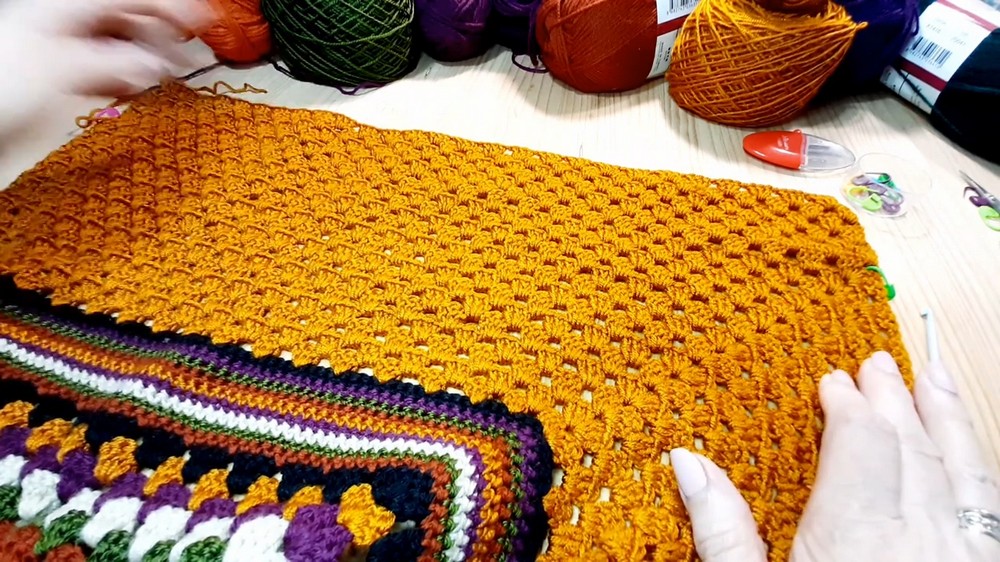
3. First Color Round (Main Color – mustard yellow)
- Join yarn in any 3-chain space, work:
- 1 sc, chain 2 (counts as dc + chain 1), 2 dc in same space (3 dc cluster)
- Chain 1, repeat 3 dc cluster in each 3-chain space along row, chain 1 between.
- At the row ends, work corners: 3 dc, chain 2, 3 dc all in same 3-chain space.
- Join with slip stitch.
4. Work Granny Stitch Rows (Color Changes)
- Change color every row or every few rows for retro stripes.
- Repeat:
- In each chain-1 space, work 3 dc clusters.
- At corners, work corner cluster: 3 dc, chain 2, 3 dc in same space.
- Chain 1 between clusters.
5. Creating the Neckline and Shoulders
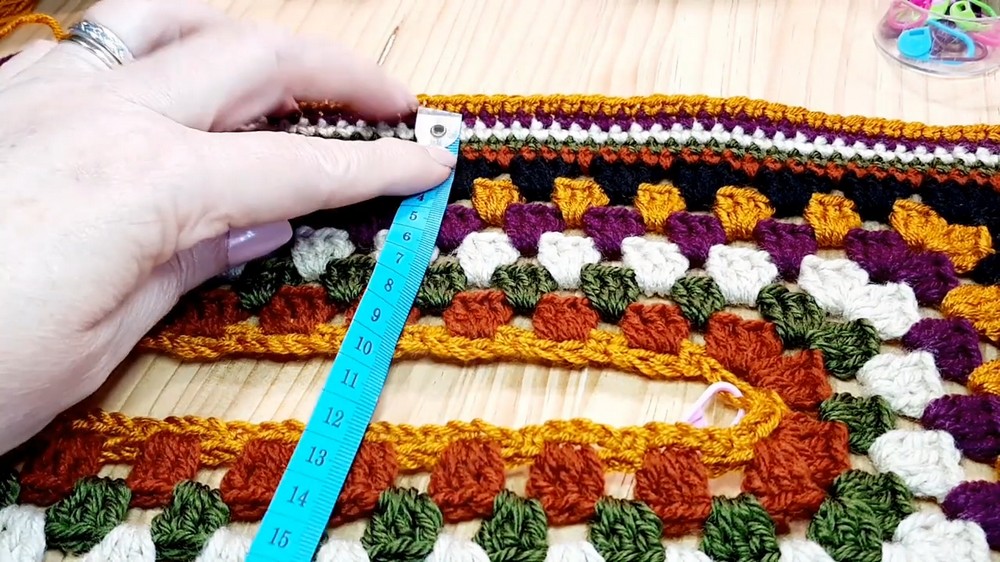
- Measure width across chest and neck area in front of mirror.
- Chain the number of stitches to correspond with the neck depth/width you want.
- Attach chains evenly to the last row and continue working granny stitch clusters over the chains to form the neckline extension and shoulders.
- Adjust stitch counts by fudging skips or working extra clusters when needed.
6. Back Panel: Granny Square Formation
- Start with chain 5, join with slip stitch to form ring.
- Round 1: chain 5 (counts as dc + chain 2), 3 dc cluster in ring, chain 2, 3 dc cluster, chain 2 repeat 3 times, join.
- Continue rounds building granny square with 3 dc clusters and chain 2 corners, slip stitch in back loop to avoid twisting.
- Make enough rounds to have length equal to front panel.
- Add extra rows of granny stitch on the sides (right and left) evenly to match the front panel width.
7. Join Front & Back Panels
- Place front and back panels with right sides facing in (wrong side out).
- Use stitch markers to align shoulder and side seams.
- Seam with single crochet stitches through corresponding stitches/posts (2 sc per dc).
- Ensure that no stitches are missed or extra stitches created to keep seams even.
8. Neck and Front Edge Finishing
- Turn the garment right side up.
- Work round of single crochets around neckline and front edges, skipping no stitches.
- To create decorative loops edge (shoelace effect), chain 5 between single crochets at even intervals, slip stitch back beside each single crochet for a neat finish.
9. Bottom Rib Detail
- Along bottom edge, work granny stitch clusters with occasional decreases over gaps to prevent “toothy” gaps.
- Continue changing colors for stripes and contrast.
- Complete with several rounds of single crochet for neat finishing.
10. Sleeves with Decreases and Boho Style
- Join yarn under armhole and work granny stitch clusters in rounds, marking start with stitch marker.
- Turn work at end of each round for easier handling and shaping.
- Decrease every fourth round by skipping chains and dc stitches as follows:
In the decrease chain space, work 2 dc instead of 3 dc cluster and omit chain-1 at this cluster. - Continue decreases until sleeve fits comfortably at elbow or desired length.
- Finish sleeve edge with several rounds of single crochet alternating colors.
- Optional increases in stitches at specific places create a boho slight flare.
Tutor’s Suggestions
- Use stitch markers liberally to mark important points: beginning of rows, decreases to keep track easily.
- Measure frequently by trying on garment as you go for best fit.
- If your yarn splits, take it slow and consider using one size larger hook.
- When decreases don’t line up perfectly, fudge stitch counts slightly to maintain overall look and symmetry.
- Weave in ends regularly while working to minimize finishing.
Uses
- Casual retro style sweater, suitable for cool spring/fall weather.
- Perfect with jeans or skirts as a layering piece.
- Unique gift with personalized color scheme and fit.
- Adaptable for various sizes and personal styles.
Tip
Every project is unique—do not be afraid to “fudge” stitches lightly around corners and joins to keep your work smooth and proportional. Freestyle crochet is about creativity and adjustment, so embrace small variations as part of the charm!
Conclusion
This retro granny square sweater blends classic crochet texture with modern boho style, offering customizable fit and vibrant color fun. Perfect for lovers of freestyle crochet, it allows creative expression through color changes and shaping.
Leave a Reply