
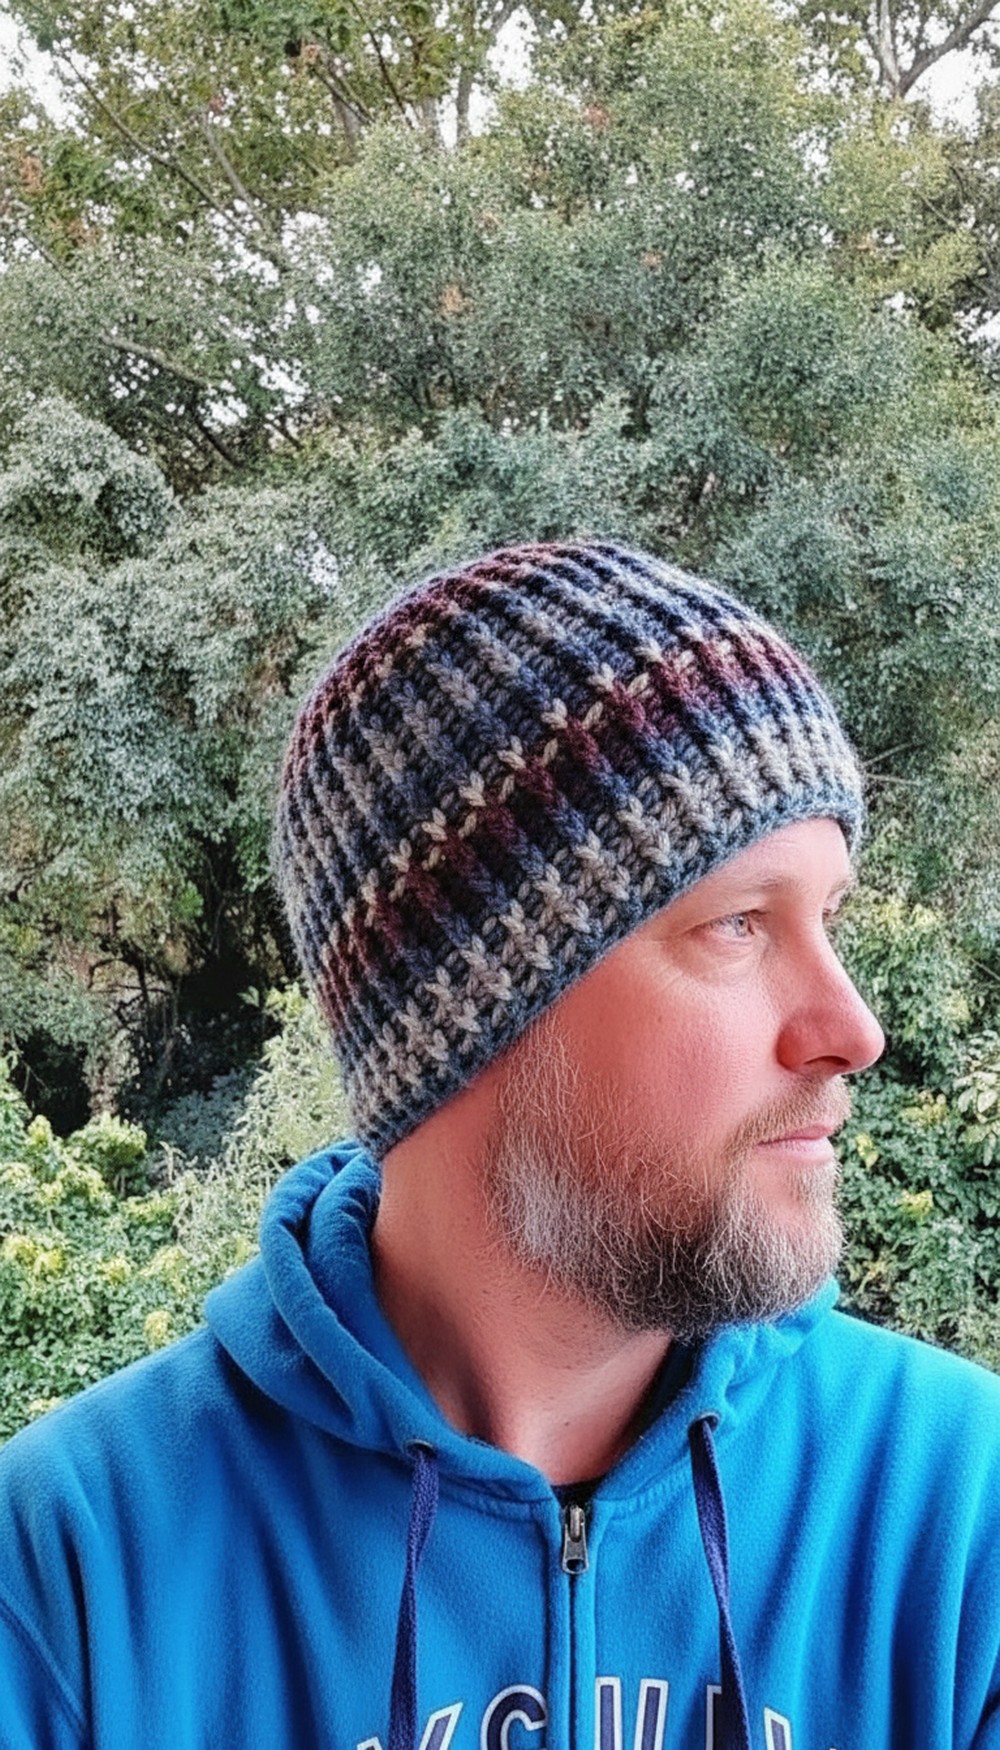
Keep cozy in style with this Crochet Men’s Beanie Pattern, featuring comfy textures, sleek design, and a versatile hat perfect for everyday wear or gifts.
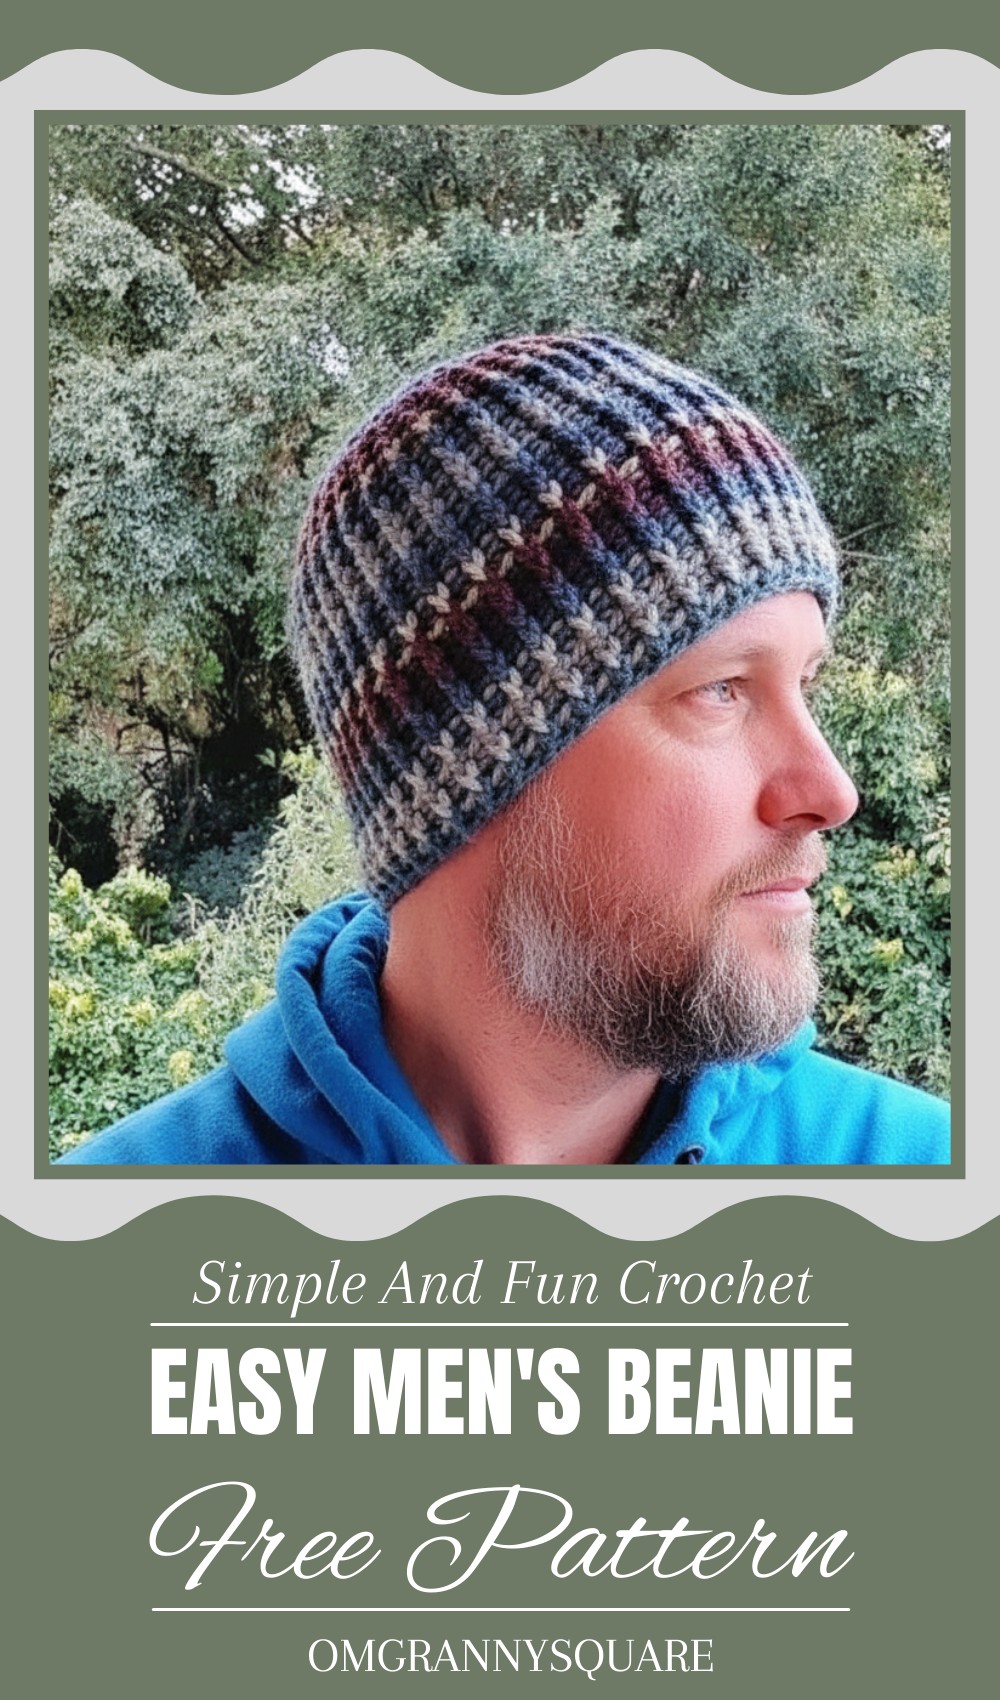
Easy Crochet Men’s Beanie Pattern That Looks Great With Jackets
Sturdy and stylish, this beanie brings both warmth and a classic look to any wardrobe. Its simple design makes it an ideal project for beginners who want to learn crochet while creating something practical. The snug fit helps keep the cold out, making it perfect for chilly days or outdoor adventures. Crafted with basic stitches, this beanie builds confidence through straightforward steps without overwhelming complexity.
The clean lines and versatile shape give it a timeless appeal, suitable for everyday wear or casual outings. Whether paired with a jacket or your favorite sweater, it adds an effortless touch of comfort and style. Easy to customize with different colors or yarn textures, this pattern invites creativity while focusing on functionality. Making this beanie is a satisfying way to develop new skills and end up with a cozy, handsome accessory made just for you or as a thoughtful gift.
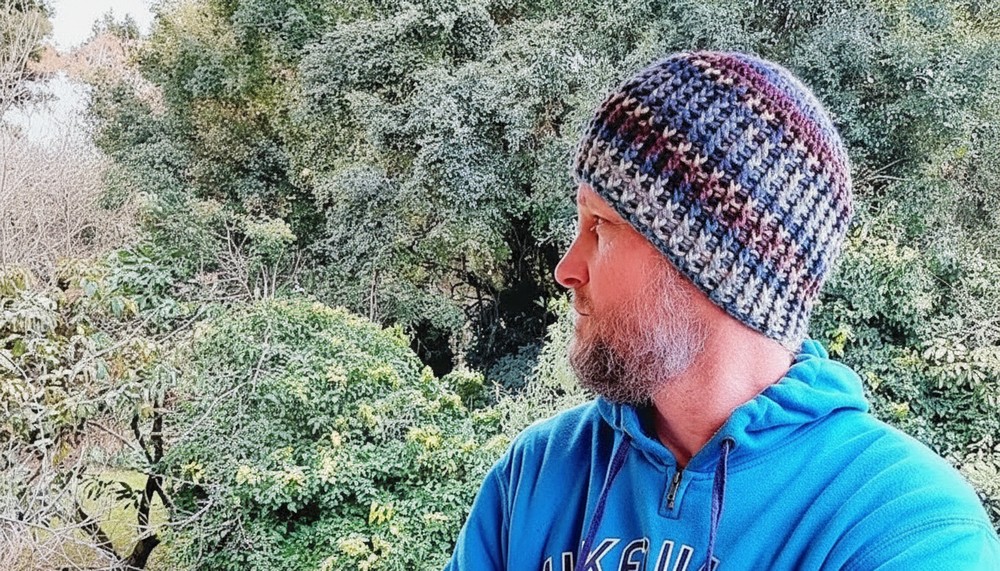
Crochet Beanie Hat Pattern with Front Post Back Post Ribbing
Special Features
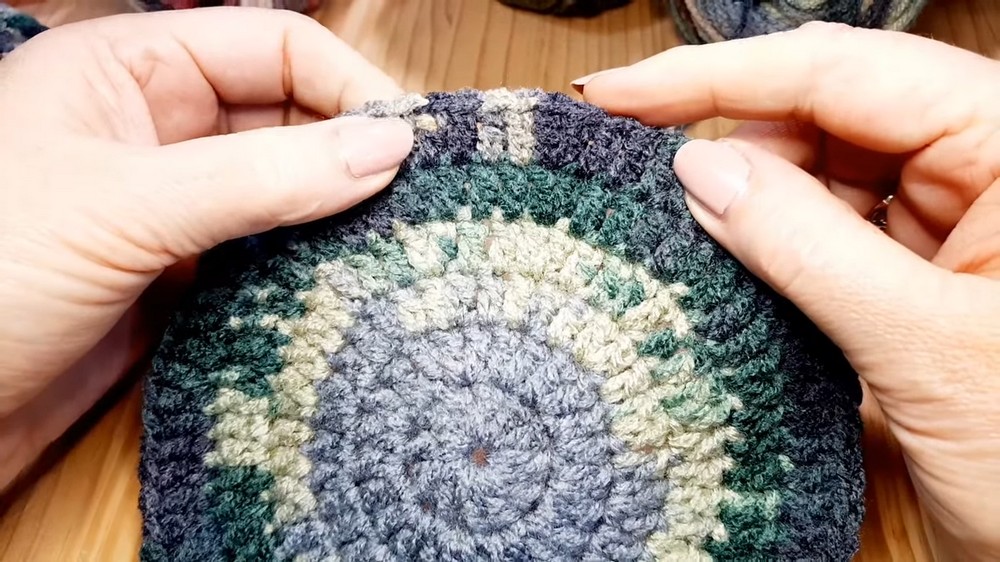
- Circular flat crown built with classic doubles and strategic increases.
- Textured front post back post double crochet ribbing for flexibility and warmth.
- Customizable size by stopping increases or adding rounds.
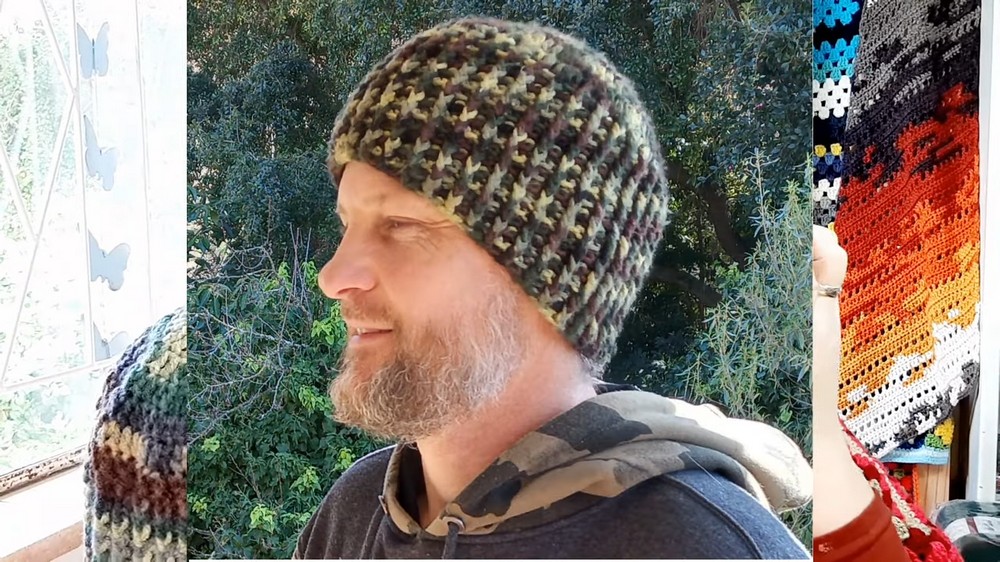
- Great drape and stitch definition from double knit/thicker 3-weight yarn.
- Perfect ear coverage with optional ribbing start position.
- Easy to modify ribbing placement for personal style.
- Works well with variegated or solid yarns, color shown beautifully.
Skill Level
Beginner to Intermediate:
Basic stitches (chain, single crochet, double crochet) plus front and back post double crochets. Familiarity with increasing rounds and counting stitches recommended.
Materials Needed
- 1 ball (100g, ~210m) double knit or 3-weight yarn (recommended acrylic blend)
- Crochet hook 4 mm (can use 4.5 mm or 5 mm depending on tension)
- Wool/darning needle for weaving in ends
- Scissors
Step-by-Step Pattern
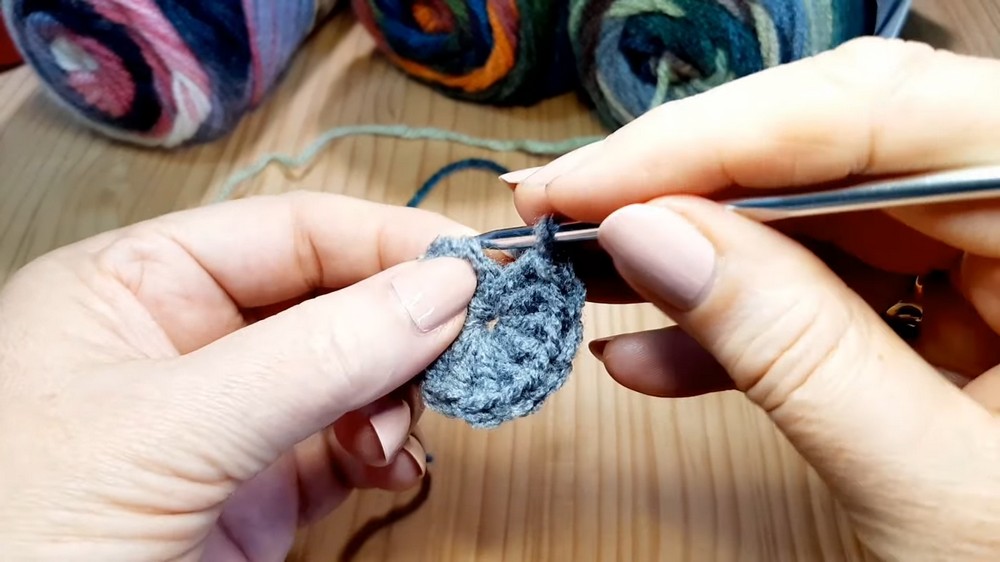
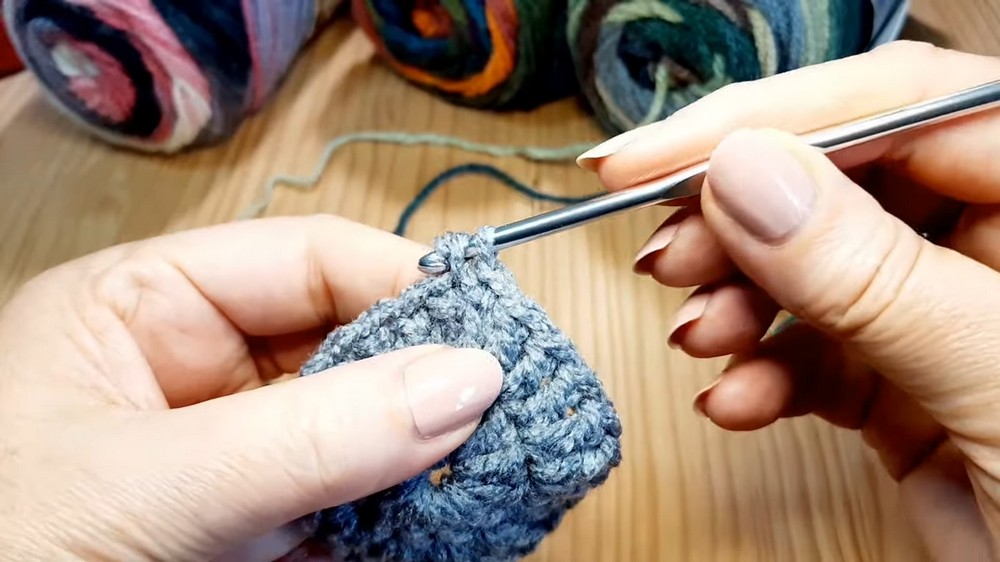
Starting the Crown
- Make a slip knot (not too tight), chain 3 (counts as a double crochet).
- Into the same stitch, work 11 double crochets (dc), making 12 dc total including the starting chain 3.
- Join with a slip stitch to the top of the starting chain 3 to form a round.
Round 2: Increasing Round
- In the next round, work 2 dc in every dc around.
You should have 24 stitches.
Round 3:
- Chain 1, single crochet into first stitch, chain 2 (counts as dc).
- Repeat the pattern around: increase (2 dc in one stitch), then 1 dc in the next stitch.
Resulting in 36 stitches.
Round 4:
- Slip stitch join round.
- Chain 1, single crochet into first stitch, chain 2 (dc).
- Work the pattern: increase (2 dc in one stitch), 2 dc in the next two stitches.
Resulting in 48 stitches.
Round 5:
- Join with slip stitch.
- Chain 1, single crochet into first stitch, chain 2 (dc).
- Work the pattern: increase, then 3 dc in the next three stitches.
Resulting in 60 stitches.

Round 6:
- Join with slip stitch.
- Chain 1, single crochet into first stitch, chain 2 (dc).
- Work the pattern: increase, then 4 dc in the next four stitches.
Resulting in 72 stitches.
This is the last increase round for the average adult head.
Optional: For larger heads, continue increasing rounds by adding one more dc between increases (e.g., increase, 5 dc; increase, 6 dc, etc.).
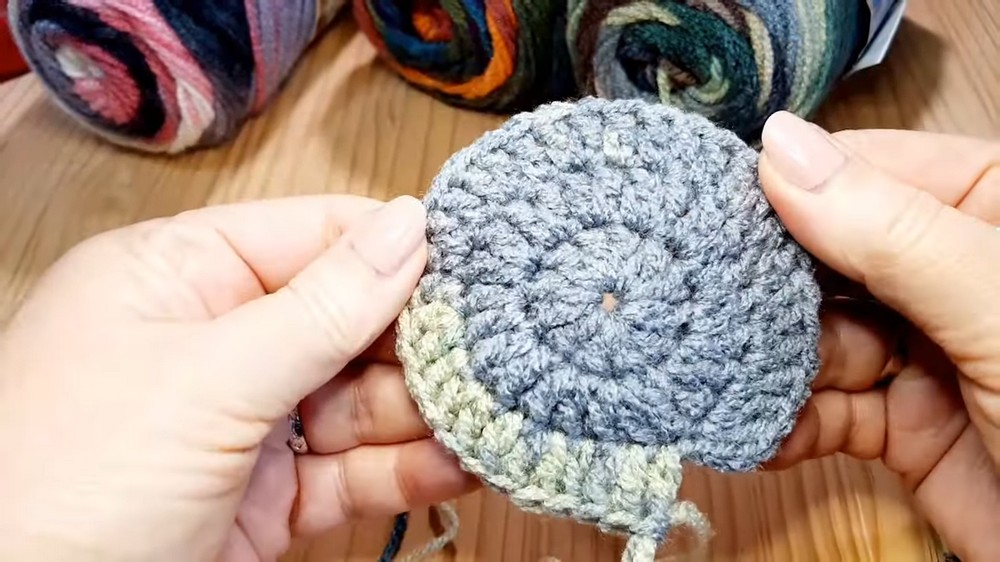
Body of the Beanie – No Increase Rounds
- Join with slip stitch.
- Chain 1, single crochet, chain 2 (dc).
- Work one dc in each stitch around — no increases or decreases.
- Continue until work measures approximately 17 cm across the crown.
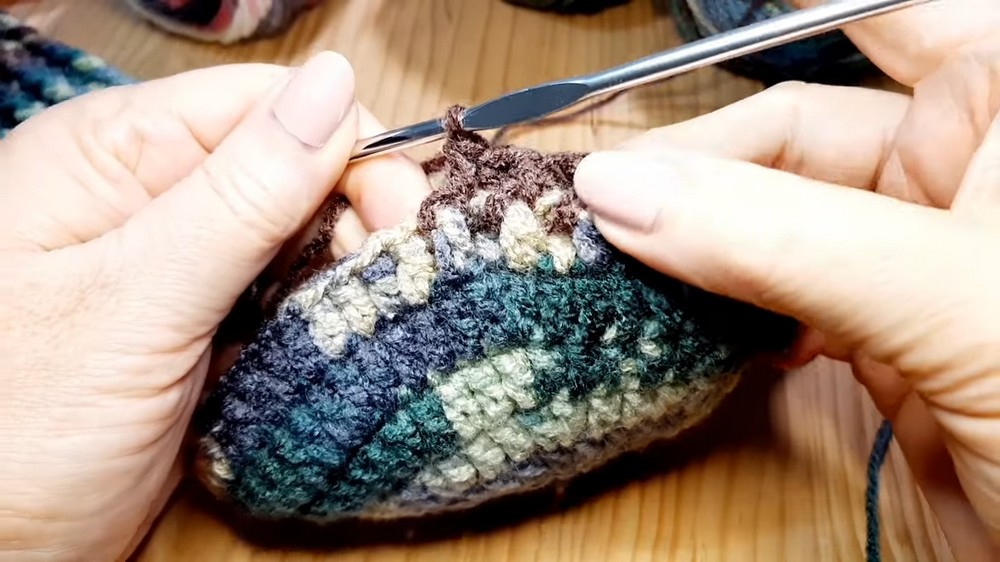
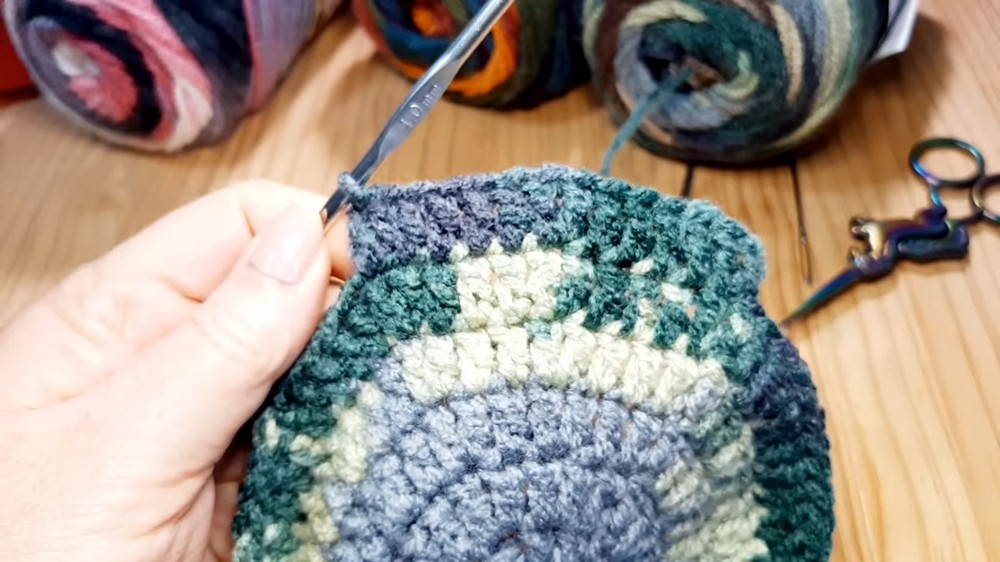
Front Post Back Post Ribbing (Textured Band)
- Join with slip stitch, chain 2 (counts as back post dc).
- Work front post double crochet (FPdc) around next stitch, then back post double crochet (BPdc) around the following stitch.
- Continue alternating FPdc, BPdc around to create a stretchy ribbing.
- Finish round by slip stitching into chain 2.
- Chain 2, repeat alternating FPdc, BPdc for desired length (typically 16 rounds).
- End with a slip stitch, fasten off leaving long tail to weave in.

Tutor’s Suggestions
- Avoid starting rounds with chains higher than 1 or 2 to keep the edges invisible and smooth.
- Use stitch markers to mark the first stitch of each round to keep track easily.
- Front post and back post stitches create a ribbed effect; perfect practice for intermediate stitch techniques.
- Adjust your hook size if your tension is tight or loose for best fit.
- Ribbing can be started earlier or later depending on how far down you want the textured band.
- Try adding color changes or stripes for a personal touch.
Uses
- Warm, stylish winter accessory protecting ears and forehead.
- Flexible stretch fit works well for men, women, and teenagers.
- Ideal gift for family and friends.
- Comfortable casual wear or for outdoor activities.
Tip
If unsure about sizing, measure the head circumference and adjust the number of increase rounds. Stop increases once the crown width matches approximately half the head circumference, then work straight until desired length.
Conclusion
With simple stitches and easy-to-follow increases, you’ll create a versatile beanie that fits comfortably and looks great. Add ribbing for stretch and design, customizing length or size for a perfect fit.
Leave a Reply