
Carry all your must-haves in style with this free crochet messenger bag pattern that’s perfect for adding a personal touch to your wardrobe.
About Channel:
DIY Maycraft offers a creative space where beginners and experienced crocheters alike can find crochet tutorials, tips, and inspiring handmade projects to spark their imagination.
A chic and functional crochet messenger bag is one of the most versatile handmade accessories you can create. The Free Crochet Messenger Bag Pattern allows you to craft a stylish yet practical piece that’s perfect for carrying books, essentials, or even your crochet supplies. Beyond its everyday use, this bag makes a thoughtful gift for friends or family, blending utility with an eye for handmade charm.
Messenger Bag Free Crochet Pattern for Beach Days

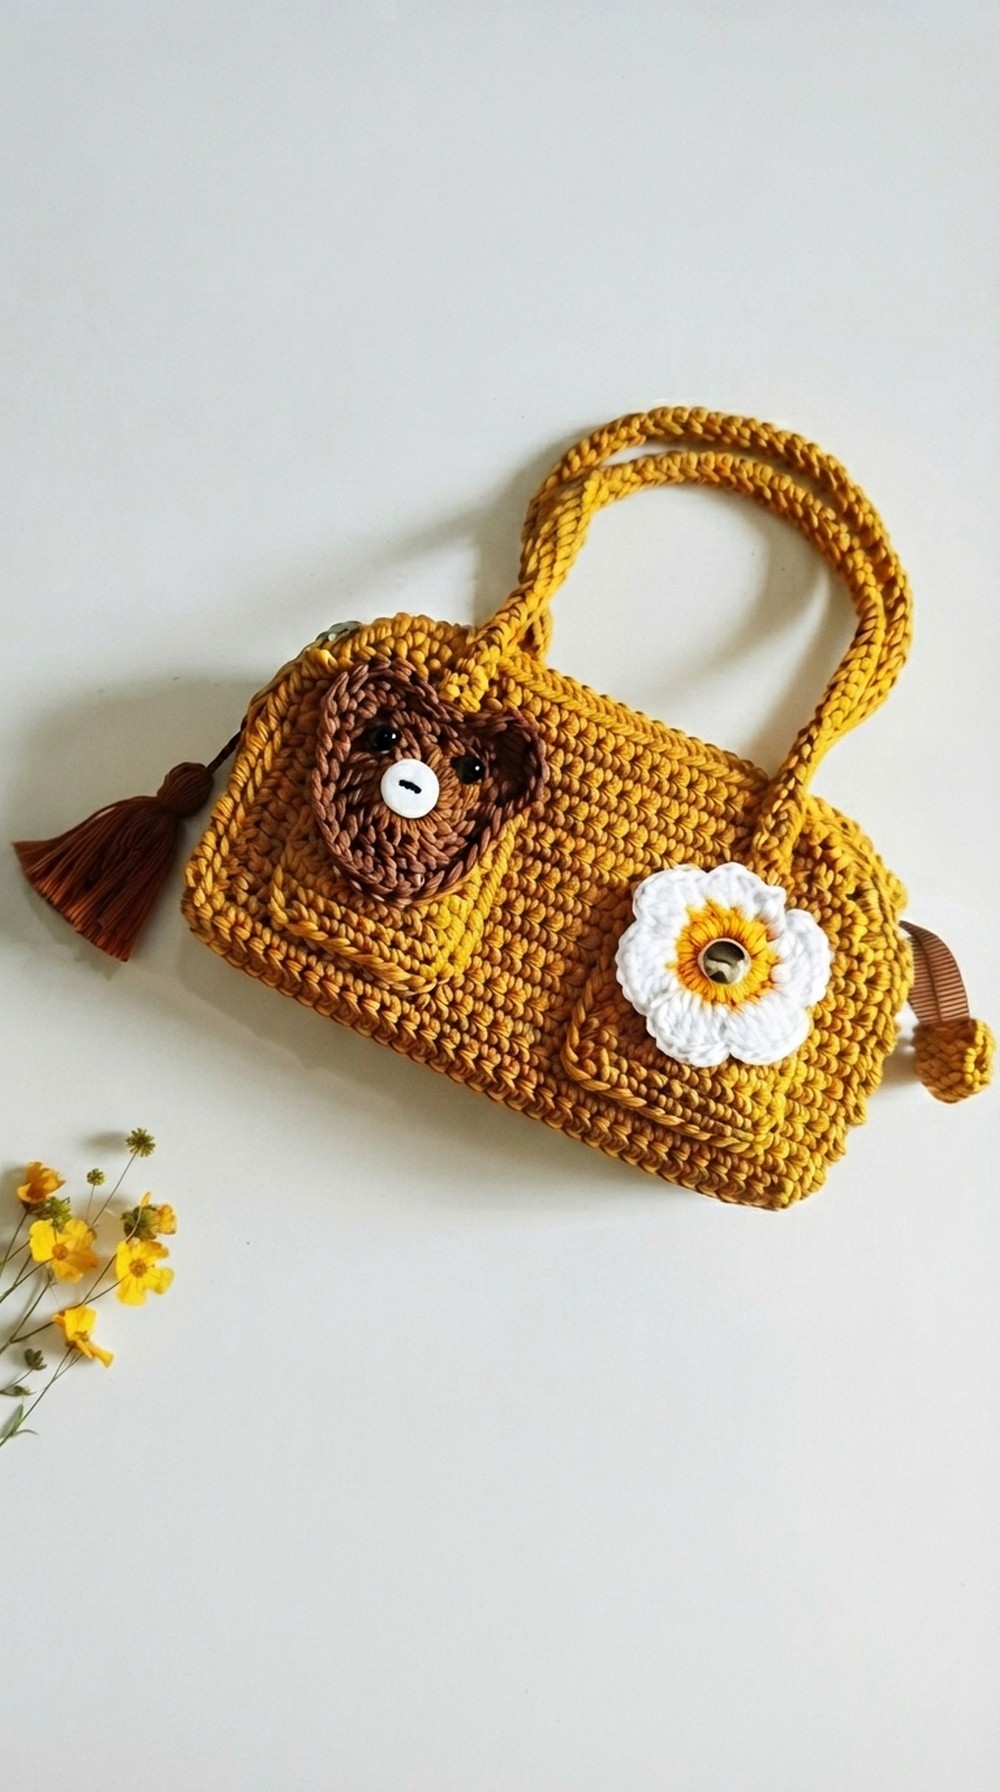
Featuring a rectangular body and adjustable strap, the bag boasts a clean and modern shape. The textured stitchwork adds depth and durability, while simple decorative touches like buttons or flap closures elevate its design. Whether you’re choosing neutral tones for a minimalist look or bold colors for a statement piece, this bag is easy to customize to match any style. The finished project is both fashionable and sturdy, combining everyday function with timeless elegance.

Crocheting this messenger bag is a great learning opportunity, especially for intermediate makers seeking to explore larger projects. By following the pattern, you’ll expand your skills in making structured shapes, seamless edges, and straps, all while creating a bag that’s truly one-of-a-kind.
Messenger Bag Crochet Pattern
This tutorial guides you through creating a charming messenger bag measuring approximately 11 cm by 20 cm. The bag is crafted using Polithick yarn (Onit Suga) on a 6/0 Tulip crochet hook, producing a dense yet pleasantly textured fabric. The piece features a carefully shaped main body with increases and decreases to taper the silhouette, separate side panels to add volume, a reinforced zipper area, and finishing touches including a Romanian cord strap and a decorative flower accent made via the magic ring technique. This detailed, step-by-step pattern provides all the instructions needed to recreate this delightful bag with precision and style.
Pattern Highlights
- Main Body Construction: Foundation chains and rows of single crochet stitches with increases and decreases shaping the bag’s silhouette.
- Tapered Form: The body widens through increases and is tapered toward the top via decreases at the row edges.
- Side Panels: Separate panels crocheted with single crochet stitches and sewn on to create depth.
- Zipper Edge: Back loop only single crochet stitches shape the upper edge, facilitating zipper attachment.
- Straps & Pocket: Romanian cord strap added for enhanced durability and style; a small pocket sewn on for functionality.
- Decorative Flower: A magic ring base with 12 single crochets, extended by six petals with double crochet increases, adding charm and a homemade feel.
Notes
- Maintain consistent gauge to ensure a clean shape and easy assembly.
- Increases and decreases on the edges should align properly to taper the form symmetrically.
- The back loop only (blo) row for the zipper ensures a clean and practical finish.
- Assembly requires sewing skills for neat side panel attachment and strap installation.
- The flower embellishment is done separately and should be securely sewn on after assembly.
- Proper finishing with weaving in ends and blocking (optional) will enhance the bag’s final look.
Skill Level
Intermediate: Requires familiarity with
- Working in rows with single crochet.
- Performing single crochet increases and decreases.
- Back loop only stitches.
- Magic ring technique for motifs.
- Basic sewing for assembly.
- Creating and attaching separate parts like panels and decorative accents.
Materials
- Yarn: Polithick (Onit Suga) suitable for bags, ensuring structure and durability.
- Crochet Hook: 6/0 Tulip (approximately 4 mm).
- Romanian cord (or similar) for straps.
- Needle and thread for sewing.
- Scissors.
- Optional zipper for bag closure.
Measurements / Sizing
- Finished bag: approximately 11 cm width x 20 cm height.
- Side panels: roughly 9 stitches wide by 15 rows tall.
- Decorative flower: sized proportionally, approx. 5–6 cm diameter.
Gauge and Stitch Pattern
- Gauge is not critical but a consistent tension producing a firm texture is essential for shape retention.
- Predominantly single crochet rows form the bag’s fabric.
- Strategic increases and decreases shape the taper.
- Back loop only single crochet stitches finish the zipper area neatly.
Stitch Abbreviations
- ch = chain
- sc = single crochet
- dc = double crochet
- sl st = slip stitch
- inc = increase (2 sc in the same stitch)
- dec = decrease (crochet two stitches together)
- blo = back loop only
Special Stitches
- Magic Ring: Adjustable ring used to start crochet motifs in the round, such as the flower base.
- Back Loop Only (blo): Working stitches into only the back loop of a stitch, creating a ridge or structured edge.
- Increase (inc): Working two single crochet stitches into the same stitch to expand stitch count.
- Decrease (dec): Combining two stitches into one by crocheting them together to reduce stitch count and taper shapes.
The Crochet Pattern
Main Body Construction
Foundation:
- Begin with a slip knot and chain 25 stitches (foundation chain).
Row 1:
- Starting from the second chain from the hook, work 24 single crochet (sc) stitches evenly across.
Row 2 (Increase Row):
- Chain 1, turn.
- Work 1 single crochet increase (inc) into the first stitch (2 sc in same st).
- Work 22 single crochet stitches across.
- Work 1 sc increase (inc) into the last stitch.
- Total stitches: 26.
Row 3:
- Chain 1, turn.
- Work 26 sc evenly across.
Row 4 (Increase Row):
- Chain 1, turn.
- Work 1 sc increase in the first stitch.
- Work 24 sc evenly.
- Work 1 sc increase in the last stitch.
- Total stitches: 28.

Row 5:
- Chain 1, turn.
- Work 28 sc evenly across.
Row 6 (Increase Row):
- Chain 1, turn.
- Work 1 sc increase in the first stitch.
- Work 26 sc evenly.
- Work 1 sc increase in the last stitch.
- Total stitches: 30.
Rows 7–43:
- Chain 1, turn.
- Work 30 sc evenly across each row.

Rows 44–49 (Decreasing Rows):
- Chain 1, turn.
- At the beginning and end of each row, work single crochet decreases (dec) by crocheting two stitches together, reducing the stitch count symmetrically.
- Continue with sc stitches in between decreases for tapering.

Assembly and Additional Details
Border:
- After completing the main body, work a round of single crochet stitches evenly around the perimeter of the entire piece to enclose edges and add stability.
Side Panels:
- Chain 9 stitches to form the width of the side panels.
- Work back-and-forth rows of single crochet for 15 rows total to create a rectangular panel.
- Once completed, sew these side panels carefully along the tapered edges of the main body to create depth and shape.
Zipper Area:
- At the top edge of the bag, work 34 single crochet stitches in back loops only (blo).
- This row produces a defined, sturdy edge suitable for attaching a zipper or lining.

Straps & Pocket:
- Attach a Romanian cord strap to the bag’s designated ends securely.
- Sew a small pocket onto the front or interior of the bag as desired, ensuring neat and strong stitches for durability.
Decorative Flower Accent
Magic Ring Base:
- Create a magic ring by forming an adjustable loop.
- Crochet 12 single crochet (sc) stitches into the ring.
- Pull the ring closed tightly and slip stitch to join.
Flower Petals (6 petals):
- Round 2 onward, develop 6 petals evenly spaced around the magic ring base.
- For each petal, work sequences consisting of double crochet (dc) increases to create a flared, textured petal shape.
- Join rounds with slip stitches or single crochet to maintain the shape and secure the petal placement.

Finishing:
- Attach the completed flower embellishment securely onto the bag’s flap, front panel, or side, as desired.
Assembly & Finished Size
Upon completion and assembly, the messenger bag measures approximately 11 cm wide by 20 cm tall. The tapered shaping through increases and decreases contour the bag for a flattering silhouette. The side panels, measuring roughly 9 stitches wide by 15 rows tall, provide depth for practical storage. The reinforced top edge with back loop single crochets allows for a neat attachment for zippers if desired. The Romanian cord strap adds durability and style, while the embroidered flower adds a charming, handcrafted appeal to the finished bag.

Conclusion
This messenger bag project features straightforward single crochet stitch work enhanced by shaping techniques through increases and decreases, combined with thoughtful assembly of side panels and finishing elements. The back loop stitch technique employed for the top edge provides both structure and practicality for zipper installation. Completing the bag with a Romanian cord strap and a delightful homemade flower accent produces a product that is both useful and visually appealing. This intermediate-level pattern is an excellent way to develop skills in shaping crochet work, integrating multiple components, and creating decorative motifs, culminating in an elegant and sturdy messenger bag.
Leave a Reply