
DIY Polymer Clay Gift Ideas offer endless possibilities for designing personalized presents with practical uses, styling tips, and unique benefits.
Looking for a fun, creative way to show someone how much you care? Crafting with polymer clay gives you the chance to handmake personalized gifts that speak from the heart. Whether it’s for a birthday, holiday, or just because, crafting your own clay treasures adds a touch of love and uniqueness that you simply can’t get from store-bought items. Plus, the process itself is an enjoyable way to unwind, explore your imagination, and perhaps even discover a hidden artistic talent.
DIY Polymer Clay Gift Ideas: Thoughtful and Handmade Creations

Polymer clay is incredibly versatile and easy to work with, making it ideal for both beginners and seasoned crafters. From cute keychains and delicate earrings to colorful trinket dishes and miniature décor, there’s an endless variety of DIY projects you can try. You can experiment with different shapes, textures, and colors to create pieces that match the recipient’s personality or even reflect your own.
One of the perks of working with polymer clay is that it lets you make completely custom gifts that feel thoughtful and special. Personalize a set of coasters with initials, shape adorable animal-themed magnets, or craft meaningful jewelry that will brighten someone’s day. Best of all, polymer clay is durable and doesn’t require fancy equipment, just bake it in your home oven to bring your creations to life.
DIY 4 Unique Polymer Clay Gift Ideas
1. Modern Wall Hanging
Materials Needed
- Sculpey 3 polymer clay (or similar)
- Rolling pin (or a flat surface)
- Raw sienna, white, and brown acrylic paints
- Yarn in two different colors
- Scissors
- Baking tray and parchment paper
- Oven (preheated to 275°F (135°C))
Step-by-Step Instructions
- Prepare the Clay:
- Break off a chunk of polymer clay.
- Warm it in your hands by kneading it until soft and pliable. Work in small sections if needed.
- Roll Out the Clay:
- Roll the clay into a large ball, then use a rolling pin to flatten it into a sheet—about ¼ inch thick.
- Shape the Wall Hanging:
- Cut the flattened clay into a fun shape like a wonky eight (two interlocking circles resembling an hourglass). Experiment with different shapes if you’d like.
- Add an optional strip of clay around the middle of the “8” for added detail.
- Bake the Clay:
- Place the clay shape on a baking tray lined with parchment paper.
- Bake the piece in a preheated oven at 275°F (135°C) for 15-20 minutes. Let it cool completely.
- Paint the Clay:
- Mix raw sienna, white, and brown paints together to create a wood-like texture/color.
- Use a brush to paint the entire surface, ensuring even coverage. Let it dry.
- Add the Yarn:
- Cut a piece of yarn in the length you want for the tassels. Use this piece as a guide to cut matching lengths for all your yarn pieces.
- Fold each yarn piece in half, loop them through the holes or gaps in the clay, and secure with a macrame-style knot (you can find tutorials online if you’re new to knotting).
- Trim the yarn ends evenly for a polished look.
- Admire Your Modern Wall Hanging!
- Boho meets modern—how cute is that? This makes a great gift for home décor lovers.

2. Crushed Glass Rings
Materials Needed
- Sculpey Premo polymer clay (more durable than Sculpey 3)
- Crushed glass (find at a craft store or Dollar Tree)
- Rolling pin
- X-Acto knife
- Metallic spray paint (gold, silver, or your choice)
- E6000 glue
- Baking tray and parchment paper
- Oven (preheated to 275°F (135°C))
Step-by-Step Instructions
- Prepare the Clay:
- Take a chunk of Sculpey Premo clay (color doesn’t matter because you’ll paint it later) and knead it until soft.
- Make the Ring Band:
- Roll the clay into a thin snake-like shape. Flatten it slightly with a rolling pin.
- Measure the band around your finger (or a ring if it’s a gift). Trim any excess clay with an X-Acto knife and smooth out the seam where the band meets.
- Attach the Glass:
- Select a piece of crushed glass (avoid sharp edges).
- Wrap a small piece of clay around the base of the glass, leaving the top open.
- Smooth the edges with your fingers or an X-Acto knife for a clean finish. Ensure the connection between the ring band and the glass is strong.
- Bake the Clay:
- Place the rings on a parchment-lined tray.
- Bake at 275°F (135°C) for 30 minutes. Let them cool completely.
- Paint the Rings:
- Spray paint the clay base and band with metallic paint.
- Allow the paint to dry before handling.
- Assemble the Ring:
- Secure the crushed glass in place with E6000 glue.
- Let it cure for at least 24 hours before wearing.
- Rock Your DIY Rings!
- These make for some seriously unique, modern jewelry pieces.
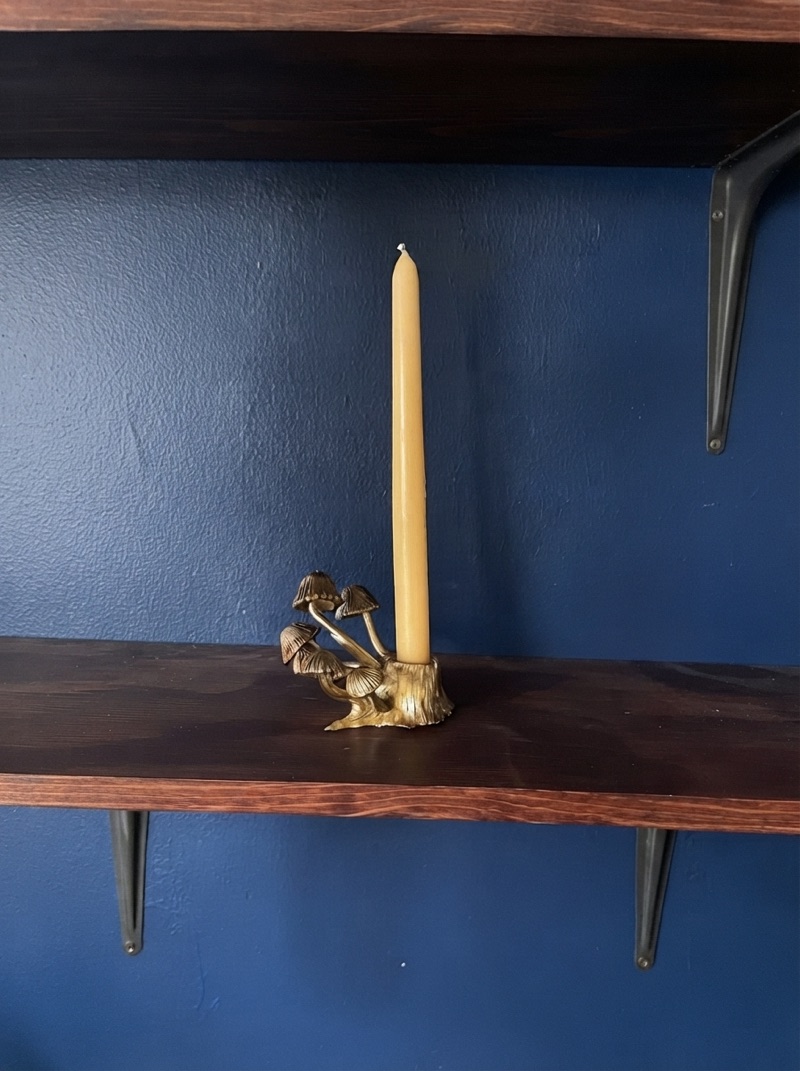
3. Mushroom Candle Holder
Materials Needed
- Sculpey Premo or Sculpey 3 polymer clay
- A real candle (for shaping the holder)
- Toothpick/Weeding tool (for bark and mushroom textures)
- E6000 glue and hot glue gun
- Metallic spray paint (gold recommended)
- Brown/black acrylic paint
- Baking tray and parchment paper
- Oven (preheated to 275°F (135°C))
Step-by-Step Instructions
- Shape the Base Holder:
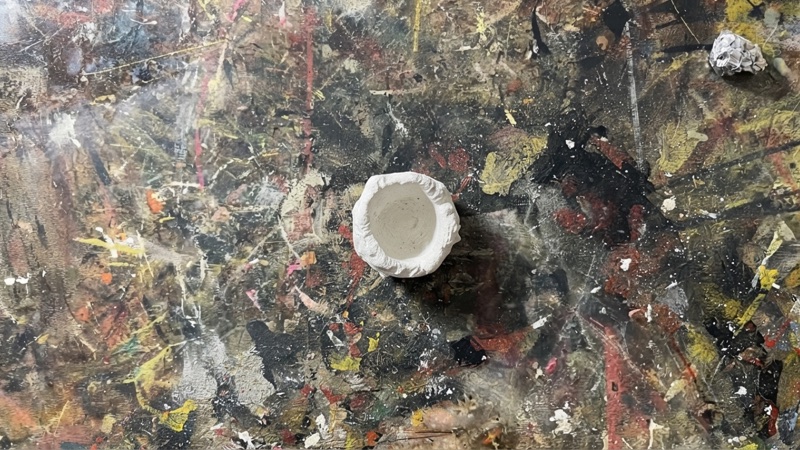
- Roll a chunk of clay into a ball and press it around the base of your candle. Form a bowl-like shape that securely fits the candle.
- Add Bark Texture:
- Use a toothpick or weeding tool to carve vertical bark-like lines into the clay.
- Make the Mushrooms:
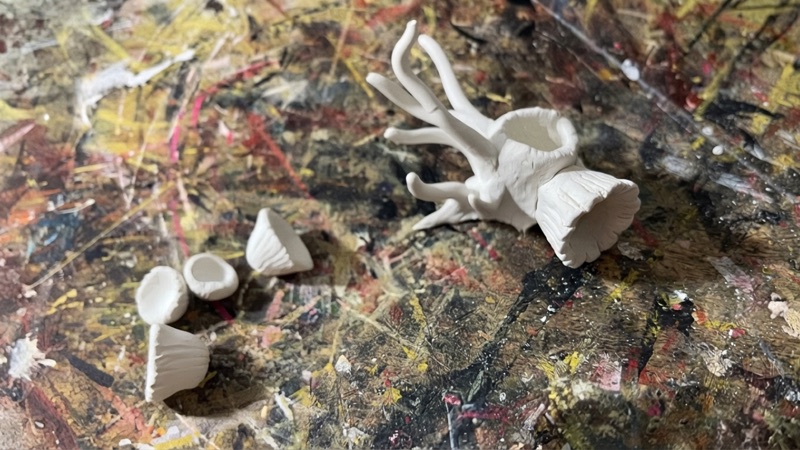
- Roll small tubes of clay for mushroom stems. Attach them to the base. Make sure they’re thicker at the bottom (near the “bark”) and thinner at the top.
- Shape mushroom caps out of clay by pressing small balls into flattened bowl shapes.
- Carve textural details into the caps using your tool.
- Bake the Clay:
- Lay everything on a lined tray, using crumpled foil to support the mushrooms so the caps stay level.
- Bake at 275°F (135°C) for 20 minutes. Let cool completely.
- Assemble the Candle Holder:
- Use E6000 glue and hot glue to attach the mushroom caps to their stems if necessary.
- Paint the Design:
- Spray the entire candle holder with metallic gold.
- Add depth by brushing black or brown paint into the lines and wiping it off, leaving shadows behind.
- Display Your Mushroom Candle Holder!
- Your adorable design works great for real or flameless candles—just make sure the final product is stable before gifting.
4. Bobcat Skull Plaque
Materials Needed
- Sculpey 3 polymer clay (or similar)
- A small ball/Christmas ornament
- X-Acto knife
- Toothpick/sculpting tools
- Wooden plaque
- Sandpaper
- E6000 glue
- Acrylic paints (raw sienna, white, brown)
- Baking tray and parchment paper
- Oven (preheated to 275°F (135°C))
Step-by-Step Instructions
- Form the Skull Base:
- Roll out a thin layer of clay and press it around a small round object like a Christmas ornament.
- Cut out eye sockets and smooth the edges with your fingers.
- Carefully press and shape the edges of the eye sockets and the bridge of the nose.
- Build Facial Details:
- Add clay strips for the jawline, nose, and bridge of the skull. Smooth with your fingers.
- Make tiny clay teeth by rolling small balls into cone shapes. Attach them to the jaw.
- Bake the Skull:
- Carefully remove the clay from the round object (use foil if it helps).
- Bake the skull at 275°F (135°C) for 30 minutes. Let it cool.
- Paint the Skull:
- Paint the skull bone-white with a raw sienna and white paint mix. Use brown for shadows around the teeth, eyes, and nose.
- Paint and Prepare the Plaque:
- Sand down the wooden plaque if rough, then paint it with brown acrylic paint.
- Let it dry completely.
- Assemble the Wall Hanging:
- Secure the painted skull to the plaque using E6000 glue.
- Allow it to cure for 24 hours before handling.
- Celebrate Your Masterpiece!
- Hang the plaque on your wall for a chic, artistic statement or gift it to someone special.
Conclusion
You now have four unique polymer clay gift ideas that are totally customizable to your creativity! Whether it’s a modern wall hanging, trendy rings, a whimsical mushroom candle holder, or a spooky-cool bobcat plaque, these crafts are sure to impress.
Leave a Reply